1. Introduction
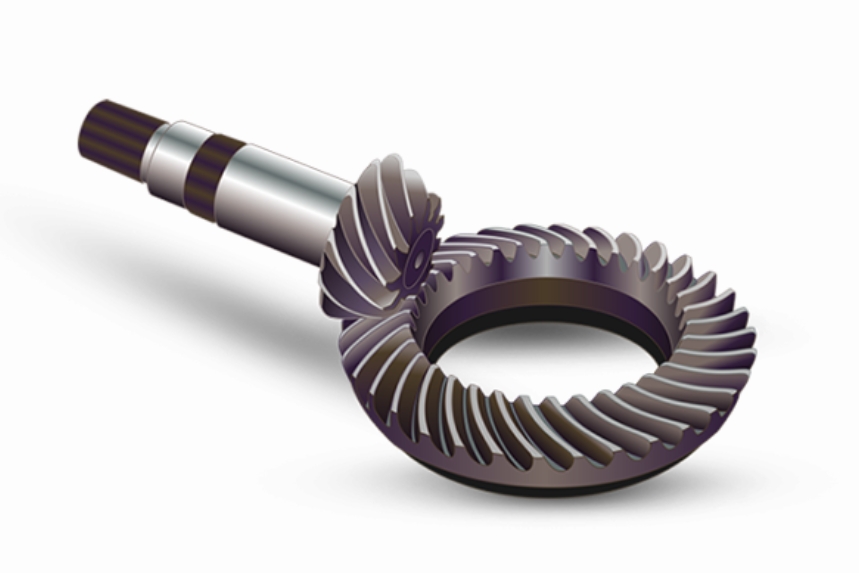
Spiral bevel gear transmission systems are widely used in aerospace, automotive, and marine applications due to their high efficiency, strong load capacity, and compact structure. This paper addresses the critical challenge of balancing computational accuracy and efficiency when analyzing system deformation under load. Traditional beam element models offer fast computation but lack precision, while full finite element models (FEM) with gear contact are accurate but computationally intensive. We propose a hybrid approach combining solid FEM and beam element models to optimize both factors.
2. Mechanical Model Equivalence
2.1 Shaft Modeling
Shafts are modeled using both solid FEM and Timoshenko beam elements. For beam elements, the stiffness matrix for a two-node beam is expressed as:
$$K_{beam} = \begin{bmatrix}
A_{11} & A_{12} \\
A_{21} & A_{22}
\end{bmatrix}$$
where submatrices \(A_{11}\) and \(A_{22}\) represent nodal stiffness:
$$A_{11} = \begin{bmatrix}
\frac{EA}{L} & 0 & 0 & 0 & 0 & 0 \\
0 & \frac{12EI_z}{L^3} & 0 & 0 & 0 & \frac{6EI_z}{L^2} \\
0 & 0 & \frac{12EI_y}{L^3} & 0 & -\frac{6EI_y}{L^2} & 0 \\
0 & 0 & 0 & \frac{GJ}{L} & 0 & 0 \\
0 & 0 & -\frac{6EI_y}{L^2} & 0 & \frac{4EI_y}{L} & 0 \\
0 & \frac{6EI_z}{L^2} & 0 & 0 & 0 & \frac{4EI_z}{L}
\end{bmatrix}$$
2.2 Gear Pair Equivalence
Gear meshing forces are decomposed into tangential (\(F_t\)), radial (\(F_r\)), and axial (\(F_a\)) components. For spiral bevel gears:
$$F_t = \frac{2000T}{d_m}$$
$$F_a = F_t \frac{\tan\alpha \sin\delta \pm \sin\beta \cos\delta}{\cos\beta}$$
$$F_r = F_t \frac{\tan\alpha \cos\delta \mp \sin\beta \sin\delta}{\cos\beta}$$
where \(T\) is torque, \(d_m\) is mean diameter, \(\alpha\) is pressure angle, \(\beta\) is spiral angle, and \(\delta\) is pitch cone angle.
3. Static Performance Analysis
3.1 Meshing Misalignment Calculation
System deformation under load causes misalignment components:
$$\Delta P = \delta_x, \quad \Delta W = \delta_y, \quad \Delta E = \delta_z, \quad \Delta\Sigma = \theta_z$$
| Parameter | Pinion | Gear |
|---|---|---|
| Teeth | 7 | 43 |
| Module (mm) | 10.512 | – |
| Pressure Angle (°) | 22.5 | 22.5 |
| Spiral Angle (°) | 48.08 | 34.35 |
3.2 Multi-Tooth Contact Analysis
A 5-tooth FEM model was developed to evaluate contact patterns and transmission error (TE). The TE formula is:
$$TE = \theta_{input} – \frac{z_2}{z_1}\theta_{output}$$
| Metric | Proposed Method | Full FEM | Error |
|---|---|---|---|
| \(\Delta P\) (mm) | 0.0918 | 0.0932 | 1.51% |
| TE Peak (μrad) | 54.43 | 53.12 | 2.41% |
| CPU Time (h) | 6.1 | 26.2 | -76.7% |
4. Dynamic Characteristics
4.1 Time-Varying Mesh Stiffness
Single tooth stiffness is calculated as:
$$k_i = \frac{F_n}{\delta_i}$$
where \(F_n\) is normal force and \(\delta_i\) is elastic deformation. Multi-tooth mesh stiffness becomes:
$$K_{mesh} = \sum_{i=1}^N k_i$$

4.2 Modal Analysis
First 6 natural frequencies of the system:
| Mode | Frequency (Hz) | Vibration Type |
|---|---|---|
| 1 | 83.31 | Bending |
| 2 | 161.43 | Torsional |
| 3 | 182.70 | Axial |
5. Experimental Validation
A CNC rolling tester measured transmission error and vibration spectra. Key results include:
| Parameter | Experiment | Simulation | Error |
|---|---|---|---|
| 1st TE Order (μrad) | 47.22 | 54.43 | 13.2% |
| Resonance Freq (Hz) | 315.2 | 319.9 | 1.47% |
| Noise Level (dB) | 79.8 | 82.1 | 2.88% |
6. Optimization Strategy
Modified tooth surface topology reduced vibration and noise:
$$TE_{optimized} = 0.74 \times TE_{original}$$
$$\Delta SPL = 10\log\left(\frac{a_{opt}^2}{a_{orig}^2}\right) = -7.6\ \text{dB}$$
This study establishes a comprehensive methodology for analyzing spiral bevel gear systems, validated through rigorous experimentation. The hybrid modeling approach demonstrates superior computational efficiency while maintaining engineering accuracy.
