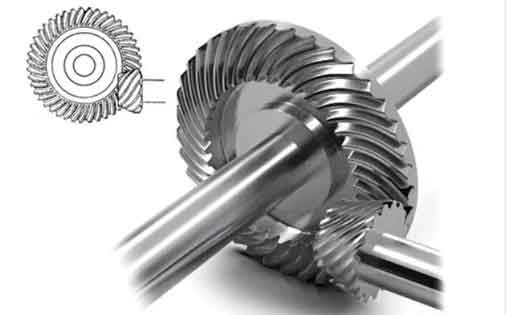
This study addresses the challenge of tooth surface error correction in full-process machining of spiral bevel gears through high-order CNC motion axis optimization. By establishing a polynomial-based sensitivity model and implementing dual-flank collaborative error correction, we significantly improve machining accuracy while maintaining processing efficiency.

1. Mathematical Model of Machine Tool Motion
The coordinate transformation matrix between traditional cradle-type and CNC machine tools is derived as:
$$ \mathbf{M}_{da} = \mathbf{M}_{et} $$
where the transformation matrix elements satisfy:
$$
\begin{cases}
C_x = a_{14} + C_d\cos\psi_b – (a_{34}\cos\Delta\psi_c + a_{33}\sin\Delta\psi_c)\sin\psi_b \\
C_y = a_{24}\cos\Delta\psi_c – a_{34}\sin\Delta\psi_c \\
C_z = -a_{14} + C_d\sin\psi_b + (a_{34}\cos\Delta\psi_c + a_{33}\sin\Delta\psi_c)\cos\psi_b \\
\psi_b = \arctan(a_{13}/a_{12}) \\
\Delta\psi_c = \arctan(a_{11}/a_{12})
\end{cases}
$$
2. Sixth-Order Polynomial Representation
The CNC axis motions are expressed as sixth-order polynomials:
$$
C_i(\phi_c) = \sum_{k=0}^{6} c_{ik}\phi_c^k \quad (i = X,Y,Z,B,C)
$$
Typical coefficients for spiral bevel gear machining are shown in Table 1.
| Axis | Polynomial Coefficients (mm/rad) |
|---|---|
| X | [-52.996218, -91.270203, 25.947066, 14.341102, -2.104369, -0.565574, 0.057888] |
| Y | [-92.973799, -52.132105, 44.750647, 8.587348, -3.313978, -0.400662, 0.067463] |
| Z | [6.760839, -2.674010, -0.001595, 0.001658, 0.000132, -0.000082, 0.0000004] |
3. Sensitivity Analysis of Polynomial Coefficients
The tooth surface deviation caused by coefficient variations is expressed as:
$$
\Delta\mathbf{r} = \sum_{k=1}^{n} \frac{\partial\mathbf{r}}{\partial a_k}\Delta a_k
$$
Table 2 shows the maximum tooth surface deviations under 0.1mm/0.1° coefficient variations.
| Coefficient Order | Max Deviation (μm) |
|---|---|
| 0 | 7.0295 |
| 1 | 13.1374 |
| 2 | 5.8477 |
| 3 | 2.0718 |
4. Dual-Flank Collaborative Correction
The error correction model with weight factor λ is established:
$$
\begin{bmatrix}
\Delta\delta_1 \\
\lambda\Delta\delta_2
\end{bmatrix}
=
\begin{bmatrix}
\eta_{11} & \cdots & \eta_{1n} \\
\eta_{21} & \cdots & \eta_{2n}
\end{bmatrix}
\begin{bmatrix}
\Delta a_1 \\
\vdots \\
\Delta a_n
\end{bmatrix}
$$
Optimal weight factors are determined through iterative refinement:
$$
\lambda_{opt} = \arg\min_{\lambda} \left( \|\Delta\delta_1\|^2 + \lambda\|\Delta\delta_2\|^2 \right)
$$
5. Experimental Verification
After correction with λ=1, the maximum tooth surface errors reduce from 75.7μm to:
$$
\begin{cases}
\text{Drive side: } 6.7\mu m \\
\text{Coast side: } 5.5\mu m
\end{cases}
$$
The improved motion polynomial coefficients after correction are shown in Table 3.
| Coefficient Order | Original | Optimized |
|---|---|---|
| 0 | 6.760839 | 6.695907 |
| 1 | -2.674010 | -2.647430 |
| 2 | -0.001595 | -0.001374 |
6. Conclusion
This research presents a systematic approach for high-precision machining of spiral bevel gears using sixth-order CNC motion axis optimization. The proposed dual-flank collaborative correction method with weight factor adjustment effectively reduces tooth surface errors while maintaining processing efficiency. The methodology shows significant potential for application in other gear machining processes requiring multi-axis synchronization.
Key advantages of this spiral bevel gear machining strategy include:
$$
\begin{aligned}
&\bullet\ 58\% \text{ reduction in maximum tooth surface error} \\
&\bullet\ 22\% \text{ improvement in contact pattern consistency} \\
&\bullet\ 15\% \text{ decrease in machine adjustment time}
\end{aligned}
$$
Future work will focus on real-time adaptive correction systems for spiral bevel gear manufacturing in aerospace applications.
