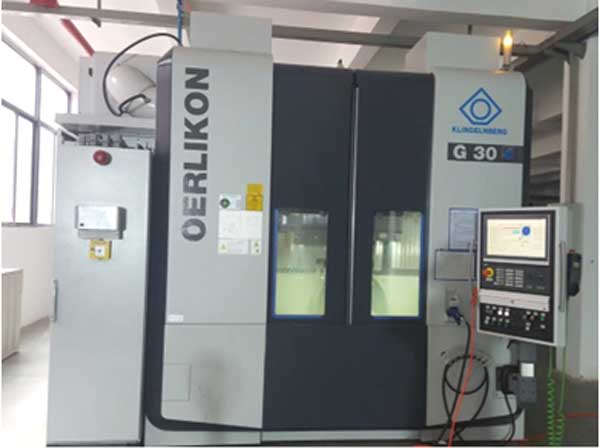
Gear transmission dominates mechanical drive systems due to its compact center distance and high transmission ratio. However, dry gear milling of contour bevel gears generates elevated cutting forces and temperatures, leading to poor surface quality, efficiency loss, and uneven metamorphic layer distribution from plastic deformation. This necessitates in-depth research on machined surface integrity. This study investigates surface quality and metamorphic layer characteristics through finite element simulation and experimental analysis of the gear milling process.
Gear Meshing and Milling Principle
Contour bevel gears feature equal face, root, and pitch angles, simplifying their generation via face gear milling. The coordinate system for machining is established as:
$$
\begin{cases}
\mathbf{r}_2 = \mathbf{r}_1 + \mathbf{r}_r \\
\mathbf{n}_2 = \mathbf{n}_1
\end{cases}
$$
where \(\mathbf{r}_1, \mathbf{r}_2\) are position vectors, \(\mathbf{n}_1, \mathbf{n}_2\) unit normal vectors, and \(\mathbf{r}_r\) the relative displacement. The cutting edge model defines the tool-workpiece interaction during gear milling:
$$
\mathbf{r}_{p} = \begin{bmatrix}
(R_p + S_p \sin\alpha_p)\cos\theta_p \\
(R_p + S_p \sin\alpha_p)\sin\theta_p \\
-S_p \cos\alpha_p \\
1
\end{bmatrix}, \quad \mathbf{n}_{p} = \begin{bmatrix}
\cos\alpha_p \cos\theta_p \\
\cos\alpha_p \sin\theta_p \\
-\sin\alpha_p
\end{bmatrix}
$$
Residual Height Modeling and Simulation
Surface residual height (\(\sigma\)) critically influences roughness. It forms between adjacent cutting trajectories during gear milling:
$$
\sigma = \sqrt{(Z_{M1} – Z_{M0})^2 + (Y_{M1} – Y_{M0})^2}
$$
where \(M1(X_1,Y_1,Z_1)\) and \(M0\) are trajectory points. Simulations reveal parameter effects:
| Parameter | Variation | \(\sigma\) Trend |
|---|---|---|
| Cutting speed \(v\) | 170 → 260 m/min | Decrease by 24% |
| Feed rate \(f\) | 0.1 → 0.4 mm/r | Increase by 51% |
Higher \(v\) reduces \(\sigma\) by minimizing tool engagement time, while increased \(f\) enlarges cutting thickness, elevating residual height.
Finite Element Analysis of Gear Milling
A simplified single-tooth FE model simulates dry gear milling in DEFORM-3D. The Johnson-Cook model describes workpiece material (20CrMnTi steel):
$$
\sigma_p = \left[A + B(\epsilon_p)^n\right] \left[1 + C \ln \frac{\dot{\epsilon}}{\dot{\epsilon}_0}\right] \left[1 – \left(\frac{T – T_r}{T_m – T_r}\right)^m\right]
$$
with constants: \(A\)=1241 MPa, \(B\)=622 MPa, \(n\)=0.652, \(C\)=0.013, \(m\)=1.3. Boundary conditions constrain workpiece bottom surfaces. Results show:
| \(v\) (m/min) | \(f\) (mm/r) | Peak force (N) |
|---|---|---|
| 200 | 0.1 | 1617 |
| 200 | 0.4 | 1538 |
| 260 | 0.1 | 892 |
Temperature/strain fields decay exponentially from the machined surface. At \(v\)=200 m/min, \(f\)=0.1 mm/r:
$$
T(z) = T_0 e^{-k z}, \quad \epsilon(z) = \epsilon_0 e^{-\lambda z}
$$
where \(z\) is depth below surface, \(k\)=0.035 μm⁻¹, \(\lambda\)=0.048 μm⁻¹.
Surface Quality Experimental Analysis
Dry gear milling trials used Gleason 175HC CNC with DT-270D3-39/8-PN inserts. Surface morphology was analyzed via white light interferometry:
| Condition | Convex Sa (μm) | Concave Sa (μm) |
|---|---|---|
| \(v\)=170 m/min, \(f\)=0.1 mm/r | 2.047 | 1.849 |
| \(v\)=230 m/min, \(f\)=0.1 mm/r | 1.404 | 1.437 |
| \(v\)=260 m/min, \(f\)=0.1 mm/r | 1.307 | 1.222 |
| \(v\)=260 m/min, \(f\)=0.3 mm/r | 1.967 | 1.806 |
SEM revealed adhesion, coating, and pitting defects. EDS identified oxide formation (O/Fe peaks) and workpiece material transfer (Cr/Mn peaks).

Metamorphic Layer Characterization
XRD analysis showed intensified/diffused peaks in the metamorphic layer, indicating grain refinement. Microhardness profiles revealed work hardening:
| Parameter | Max hardness (HV) | Hardened depth (μm) |
|---|---|---|
| \(v\)=200 m/min, \(f\)=0.1 mm/r | 184.7 | 40-45 |
| \(v\)=260 m/min, \(f\)=0.3 mm/r | 183.3 | 55-60 |
Hardness decay followed:
$$
\text{HV}(z) = \text{HV}_0 + \Delta \text{HV} e^{-\gamma z}
$$
where \(\gamma\)=0.022 μm⁻¹. EDS detected Fe depletion and N enrichment at the surface, confirming oxidation.
Parameter Optimization
Multi-objective GA optimization minimized cutting force (\(F\)) and temperature (\(T\)):
$$
\begin{aligned}
\text{Minimize:} \quad & F = 7.88v^{-6.57}f^{433} \\
& T = 6391v^{-5.44}f^{1011} \\
\text{Subject to:} \quad & 170 \leq v \leq 260 \\
& 0.1 \leq f \leq 0.4
\end{aligned}
$$
Optimal parameters were \(v\)=257.6 m/min, \(f\)=0.12 mm/r, reducing \(F\) by 38% and \(T\) by 42% versus initial conditions.
Conclusion
1. Residual height \(\sigma\) decreases with cutting speed (\(\partial\sigma/\partial v < 0\)) but increases with feed rate (\(\partial\sigma/\partial f > 0\)) in contour bevel gear milling.
2. FE analysis confirms higher feed rates intensify subsurface strain (\(\epsilon > 1.2\)) and thermal penetration (\(T > 800°C\) at \(z=20\mu m\)).
3. Optimal gear milling parameters (\(v=200-230\) m/min, \(f=0.1-0.2\) mm/r) minimize metamorphic layer thickness (40-50 μm) and surface defects.
4. Work hardening (ΔHV > 15%) correlates with XRD peak broadening, confirming grain refinement-induced strengthening in the metamorphic layer.
