
In my years of experience as an engineering professional maintaining critical satellite ground station equipment, I have encountered numerous mechanical systems, but few are as fascinating and essential as the harmonic drive gear. This compact, high-precision减速器 is the heart of our polar-orbiting meteorological satellite antenna’s drive mechanism. The antenna, which tracks satellites like the FY-1 and NOAA series, relies on this device to convert the high-speed rotation of a servo motor into a slow, high-torque output with exceptional accuracy. The failure of such a component can halt vital data reception, as I witnessed firsthand during an incident in late 2004. This article details my deep dive into the principles, application, fault diagnosis, and meticulous replacement procedure for the harmonic drive gear, drawing from that real-world scenario. I will structure this discussion to provide a comprehensive guide, utilizing tables and mathematical formulations to encapsulate key concepts, all from my first-person perspective as the engineer on the ground.
The core function of a harmonic drive gear, often simply called a harmonic drive, is to provide a high reduction ratio in a minimal space with near-zero backlash. Its operation is not based on conventional gear meshing but on elastic dynamics. The fundamental components are three: the Flexspline (a thin-walled, flexible external gear), the Wave Generator (an elliptical bearing assembly that deforms the Flexspline), and the Circular Spline (a rigid internal gear). In the most common configuration for our antenna drives, the Circular Spline is fixed. As the Wave Generator rotates, it induces a controlled elastic deformation in the Flexspline, causing its teeth to engage and disengage with those of the Circular Spline in a traveling wave motion. The magic lies in the tooth count difference. Typically, the Flexspline has two fewer teeth than the Circular Spline. Therefore, for every complete revolution of the Wave Generator, the Flexspline rotates backward by a distance equivalent to two teeth relative to the Circular Spline. This results in a large speed reduction. The reduction ratio \( i \) can be expressed mathematically. If \( N_c \) is the number of teeth on the Circular Spline and \( N_f \) is the number on the Flexspline, with \( N_c – N_f = 2 \), then for one rotation of the Wave Generator (input), the rotation of the Flexspline (output) is:
$$ \theta_{out} = -\frac{N_c – N_f}{N_f} \times \theta_{in} = -\frac{2}{N_f} \times 2\pi \text{ radians} $$
Thus, the reduction ratio \( i \), defined as output speed over input speed, is:
$$ i = \frac{\omega_{out}}{\omega_{in}} = -\frac{1}{\left(\frac{N_f}{2}\right)} = -\frac{2}{N_f} $$
The negative sign indicates the output rotates opposite to the input. In practice, the ratio is often stated as a positive number, e.g., 1:160, meaning the output shaft turns once for every 160 turns of the input. The torque multiplication is conversely high, approximately \( 1/i \). This principle allows the harmonic drive gear to achieve ratios from 30:1 to over 300:1 in a single stage, a feat unmatched by planetary or spur gear sets of comparable size.
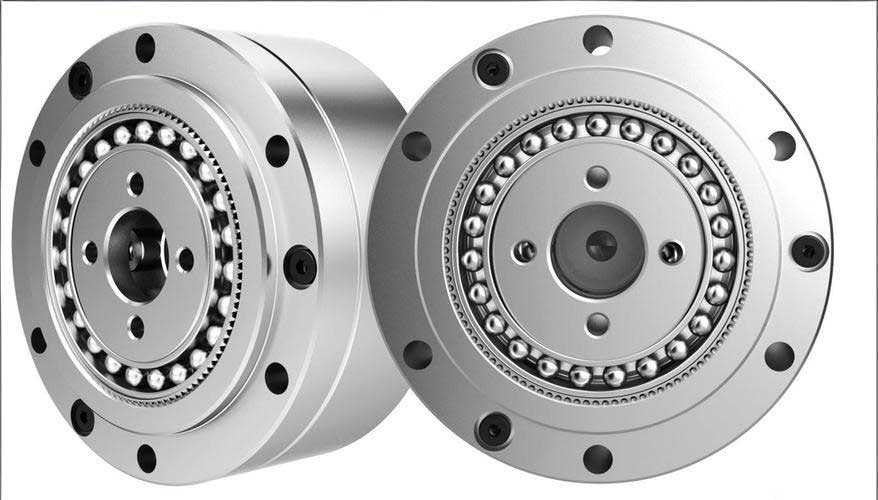
The image above provides a clear cross-sectional view of a typical harmonic drive gear assembly. You can see the Wave Generator (the elliptical core with bearings), the deformed Flexspline meshing with the fixed Circular Spline, and the output flange. This compactness and high torque density made it the ideal choice for our antenna’s azimuth (X-axis) and elevation (Y-axis) drives. The specific parameters for our system are summarized in the table below.
| Axis | Input Speed (RPM) | Maximum Output Torque (N·m) | Reduction Ratio | Primary Function |
|---|---|---|---|---|
| X-Axis (Azimuth) | 3000 | ≤ 240 | 1/125 | Heavy-duty rotation of entire antenna structure |
| Y-Axis (Elevation) | 3000 | ≤ 120 | 1/160 | Tilting the antenna reflector |
The failure event began during a routine satellite pass preparation. The antenna control system indicated an X-axis limit fault, and manual override commands yielded no movement. Ascending the antenna pedestal and inspecting the drive compartment confirmed the harmonic drive gear was not transmitting motion. A preliminary diagnosis pointed to internal failure—likely excessive wear, a broken Flexspline, or seizure of the Wave Generator bearings. Given the urgency of restoring satellite data reception, we decided to proceed with an immediate replacement. Manufacturer support was not instantly available, and no detailed service manuals were provided, underscoring the need for self-reliance. The challenge was not just swapping the unit; it involved safely handling massive ancillary components like the counterweight box, which weighed over 500 kg.
Before detailing the replacement procedure, it’s valuable to understand the stress and strain relationships within the Flexspline, as they are central to the harmonic drive gear’s function and potential failure modes. The deformation is primarily bending. The radial displacement \( w(\phi, t) \) of the Flexspline’s neutral axis, as a function of angular position \( \phi \) and time \( t \), can be modeled when the Wave Generator imposes an elliptical shape. For a simple approximation, the deflection can be considered as:
$$ w(\phi) \approx \delta \cos(2\phi) $$
where \( \delta \) is the maximum radial deformation. The resulting strain \( \epsilon \) in the flexspline wall is critical for fatigue life analysis. The meshing force between the Flexspline and Circular Spline teeth generates the output torque. The torque capacity \( T_{out} \) relates to the tangential force component \( F_t \) and the pitch radius \( r_f \) of the Flexspline:
$$ T_{out} = N_f \cdot F_t \cdot r_f $$
where \( N_f \) is the number of simultaneously engaged teeth, which is high in a harmonic drive gear due to the continuous engagement around the ellipse, contributing to its smooth operation and high torque capacity.
The dismantling and replacement process was methodical and required careful planning due to safety risks. The following comprehensive table outlines the major phases, key actions, required tools, and associated risks.
| Phase | Key Actions | Tools & Equipment | Safety Considerations |
|---|---|---|---|
| 1. Preparation & Isolation | Power down system. Secure antenna reflector with multiple ropes to fixed structures to prevent accidental movement. Remove drive motor and mounting bracket. | Industrial ropes, shackles, wrenches, hoist. | Ensure ropes are rated for load. Distribute load points evenly on reflector frame. |
| 2. Counterweight Box Removal | Extract loose counterweight blocks. Position sturdy support frame at pedestal level. Use timber beams and coordinated manpower to support and detach the main box. | Support frame (500kg+ capacity), timber beams (200kg+ each), 16mm spanners, 8-person team. | Lift uniformly to avoid twisting. Clear communication among team members is essential. |
| 3. Gearbox & Harmonic Drive Gear Access | Unbolt and remove the outer gearbox housing. Disconnect the output pinion from the harmonic drive gear’s output shaft using gear pullers. | Gear pullers (2 for balance), socket set, rubber mallet. | Support the pinion during extraction to prevent dropping. Mark orientation for reassembly. |
| 4. Harmonic Drive Gear Extraction | Disengage the manual/automatic clutch on the input side by loosening springs and shifting the worm gear. Carefully maneuver the entire harmonic drive gear unit out of its mounting托架. | Hex keys, pry bars, lifting sling. | Avoid damaging clutch components or wiring. Note the exact positioning of shims. |
| 5. Installation & Alignment | Mount the new harmonic drive gear. Reattach the output pinion and input clutch. Perform preliminary meshing check by hand-rotating the input. | Torque wrench, feeler gauges, alignment dial indicator. | Ensure proper gear backlash. Follow manufacturer’s torque specs for fasteners. |
| 6. Reassembly | Reverse the disassembly process: reposition gearbox, reinstall counterweight box and blocks, remount drive motor. | Cranes or hoists for heavy components. | Verify all bolts are tightened to specification in a cross pattern. |
| 7. Testing & Commissioning | Conduct slow manual rotation through full range. Power up control system and run automated slew tests at low speed, then operational speed. | Multimeter, control system interface. | Monitor for unusual noises or vibrations. Verify limit switch functionality. |
From this experience, I formalized a step-by-step operational规程 to ensure repeatability and safety for future maintenance of the harmonic drive gear. This procedure, distilled into nine cardinal steps, served as our internal manual.
| Step | Procedure Detail | Success Criteria |
|---|---|---|
| 1 | Disconnect power and remove the drive motor and its mounting bracket from the antenna axis. | Motor safely stored, wiring terminals insulated and labeled. |
| 2 | Secure the antenna reflector dish using at least eight ropes anchored to robust ground points around the radome, distributing load across the dish’s frame. | Dish is immobilized and cannot swing or tilt under its own weight. |
| 3 | Remove the counterweight box. First, extract all removable weight blocks. Then, using a pre-positioned support structure and a team lift with timber beams, unbolt and lower the main box. | Counterweight box safely resting on support frame without strain on antenna structure. |
| 4 | Dismantle the reduction gearbox cover to expose the harmonic drive gear assembly. | Full access to the harmonic drive gear unit and its connecting gears. |
| 5 | Extract the faulty harmonic drive gear. Detach the output pinion using balanced pullers. Loosen the input clutch mechanism and carefully remove the entire harmonic drive gear unit from its托架. | Harmonic drive gear removed without damage to surrounding components or its own shafts. |
| 6 | Install the replacement harmonic drive gear. Re-attach the output pinion and input clutch, ensuring perfect alignment and smooth meshing with both the antenna’s large gear and the clutch gears. | All gears rotate freely by hand without binding or excessive play. |
| 7 | Reassemble the gearbox and refit the counterweight box, reinstalling all weight blocks securely. | All fasteners torqued to spec. Counterweight box securely bolted to the pedestal. |
| 8 | Reinstall the drive motor bracket and the motor itself, reconnecting all electrical connections. | Motor shaft couples correctly with the harmonic drive gear input clutch. |
| 9 | Perform functional tests. Manually rotate the axis, then apply power for controlled servo tests to verify smooth operation across the full range of motion. | Antenna moves smoothly in both directions under manual and automatic control, with no error alarms. |
Beyond immediate repair, this incident highlighted the importance of proactive maintenance for harmonic drive gears. These components, while robust, are subject to wear, especially in the Flexspline due to cyclic fatigue and in the Wave Generator’s bearings. I instituted a regular inspection regimen involving vibration analysis and thermal monitoring. Lubrication is critical; using the wrong grease type or interval can lead to premature failure. The following formula can estimate remaining useful life based on operating cycles, though it’s a simplification:
$$ L_{10} = \left( \frac{C}{P} \right)^p \times 10^6 \text{ revolutions} $$
where \( L_{10} \) is the rated life in revolutions for 90% reliability, \( C \) is the dynamic load rating, \( P \) is the equivalent dynamic load, and \( p \) is an exponent (typically 3 for ball bearings, 10/3 for roller bearings). For the harmonic drive gear system, the load on the Flexspline is complex, but this gives a ballpark for the Wave Generator bearing life.
In conclusion, the harmonic drive gear is an engineering marvel that enables precise positioning in demanding applications like satellite tracking. My hands-on experience with its failure and replacement reinforced that technical self-sufficiency is invaluable in critical infrastructure. By developing a deep understanding of its principles—encapsulated in the formulas for reduction ratio and strain—and by creating systematic procedures like the nine-step replacement guide, we transformed a crisis into a learning opportunity. This knowledge ensures the continued reliability of our satellite data reception, a vital link in global weather monitoring. The harmonic drive gear, with its unique elastic kinematics, remains a cornerstone of our mechanical systems, and its proper care is paramount. Future work may involve integrating condition-monitoring sensors directly into the harmonic drive gear assembly for predictive maintenance, further enhancing system uptime.
To further illustrate the design advantages, let’s compare the harmonic drive gear with a conventional planetary gearset for our application. The table below highlights key differences.
| Feature | Harmonic Drive Gear | Planetary Gearset (Multi-stage) |
|---|---|---|
| Reduction Ratio (Single Stage) | 50:1 to 320:1 | 3:1 to 10:1 (typically) |
| Backlash | Very low (≤ 1 arcmin) | Higher, accumulates with stages |
| Torque Density | Very High | High, but lower than harmonic for same ratio |
| Number of Moving Parts | Low (3 main components) | High (multiple gears, carriers) |
| Efficiency | 80% – 90% | 90% – 97% per stage |
| Key Wear Component | Flexspline (fatigue) | Gear teeth, bearings |
The choice of the harmonic drive gear for our antenna was clearly justified by its unparalleled single-stage ratio and minimal backlash, which are crucial for precise pointing accuracy. Every engagement of the harmonic drive gear teeth is a testament to controlled elastic deformation physics. Reflecting on the entire process, from diagnosis to successful recommissioning, the harmonic drive gear stands out not just as a component but as a system whose reliability we can now confidently manage through rigorous procedure and understanding.