
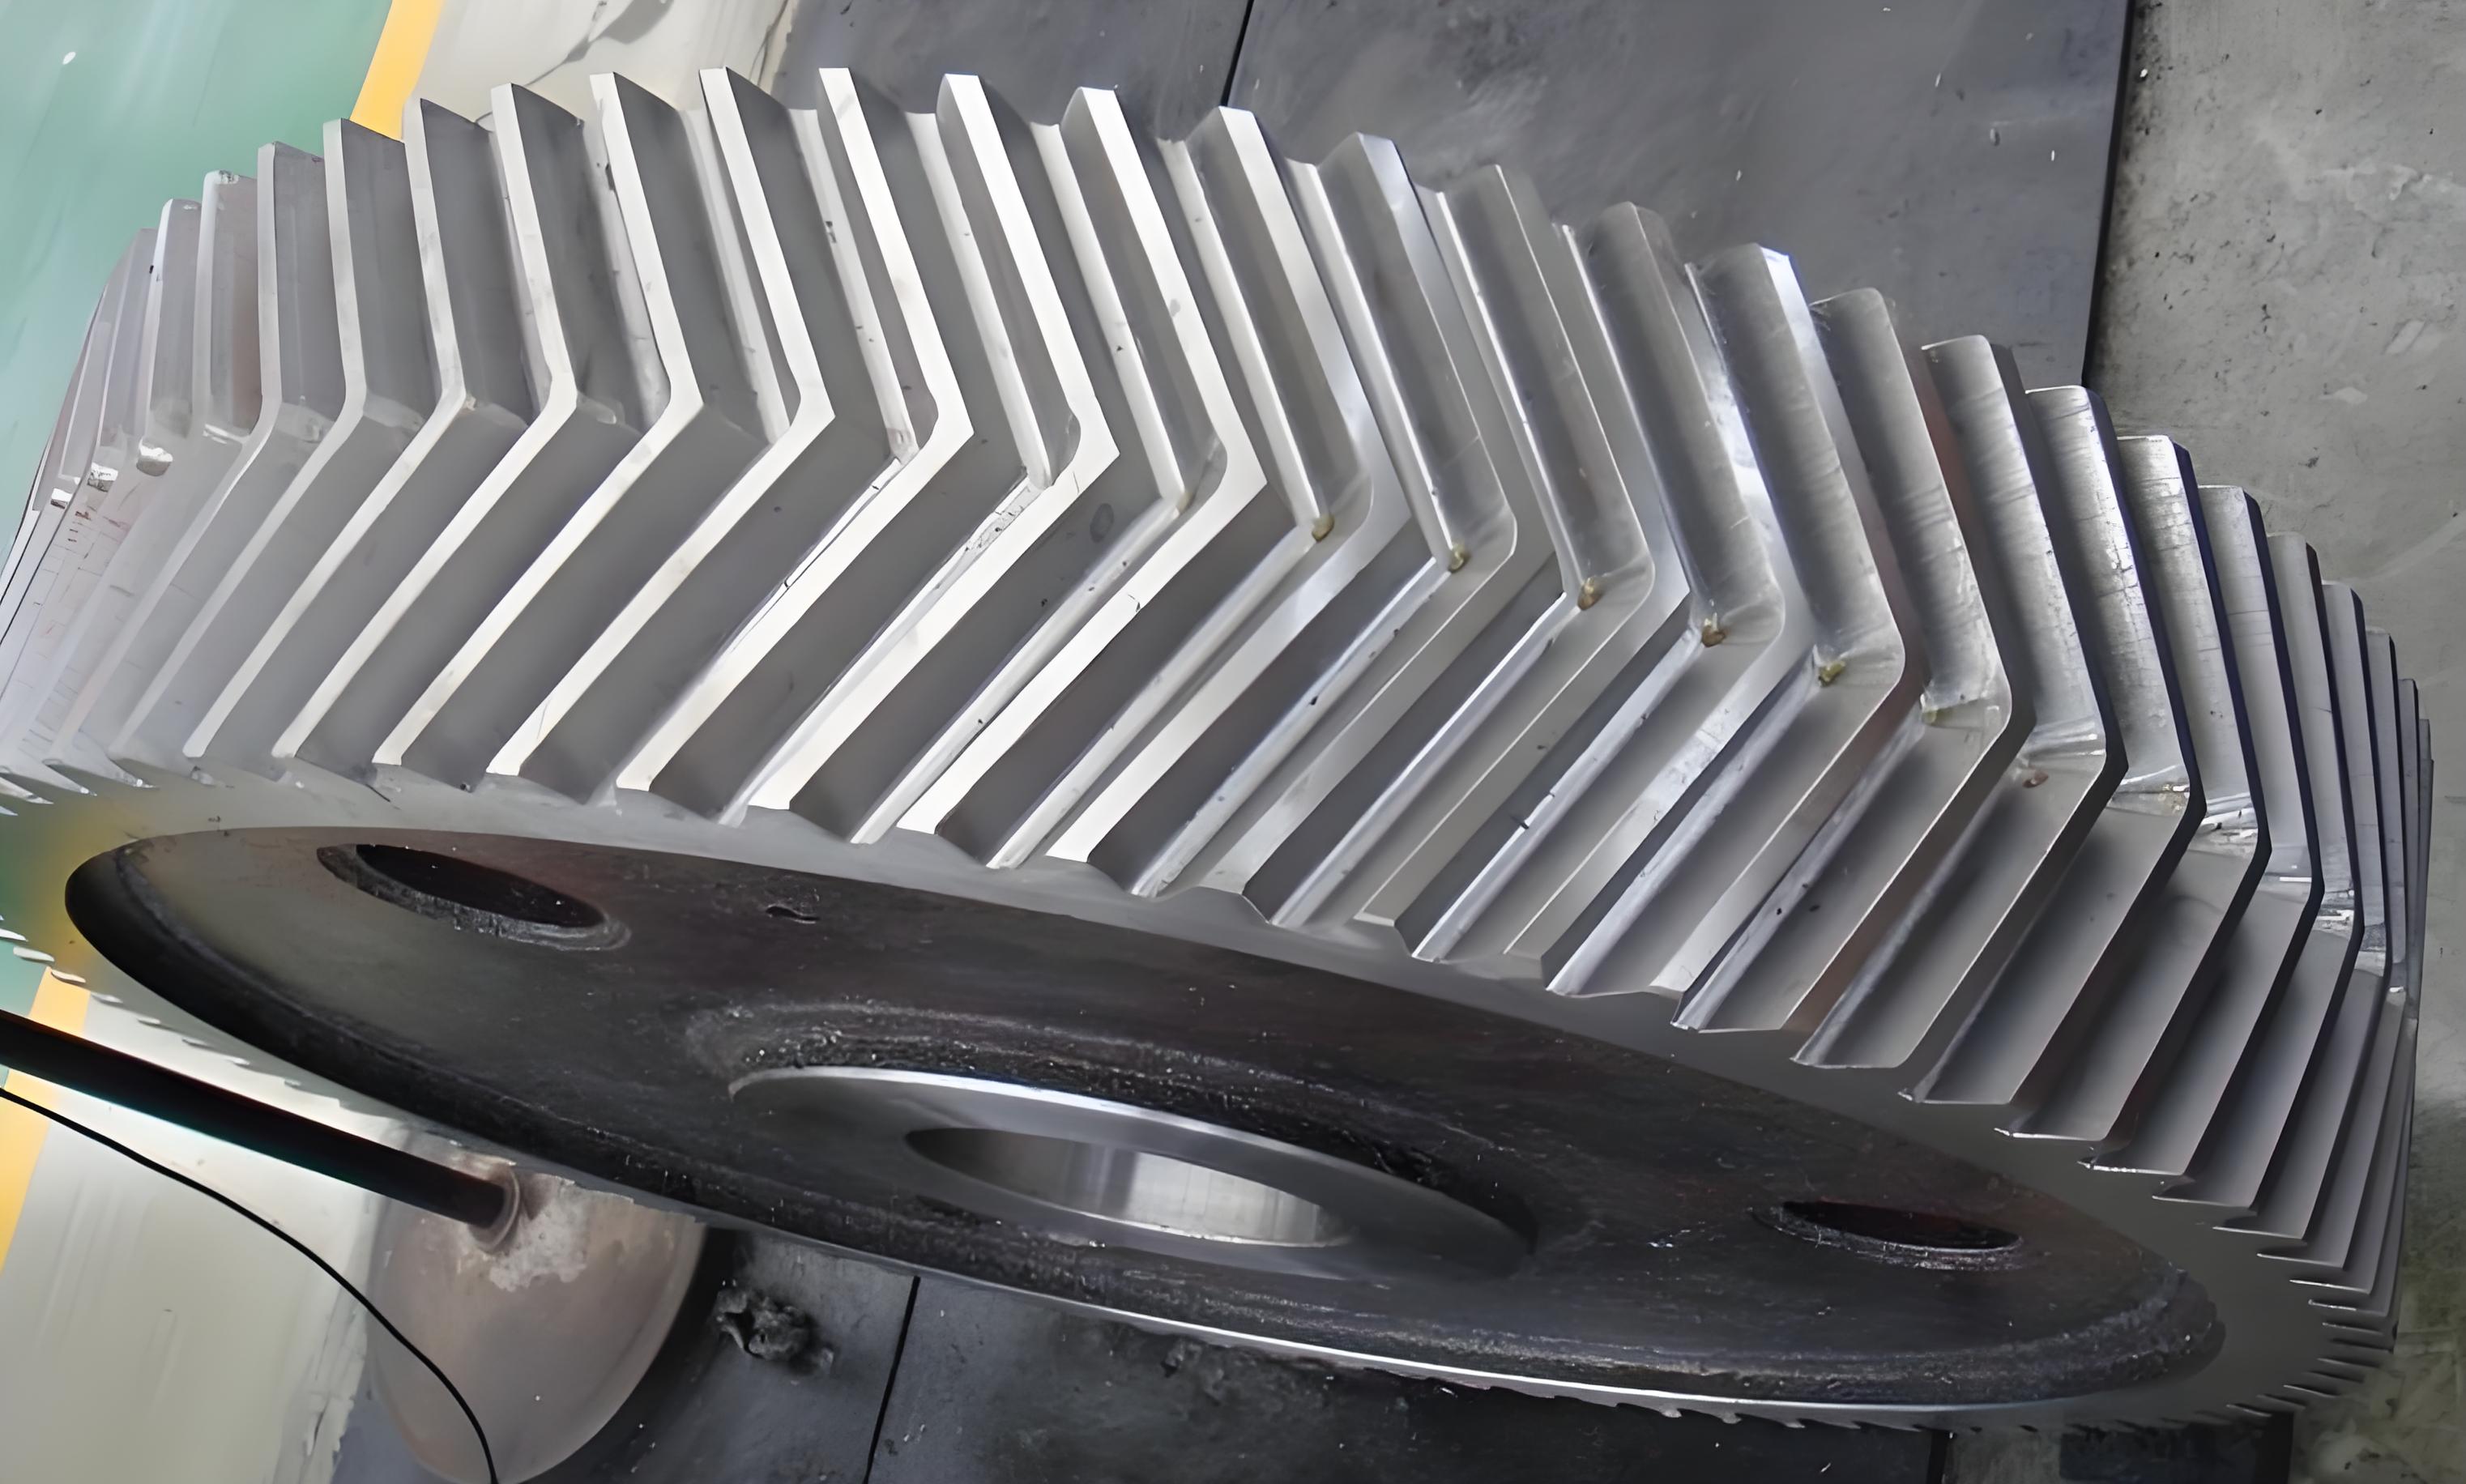
In my extensive experience within heavy machinery transmission systems, herringbone gears have consistently proven their value due to their exceptional load-bearing capacity, smooth operation, and minimal axial thrust. These advantages make herringbone gears indispensable in applications such as mechanical presses exceeding 800 tons. However, the manufacturing of herringbone gears presents significant challenges, primarily due to their complex geometry and the precision required for proper meshing. The high cost and difficulty in processing are inherent drawbacks. Typically, herringbone gears are constructed in two forms: as a monolithic unit or as split components assembled together. This article, drawing from a project involving a specialized machine—a CNC deep-hole drill (model TK2150×120/20) for a primary drive system—details a practical machining strategy for split-type herringbone gears. The goal is to provide a reference for similar manufacturing endeavors, focusing on overcoming synchronization challenges in split herringbone gears assemblies.
The core challenge in machining split herringbone gears lies in achieving precise phase synchronization between the two helical halves after assembly. Considering a specific component with a module of 8 mm and a helix angle $$ \beta = 20^\circ 1′ 30” $$, the conventional approach of machining the gear as a pre-assembled unit is often thwarted by insufficient clearance for tool withdrawal. For herringbone gears, the intermediate gap or undercut width is critical. According to standard data for hobbling herringbone gears with a normal module $$ m_n = 8 $$ mm and helix angles between $$ 15^\circ $$ and $$ 25^\circ $$, the required undercut width is approximately 85 mm. However, in our case, the designed gap was a mere 10 mm, rendering standard hobbling impossible. Alternative methods like gear shaping were also unsuitable due to the required gear quality of grade 7-6C and the post-heat treatment surface hardness of 52 HRC on the teeth, which eliminates machining via shaping after hardening. Consequently, grinding emerged as the only viable finishing process, necessitating separate machining of the two gear halves before assembly. This brought the issue of phase synchronization to the forefront as the paramount difficulty.
To quantify the geometrical constraints, the relationship between the normal module, helix angle, and the theoretical minimum undercut width can be expressed. For a herringbone gear, the axial pitch $$ P_a $$ is given by:
$$ P_a = \frac{\pi m_n}{\sin \beta} $$
The undercut width must accommodate the tool’s travel and withdrawal. A simplified empirical formula for minimum undercut width $$ W_{min} $$ in hobbling is:
$$ W_{min} \approx k \cdot m_n \cdot \csc \beta $$
where $$ k $$ is a factor depending on tool and machine specifics (often between 8 and 12 for standard hobs). For our parameters:
$$ W_{min} \approx 10 \times 8 \times \csc(20^\circ 1′ 30”) \approx 10 \times 8 \times 2.92 \approx 233.6 \text{ mm} $$
This theoretical value starkly contrasts with the available 10 mm, confirming the infeasibility of conventional methods and underscoring the need for the split-and-assemble strategy for these herringbone gears.
| Parameter | Symbol | Value | Unit |
|---|---|---|---|
| Number of Teeth | z | 38 | – |
| Normal Module | m_n | 8 | mm |
| Normal Pressure Angle | α_n | 20° | degree |
| Helix Angle | β | 20° 1′ 30″ | degree |
| Hand of Helix | – | Left/Right | – |
| Profile Shift Coefficient | x | 0 | – |
| Accuracy Grade (ISO) | – | 7-6C | – |
| Tooth Surface Hardness | – | 52 HRC | – |
| Measured Chordal Tooth Thickness | W_k | 111.24 mm | mm |
| Maximum Peripheral Speed | v | 17.1 | m/s |
The devised machining strategy for these herringbone gears centers on ensuring phase alignment through precision dowel pins and a custom alignment fixture. Before any gear cutting, the two halves (referred to as Part 1 and Part 2) are temporarily assembled using six M20 hex socket head bolts. The critical step involves drilling and reaming two diametrically opposite $$ \phi 6 \text{H7} $$ dowel holes across the assembled interface. These holes are meticulously positioned to lie on a common axis parallel to the gear’s central axis and equidistant from both tooth end faces. The target was to keep this positional error within 0.02 mm. The core idea is that the centerline of these dowel holes coincides precisely with the center of a specific tooth space (the “valley”) on one part. After separating the halves, each is individually gear cut and ground, using these dowel holes as a primary datum to maintain the indexed position of the teeth relative to the holes.
Two major concerns arose with this approach for herringbone gears: first, the potential distortion during heat treatment (induction hardening of the teeth) that could prevent reassembly; second, guaranteeing that the $$ \phi 6 \text{H7} $$ holes indeed align with the center of a tooth valley on both parts after separate machining. To mitigate heat treatment distortion, material stability was prioritized. The gear blanks were subjected to normalizing treatment prior to machining to relieve internal stresses and ensure dimensional stability during the localized induction hardening process. For the second concern, a specialized single-tooth centering fixture was designed and employed. This fixture, engaging with the $$ \phi 6 \text{H7} $$ holes, allows for precise centering of a tooth space relative to the machine spindle during grinding, achieving a centering accuracy better than 0.02 mm. The theoretical cumulative error for the assembled herringbone gears synchronization was estimated to be within 0.10 mm.
| Step | Operation | Machine Tool | Key Actions & Tolerances |
|---|---|---|---|
| 1 | First Turning | CNC Horizontal Lathe | Chuck on φ195k6 OD. Indicate gear OD and face. Turn gear OD to φ343.80h7, face right end. Machine a reference band on left of 60mm face. Leave 0.7mm stock on bore. |
| 2 | Second Turning | CNC Horizontal Lathe | Reverse part. Chuck on right OD. Indicate gear OD and reference band (≤0.01mm). Turn φ195k6, φ285 OD, face to dimension 65±0.1mm, machine left face of 130mm dimension, finish tooth width to 60⁰₋₀.₀₂ mm. All runouts ≤0.015mm. |
| 3 | Assembly & Drilling | Assembly Station / CNC Mill | Assemble Part 1 and Part 2 with 6x M20 bolts. Drill and ream 2x φ6H7 dowel holes on gear OD, positioned per diagram. |
| 4 | Precision Hole Location | CNC Boring Mill | Ensure the two φ6H7 holes are on same axis || to part axis, equidistant from tooth ends (error ≤0.02mm). |
| 5 | Disassembly | – | Separate Part 1 and Part 2 for individual gear machining. |
| 6 | Gear Hobbing | Gear Hobbing Machine | Using φ6H7 holes as datum, hob teeth leaving 0.8mm stock on tooth thickness for grinding. Center symmetry of hole relative to tooth space ≤0.06mm. |
| 7 | Heat Treatment | Induction Hardening | Selective hardening of tooth flanks only to 52 HRC. |
| 8 | Gear Grinding | Gear Grinding Machine | Using φ6H7 holes and centering fixture, grind teeth to final dimensions. Maintain hole center symmetry ≤0.02mm relative to tooth space. |
The mathematical foundation for ensuring synchronization in these herringbone gears involves the angular relationship between the dowel holes and the gear teeth. The angular position of a tooth space relative to a fixed datum on the gear blank is defined by the index angle. For a gear with $$ z $$ teeth, the base circular pitch angle is $$ \theta_b = 360^\circ / z $$. If the dowel hole is intended to be centered in the $$ k $$-th tooth space, its theoretical angular position $$ \phi_{hole} $$ from a reference feature should be:
$$ \phi_{hole} = (k – 0.5) \times \theta_b $$
where $$ k $$ is an integer from 1 to $$ z $$. The challenge during separate machining is to maintain this relationship on both halves of the herringbone gears. The centering fixture essentially establishes a mechanical reference that simulates this angular condition during grinding. The error in synchronization, $$ \Delta S $$, after assembly can be approximated by the root sum square of individual centering errors from both halves and the dowel hole positional error:
$$ \Delta S \approx \sqrt{(\Delta C_1)^2 + (\Delta C_2)^2 + (\Delta P)^2} $$
where $$ \Delta C_1, \Delta C_2 $$ are the centering errors (≤0.02 mm each) during grinding of Part 1 and Part 2, and $$ \Delta P $$ is the dowel hole positional error (≤0.02 mm). This yields:
$$ \Delta S \approx \sqrt{0.02^2 + 0.02^2 + 0.02^2} = \sqrt{0.0012} \approx 0.0346 \text{ mm} $$
Theoretical prediction was conservative at 0.10 mm, accounting for additional factors like bolt tightening forces and micro-geometrical deviations.
Material selection and pre-processing play a vital role in the successful manufacture of high-precision herringbone gears. The gear blanks were forged and normalized to achieve a homogeneous, fine-grained structure with minimal residual stress, which is crucial for dimensional stability during and after heat treatment. The chemical composition of the gear steel significantly influences its hardenability and distortion propensity. While the exact grade wasn’t specified, for gears requiring surface hardness of 52 HRC, common choices include alloy steels like 42CrMo or similar. The carbon equivalent (C.E.) is a useful indicator for weldability and machinability, but in our context, it relates to hardenability. A simplified formula for carbon equivalent considering hardening tendency is:
$$ C.E. = C + \frac{Mn}{6} + \frac{Cr + Mo + V}{5} + \frac{Ni + Cu}{15} $$
For many gear steels, keeping the C.E. below 0.5% helps control distortion during induction hardening, which was a critical consideration for our herringbone gears.
| Method | Typical Undercut Width Required | Suitability for High Hardness (>45 HRC) | Achievable Accuracy (Grade) | Relative Cost | Applicability to Split Herringbone Gears |
|---|---|---|---|---|---|
| Hobbing (Conventional) | Large (>80 mm for mn=8) | No (Pre-hardening only) | 6-8 | Low | Poor (if undercut is small) |
| Shaping (Gear Shaper) | Moderate | No | 6-7 | Medium | Moderate (for pre-assembly) |
| Grinding | Very Small (or none for split design) | Yes | 3-6 | High | Excellent (enables split design) |
| Hobbing + Skiving (Hard) | Large | Yes (Limited) | 6-7 | Medium-High | Poor |
| Proposed Split & Grind Method | None required on component | Yes | 6-7 (achieved) | High (but necessary for design) | Excellent (specifically for assembly) |
The grinding process for these herringbone gears demanded meticulous setup. The centering fixture, engaging the two $$ \phi 6 \text{H7} $$ holes, effectively created a kinematic coupling between the gear half and the grinding machine’s workholding system. This ensured that the rotational orientation of the gear blank was precisely controlled relative to the grinding wheel. The grinding itself followed the standard generating or form grinding principles. For involute herringbone gears, the tooth profile is defined by the basic rack parameters. The transverse pressure angle $$ \alpha_t $$ is related to the normal pressure angle $$ \alpha_n $$ by:
$$ \tan \alpha_t = \frac{\tan \alpha_n}{\cos \beta} $$
Substituting our values:
$$ \tan \alpha_t = \frac{\tan 20^\circ}{\cos(20^\circ 1′ 30”)} \approx \frac{0.36397}{0.93969} \approx 0.3873 $$
Thus, $$ \alpha_t \approx 21.17^\circ $$. This transverse angle is critical for setting up the grinding wheel profile or the machine’s generation kinematics. The grinding operation removed the 0.8 mm stock left from hobbing, achieving the final tooth thickness, profile, lead, and pitch accuracy as per the 7-6C grade requirements for these critical herringbone gears.
Assembly verification was the final step. After separately grinding both halves of the herringbone gears, they were assembled using the M20 bolts and the $$ \phi 6 \text{H7} $$ dowel pins. The synchronization error was measured by checking the alignment of corresponding tooth flanks from both halves across the assembly interface. Using a high-precision dial indicator and a master reference gear or a coordinate measuring machine (CMM), the axial misalignment between the left and right helical teeth was quantified. In our production trial, the measured synchronization error was 0.08 mm, which was well within the estimated 0.10 mm limit and satisfactory for the functional requirements of the heavy-duty drive system. This successful outcome validated the entire machining strategy for assembled herringbone gears.
Reflecting on the process, several factors contributed to the success of manufacturing these split herringbone gears. First, the decision to use dowel holes as a common precision datum before separating the components was pivotal. Second, the design and use of the single-tooth centering fixture bridged the gap between separate machining and unified assembly. Third, the choice of material and its pre-treatment (normalizing) minimized unpredictable distortion from heat treatment. Fourth, the sequence of operations—turning, assembly for hole drilling, disassembly, rough cutting (hobbing), hardening, and finish grinding—was logically structured to minimize error accumulation. This approach is particularly relevant for large or heavy herringbone gears where monolithic machining is impossible due to size or undercut constraints.
In conclusion, the presented machining scheme offers a robust solution for manufacturing high-precision, hardened herringbone gears in a split configuration. It effectively addresses the fundamental challenge of phase synchronization through integrated mechanical datums and precision grinding. This methodology expands the design possibilities for herringbone gears in heavy machinery, allowing engineers to specify them even when space constraints prohibit large undercuts. The principles outlined—pre-assembly datum creation, separate finishing with dedicated tooling, and careful process sequencing—are broadly applicable to other complex, precision components requiring assembly after critical feature machining. The continual evolution of such techniques ensures that herringbone gears remain a viable and superior choice for transmitting high power in demanding mechanical systems.