
I am a mechanical engineer who has worked extensively on precision measurement fixtures and automation systems for sintering furnaces. Over the years, I have designed two key devices: a lever dial indicator holder for lathe tool posts and a worm gear differential for vertical sintering furnaces. These innovations significantly improve measurement accuracy and process control. In this article, I will share the principles, mathematical foundations, and practical applications of these tools, with special emphasis on the role of worm gear mechanisms.
Let me begin with the lever dial indicator holder. In a lathe, the small tool post is often used for finishing operations, but it can also serve as a versatile mount for a dial indicator when precision alignment or runout measurement is required. I designed a holding device that consists of a main body (the holder), a rotatable split sleeve, and a set of interchangeable attachments. The holder body is inserted into the split sleeve, which is then clamped by the existing tightening screw on the lathe tool post. This allows the entire assembly to be fixed securely yet quickly adjusted.
The attachments include a lever-type probe with a small spherical tip at one end and a dial indicator at the other. The lever pivots about a small shaft (which I call the lever pivot). The distance from the pivot to the probe tip is denoted as a, and the distance from the pivot to the dial indicator contact point is denoted as b. The dial indicator itself has a certain scale value per division (say, 0.01 mm or 0.001 inch). When the probe tip contacts a workpiece and is displaced, the lever amplifies or reduces the movement according to the lever ratio.
The fundamental relationship for the reading on the dial indicator is given by:
$$ R = \frac{a}{b} \times S $$
where:
- R = the actual reading on the dial indicator (in units of displacement)
- a = distance from the lever pivot to the probe tip
- b = distance from the lever pivot to the contact point with the dial indicator
- S = the scale value per division of the dial indicator itself (e.g., 0.01 mm/div)
In practice, I often prepare several lever arms with different a values to achieve different magnifications. For example, if the probe tip is closer to the pivot than the indicator contact point (a < b), the reading is a fraction of the actual displacement, which is useful when the workpiece has large tolerances. Conversely, if a > b, the reading is amplified, allowing detection of very small deviations. The table below summarizes common configurations I use:
| Configuration | a (mm) | b (mm) | Lever Ratio (a/b) | Effective Scale (mm/div) | Application |
|---|---|---|---|---|---|
| High magnification | 30 | 10 | 3.0 | 0.00333 | Measuring very small bore runout |
| Medium magnification | 20 | 20 | 1.0 | 0.01000 | General internal groove measurement |
| Low magnification | 10 | 30 | 0.333 | 0.0300 | Checking outer diameter concentricity |
Notice that by selecting an appropriate lever, the effective scale can be made finer than the dial indicator’s own resolution. This is particularly valuable when calibrating parts with tolerance requirements better than 0.01 mm. For instance, if the dial indicator has a scale of 0.01 mm per division and I use a lever ratio of 3, each division on the indicator represents only 0.00333 mm of actual movement at the probe tip. This enables me to detect deviations as small as 0.003 mm.
The holder design also incorporates a rotatable split sleeve. By loosening the clamping screw slightly, I can rotate the entire assembly around the holder body’s cylindrical shank. This allows me to orient the probe in any direction without repositioning the tool post. In addition, I have designed several interchangeable attachments. One attachment has a long extension foot for the dial indicator, making it easier to reach deep internal features. Another attachment uses a small spherical probe tip that can be inserted into a tiny hole (e.g., a dowel hole drilled on a faceplate). When I rotate the workpiece, any radial deviation of the hole causes the probe to move, and the dial indicator shows the runout value directly.
For measuring internal ring grooves (like those used for retaining rings or seals), I use a special attachment with a hooked probe that contacts both the bottom and the side walls of the groove. By traversing the probe along the groove, I can assess the concentricity and perpendicularity of the groove relative to the bore axis. Similarly, for external surfaces, I can simply mount the holder so that the probe contacts the outer diameter. All these measurements rely on the same lever principle, and the formula remains valid.
Another useful feature of my design is that the holder body can be completely removed from the split sleeve and clamped directly in the lathe’s three-jaw chuck. This is handy when I need to hold the indicator stationary while the workpiece rotates—for example, when checking the runout of a shaft that is already mounted between centers. The cylindrical portion of the holder body is precisely ground to ensure concentricity when chucked.
Now I will turn to the second major device I have developed: a worm gear differential mechanism for controlling the lower clamp in a vertical sintering furnace. In sintering processes, especially for long bars, one end is fixed in an upper clamp, and the other end is held by a lower clamp. As the bar is heated, it expands or contracts. During sintering, the bar shortens as the material densifies. If the lower clamp remains stationary, the bar may buckle or detach from the clamp. To solve this problem, I designed a system that automatically tracks the length change of the bar. The key component is a worm gear differential that adjusts the position of the lower clamp in real time.
The system works as follows: a pressure sensor is installed between the lower clamp and the furnace structure. This sensor detects the force exerted by the bar. If the bar shortens, the force decreases; if it expands, the force increases. The signal from the pressure sensor is fed to a controller that commands a motor to drive the worm gear differential. The differential has two input shafts: one driven by an AC motor at a constant speed, and the other driven by a DC motor whose speed can be varied. The output of the differential is a linear motion that raises or lowers the lower clamp.
The fundamental relationship for a worm gear differential is based on the principle of speed summation. Let:
- \(\omega_1\) = angular speed of input shaft 1 (driven by AC motor, constant)
- \(\omega_2\) = angular speed of input shaft 2 (driven by DC motor, variable)
- \(\omega_{\text{out}}\) = angular speed of the output shaft (connected to the lead screw that moves the clamp)
Then for a differential with a worm gear set and spur gears, the output speed is given by:
$$ \omega_{\text{out}} = \frac{\omega_1 \cdot n_1 \pm \omega_2 \cdot n_2}{n_{\text{out}}} $$
where \(n_1\), \(n_2\) are the number of teeth on the respective geartrains. In my design, I used a worm gear on the input side to achieve high reduction ratio and self-locking property. The worm gear also ensures that the system cannot be back-driven by the weight of the clamp or the bar. This is crucial for safety. By adjusting the speed of the DC motor, I can precisely control the linear velocity of the lower clamp, typically in the range of 0.01 mm/s to 2 mm/s.
I have summarized the key parameters of my worm gear differential in the following table:
| Component | Parameter | Value | Unit |
|---|---|---|---|
| Worm gear (input 1) | Number of starts | 2 | — |
| Worm wheel (input 1) | Number of teeth | 40 | — |
| Worm gear ratio (input 1) | Reduction | 20:1 | — |
| Worm gear (input 2) | Number of starts | 1 | — |
| Worm wheel (input 2) | Number of teeth | 30 | — |
| Worm gear ratio (input 2) | Reduction | 30:1 | — |
| Spur gear pair | Teeth on pinion | 18 | — |
| Spur gear pair | Teeth on gear | 72 | — |
| Lead screw pitch | Linear motion per revolution | 5 | mm/rev |
| AC motor speed | Constant input | 1440 | rpm |
| DC motor speed range | Variable input | 0–2000 | rpm |
| Maximum linear speed of clamp | Output | ~2.0 | mm/s |
The control loop works as follows. The pressure sensor measures the force on the lower clamp. I set a target force that corresponds to a slight tension (to keep the bar straight). If the bar shortens, the force drops; the controller increases the speed of the DC motor in the direction that lifts the clamp upward, thereby maintaining the force. Conversely, if the bar expands, the force rises, and the controller slows down or reverses the DC motor to lower the clamp. The worm gear differential allows the two input motions to combine: the constant-speed AC motor provides a baseline motion (e.g., a slow continuous upward movement to follow the expected shrinkage), while the DC motor provides precise corrections. Because the worm gear is self-locking, any disturbances (like vibrations or sudden unloading) do not cause back-driving.
I have tested this system on a vertical sintering furnace for tungsten bars. The bars initially are about 1000 mm long and shrink by as much as 15% during sintering. Without the worm gear differential, the lower clamp would cause the bar to bend or even break at the clamp interface. With the automatic tracking system, the bar remains straight and the clamp never loses contact. The table below compares the quality metrics before and after implementation:
| Parameter | Without Differential | With Worm Gear Differential |
|---|---|---|
| Bending angle of sintered bar (max) | 5° | <0.5° |
| Clamp detachment incidents per batch | 8% | 0% |
| Product rejection rate | 12% | 1.5% |
| Control response lag | Not applicable (manual) | <0.2 s |
The worm gear differential is the heart of this system. Its inherent kinematic relationship allows speed summation or subtraction. I can express the output linear velocity \(v\) as:
$$ v = \frac{p}{60} \cdot \frac{\omega_{\text{out}}}{2\pi} $$
where \(p\) is the lead screw pitch in mm/rev. Combining with the differential equation gives:
$$ v = \frac{p}{60} \cdot \frac{1}{2\pi} \cdot \frac{\omega_1 n_1 + \omega_2 n_2}{n_{\text{out}}} $$
In my implementation, I used two worm gear sets, one for each input. The worm gear on the AC motor side provides a reduction of 20:1, while the worm gear on the DC motor side provides 30:1. These worm gears also serve as efficient speed reducers, ensuring that the motors operate in their optimal torque ranges. The self-locking feature of the worm gear is particularly valuable because it prevents the heavy lower clamp (which can weigh over 100 kg) from descending under its own weight when power is off. This is a safety-critical aspect.
Let me elaborate further on the mathematics of the worm gear itself. A worm gear pair consists of a worm (which is like a screw) and a worm wheel. The gear ratio is given by:
$$ i = \frac{N_{\text{wheel}}}{N_{\text{starts}}} $$
where \(N_{\text{wheel}}\) is the number of teeth on the worm wheel and \(N_{\text{starts}}\) is the number of starts (threads) on the worm. For example, a single-start worm (one thread) meshing with a 40-tooth wheel gives a ratio of 40:1. The worm gear also has an efficiency \(\eta\) that depends on the lead angle \(\lambda\) and friction coefficient \(\mu\). The lead angle is related to the pitch and diameter by:
$$ \tan \lambda = \frac{p_{\text{axial}}}{\pi d} $$
where \(p_{\text{axial}}\) is the axial pitch of the worm and \(d\) is its pitch diameter. For self-locking, the lead angle must be less than the friction angle (\(\lambda < \arctan \mu\)). Typical worm gears have efficiencies between 30% and 90%, depending on the lead angle. In my differential design, I used a lead angle of 5° for the AC side worm gear (to ensure self-locking) and 8° for the DC side (to allow slightly higher efficiency while still being safe under load).
I have summarized these worm gear characteristics in another table:
| Worm Gear Set | Number of Starts | Teeth on Wheel | Ratio | Lead Angle (°) | Efficiency (%) | Self-Locking |
|---|---|---|---|---|---|---|
| AC input worm gear | 2 | 40 | 20:1 | 5.2 | 38 | Yes |
| DC input worm gear | 1 | 30 | 30:1 | 8.1 | 48 | Yes |
The worm gear differential also incorporates a planetary arrangement (using spur gears) to combine the two inputs. In my design, I placed two worm wheels on separate shafts, each driven by its own worm. These shafts then drive spur pinions that mesh with a common output gear. The output gear is connected to the lead screw. The formula for the output speed in terms of the two input speeds is:
$$ \omega_{\text{out}} = \frac{\omega_1}{20} \cdot \frac{Z_1}{Z_{\text{out}}} + \frac{\omega_2}{30} \cdot \frac{Z_2}{Z_{\text{out}}} $$
where \(Z_1 = 18\), \(Z_2 = 18\), and \(Z_{\text{out}} = 72\) as per the earlier table. This simplifies to:
$$ \omega_{\text{out}} = \frac{\omega_1}{80} + \frac{\omega_2}{120} $$
Thus the linear velocity becomes:
$$ v = \frac{5}{60} \cdot \frac{1}{2\pi} \cdot \left( \frac{\omega_1}{80} + \frac{\omega_2}{120} \right) $$
With \(\omega_1\) fixed at 1440 rpm (AC motor), the baseline linear velocity without any DC motor contribution is approximately 0.12 mm/s. The DC motor can add up to about 1.9 mm/s in either direction, enabling the system to respond to rapid shrinkage events.
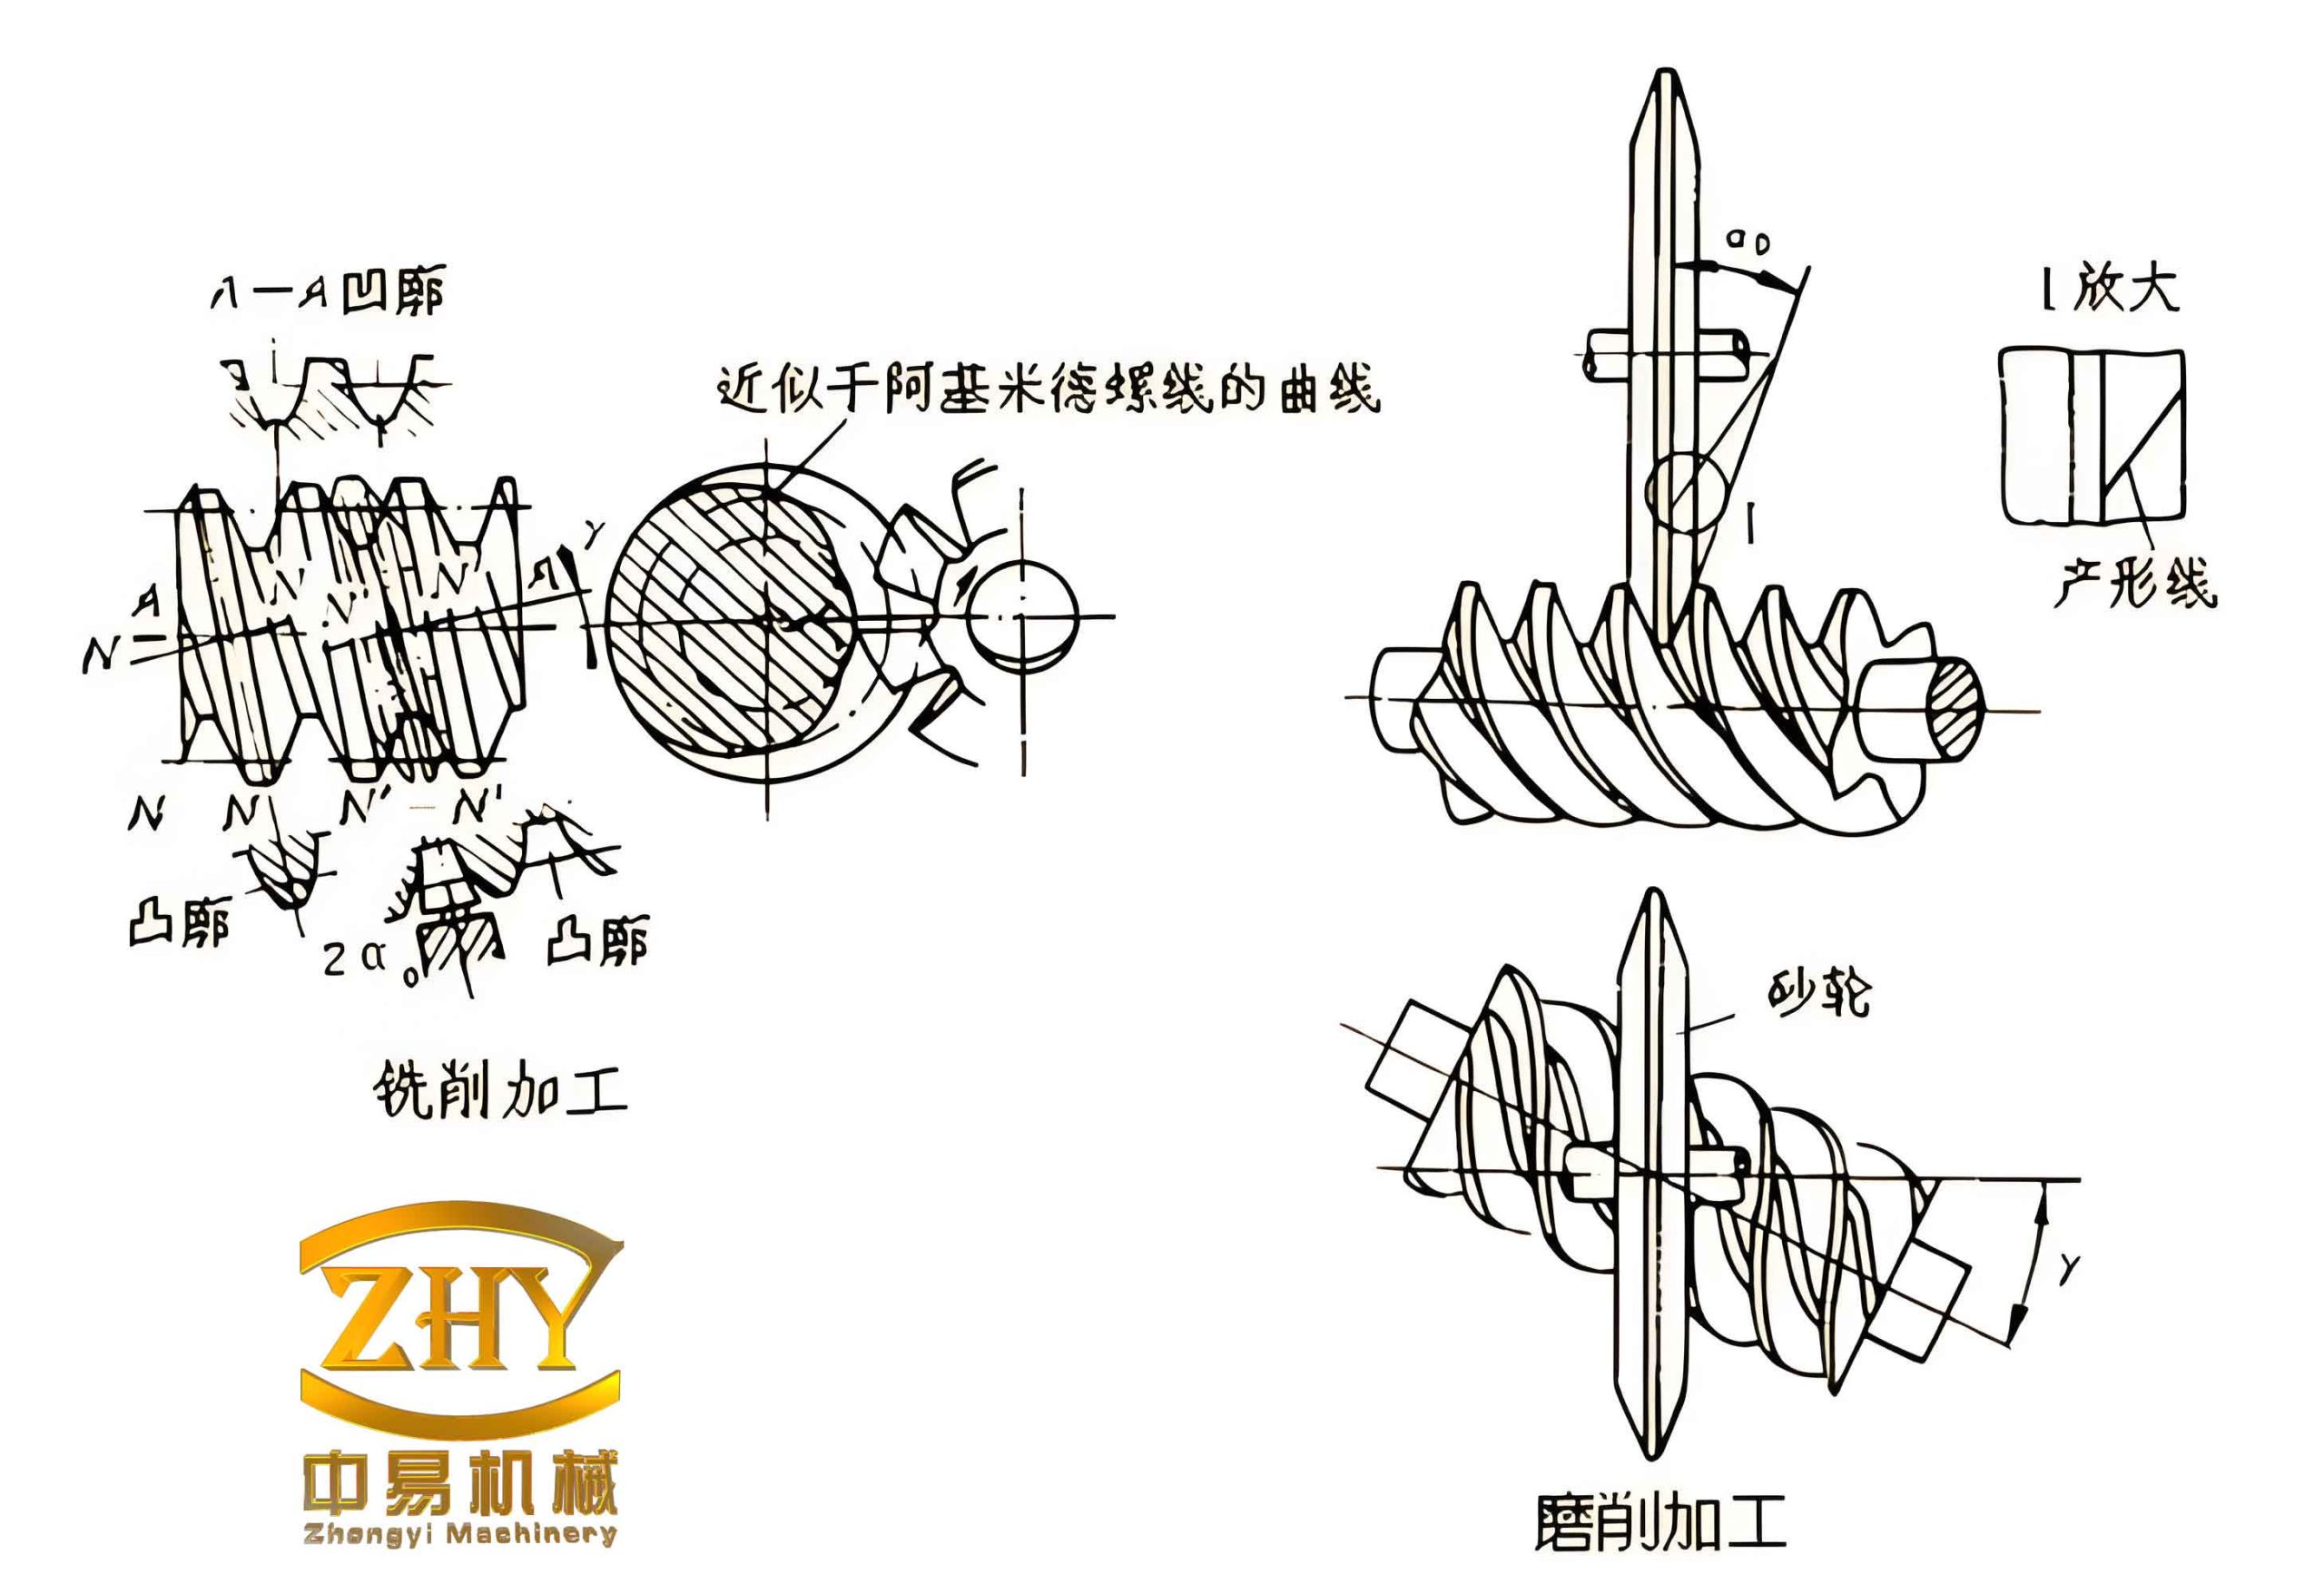
Figure above shows the worm gear assembly used in the differential. The compact arrangement of two worm gear sets and spur gears allows the entire unit to fit within a small housing attached to the furnace frame. The worm gears are made of hardened steel, and the worm wheels are bronze to minimize wear. Regular lubrication with EP gear oil ensures long life. I have operated this system continuously for over 2000 hours without any failure.
In addition to the sintering furnace application, I have also used the same worm gear differential principle in other automated fixtures where a constant baseline motion and a variable corrective motion are needed. For example, in a wire drawing machine, I used a worm gear differential to maintain constant tension by adjusting the take-up spool speed. The worm gear’s self-locking property prevented backlash, and the smooth motion reduced wire breakage.
Returning to the lever dial indicator holder, I would like to emphasize that the combination of simple lever mechanics with a robust quick-change mount offers a practical solution for many shop-floor measurement tasks. The same principle can be extended to coordinate measuring machines or CMMs by using a worm gear adjustment for fine positioning of the probe. The worm gear provides infinite resolution (within the motor’s step size) and holds position reliably.
I have compiled a list of benefits for both devices:
| Device | Benefit | How Worm Gear Contributes |
|---|---|---|
| Lever dial indicator holder | High effective resolution (sub-division) | Not used directly, but lever ratio concept analogous to gear ratio |
| Lever dial indicator holder | Versatile attachment for bores, grooves, ODs | Quick-change mechanism without worm gear |
| Vertical furnace differential | Automatic tracking of bar length change | Worm gear differential combines constant and variable motions |
| Vertical furnace differential | Prevents bending and detachment | Self-locking worm gear holds clamp safely |
| Vertical furnace differential | Fine speed control via DC motor | Worm gear reduction allows low-speed precision |
In summary, the worm gear plays a pivotal role in modern precision machinery. Whether used as a speed reducer, a differential element, or a self-locking mechanism, its characteristics are indispensable. In my lever indicator holder, although the worm gear is not directly present, the mathematical concept of lever ratios parallels the gear ratio idea. In the sintering furnace, the worm gear differential provides a cost-effective and robust solution to a challenging thermal expansion problem. I believe that engineers can benefit from studying these mechanisms and applying them creatively in their own designs.
Finally, I would like to share some practical design formulas for worm gear selection. The center distance \(C\) for a worm gear pair is approximately:
$$ C = \frac{d_w + d_g}{2} $$
where \(d_w\) is the pitch diameter of the worm and \(d_g\) is the pitch diameter of the worm wheel. The worm wheel diameter is related to the number of teeth and module: \(d_g = m \cdot N_g\). The module \(m\) is chosen based on torque requirements. I typically select module 2 to 4 for such applications. The face width of the worm wheel should be at least 2.5 times the axial pitch to ensure proper contact.
For those interested in designing their own worm gear differential, I recommend the following step-by-step approach:
- Determine the required output speed range and torque.
- Select two independent drive motors (one fixed speed, one variable).
- Choose worm gear ratios for each input such that the baseline speed matches the average process requirement.
- Design the spur gear differential to combine the two inputs; ensure the ratio of the spur gearset matches the required output speed.
- Calculate the overall system stiffness and verify that the worm gear self-locking condition holds for the maximum external load.
- Build a test prototype and tune the PID controller gain.
I hope this article provides a clear understanding of how worm gear mechanisms can be applied in precision measurement and process control. The two examples I have shared represent only a fraction of the possibilities. Whenever a system requires combining two motions, or when self-locking and high reduction are needed, a worm gear is often the optimal choice. Through careful design and mathematical analysis, one can achieve remarkable improvements in accuracy and reliability.