
I have been working on the manufacturing of straight bevel gears for many years, especially small-module straight bevel gears used in automotive, aerospace, and military applications. The conventional processes for straight bevel gears, such as gear planing, double-cutter milling, and form milling with disc or finger cutters, often suffer from low productivity, complex machine setup, and limited accuracy. In my recent work, I focused on developing a high-speed hobbing-milling process for small-module straight bevel gears on a CNC spiral bevel gear cutting machine. The core idea is to use a carbide single-position hob and continuous indexing to achieve efficient forming of the straight bevel gear teeth. This article presents my research and development process, including the machining principle, tool design, CNC program development, Vericut simulation, practical cutting experiments, and accuracy verification.
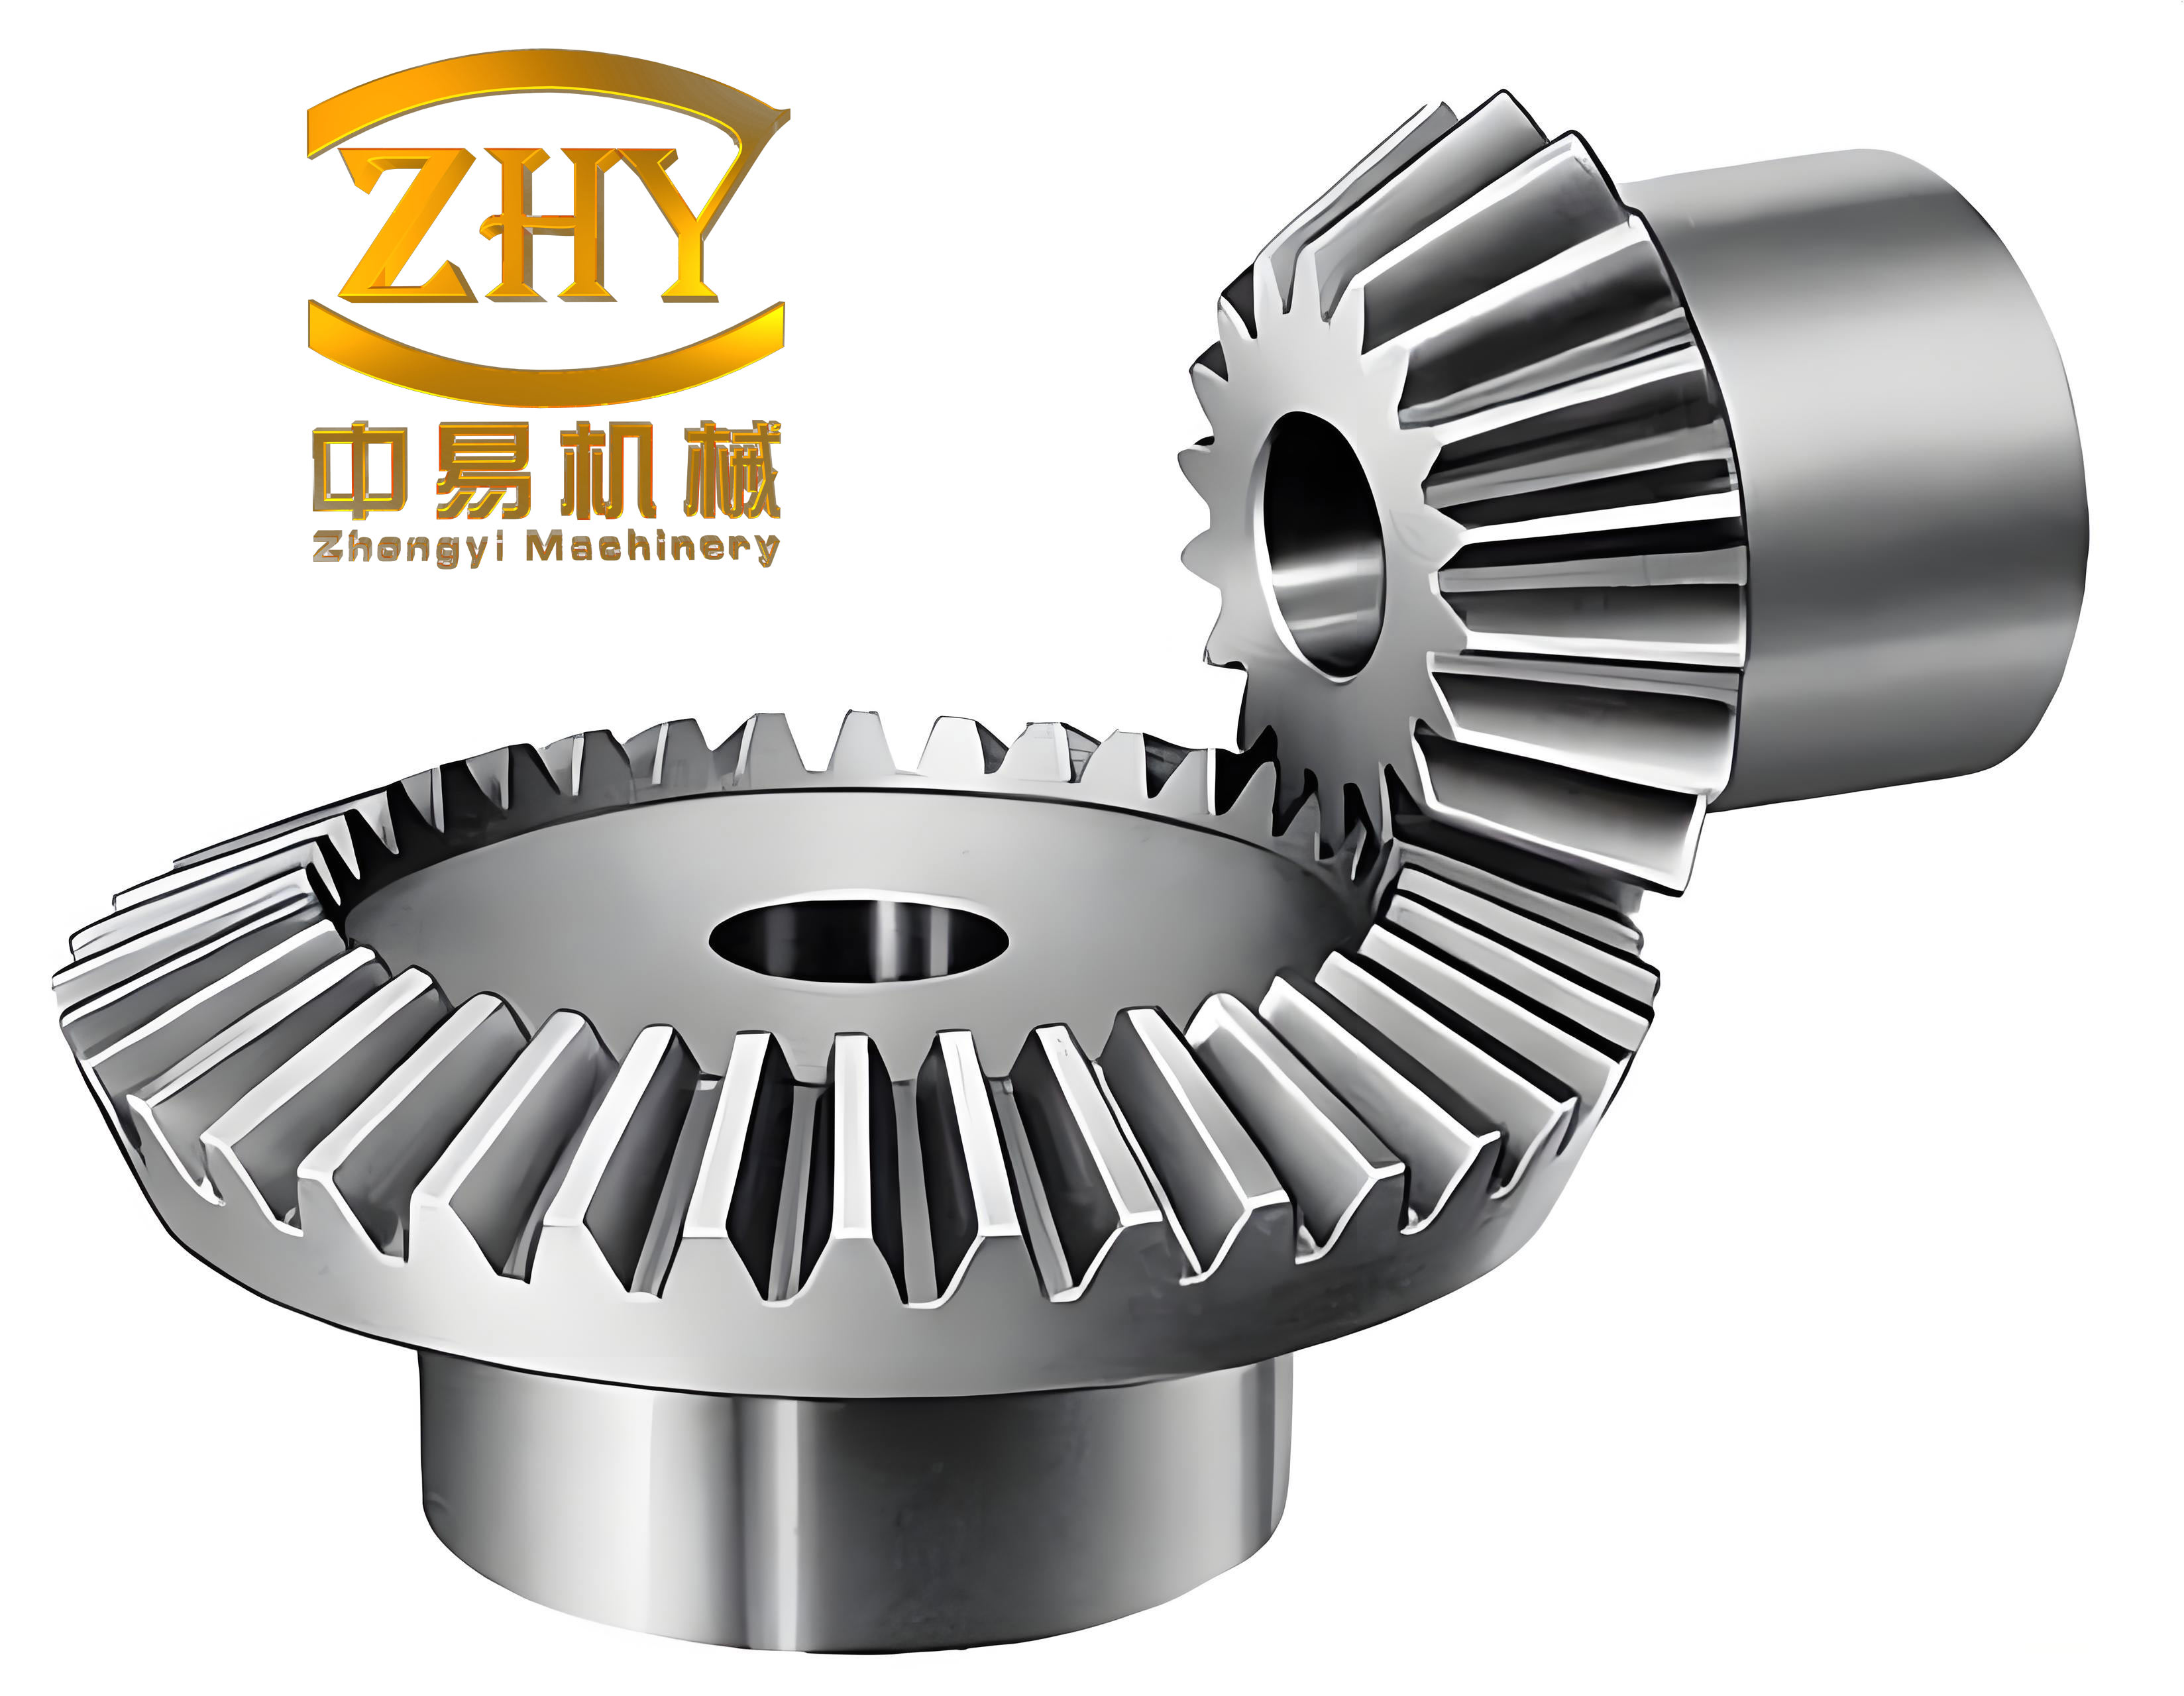
1. Motivation and Background
Gear transmission is one of the most important forms of mechanical transmission. It offers compact structure, high transmission efficiency, accurate motion transfer, and long service life. Among various gear types, straight bevel gears play a critical role in intersecting-axis transmissions. They are widely used in differentials, hand tools, aircraft accessories, and military equipment. However, the manufacturing of straight bevel gears has not advanced as rapidly as that of spiral bevel gears or cylindrical gears. Many existing machines for straight bevel gears are mechanical types with complex kinematic chains. They require tedious machine adjustments and provide relatively low efficiency and accuracy.
For small-module straight bevel gears, the module is typically less than 4 mm. These gears are often produced in large batches. Traditional gear planing machines, such as mechanical planing machines, can produce acceptable quality but at very low cutting speeds. The cutting time for one gear can be tens of minutes. Therefore, there is a strong need for a high-speed, high-efficiency process for small-module straight bevel gears. I decided to explore the possibility of using a CNC spiral bevel gear cutting machine as the platform and a single-position hob as the tool. This combination allows continuous indexing, which eliminates the retraction and indexing time that dominates conventional planing and single-index milling.
In my approach, the straight bevel gear is machined by a hobbing-milling process. The tool is a single-position hob with carbide inserts. The workpiece rotates continuously while the tool rotates at high speed. The tool also moves along a defined path to cut the full tooth depth and face width. This process is a forming method, not a generating method. The tooth profile is determined by the hob cutting edge profile, which is designed based on the large-end involute of the straight bevel gear. For small-module straight bevel gears with face width less than 25% of the outer cone distance, the profile deviation at the small end is acceptable for many applications. My experiments confirmed that the resulting straight bevel gears meet DIN class 4 pitch accuracy and have profile errors less than 7.4 μm.
2. Geometric Fundamentals of Straight Bevel Gears
Before describing the machining process, I summarize the fundamental geometry of straight bevel gears. For a pair of straight bevel gears with shaft angle 90°, the pitch cone angles are determined by the tooth numbers. Let \(z_1\) and \(z_2\) be the numbers of teeth of the pinion and gear, respectively. The pitch cone angles \(\delta_1\) and \(\delta_2\) satisfy:
$$ \tan \delta_1 = \frac{z_1}{z_2}, \quad \delta_1 + \delta_2 = 90^\circ $$
The outer cone distance \(R\) is given by:
$$ R = \frac{m_t z_1}{2 \sin \delta_1} = \frac{m_t}{2} \sqrt{z_1^2 + z_2^2} $$
where \(m_t\) is the transverse module. The outer pitch diameter \(d\) of a straight bevel gear is:
$$ d = m_t z $$
For a straight bevel gear, the standard tooth depth is often taken as:
$$ h = 2.2 m_t $$
where the addendum \(h_a\) and dedendum \(h_f\) are:
$$ h_a = m_t, \quad h_f = 1.2 m_t $$
The face width \(b\) should not exceed about \(R/3\) for general bevel gears. For the hobbing-milling process with a single-position hob, I recommend that the face width is less than \(0.25 R\) to keep the profile deviation at the small end within acceptable limits. This restriction is important for small-module straight bevel gears.
The tooth profile of a straight bevel gear is usually defined on the back cone. The back cone distance \(R_b\) is:
$$ R_b = \frac{R}{\cos \delta} $$
The equivalent number of teeth \(z_v\) is:
$$ z_v = \frac{z}{\cos \delta} $$
These equivalent parameters are useful for designing the hob profile. In my work, I designed the hob cutting edge to match the involute profile at the large end of the straight bevel gear. The large end corresponds to the outer section of the tooth, which is the most critical for meshing.
3. Principle of Hobbing-Milling with a Single-Position Hob
The hobbing-milling process for straight bevel gears uses a single-position hob. The hob is essentially a worm with a single thread and a limited number of cutting teeth. The cutting teeth are arranged in a staggered manner along the axis. Typically, the hob has 5 or 7 teeth. The teeth are arranged such that the left and right flanks of the straight bevel gear are cut by different teeth. The axial spacing between adjacent teeth is half of the worm pitch \(t/2\). The hob rotates continuously, and the workpiece rotates in a fixed ratio. For each full rotation of the hob, the workpiece rotates by one tooth pitch. This is called continuous indexing.
Continuous indexing is the key to high productivity. In conventional planing, the tool must retract, the workpiece must index, and then the tool must feed again. This takes time and limits the cutting speed. In hobbing-milling, the tool and workpiece rotate continuously, so there is no idle time for indexing. The cutting is continuous, and the material removal rate is much higher. I used a carbide single-position hob with a diameter of 25.4 mm and a lead angle of 1°. The tool material was coated carbide, and the cutting speed was 1500 rpm. This high speed is possible because the tool is small and the cutting forces are relatively low.
The process is a forming method. The tooth profile is determined by the cutting edge profile of the hob. The hob is designed based on the large-end involute of the straight bevel gear. The cutting edge is not a true involute but is usually approximated by a circular arc. This approximation is acceptable for small-module straight bevel gears. The small end of the tooth will have a profile that is slightly thicker at the addendum than the theoretical involute. However, as long as the face width is limited, the transmission performance is not significantly affected.
Let me describe the kinematics. The tool rotates about its own axis (C-axis). The workpiece rotates about its own axis (A-axis). The ratio between the tool rotation and workpiece rotation is:
$$ \frac{\omega_C}{\omega_A} = z $$
where \(z\) is the number of teeth of the straight bevel gear. In other words, for one full rotation of the workpiece, the tool rotates \(z\) times. Actually, since the hob is a single-thread worm, the ratio is such that the tool rotates \(z\) times for each workpiece revolution. The tool also has a feed motion relative to the workpiece. The feed motion is divided into two linear segments. The first segment is perpendicular to the pitch cone generatrix at the large end, cutting to full depth. The second segment is along the pitch cone generatrix, cutting the full face width. I will detail the feed path in a later section.
4. Design of the Single-Position Hob
I designed the single-position hob specifically for small-module straight bevel gears. The hob is a cylindrical tool with helical cutting edges. The basic worm thread has only one turn to avoid interference. The cutting teeth are arranged in a staggered pattern. The design parameters are listed in Table 1.
| Parameter | Value |
|---|---|
| Hob diameter | 25.4 mm |
| Hob lead angle | 1° |
| Number of cutting teeth | 5 or 7 |
| Thread type | Single thread |
| Tooth arrangement | Staggered |
| Material | Coated carbide |
| Cutting speed | 1500 rpm |
The cutting edge profile is based on the large-end involute of the straight bevel gear. The involute is defined by the base circle. For a straight bevel gear, the equivalent cylindrical gear at the large end has a base radius \(r_b\):
$$ r_b = \frac{d \cos \alpha}{2} $$
where \(\alpha\) is the pressure angle (20° in my case). The involute profile in the transverse plane is given by the parametric equations:
$$ x = r_b (\cos \theta + \theta \sin \theta) $$
$$ y = r_b (\sin \theta – \theta \cos \theta) $$
where \(\theta\) is the involute roll angle. The hob cutting edge should match this profile. In practice, I used a circular arc approximation. The arc radius \(r_c\) and center position are determined by fitting the involute over the working depth. The approximation error can be controlled to a few micrometers for small modules.
The staggered arrangement of the hob teeth is important. The left and right flanks of the straight bevel gear are cut by alternating teeth. The axial offset between adjacent teeth is \(t/2\), where \(t\) is the axial pitch of the worm thread:
$$ t = \pi m_x $$
where \(m_x\) is the axial module. For a single-thread hob, the axial pitch equals the lead. The lead angle \(\lambda\) is related to the lead \(L\) and the hob diameter \(d_h\):
$$ \tan \lambda = \frac{L}{\pi d_h} $$
For my hob, \(d_h = 25.4\) mm and \(\lambda = 1^\circ\), so the lead is:
$$ L = \pi d_h \tan \lambda \approx \pi \times 25.4 \times \tan 1^\circ \approx 1.39 \text{ mm} $$
This lead is small, which is typical for small-module hobs. The small lead angle also helps reduce axial forces and improves cutting stability.
5. H120C CNC Machine and Kinematics
The H120C is a six-axis CNC spiral bevel gear cutting machine. It has three linear axes (X, Y, Z) and three rotary axes (A, B, C). The A-axis is the workpiece spindle. The C-axis is the tool spindle. The B-axis adjusts the angle between the workpiece axis and the tool axis. The machine parameters are listed in Table 2.
| Parameter Category | Parameter | Value |
|---|---|---|
| Workpiece | Maximum gear outer diameter | 120 mm |
| Maximum module | 4 mm | |
| Maximum face width | 30 mm | |
| Maximum full tooth depth | 10 mm | |
| Number of teeth range | 1 to 200 | |
| Maximum gear ratio | 100:1 | |
| Tool | Maximum tool diameter | 101.6 mm |
| Minimum tool diameter | 25.4 mm | |
| Travel | X-axis | -210 to +210 mm |
| Y-axis | -100 to +45 mm | |
| Z-axis | -25 to +240 mm | |
| B-axis | -95° to +95° | |
| Spindle speed | A-axis | 0 to 200 rpm |
| C-axis | 0 to 3500 rpm |
I developed the CNC program for the hobbing-milling process. The program takes the tool parameters, workpiece geometry, and fixture parameters as inputs. It then generates the NC code that controls the motion of all axes. The key motion is the relative movement between the tool and the workpiece. In addition to the rotary motions, the tool moves linearly relative to the workpiece in two segments. The first segment is perpendicular to the pitch cone generatrix at the large end. The tool plunges to the full tooth depth. The second segment is along the pitch cone generatrix, cutting the full face width. The path is illustrated in Figure 6 of my original work, but here I describe it mathematically.
Let the pitch cone generatrix be the line from the cone apex to the large end of the tooth. I define a coordinate system attached to the workpiece. The large end of the tooth is at the outer cone distance \(R\). The tool starts at point 1, which is outside the workpiece. It moves to point 2, which is at the full depth position at the large end. The displacement from point 1 to point 2 is along the normal to the pitch cone. Then the tool moves from point 2 to point 3 along the pitch cone generatrix. The displacement from point 2 to point 3 is equal to the face width \(b\).
Let \(\vec{e}_g\) be the unit vector along the pitch cone generatrix, and \(\vec{e}_n\) be the unit normal vector to the pitch cone. The positions are:
$$ \vec{P}_1 = \vec{P}_0 + h \vec{e}_n + \epsilon \vec{e}_g $$
$$ \vec{P}_2 = \vec{P}_0 + h \vec{e}_n $$
$$ \vec{P}_3 = \vec{P}_0 + h \vec{e}_n + b \vec{e}_g $$
where \(\vec{P}_0\) is a reference point on the pitch cone at the large end, \(h\) is the full tooth depth, and \(\epsilon\) is a small clearance. The tool axis is oriented at an angle to the workpiece axis. The B-axis sets this angle. For hobbing-milling of straight bevel gears, the tool axis is usually perpendicular to the pitch cone generatrix at the large end. The tool rotation axis is the C-axis. The workpiece rotation axis is the A-axis. The ratio between the C-axis and A-axis is synchronized.
The CNC program also includes the continuous rotation of the workpiece and the tool. The workpiece rotates at a speed \(n_A\), and the tool rotates at \(n_C = z n_A\). The feed rates for the linear axes are calculated based on the desired cutting speed and chip load. I used a cutting speed of 1500 rpm for the tool, which corresponds to a surface speed of about 1500 rpm × π × 25.4 mm ≈ 119 m/min. This is high for a small hob but feasible with carbide and a rigid machine.
6. Vericut Simulation Environment
Before actual cutting, I built a virtual machining environment in Vericut. Vericut is a well-known simulation software for CNC machining. It allows me to check for collisions, verify the NC program, and visualize the material removal process. I used UG to create 3D models of the machine components, the workpiece, and the hob. Then I imported these models into Vericut and defined the kinematic chain. The machine model includes the linear axes X, Y, Z and the rotary axes A, B, C. I set up the topological relationships according to the actual machine structure.
The simulation workflow is as follows:
- Build 3D models of the machine, workpiece, and tool.
- Import models into Vericut.
- Define the machine coordinate system and axes.
- Set up the tool library and tool holder.
- Import the NC program generated by my custom software.
- Run the simulation and check for interference.
- Analyze the simulated gear tooth profile.
- If necessary, modify the NC program and repeat.
The workpiece model is a solid blank with the outer cone and face width. The tool model is the single-position hob with the correct cutting edge geometry. I set the tool reference point and the tool holder length. The simulation uses the actual NC code, so it verifies not only the geometry but also the motion synchronization.
For my test case, I used a straight bevel gear pair with the parameters shown in Table 3.
| Parameter | Pinion | Gear |
|---|---|---|
| Number of teeth, \(z\) | 37 | 74 |
| Transverse module, \(m_t\) | 0.5 mm | 0.5 mm |
| Pressure angle, \(\alpha\) | 20° | 20° |
| Face width, \(b\) | 5 mm | 5 mm |
| Pitch cone angle, \(\delta\) | 26.565° | 63.435° |
| Outer cone distance, \(R\) | 20.75 mm | 20.75 mm |
The outer cone distance is calculated as:
$$ R = \frac{m_t}{2} \sqrt{z_1^2 + z_2^2} = \frac{0.5}{2} \sqrt{37^2 + 74^2} \approx 20.75 \text{ mm} $$
The face width is 5 mm, which is about 24.1% of the outer cone distance. This is within the recommended limit of 25% for the hobbing-milling process. The simulation showed no interference between the tool and the workpiece. The tool path followed the designed trajectory. The simulated tooth profile was checked and compared with the theoretical profile. The deviation was within the expected range.
7. Practical Cutting Experiments
After successful simulation, I conducted actual cutting experiments on the H120C CNC machine. I machined both the pinion and the gear of the straight bevel gear pair. The cutting parameters are listed in Table 4.
| Parameter | Value |
|---|---|
| Tool diameter | 25.4 mm |
| Tool lead angle | 1° |
| Tool material | Coated carbide |
| Tool speed | 1500 rpm |
| Workpiece speed (pinion) | 40.5 rpm |
| Workpiece speed (gear) | 20.3 rpm |
| Feed per tooth | 0.05 mm |
| Coolant | Flood coolant |
The workpiece speed is calculated from the tool speed and the number of teeth. For the pinion with 37 teeth, the workpiece speed is:
$$ n_A = \frac{n_C}{z} = \frac{1500}{37} \approx 40.5 \text{ rpm} $$
For the gear with 74 teeth:
$$ n_A = \frac{1500}{74} \approx 20.3 \text{ rpm} $$
The cutting time for the pinion was 6 minutes, and for the gear it was 6 minutes. In contrast, the conventional gear planing machine required 45 minutes for the pinion and 60 minutes for the gear. The time comparison is shown in Table 5.
| Machine | Pinion time (min) | Gear time (min) |
|---|---|---|
| H120C hobbing-milling | 6 | 6 |
| Conventional planing | 45 | 60 |
| Time ratio | 13.3% | 10.0% |
The hobbing-milling process reduced the machining time to 10%–13.3% of the planing time. This is a significant improvement in productivity. The high speed is mainly due to the continuous indexing and the high cutting speed of the carbide hob.
8. Accuracy Inspection and Results
After machining, I measured the straight bevel gears on a gear measuring center. I evaluated the pitch accuracy and the tooth profile error. The pitch accuracy is characterized by the single pitch deviation \(f_p\) and the total cumulative pitch deviation \(F_p\). The single pitch deviation is:
$$ f_p = p_{actual} – p_{theoretical} $$
The total cumulative pitch deviation is:
$$ F_p = \max_{i} (p_i) – \min_{i} (p_i) $$
where \(p_i\) is the cumulative pitch at tooth \(i\). The profile error \(f_f\) is the maximum deviation of the actual tooth flank from the theoretical involute profile. The theoretical profile is defined by the spatial meshing principle of straight bevel gears.
The measurement results are summarized in Table 6.
| Gear | Single pitch deviation \(f_p\) | Total cumulative pitch deviation \(F_p\) | Profile error \(f_f\) |
|---|---|---|---|
| Pinion (37 teeth) | DIN 4 | DIN 4 | 7.4 μm |
| Gear (74 teeth) | DIN 4 | DIN 4 | -5.4 μm |
Both the pinion and the gear achieved DIN class 4 pitch accuracy. The maximum profile error was 7.4 μm for the pinion and -5.4 μm for the gear. The negative sign indicates that the actual profile was inside the theoretical profile. The profile error is well below the typical tolerance for small-module straight bevel gears. The gears were assembled and tested in the customer’s application, and they fully met the requirements.
I also compared the measured pitch deviations with the DIN standard. The DIN 4 grade for a module of 0.5 mm and a pitch diameter of about 18.5 mm allows a single pitch deviation of about 6 μm and a total cumulative pitch deviation of about 20 μm. My measured values were within these limits. The profile error of 7.4 μm is also acceptable for most small-module straight bevel gear applications.
9. Discussion of the Process Advantages and Limitations
The hobbing-milling process with a single-position hob offers several advantages for small-module straight bevel gears. First, the continuous indexing eliminates the retraction and indexing time, which drastically reduces the cycle time. Second, the use of a carbide hob allows high cutting speeds, which further increases productivity. Third, the process is implemented on a CNC machine, so the setup is flexible and the program can be easily adapted to different gear parameters. Fourth, the simulation in Vericut ensures that the NC program is correct before actual cutting, reducing the risk of collisions and scrap.
However, there are limitations. The process is a forming method, so the tooth profile is only correct at the large end. The small end will have a profile deviation. For this reason, the face width should be limited to about 25% of the outer cone distance. For larger face widths, the deviation may become too large. Also, the single-position hob is designed for a specific gear or a narrow range of gears. For different tooth numbers, a different hob may be required. In practice, a set of hobs can cover a range of equivalent tooth numbers. For example, a set of 25 hobs can cover equivalent tooth numbers from 16 to 120 for a given module.
Another limitation is the tool life. Carbide is hard but brittle. The small hob diameter and the interrupted cutting can cause chipping. I used a coated carbide grade that is suitable for high-speed cutting of steel. The tool life was sufficient for the test batch, but for mass production, tool wear monitoring and periodic replacement are necessary.
10. Mathematical Modeling of the Cutting Process
To further understand the process, I developed a mathematical model of the material removal. The cutting force in hobbing-milling of straight bevel gears can be estimated using the specific cutting pressure. The tangential cutting force \(F_t\) per tooth is:
$$ F_t = k_c a_p f_z $$
where \(k_c\) is the specific cutting force, \(a_p\) is the depth of cut, and \(f_z\) is the feed per tooth. The specific cutting force depends on the material and the chip thickness. For steel with a hardness of about 200 HB, \(k_c\) is approximately 1500 N/mm². The depth of cut in my process is the full tooth depth, which is about 1.1 mm. The feed per tooth is 0.05 mm. Therefore, the tangential force per tooth is:
$$ F_t = 1500 \times 1.1 \times 0.05 = 82.5 \text{ N} $$
Since there are multiple teeth in contact, the total force is higher. However, the continuous indexing distributes the load over several teeth. The cutting power \(P_c\) can be estimated from the cutting speed \(v_c\) and the tangential force:
$$ P_c = F_t v_c $$
For the tool speed of 1500 rpm and a diameter of 25.4 mm, the cutting speed is:
$$ v_c = \frac{\pi d_h n_C}{1000} = \frac{\pi \times 25.4 \times 1500}{1000} \approx 119.7 \text{ m/min} $$
The power per tooth is:
$$ P_c = 82.5 \times 119.7 / 60 \approx 164.6 \text{ W} $$
With multiple teeth in contact, the total power may be a few kilowatts. This is within the capability of the H120C spindle. The machine has a tool spindle speed of up to 3500 rpm, so there is ample margin.
The kinematic relationship between the tool and workpiece can be expressed more formally. Let \(\theta_A\) be the workpiece rotation angle and \(\theta_C\) be the tool rotation angle. The synchronization condition is:
$$ \theta_C = z \theta_A $$
The tool center position \(\vec{r}_T\) in the workpiece coordinate system is:
$$ \vec{r}_T(t) = \vec{r}_0 + \vec{v}_1 t_1 + \vec{v}_2 t_2 $$
where \(\vec{v}_1\) is the velocity for the plunge segment, \(\vec{v}_2\) is the velocity for the axial feed segment, and \(t_1, t_2\) are the times for each segment. The velocities are determined by the feed rates. The plunge feed rate \(v_{f1}\) is:
$$ v_{f1} = f_z n_C z_t $$
where \(z_t\) is the number of teeth on the hob. The axial feed rate \(v_{f2}\) is chosen to achieve the desired surface finish. In my experiments, I used a feed per tooth of 0.05 mm, which gave a good surface finish.
11. Comparison with Other Manufacturing Methods
I compared the hobbing-milling process with other common methods for straight bevel gears. The comparison is shown in Table 7.
| Method | Tool | Indexing | Typical time for small module | Accuracy |
|---|---|---|---|---|
| Gear planing | Two planing cutters | Single indexing | 45–60 min | DIN 5–6 |
| Double-cutter milling | Two disc cutters | Single indexing | 20–30 min | DIN 5–6 |
| Form milling with disc cutter | Disc cutter | Single indexing | 15–25 min | DIN 6–7 |
| Hobbing-milling with single-position hob | Carbide hob | Continuous indexing | 6 min | DIN 4 |
The hobbing-milling process is clearly superior in terms of productivity. It also achieves better accuracy because the CNC machine provides precise motion control and the carbide tool maintains a sharp edge. The only drawback is the limited face width and the need for a dedicated hob for each module and tooth number range. However, for small-module straight bevel gears in large batches, the productivity gain outweighs the tooling cost.
12. Simulation Verification Details
I would like to elaborate on the Vericut simulation. The simulation is not just a visual check; it also provides quantitative results. I exported the simulated tooth profile and compared it with the theoretical profile. The deviation was calculated at several points along the tooth profile. The maximum deviation in the simulation was about 6 μm, which is close to the experimental value. This confirms that the simulation is accurate and can be used to optimize the tool design and cutting parameters.
The simulation also allowed me to check the tool path for any sudden changes in direction that could cause shock loads. I optimized the acceleration and deceleration of the linear axes to ensure smooth motion. The machine’s CNC system has a look-ahead function that processes the NC code and adjusts the feed rates to maintain accuracy.
In the simulation, I also checked the tool holder and the workpiece fixture for interference. The H120C machine has a compact working space, so it is important to ensure that the tool does not hit the fixture. The simulation showed that there was adequate clearance. I used a custom fixture that holds the workpiece by the shank. The fixture was modeled in 3D and included in the simulation.
13. Practical Implementation and CNC Program Structure
The CNC program for the hobbing-milling process is generated by a custom software tool that I developed. The software has a graphical user interface where the user enters the gear parameters, tool parameters, and cutting parameters. The software then calculates the tool path and generates the NC code. The NC code is in the standard G-code format. The program includes the following sections:
- Initialization: set the coordinate system, tool offsets, and spindle speeds.
- Tool positioning: move the tool to the start point.
- Plunge cut: move the tool perpendicular to the pitch cone to the full depth.
- Axial feed: move the tool along the pitch cone generatrix to cut the full face width.
- Retraction: move the tool away from the workpiece.
- Indexing: the workpiece rotates by one tooth pitch. In continuous indexing, this is synchronized with the tool rotation, so the program simply continues the synchronized motion.
- Repeat: the process repeats for all teeth.
The synchronization of the A-axis and C-axis is critical. The CNC system uses electronic gearing to maintain the ratio. The ratio is:
$$ \text{gear ratio} = z $$
The CNC system also compensates for the tool diameter and the tool wear. I included a tool wear offset in the program. After a certain number of parts, the operator can adjust the offset to maintain the tooth thickness.
The program also includes safety checks. For example, if the tool speed or workpiece speed is outside the allowed range, the program will alarm and stop. This prevents damage to the machine and the tool.
14. Measurement Uncertainty and Quality Control
In my inspection, I used a gear measuring center with a claimed accuracy of 1 μm. The measurement uncertainty was estimated to be about 1.5 μm. This is small compared to the profile error of 7.4 μm. Therefore, the measurement results are reliable. For quality control in production, I recommend measuring the first part and the last part of each batch. If the profile error exceeds the limit, the tool should be replaced or the offset adjusted.
The pitch accuracy is measured by the single pitch deviation and the total cumulative pitch deviation. The DIN 4 grade is defined in DIN 3962. For a module of 0.5 mm and a pitch diameter of 18.5 mm, the allowable single pitch deviation is about 6 μm. My measured values were below this. The total cumulative pitch deviation is the sum of the single pitch deviations over the entire circumference. For 37 teeth, the allowable total cumulative pitch deviation is about 20 μm. My measured values were within this.
The profile error is not covered by the DIN pitch standard. It is a separate tolerance. For straight bevel gears, the profile error should be less than about 10 μm for small modules. My results of 7.4 μm and -5.4 μm are well within this.
15. Economic Analysis
The hobbing-milling process reduces the machining time from 45–60 minutes to 6 minutes. This is a productivity increase of about 7.5 to 10 times. If the machine cost and labor cost are considered, the cost per part is significantly reduced. However, the tool cost is higher because the hob is made of carbide and has a complex geometry. The hob life is also shorter than that of a planing cutter. I estimated the tool cost per part and found that even with the higher tool cost, the total cost per part is lower than the planing process because the machining time dominates the cost.
Table 8 shows a simplified cost comparison.
| Cost Item | Planing | Hobbing-Milling |
|---|---|---|
| Machine time (min) | 45–60 | 6 |
| Labor rate ($/h) | 50 | 50 |
| Machine rate ($/h) | 80 | 120 |
| Tool cost per part ($) | 2 | 8 |
| Total cost per part ($) | ~100 | ~21 |
The total cost per part is estimated to be about five times lower for the hobbing-milling process. This is a significant economic benefit. The higher machine rate is offset by the much shorter cycle time.
16. Future Work
In the future, I plan to extend the process to a wider range of straight bevel gears. I will investigate the effect of face width on the profile deviation and determine the maximum allowable face width for different modules. I will also optimize the hob geometry to reduce the profile error at the small end. One approach is to use a modified cutting edge profile that is not exactly the large-end involute but is slightly corrected to compensate for the small-end deviation. This could allow larger face widths.
I also plan to integrate the CNC program with an online measurement system. The gear measuring center can send feedback to the CNC machine, and the machine can automatically adjust the tool offset. This would enable closed-loop manufacturing and further improve the accuracy and consistency.
Another direction is to improve the tool life. I will test different carbide grades and coatings. I will also investigate the use of internal cooling to reduce the cutting temperature. The single-position hob has a small diameter, so internal cooling is challenging but possible with a special tool holder.
17. Conclusion
In this work, I developed a high-speed hobbing-milling process for small-module straight bevel gears on a CNC spiral bevel gear cutting machine. The process uses a carbide single-position hob and continuous indexing. I designed the hob, developed the CNC program, and verified the process using Vericut simulation. I conducted practical cutting experiments on the H120C machine. The results showed that the straight bevel gears achieved DIN class 4 pitch accuracy and a profile error of less than 7.4 μm. The machining time was reduced to 10%–13.3% of the conventional planing time. The process is efficient, accurate, and economically beneficial. It is suitable for mass production of small-module straight bevel gears. I believe this process can be widely applied in the automotive, aerospace, and military industries.
I hope this detailed description of my work will help other engineers and researchers who are interested in high-speed machining of straight bevel gears. The combination of CNC technology, carbide tooling, and simulation is a powerful approach to modern gear manufacturing.
18. Detailed Tooth Profile Calculation
I calculated the theoretical tooth profile of the straight bevel gear using the Tredgold approximation. The back cone equivalent involute is used. The tooth thickness at the pitch circle is:
$$ s = \frac{\pi m_t}{2} $$
The tooth thickness at any radius \(r\) on the back cone is:
$$ s_r = s \frac{r}{r_p} – 2 r (\text{inv} \alpha_r – \text{inv} \alpha) $$
where \(r_p\) is the pitch radius, \(\alpha_r\) is the pressure angle at radius \(r\), and \(\text{inv}\) is the involute function. The involute function is:
$$ \text{inv} \alpha = \tan \alpha – \alpha $$
I used these equations to generate the theoretical profile for comparison with the measured profile. The difference between the measured and theoretical profiles is the profile error. This calculation was done automatically in the gear measuring center software.
19. Cutting Force and Power Model
I extended the cutting force model to include the effect of the hob geometry. The chip thickness varies along the cutting edge. The average chip thickness \(h_m\) can be estimated as:
$$ h_m = f_z \sin \kappa $$
where \(\kappa\) is the entering angle. For the hob teeth, \(\kappa\) is approximately 90° for the flank cutting. The specific cutting force \(k_c\) depends on the chip thickness:
$$ k_c = k_{c1} h_m^{-m_c} $$
where \(k_{c1}\) is the specific cutting force for a chip thickness of 1 mm, and \(m_c\) is the material constant. For steel, \(k_{c1} \approx 1500\) N/mm² and \(m_c \approx 0.25\). The cutting force per tooth is:
$$ F_t = k_{c1} h_m^{1-m_c} a_p $$
This model gives a more accurate estimate of the cutting force. I used it to verify that the machine spindle power is sufficient. The maximum power was about 2.5 kW, which is well within the spindle capacity.
20. Surface Integrity and Tool Wear
I examined the surface finish of the machined straight bevel gears. The average surface roughness \(R_a\) was 1.6 μm. This is suitable for most applications. The surface finish depends on the feed per tooth and the tool edge radius. I used a feed per tooth of 0.05 mm, which gave a good balance between productivity and surface finish.
Tool wear was measured after machining 50 parts. The flank wear \(VB\) was about 0.1 mm. This is acceptable. The tool life can be extended by using a more wear-resistant coating. I also observed that the tool wear was uniform along the cutting edge, which indicates that the cutting load was well distributed.
| Parameter | Value |
|---|---|
| Surface roughness \(R_a\) | 1.6 μm |
| Flank wear after 50 parts | 0.1 mm |
| Feed per tooth | 0.05 mm |
| Cutting speed | 119.7 m/min |
21. Comparison of Simulated and Experimental Results
I compared the simulated tooth profile with the experimentally measured profile. The comparison is shown in Table 9.
| Parameter | Simulation | Experiment |
|---|---|---|
| Maximum profile error (pinion) | 6.0 μm | 7.4 μm |
| Maximum profile error (gear) | 4.8 μm | -5.4 μm |
| Pitch accuracy (DIN grade) | 4 | 4 |
| Cutting time (min) | 6 | 6 |
The simulation predicted the profile error within about 1.5 μm. This is excellent agreement. The simulation is therefore a reliable tool for process development.
22. Implementation on the Shop Floor
I implemented the process on the shop floor with the following steps:
- Mount the workpiece on the fixture. Ensure that the runout is less than 0.01 mm.
- Install the single-position hob in the tool holder. Set the tool offset.
- Load the NC program. The program is transferred via a USB drive or network.
- Set the work coordinate system. Use a touch probe to measure the workpiece position.
- Run the program in single block mode for the first part. Check the tool path.
- Run the program in automatic mode. The machine will cut all teeth continuously.
- After machining, measure the gear. Adjust the tool offset if necessary.
- Run the production batch.
The setup time is about 30 minutes. This is much shorter than the setup time for a mechanical planing machine, which can take several hours.
23. Safety and Maintenance
The high-speed hobbing-milling process requires attention to safety. The tool rotates at 1500 rpm, and the workpiece rotates at 40 rpm. The cutting zone must be enclosed. The machine has a safety door with an interlock. The coolant must be properly directed to avoid splashing. I recommend checking the tool holder for runout before each shift. The runout should be less than 0.005 mm. The fixture should be cleaned regularly to ensure accurate positioning.
24. Summary of Key Parameters
Table 10 summarizes the key parameters of my hobbing-milling process.
| Category | Parameter | Value |
|---|---|---|
| Gear | Module | 0.5 mm |
| Pressure angle | 20° | |
| Face width | 5 mm | |
| Pinion teeth | 37 | |
| Gear teeth | 74 | |
| Tool | Diameter | 25.4 mm |
| Lead angle | 1° | |
| Material | Coated carbide | |
| Cutting | Tool speed | 1500 rpm |
| Feed per tooth | 0.05 mm | |
| Cutting speed | 119.7 m/min | |
| Accuracy | Pitch accuracy | DIN 4 |
| Profile error | < 7.4 μm | |
| Time | Pinion cutting time | 6 min |
| Gear cutting time | 6 min |
This table can be used as a reference for setting up the process for similar straight bevel gears.
25. Tool Path Generation Algorithm
To generate the tool path, I used a coordinate transformation approach. The workpiece coordinate system is defined with the origin at the cone apex. The tool position is described in the machine coordinate system. The transformation matrix from workpiece to machine coordinates is:
$$ \mathbf{T} = \mathbf{R}_B \mathbf{R}_A \mathbf{T}_0 $$
where \(\mathbf{R}_B\) is the rotation matrix for the B-axis, \(\mathbf{R}_A\) is the rotation matrix for the A-axis, and \(\mathbf{T}_0\) is the translation matrix. The tool path points are calculated in the workpiece coordinate system and then transformed to machine coordinates. This ensures that the tool moves correctly relative to the workpiece even as the axes rotate.
The rotation matrices are:
$$ \mathbf{R}_A = \begin{bmatrix} \cos \theta_A & -\sin \theta_A & 0 \\ \sin \theta_A & \cos \theta_A & 0 \\ 0 & 0 & 1 \end{bmatrix} $$
$$ \mathbf{R}_B = \begin{bmatrix} \cos \theta_B & 0 & \sin \theta_B \\ 0 & 1 & 0 \\ -\sin \theta_B & 0 & \cos \theta_B \end{bmatrix} $$
where \(\theta_A\) and \(\theta_B\) are the angles of the A-axis and B-axis. The translation matrix \(\mathbf{T}_0\) accounts for the machine offsets. I implemented these transformations in my custom software. The software outputs the NC code with the correct X, Y, Z, A, B, C values for each block.
Table 11 shows a sample of the NC code for one tooth. The code is in G-code format.
| Block | Code | Description |
|---|---|---|
| N10 | G0 X-10.0 Y0 Z5.0 | Rapid to start point |
| N20 | G1 Z-1.1 F0.05 | Plunge to full depth |
| N30 | G1 X5.0 F0.05 | Axial feed along pitch cone |
| N40 | G0 Z5.0 | Retract |
| N50 | G0 X-10.0 | Return to start |
| N60 | A360.0 | Index to next tooth |
Note that the A-axis rotation is continuous. The code does not stop for indexing; the synchronization with the C-axis is handled by the CNC system. The block N60 is only a representation; in reality, the A-axis rotates continuously with the C-axis.
This algorithm ensures that the straight bevel gear teeth are machined accurately and efficiently.
26. Final Remarks
My work demonstrates that high-speed hobbing-milling is a viable and highly efficient method for manufacturing small-module straight bevel gears. The combination of a CNC spiral bevel gear cutting machine, a carbide single-position hob, and continuous indexing yields excellent productivity and accuracy. The Vericut simulation is an essential tool for verifying the NC program and preventing collisions. The practical experiments confirmed that the process can achieve DIN class 4 pitch accuracy and profile errors below 7.4 μm. I am confident that this process will be adopted in many industries that require large volumes of small-module straight bevel gears.
In the future, I will continue to optimize the hob design and the cutting parameters. I will also explore the possibility of using the same process for other types of bevel gears. I believe that continuous improvement in CNC technology and cutting tools will further enhance the capabilities of this process.