
In 2021, Shanxi Coal Mine Machinery Manufacture reported average annual output of more than 40 self-manufactured reducers and accessory units. In that production setting, the spiral bevel gear is one of the most critical and tolerance-sensitive parts in the reducer. Its contact pattern—the position, size, and shape of the contact mark produced under a checking load—is the most visible indicator of mesh quality. A pattern that is displaced toward the toe or heel, concentrated at the tooth tip or root, too short, too narrow, or skewed diagonally indicates tooth-flank errors that can raise noise levels, concentrate edge loads, and shorten the service life of the reducer and the downstream scraper conveyor system.
The pattern is not a fixed drawing dimension. It is the integrated result of the two tooth flanks, the mounting distance, and the machine settings used to cut the pinion and gear. The practical problem is therefore not simply to “make the pattern bigger” or “move it to the center,” but to identify which machine setting produced the deviation and to correct it with the smallest coupled change that preserves the rest of the mesh.
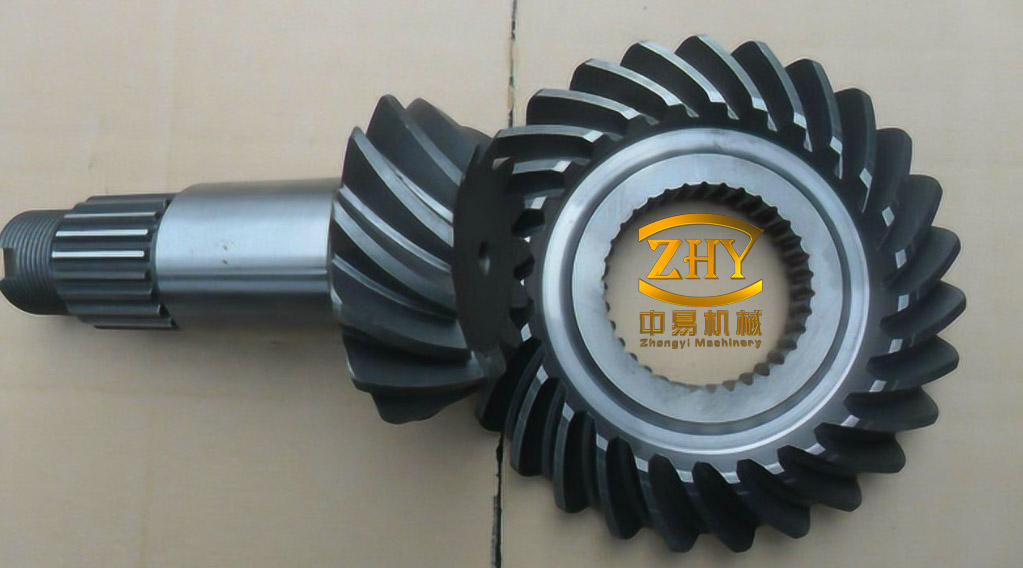
Why the Contact Pattern Is the Controlling Quality Variable
For a spiral bevel gear pair, contact accuracy and the contact area’s position, size, and shape are the most important measures of meshing quality. They determine whether the load is distributed across the working flank or concentrated at a corner. A pattern at the toe or heel, at the tip or root, or along a diagonal produces local sliding velocities and contact stresses that differ from the design intent; the result is uneven wear, noise, and a shorter fatigue life. Because the pattern integrates so many geometric effects, it is also the most useful diagnostic signal available on the shop floor.
The pattern is checked on a rolling tester. The gear and pinion are mounted in their working relationship, a checking load is applied, and the contact mark is read after rotation. By changing the relative position of the two members—particularly the vertical or horizontal position of the spindle box—the operator can observe how the pattern moves along the tooth height and along the face width. This turns the tester into a sensitivity instrument: the direction in which the pattern moves identifies the type of error, and the amount of movement indicates the size of the correction.
Correction is generally applied to the pinion rather than the gear. The pinion has fewer teeth and requires less cutting time, so a setting change on the pinion is cheaper and faster. The gear is left unchanged whenever possible. The exception is the need for complete interchangeability: when any pinion in a batch must mate with any gear, the gear may also be corrected so that pairs can be matched more easily. That is a production-economics rule, not a geometric necessity.
Reading Pattern Movement on the Rolling Tester
The rolling tester does not by itself say which machine setting is wrong. It shows a displacement. A vertical shift of the spindle box changes the relative height of the axes and moves the pattern in the tooth-height direction; a horizontal shift changes the relative axial position and moves the pattern along the face width. The sign of the movement is not universal. It depends on the hand of the gear and pinion and on whether the flank is convex or concave. A movement that raises the pattern on one flank may lower it on the other. For this reason, the tester must be used to establish the local direction for the particular hand and flank before a machine correction is chosen.
In shop practice, the pattern movement is recorded separately for the gear and the pinion, and for left-hand and right-hand members. That separation is important because a correction chosen from one member alone can improve the pinion pattern while worsening the gear pattern. The useful question is not “which way did the mark move?” but “which way did the relative mark move for this pair, on this flank, at this mounting position?”
Correcting Position Along the Face Width
When the pattern sits too close to the toe or the heel, the usual cause is a spiral-angle error. The correction is made at the cutter: changing the cutter position, also expressed through the eccentric angle, changes the spiral angle of the generated flank and therefore shifts the contact pattern along the face width. In production, the cutter-position change for this correction is typically 1–3 mm. Increasing and decreasing the cutter position move the pattern in opposite directions; the observed direction on the rolling tester determines which sign is required.
This adjustment should not be evaluated only by the toe-to-heel position of the mark. Cutter position also interacts with the pattern length and with the pressure-angle correction. A change that centers the pattern along the face width but shortens it excessively is not a complete correction. The practical approach is to make the cutter-position change, recheck the midpoint spiral angle and the pattern length, and then compensate with the other settings if necessary.
Correcting Position Along the Tooth Height
A pattern concentrated at the tooth root or the tooth tip is mainly the result of a pressure-angle error. Two correction routes are used, depending on the size of the error.
Horizontal wheel position with bed compensation. This route changes the horizontal wheel position—the axial mounting distance of the workpiece—and compensates with the bed position, the carriage displacement. Reducing the horizontal wheel position (moving forward) is paired with increasing the bed position (moving backward); increasing the horizontal wheel position (moving backward) is paired with decreasing the bed position (moving forward). This pairing changes the pressure angle while keeping the generating geometry under control.
Horizontal wheel position also affects the spiral angle. To keep the midpoint spiral angle unchanged, the cutter position or eccentric angle must be adjusted at the same time. The required direction of that cutter-position compensation depends on whether the tooth is left-hand or right-hand and whether the flank is convex or concave. The setting is therefore a coupled change: horizontal wheel position, bed position, and cutter position are adjusted as a group, not one at a time.
Roll-ratio correction. When the pressure-angle correction is larger, the roll ratio is changed instead. A roll-ratio change alters both the pressure angle and the spiral angle, but the pressure-angle effect is more pronounced. The correction is small: typical roll-ratio changes are about 0.003–0.03, a dimensionless change in the rolling ratio rather than a linear machine-setting increment. The amount can be set from operator experience or estimated from the change in pinion mounting distance observed on the rolling tester. Increasing and decreasing the roll ratio move the contact pattern in opposite directions, so the sign must be checked against the actual pattern.
Diagonal Contact: A Combined Setting Problem
Diagonal contact is a pattern that runs along a diagonal of the tooth surface instead of lying across the mid-face. It is classified by the direction of that diagonal. In internal diagonal contact, on the convex flank, the pattern starts near the tooth tip at the large end (heel) and runs toward the tooth root at the small end (toe); on the concave flank, it starts near the tooth root at the large end and runs toward the tooth tip at the small end. In external diagonal contact, the convex-flank pattern starts near the tooth root at the large end and runs toward the tooth tip at the small end, while the concave-flank pattern starts near the tooth tip at the large end and runs toward the tooth root at the small end.
Diagonal contact is rarely corrected by a single setting. It reflects a mismatch between the spiral-angle and pressure-angle corrections, and a change that removes one diagonal can create the opposite diagonal if the coupled settings are not adjusted together. The directional corrections are summarized below. The table gives the direction of each setting change, not the magnitude; the amount must be established by the pattern response on the rolling tester.
| Contact type | Flank | Roll ratio | Horizontal wheel position | Cutter position | Bed position |
|---|---|---|---|---|---|
| Internal diagonal | Concave | Increase | Decrease | Decrease | Increase |
| Internal diagonal | Convex | Decrease | Increase | Increase | Decrease |
| External diagonal | Concave | Decrease | Increase | Increase | Decrease |
| External diagonal | Convex | Increase | Decrease | Decrease | Increase |
The symmetry in the table is useful. Internal concave and external convex require the same direction of correction; internal convex and external concave require the opposite. That symmetry follows from the mirror relationship between the two diagonal types, and it gives a quick check on whether a proposed setting change is internally consistent.
Correcting Pattern Length
Pattern length is controlled through the cutter head diameter. A change in cutter head radius is made by changing the cutter head shim; if the required change is larger than the shim range, the cutter head body can be changed. The radius change is not independent of the pattern position. After the cutter head radius is changed, the cutter position must be adjusted accordingly; otherwise the pattern will move along the face width even though the intended change was only to its length. The practical sequence is to set the cutter head radius for the required length, then re-center the pattern with cutter position and recheck the diagonal tendency.
Correcting Pattern Width
Pattern width is usually corrected with the vertical wheel position. The adjustment range in production is typically 1–5 mm. Because the vertical wheel position also changes the local pressure-angle relationship, the cutter position and roll ratio are adjusted with it. The following table gives the direction of the three settings for widening or narrowing the pattern, separated by gear hand and flank. The entries “raise” and “lower” refer to the vertical wheel position.
| Objective | Gear hand | Flank | Vertical wheel position | Cutter position | Roll ratio |
|---|---|---|---|---|---|
| Widen pattern | Left-hand | Convex | Raise | Decrease | Increase |
| Widen pattern | Left-hand | Concave | Lower | Increase | Decrease |
| Widen pattern | Right-hand | Convex | Lower | Decrease | Increase |
| Widen pattern | Right-hand | Concave | Raise | Increase | Decrease |
| Narrow pattern | Left-hand | Convex | Lower | Increase | Decrease |
| Narrow pattern | Left-hand | Concave | Raise | Decrease | Increase |
| Narrow pattern | Right-hand | Convex | Raise | Increase | Decrease |
| Narrow pattern | Right-hand | Concave | Lower | Decrease | Increase |
As with the diagonal table, the entries are directions; the magnitude is set by the observed response and by the allowable change in the other pattern attributes.
Typical Adjustment Windows
The three main machine-setting families have different scales and different primary effects. The values below are shop-floor starting ranges, not universal specifications; they indicate the order of magnitude and the coupling that must be managed.
| Adjustment | Typical correction | Primary effect on pattern |
|---|---|---|
| Cutter position (eccentric angle) | 1–3 mm | Position along face width; spiral angle |
| Roll-ratio correction | 0.003–0.03 (dimensionless) | Position along tooth height; pressure angle, with secondary spiral-angle change |
| Vertical wheel position | 1–5 mm | Pattern width |
A Disciplined Correction Loop
The corrections above are not a set of independent adjustments. A cutter-position change alters the spiral angle and the pattern length; a horizontal wheel-position change alters the pressure angle and the spiral angle; a vertical wheel-position change alters the width and the local pressure-angle relationship. The practical correction loop therefore has four steps. First, establish a stable pattern on the rolling tester and record its position along the face width, its position along the tooth height, its length, its width, and any diagonal tendency. Second, classify the dominant error: face-width position, tooth-height position, diagonal contact, length, or width. Third, apply the smallest setting change that addresses that error, together with the coupled compensation required to hold the other attributes. Fourth, recheck the pattern and repeat only after the direction of the response is confirmed.
This loop explains why the contact pattern remains the central control variable for spiral bevel gear production. It is a compact representation of the tooth-flank geometry, and its changes reveal which machine setting is out of adjustment. When the pattern is read as a directional signal rather than as a single pass/fail mark, the machine settings can be corrected with fewer trials, and the resulting gear pair has a better chance of running quietly, sharing the load across the flank, and reaching its intended service life.