
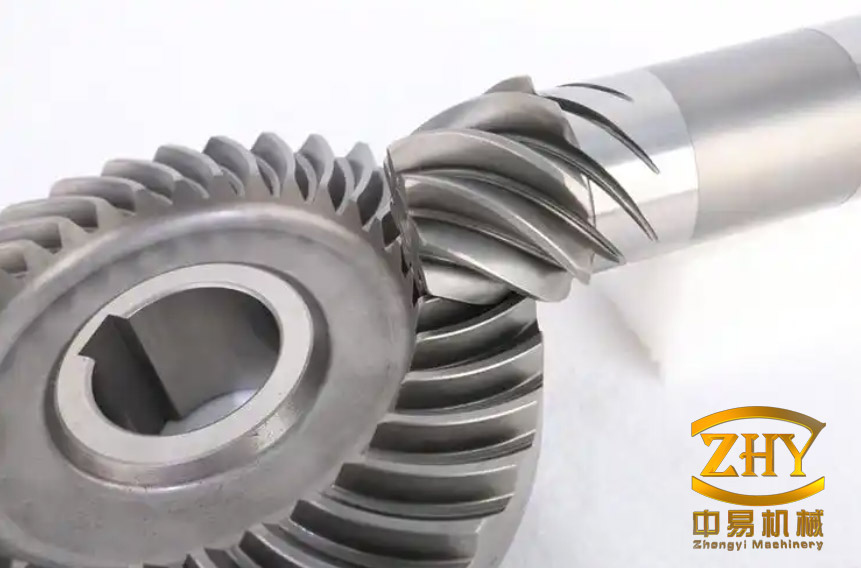
A tractor rear axle uses spiral bevel gears to turn torque through a right angle while carrying high loads. The curved tooth trace and tapered tooth form distribute contact gradually, but they also make the gear sensitive to design parameters and assembly position. CAD platforms can produce precise gear models, and specialized contact tools can analyze them, but a rendering mesh does not automatically become an interactive physics body in Unity3D. The physics engine needs a closed solid and a collision body that can resolve contact on the tooth flanks, including the concave side.
The construction method described here builds a mesh solid and a virtual collision body for a Gleason spiral bevel gear from the kinematics of its generating process. The tooth is divided into finite cross-sectional cells. Each cell carries a straight bevel gear involute profile at its local cone distance. The cells are placed along the curved tooth trace, wrapped onto the pitch cone, and arrayed around the gear axis. The resulting surface serves as the rendered mesh and as the basis of the collision body. In a 12-division comparison with a SolidWorks model of the same gear, sampled position-vector errors remained below 1% and curvature-radius errors below 3%. A rear-axle assembly test in Unity3D then exercised the meshing contact with the built-in physics system.
From Generating Motion to Tooth Geometry
Gleason spiral bevel gears are generated by a cutter head that rotates on a cradle while the gear blank rotates in a timed relationship. The blades of the cutter head approximate the tooth of an imaginary generating gear. As the cradle and blank turn, the blade envelope cuts the tooth space, and the relative motion defines both the curved tooth trace and the orientation of each tooth section. The construction uses this kinematic relationship as a geometric specification rather than simulating every cutting pass.
In the case considered, the mid-face helix angle is 35°. That angle fixes the position of the cutter-head center in the developed plane, and the tooth trace is the circular arc swept by the cutter radius. The angular increment per tooth is \(2\pi/Z\), where \(Z\) is the tooth count. The local rotation used to place a section is scaled by the cone distance:
$$
\epsilon=\frac{2\pi}{Z},\qquad \epsilon’=\epsilon\frac{R}{L}
$$
where \(R\) is the local cone distance and \(L\) is the large-end cone distance. The sign of the offset depends on the hand of the gear. The mid-face is the zero-rotation reference: the absolute offset falls from the small end to the mid-face and rises again toward the large end, with opposite signs on the two sides.
The tooth form is an equal-clearance tapered tooth. Addendum and dedendum converge toward the pitch-cone apex, so tooth height scales with cone distance. This is the property that lets one profile generator be reused at every section: the sections are geometrically similar, and the local module, pitch radius, and tooth height can be obtained by scaling from the large end.
Discretizing the Tooth into Cross-Sectional Cells
The continuous tooth is replaced by \(A_r\) cross-sectional cells along the tooth trace. At section \(i\), the local cone distance \(L’\) lies between the small-end and large-end values. The module, pitch radius, and base radius follow the taper:
$$
M’=M\frac{L’}{L},\qquad R’=\frac{M’Z}{2},\qquad R_b=R’\cos 20^\circ
$$
where \(M\) is the large-end module, \(M’\) the local module, \(R’\) the local pitch radius, and \(R_b\) the local base radius. The addendum and dedendum at the same section are
$$
h_a’=L’\tan\theta_a,\qquad h_f’=L’\tan\theta_f
$$
with \(\theta_a\) and \(\theta_f\) the addendum and dedendum angles of the tapered tooth. The involute is then sampled between the base circle and the addendum circle. For a point at radius \(R\) on the involute, the roll angle \(\varphi\) satisfies
$$
\frac{R}{R_b}=\sqrt{1+\varphi^2}
$$
Sampling \(\varphi\) at finite intervals produces a polyline that approximates the involute. The pitch-circle tooth thickness is \(\pi M’/2\), and the symmetric involute is offset by the corresponding half-thickness. Each cell therefore contains the local profile points, the tooth thickness, and the position along the trace. Differential subdivision and interpolation convert the continuous involute and trace into a finite point set. As the number of divisions increases, the polyline converges to the involute and the cell chain converges to the curved tooth trace.
Positioning the Cells on the Curved Trace
The tooth trace is first laid out in a plane as an arc of the cutter circle. If the cutter center is at radius \(\rho_0\) from the gear axis, the cutter radius is \(R_0\), and a trace point is at radius \(\rho\), the angular position of that point follows from the cosine rule:
$$
\theta=\arccos\left(\frac{\rho_0^2+\rho^2-R_0^2}{2\rho_0\rho}\right)
$$
This gives the angular offset of each cross-section along the arc. The sections are then rotated and translated so that their local tooth thickness and profile orientation follow the trace. The mid-face section is the reference. Toward the small end, the angular offset grows in one direction; toward the large end, it grows in the other. The hand of the spiral determines which sign is assigned to each side.
The result at this stage is a chain of profile cells distributed along a planar arc. The chain still has to be wrapped onto the pitch cone without changing the relative distances between points. That step is what turns the planar layout into a three-dimensional tooth surface.
Wrapping the Trace onto the Pitch Cone
The wrap uses conical coordinates. Let \(R\) be the slant distance from the pitch-cone apex, \(\theta\) the developed angular coordinate along the trace, and \(\delta\) the pitch-cone angle. The developed arc length is \(S=R\theta\). The corresponding point on the cone is
$$
z=R\cos\delta,\qquad \rho=R\sin\delta,\qquad \phi=\frac{S}{\rho}=\frac{\theta}{\sin\delta}
$$
$$
x=\rho\cos\phi,\qquad y=\rho\sin\phi
$$
where \(z\) is the axial coordinate, \(\rho\) the radial distance from the gear axis, and \(\phi\) the physical azimuth on the cone. The mapping preserves the developed arc length \(S\), so the curvature of the trace and the spacing between cells are retained after wrapping. Each profile cell is transformed by the same rotation and translation as its trace point. A circular array of \(2\pi/Z\) then repeats the single tooth around the axis and closes the gear solid.
The point set is triangulated into the tooth surface and combined into the gear mesh. The virtual collision body is derived from the same generated tooth geometry, so the physics engine can resolve contact on the curved flanks rather than on a bounding proxy. This is the practical difference between a CAD display model and an interactive gear solid: the collision body carries the flank shape that governs meshing.
Accuracy Against a CAD Reference
The generated mesh was compared with a SolidWorks model of a Gleason spiral bevel gear built with the same parameters. Four tooth-flank edge curves were extracted from the mesh at a 12-division setting, and the corresponding CAD curves were divided into 12 equal segments. At each division point, the position vector from the curve start was compared with the CAD position vector. Local bending was checked by fitting a circle through three consecutive points on the polyline and comparing its radius with the curvature radius of the CAD curve. This tests both spatial placement and curvature, not just visual similarity.
| Case | Mesh position-vector data | CAD position-vector data | Relative error (%) |
|---|---|---|---|
| 1 | (0.58, 0.33, 0.80) | (0.59, 0.28, 0.81) | 0.289 |
| 2 | (0.65, 0.34, 0.67) | (0.67, 0.28, 0.68) | 0.329 |
| 3 | (0.62, 0.28, 0.73) | (0.63, 0.24, 0.74) | 0.157 |
| 4 | (0.55, 0.36, 0.82) | (0.57, 0.30, 0.84) | 0.257 |
| Case | Mesh curvature radius (mm) | CAD curvature radius (mm) | Relative error (%) |
|---|---|---|---|
| 1 | 14.224 | 14.312 | 0.615 |
| 2 | 38.415 | 39.429 | 2.572 |
| 3 | 25.701 | 25.868 | 0.646 |
| 4 | 13.536 | 13.353 | 1.370 |
The comparison is local rather than full-surface. It covers four edge curves and one discretization level, so it does not by itself establish contact stress, transmission error, or durability. Within that scope, the largest sampled position-vector error was 0.329% and the largest curvature-radius error was 2.572%. All position errors were below 1%, all curvature errors were below 3%, and the 12-division mesh met the 97% acceptance threshold adopted for the check. The curvature check is the stricter of the two because it responds to local shape rather than only to point position.
Virtual Rear-Axle Assembly Test
The collision body was tested in a Unity3D rear-axle scene. The gear bodies were placed in the virtual rear axle, and the built-in physics system was used to bring the spiral bevel gear pair into mesh. The generated colliders completed the meshing contact, so the assembly check could use physical collision rather than visual overlap alone. This is a qualitative test of collision behavior. It shows that the constructed body can support interactive assembly and meshing, but it does not quantify contact pressure, transmission error, efficiency, or wear.
For assembly studies, the value of the method is that design parameters can be changed and the gear mesh rebuilt within the same point-set pipeline, keeping the rendered surface and the collision surface aligned. That alignment matters when the simulation is used to check clearances, insertion paths, and gear meshing in a tractor rear axle.
Scope and Engineering Limits
The construction is specific to Gleason spiral bevel gears with an equal-clearance tapered tooth form. The 35° mid-face helix angle and the 12-division setting belong to the case studied; other helix angles, tooth counts, or tooth forms require the trace and section parameters to be recalculated. The method is geometric. It represents the generated tooth surface, but it does not include cutter-blade wear, heat-treatment distortion, manufacturing tolerances, or assembly misalignment unless those effects are added separately.
The accuracy check is an edge-line comparison at a fixed discretization, not a full metrology of the tooth surface. A production decision on load capacity, noise, or fatigue still requires physical testing or a high-fidelity contact analysis. The appropriate use of the method is earlier in the design chain: as a way to turn a parameterized spiral bevel gear into a physics-ready solid for virtual assembly, collision checking, and design iteration before those expensive checks are made.
The broader principle is straightforward: derive the tooth trace from the generating motion, scale the involute section by cone distance, place the cells along the trace, wrap them onto the pitch cone, and use the same surface for rendering and collision. That pipeline gives Unity3D a gear solid whose contact geometry follows the constructed flank form, which is a prerequisite for meaningful virtual assembly of the tractor rear axle.