
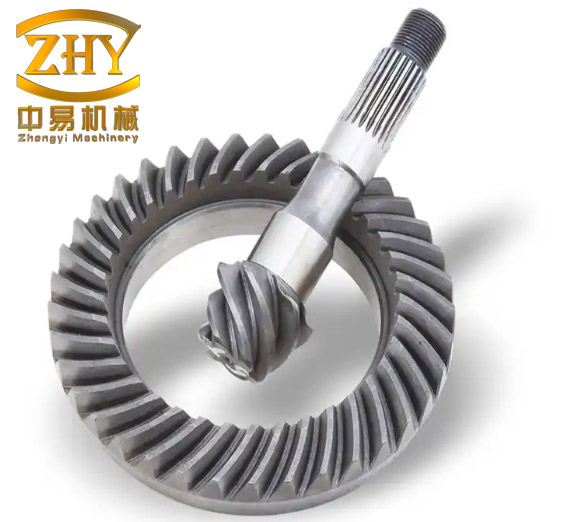
Spiral bevel gears carry motion between intersecting shafts with smooth, gradual tooth engagement, which is why they dominate the final drive of power tools, garden equipment, sewing machines, instruments and automotive accessories. In the small-module range these gears are also produced in very large batches, and the economics of the process push manufacturers toward a single cutter head that machines both flanks of both members of a pair at once. That arrangement — the duplex spread-blade method — is fast and its setup calculation is simple, but it transfers a large share of the quality burden to the shop floor, where the contact pattern has to be brought in by repeated trial cuts. The following discusses how the generating kinematics of that process can be turned into an exact solid model, and how that model can be used to evaluate and correct the contact pattern before any metal is cut.
The Small-Module Case: Why Setup Adjustment Dominates Quality
Duplex spread-blade cutting uses one duplex cutter head whose inner and outer blades are spread apart by a fixed offset, so that both flanks of the pinion and both flanks of the gear are generated from the same tool. Cutting a pair therefore requires only one tool change and one set of machine settings, and the cutting cycle is short — decisive advantages when the parts are small and the annual volume is measured in millions.
The price is paid in the geometry. Duplex spread-blade pairs are designed with a duplex taper (a double-shrinkage blank), a compromise that equalises the spiral angle and the pressure angle of the two members only at the reference point of the tooth surface. What the design controls is therefore the location of the contact pattern; the shape and the extent of the pattern along the tooth are left largely to the natural curvature of the generated surfaces. Since both flanks of both members are constrained by a single tool, the two flanks cannot be optimised independently, and a correction applied to improve the drive side necessarily disturbs the coast side.
In practice this means the contact pattern is obtained by the experience of the machine operator rather than by calculation: the pair is cut, rolled on a tester, the pattern is inspected, the settings are trimmed, and the loop is repeated until the pattern is acceptable. The loop consumes machine time, scrapped parts and skilled labour, and its outcome depends on who is running the machine. A numerical route that predicts the pattern from the same parameters that drive the machine removes most of that iteration.
Generating Geometry and the Tooth Surface Equation
Spiral bevel tooth surfaces are generated by a plane generating gear — a virtual crown gear whose tooth is represented by the rotating cutter head. At every instant of the generating roll, a point on the cutting edge of a blade corresponds to one point on the tooth surface being produced; the cradle rotation sweeps the cutter head past the workpiece in the same way that the crown gear tooth would sweep past it, while the workpiece rotates in a timed relationship given by the cutting roll ratio.
Two coordinate frames are enough to describe this. The cutter frame St is attached to the head and carries the equation of the conical cutting surface traced by the blade edge; the workpiece frame Sp is attached to the blank. The transformation between them is a chain of elementary rotations and translations fixed by the machine settings — radial setting, angular setting, machine installation angle, and the offsets between the cradle centre, the head centre and the blank apex. Combining the chain gives the surface point in the workpiece frame:
$$\mathbf{r}_p=\mathbf{M}_{pt}(q,\theta_t)\,\mathbf{r}_t(u,\varphi)$$
where rt is a point on the cutting cone parametrised by the blade-edge coordinate u and the angular position φ, θt is the cutter spindle rotation that indexes successive blades into position, q is the cradle angle, and Mpt is the product of the elementary transformation matrices. Discretising the blade edge at a series of u values and stepping the cradle angle q through the generating roll maps a rectangular grid of cutter points onto a grid of tooth surface points: one family of curves runs along the tooth height, the other along the face width. Because the surface is smooth and gently curved over a single tooth, a modest grid reproduces it accurately enough for solid modeling.
From Point Grid to Solid Model
The modeling sequence follows the kinematics directly rather than approximating the tooth with a swept or lofted profile:
- Design the blank according to the duplex taper (double-shrinkage) rules and establish the duplex spread-blade machine settings and cutter head parameters.
- Build the machine coordinate system from those settings, evaluate the surface equation over the grid, and store the resulting coordinates together with the blank geometry.
- Export the point grid as a plain-text file of x y z triples, organised in rows — one row per position along the face width, twenty rows for a typical small-module tooth.
- In a CAD environment, revolve the blank section sketch about the gear axis to obtain the solid blank; import the point file, fit a surface through the points, sew the surface patches into a closed sheet representing one tooth space, subtract it from the blank to trim the slot, then pattern the slot around the axis.
A representative grid uses 20 stations along the face width and 15 along the tooth depth, that is 300 points per flank; the coordinate rows for a 34-tooth gear run from values near 15.06, −4.67, −31.83 at the inner end to roughly 20.00, 1.08, −43.11 at the outer end of the grid. Fitting a surface through these points produces a smooth flank free of the faceting that appears when a tooth is approximated by a single arc or by a swept profile. Mirroring and patterning the same procedure on the 17-tooth member completes the pair.
A 17/34 Example: Blank, Cutter Head and Machine Settings
A two-to-one pair for a small power-tool drive illustrates the parameter set. The pinion is left-handed and the gear right-handed, the shaft angle is 90°, and both members share the module, the face width, the pressure angle and the spiral angle.
| Parameter | Pinion | Gear |
|---|---|---|
| Number of teeth | 17 | 34 |
| Module (mm) | 2.5 | 2.5 |
| Face width (mm) | 12 | 12 |
| Shaft angle (°) | 90 | 90 |
| Pressure angle (°) | 20 | 20 |
| Spiral angle (°) | 35 | 35 |
| Addendum coefficient | 0.85 | 0.85 |
| Clearance coefficient | 0.2 | 0.2 |
| Whole depth (mm) | 4.75 | 4.75 |
| Outer diameter (mm) | 47.609 | 86.247 |
| Crown distance, apex to crown plane (mm) | 41.223 | 20.003 |
| Face cone angle (°) | 30.605 | 65.717 |
| Root cone angle (°) | 24.823 | 59.395 |
| Hand of spiral | Left | Right |
| Parameter | Pinion | Gear |
|---|---|---|
| Cutter head diameter (mm) | 63.5 | 63.5 |
| Blade offset, point width (mm) | 1.1 | 1.1 |
| Blade number | 12 | 12 |
| Radial cutter position (mm) | 39.154 | 39.154 |
| Angular cutter position (°) | −46.263 | 46.263 |
| Cutting roll ratio | 2.234 29 | 1.187 82 |
| Machine installation angle (°) | 24.823 | 59.353 |
The two settings that differ most between the members are the cutting roll ratio and the machine installation angle, and both follow from the cone angles: the pinion is installed at its root angle of 24.823°, the gear at 59.353° against a root cone angle of 59.395°. These are precisely the numbers an operator would dial in, which is why a model built from them describes the surface the machine will actually produce — provided cutter wear, machine geometric error and thermal distortion are set aside.
Because the model is a faithful replica of the generated flank, it can be measured directly: tooth thickness on both members shows how the total thickness is split between pinion and gear, the tooth height along the face width shows whether the duplex taper is shrinking as intended, and the top land width and root region reveal undercut or pointed teeth. Such checks are normally made on the first article after cutting; doing them on the model shifts them upstream of the machine.
Unloaded Contact Simulation in a Virtual Assembly
With both members modeled, the pair is assembled in the CAD environment under the mounting conditions of the drawing: the pitch cone apices of pinion and gear are made coincident, the shaft angle is set to 90°, and the two flanks are allowed to overlap by a small artificial interference — 0.01 mm in the example — which stands in for contact. Rendering the gear in a dark colour and the pinion in a light one, with 70 % transparency on the pinion, makes the resulting footprint visible through the meshing tooth. The instantaneous contact area appears as an elongated ellipse running across the flank.
The interference is a geometric construction, not a simulation of elastic contact: it replaces the real contact area with a thin band of penetration and therefore indicates where the surfaces come closest, which is very nearly where they would touch under a light load. Used this way it reproduces what a rolling test on a pair of freshly cut gears shows, and the usual acceptance criteria can be read off it — the size and position of the pattern relative to the tooth ends and the root, the tooth flank clearance, the presence of edge contact or of interference at the toe and heel, and whether the pattern leans toward the root or the top.
Static assembly shows one meshing position; a kinematic simulation shows the whole cycle. Constraining the pinion as the driving member at constant speed about its own axis and letting the gear follow about its axis at the fixed tooth ratio, then animating the mesh, displays how the contact band travels from the entry of a tooth pair to its exit, whether it stays inside the flank throughout the roll, and whether it splits or jumps between adjacent tooth pairs. Pattern migration along the face width is the feature most sensitive to the cutting roll ratio and to the angular cutter position, so the simulation gives a direct visual link between a change in a machine setting and a change in the pattern.
The limits should be stated plainly. An unloaded geometric contact analysis of this kind excludes elastic deflection of the teeth, mounting misalignment under load, and the load-dependent shift of the pattern toward the heel that governs the real fatigue behaviour of a bevel pair. It predicts where the surfaces touch, not how they share load. For the small-module, lightly loaded drives that motivate the method — where the contact pattern is the practical acceptance criterion — that is usually sufficient, and it is far cheaper than a trial cut.
Downstream Uses of the Exact Model
Once the flanks are represented as true generated surfaces rather than approximations, the solid model supports several operations beyond contact checking. It can be used as the cavity definition for powder metallurgy compaction or precision forging of the gear, where the die has to include the shrinkage allowance applied to an accurate tooth form. It can serve as the nominal reference in coordinate measurement, so that a measured flank is compared against the surface the machine was set up to produce rather than against a simplified CAD tooth. It can be imported into finite element software for root stress and tooth deflection analysis, with the contact surfaces already conforming to each other. And it allows the tooth thickness split, the taper, the tip and root clearances and the side clearance of a new design to be inspected as a complete pair before the first blank is mounted on the machine.
Applied to the duplex spread-blade process, the sequence replaces part of the trial-and-error loop with computation: cutter parameters and machine settings are entered, the flanks are generated and assembled, the footprint is inspected and measured, and the settings are adjusted in the model until the pattern meets the requirement. Only then is the machine set up. The gain is not in the cutting time, which the duplex method already keeps short, but in the number of iterations between the machine and the rolling tester — and in the fact that the correction no longer depends on the intuition of a particular operator.