
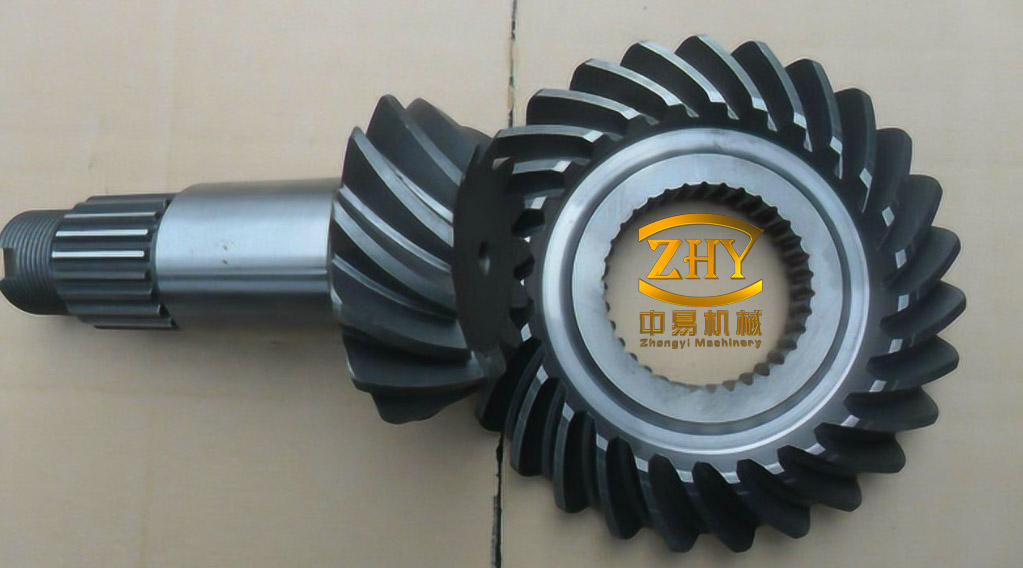
Spiral bevel gears transmit torque between intersecting shafts and are widely used in automotive drivelines, aircraft accessories, machine tools, and high-speed-train gearboxes. Their teeth engage gradually and carry load over a favorable contact pattern, but the mesh is not a linear spring. Backlash, time-varying mesh stiffness, transmission error, and elastic support deformation combine to produce loss of contact, single-sided and double-sided tooth impact, period doubling, quasi-periodic motion, and chaos. For a transmission designer, the practical question is where in the speed–load plane the mesh remains periodic and impact-free, and how to return the system to such a state when it enters a chaotic or quasi-periodic regime.
A seven-degree-of-freedom mesh model
A representative high-speed-train drive gearbox can be reduced to a lumped-parameter model with two rigid gear bodies whose axes intersect at \(90^\circ\). The supports act at the mid-face points \(O_1\) and \(O_2\), with stiffness \(k_{ij}\) and damping \(c_{ij}\) in the \(x\), \(y\), and \(z\) directions, where \(i=x,y,z\) and \(j=1,2\). The pinion is driven by a torque \(T_p=T_{pm}+T_{pv}\), composed of a constant part and a fluctuating part; the gear carries a steady resisting torque \(T_{gm}\). The original eight coordinates are the three translations and one rotation of each gear body, \((X_1,Y_1,Z_1,\theta_1,X_2,Y_2,Z_2,\theta_2)\). Combining the two torsional coordinates through the mesh deflection leaves seven independent degrees of freedom.
The mesh deflection along the normal line of action is
$$
\Lambda_n=(X_1-X_2)a_1-(Y_1-Y_2)a_2-(Z_1-Z_2+r_1\theta_1-r_2\theta_2)a_3-e_n(t),
$$
where \(r_1\) and \(r_2\) are the pitch radii, \(\delta_1\) is the pinion pitch-cone angle, \(\alpha_n\) is the normal pressure angle, and \(\beta_m\) is the mid-face spiral angle. The direction factors are
$$
a_1=\cos\delta_1\sin\alpha_n,\qquad
a_2=\cos\delta_1\cos\alpha_n\sin\beta_m,\qquad
a_3=\cos\alpha_n\cos\beta_m.
$$
The static transmission error is represented by a harmonic series,
$$
e_n(t)=\sum_{l=1}^{N}A_l\cos(l\Omega_h t+\Phi_l),
$$
with mesh frequency \(\Omega_h\), harmonic amplitude \(A_l\), and initial phase \(\Phi_l\). The normal mesh force is
$$
F_n=k_h(t)f(\Lambda_n)+c_h\dot{\Lambda}_n,
$$
where \(c_h\) is the mesh damping, \(k_h(t)\) is the time-varying mesh stiffness, and \(f(\Lambda_n)\) is the backlash function. With mid-face half-backlash \(b_n\),
$$
f(\Lambda_n)=
\begin{cases}
\Lambda_n-b_n, & \Lambda_n>b_n,\\
0, & |\Lambda_n|\le b_n,\\
\Lambda_n+b_n, & \Lambda_n<-b_n.
\end{cases}
$$
The stiffness variation is expanded as
$$
k_h(t)=k_m+\sum_{l=1}^{N}A_{kl}\cos(l\Omega_h t+\Phi_{kl}),
$$
where \(k_m\) is the mean mesh stiffness, \(A_{kl}\) is the \(l\)-th harmonic amplitude, and \(\Phi_{kl}\) is the corresponding phase. In the dimensionless simulation, the mesh stiffness is modulated as \(k_h=1+\alpha\cos(\Omega\tau)\), with stiffness modulation \(\alpha=0.2\). The normal force is projected onto the three coordinate directions through the direction cosines \(a_4\), \(a_5\), and \(a_6\), so the support equations and the combined mesh equation are coupled in all seven coordinates.
After normalization with a characteristic length \(b_h\), \(x_j=X_j/b_h\), \(y_j=Y_j/b_h\), \(z_j=Z_j/b_h\), \(\lambda=\Lambda_n/b_h\), and \(\tau=\Omega_n t\), a representative support equation takes the form
$$
\ddot{x}_1+2\xi_{x1}\dot{x}_1+2a_4\xi_{h1}\dot{\lambda}+k_{x1}x_1+a_4k_{h1}f(\lambda)=0,
$$
while the combined mesh equation is
$$
\ddot{\lambda}+2a_3a_6\xi_h\dot{\lambda}+a_3a_6k_hf(\lambda)
-a_1(\ddot{x}_1-\ddot{x}_2)+a_2(\ddot{y}_1-\ddot{y}_2)+a_3(\ddot{z}_1-\ddot{z}_2)
=f_{pm}+f_{pv}+f_e\Omega^2\cos(\Omega\tau).
$$
Here \(\Omega_n=(k_m/m_e)^{1/2}\) is the reference frequency, \(m_e\) is the equivalent mesh mass, \(\Omega=\Omega_h/\Omega_n\) is the frequency ratio, \(f_{pm}=F_{pm}/(m_e b_h\Omega_n^2)\) is the dimensionless mean load, and \(f_e\) is the internal-excitation coefficient. The dimensionless half-backlash is \(b=b_n/b_h\). The baseline parameter set used for the numerical study is listed below.
| Parameter | Symbol | Value |
|---|---|---|
| Tooth numbers, pinion/gear | \(Z_1/Z_2\) | 47/53 |
| Module | \(m\) | 3 mm |
| Mid-face spiral angle | \(\beta_m\) | \(35^\circ\) |
| Dimensionless mesh damping | \(\xi_h\) | 0.05 |
| Dimensionless half-backlash | \(b\) | 1.0 |
| Mesh-stiffness modulation | \(\alpha\) | 0.2 |
| Internal-excitation coefficient | \(f_e\) | 0.2 |
| Load-amplitude coefficient | \(f_{av}\) | 0 |
| Support damping, gear 1/gear 2 | \(\xi_{i1},\xi_{i2}\) | 0.01 |
| Support stiffness, gear 1/gear 2 | \(k_{i1},k_{i2}\) | 1.25 |
Parameter-plane map of impact and periodicity
The frequency ratio \(\Omega\) represents speed fluctuation for a given structure, while the load coefficient \(f_{pm}\) represents the mean mesh force. A two-parameter plane was therefore constructed over \(\Omega\in[1.5,2.1]\) and \(f_{pm}\in[0.1,0.6]\), divided into \(401\times401\) cells. Cell-mapping theory assigns each cell a color according to its asymptotic dynamic state, so gradients in the map represent transitions between impact regimes, loss of contact, back-side contact, and dynamic load levels. The periodic branches and their stability were tracked with a CPNF continuation scheme, combining Poincaré mapping, Newton correction, and Floquet analysis.
The state notation \(I/P\) separates impact from periodicity. The impact index is \(I=0\) for no impact, \(I=1\) for single-sided impact, and \(I=2\) for double-sided impact; \(P=1,3,\ldots\) gives the period. Motions with more than 30 periods, as well as quasi-periodic and chaotic responses, are grouped as period \(n\). The map is dominated by loss-of-contact single-sided impact \((I=1)\), but no-impact, single-sided, and double-sided states coexist in different parameter windows. Periodic states including \(P1\), \(P3\), \(P5\), \(P7\), \(P9\), \(P10\), \(P14\), \(P21\), and \(P24\) appear alongside multi-period, quasi-periodic, and chaotic regions.
The transition sequences are strongly load-dependent. For \(f_{pm}>0.5\), the map follows
$$
1/1\to2/3\to1/3\to1/n\to2/n\to1/n\to1/3\to0/1\to2/n\to1/n\to1/24\to1/n\to0/1.
$$
At \(f_{pm}=0.4\), the sequence is
$$
1/3\to2/9\to2/10\to2/n\to1/n\to1/1\to2/9\to2/n\to1/7\to1/n\to0/1,
$$
and under light load near \(f_{pm}=0.11\),
$$
2/3\to2/n\to1/n\to1/n\to1/14\to1/n\to1/7\to1/n\to1/1.
$$
These windows are shaped by period-3 grazing, Hopf bifurcation, period-7 grazing, period doubling, saddle-node bifurcation, and crisis-induced grazing. Frequency and tooth impact are the dominant factors in the periodic bifurcation structure.
Three scalar measures summarize the contact quality over a mesh period \(T\). If \(t_1\) is the loss-of-contact time and \(t_2\) is the back-side contact time,
$$
\mathrm{NMDC}=\frac{t_1}{T},\qquad
\mathrm{BMDC}=\frac{t_2}{T},
$$
where NMDC is the no-meshing duty cycle and BMDC is the back-meshing duty cycle. The dynamic load coefficient is the peak dimensionless mesh force over the cycle:
$$
\mathrm{DLC}=\max\left[k_hf(\lambda)+2\xi_h\dot{\lambda}\right].
$$
The parameter map shows a clear trade-off. Under light load \((f_{pm}<0.3)\), chaotic windows produce the most severe loss of contact, with NMDC reaching about 0.67. At \(f_{pm}<0.15\), double-sided impact is most severe and BMDC reaches about 0.35. As load increases, loss of contact and single-sided impact weaken and the no-impact area expands. However, the dynamic load coefficient grows in the heavy-load multi-period region, reaching about 1.55. Thus a heavier operating point is not uniformly safer: it reduces impact but can raise peak mesh force.
Bifurcation cross-section and phase-space evidence
The parameter map was checked against a direct numerical sweep at \(f_{pm}=0.5\). Runge–Kutta integration produced the bifurcation sequence
$$
1/1\to2/3\to1/3\to1/n\to2/n\to1/1\to2/n\to1/n\to1/7\to1/n\to1/24\to1/n\to0/1.
$$
This cross-section contains the same qualitative mechanisms seen in the two-parameter map: period-3 grazing in the \(1/1\to2/3\to1/3\) window, a Hopf route from \(1/3\) into chaos, crisis-induced grazing near \(1/1\to2/n\), and a period-7 crisis window. At the crisis points, NMDC, BMDC, and DLC all jump, which identifies backlash-induced grazing as a primary source of dynamic-load discontinuity.
Phase portraits and Poincaré sections at selected frequencies confirm the state assignments. At \(\Omega=1.50\), the system is in single-sided-impact period-1 motion. At \(\Omega=1.535\) and \(1.55\), period-2 motion appears with double-sided and single-sided impact, respectively. At \(\Omega=1.57\), the response is quasi-periodic, with three Hopf loops in the phase portrait. At \(\Omega=1.62\) and \(1.65\), the Poincaré map is bounded and self-similar, corresponding to single-sided and double-sided chaotic impact. The period-1 portrait at \(\Omega=1.50\) also agrees with an independent numerical result for the same parameter set, which supports the validity of the continuation calculation.
RBF neural-network control of the speed ratio
Once the parameter map identifies a chaotic or quasi-periodic operating point, a small adjustment of a controllable parameter can move the system toward a desired periodic orbit. The speed ratio \(\Omega\) is a natural control input because it is directly related to shaft speed. A parameter-feedback controller was built around a radial basis function neural network with a 2–5–1 structure: two input nodes, five hidden nodes, and one output node. The inputs are the Poincaré-map distances at two successive iterations,
$$
D(k)=\|X(k)-X(k-1)\|,\qquad
D(k-1)=\|X(k-1)-X(k-2)\|,
$$
and the output is a bounded speed-ratio perturbation \(u=\Delta\Omega\), with \(|u|\le u_{\max}\). Each hidden node uses a Gaussian activation,
$$
\phi_i(\|D-C_i\|)=\exp\left(-\frac{\|D-C_i\|^2}{2\sigma_i^2}\right),
$$
where \(C_i\) is the node center, \(\sigma_i\) is the center width, and the output-layer weights are \(w_i\). These parameters are optimized offline. The fitness function combines convergence of the Poincaré distance with control effort:
$$
f(P_i)=\gamma_1\sum_{k=1}^{L}\left|D^*-D(k)\right|\ln(1/\eta)+\gamma_2\sum_{k=1}^{L}\left|u(k)-\hat{u}(k)\right|.
$$
Here \(D^*=1\times10^{-7}\) is the target Poincaré distance, \(\eta\in(0,1)\) is a uniform random weight, \(\gamma_1\) and \(\gamma_2\) are relative weights, \(L\) is the data-sequence length, and \(\hat{u}(k)\) is the desired control input. The controller parameters were optimized with an adaptive hybrid gravitational search algorithm (AHGSA), which uses chaotic sequence initialization, a mutation operator, an adaptive gravitational coefficient, and an artificial-bee-colony search operator. The population size was 30, the maximum number of iterations was 200, and the AHGSA settings were \(G_0=130\), \(\alpha=18\), and \(P=0.96\).
This control architecture does not linearize the full 7-DOF vector field. It acts on the sequence of Poincaré-map distances and the scalar speed perturbation. That matters for high-dimensional gear systems, where OGY-type control can become fragile when complex conjugate eigenvalues appear in the Jacobian spectrum and alter the unstable manifold dimension.
Controlled transitions
Representative control runs are summarized below. In each case, the controller was switched on after the initial motion had developed, and the Poincaré distance was driven toward \(1\times10^{-7}\).
| Initial \(\Omega\) | Initial motion | Target | Control onset | Settling behavior | Final \(\Delta\Omega\) |
|---|---|---|---|---|---|
| 1.54 | 2/3 | 1/1 | step 50 | 20 perturbation steps; stable by step 71 | \(-0.022\) |
| 1.57 | 1/n quasi-periodic | 1/3 | step 50 | 10 perturbation steps; stable by step 61 | \(-0.015\) |
| 1.65 | 1/n chaotic | 1/1 | step 50 | stable after 6 steps | \(+0.029\) |
| 1.91, 1.96 | chaotic | period-7 | step 100 | more than 120 steps | — |
At \(\Omega=1.54\), the 2/3 motion was driven to 1/1 motion; the speed perturbation settled at \(-0.022\), and the Poincaré distance converged to the numerical precision of \(1\times10^{-7}\). At \(\Omega=1.57\), the quasi-periodic 1/n response was converted to a single-sided-impact period-3 orbit, with the perturbation settling at \(-0.015\). At \(\Omega=1.65\), the chaotic response was stabilized to period-1 motion after only six control steps, with a final perturbation of \(+0.029\). The corresponding phase portraits become closed curves after control. Chaotic motion at \(\Omega=1.91\) and \(1.96\) was also driven to a stable period-7 orbit, starting at step 100 and requiring more than 120 steps to reach the periodic precision.
These results show that a small, bounded speed modulation can reorganize a high-dimensional backlash gear system from chaos or quasi-periodicity into a periodic orbit. The control law uses the input–output sequence of Poincaré distances rather than an online integration of the full dynamic model, which makes it attractive for supervisory control of a transmission whose detailed contact parameters are difficult to identify.
What the map means for design
The parameter-plane structure supports a simple design rule: prefer operating points in the no-impact \(0/1\) region when stable periodic transmission is the primary requirement. Light load is not automatically benign. In the low-load region, loss of contact and back-side contact are most severe, and chaotic windows can produce NMDC values near 0.67 and BMDC values near 0.35. Heavy load suppresses impact and expands the no-impact area, but it raises the dynamic load coefficient, which reaches about 1.55 in the heavy-load multi-period region. The frequency ratio \(\Omega\) is the strongest single control on period bifurcation, while tooth impact and load jointly control loss of contact and dynamic load.
The map also gives a practical role to active control. A transmission can be designed to avoid the worst windows, but manufacturing variation, wear, and changing load may move an actual operating point across a bifurcation boundary. A bounded speed-ratio perturbation, optimized through a radial basis function network, provides a way to recover period-1 or low-period motion without changing the gear geometry. The numerical evidence establishes parameter sensitivity and controller feasibility; it does not replace hardware testing. Because the model is a deterministic lumped-parameter representation, it does not resolve tooth contact pressure, lubrication film behavior, or surface roughness, so the resulting regions should be treated as a design screen and a guide for experimental validation rather than a final qualification map.