
In my extensive experience working with gear manufacturing, particularly in the context of small-scale operations or maintenance workshops, I have often encountered the challenge of efficiently producing miter gears. Miter gears, which are a type of bevel gear with a 1:1 ratio and typically a 90-degree shaft angle, are crucial components in various mechanical systems, from industrial machinery to automotive differentials. Their precision requirements can be daunting, especially when access to specialized gear-cutting equipment is limited. This led me to develop a simple yet effective fixture for milling miter gears on standard milling machines, such as horizontal or vertical mills. The goal was to create a cost-effective solution that does not compromise on accuracy, enabling the production of miter gears with diameters up to 300 mm, module ranges from 2 to 5, and specific tooth counts and pitch cone angles. Throughout this article, I will delve into the design principles, mathematical foundations, operational procedures, and practical advantages of this fixture, emphasizing the versatility it brings to machining miter gears. I will use tables and formulas extensively to summarize key points, ensuring clarity for engineers and machinists alike.
The core innovation lies in a modular fixture system that can be adapted to various miter gear specifications. The fixture is primarily constructed from steel components, designed for rigidity and ease of adjustment. It consists of several key parts: a base, an inclined plate, a connection disk, an indexing plate, a spindle, a clamping cover, bolts, and a positioning pin. These components work in tandem to secure the workpiece and facilitate precise angular and indexical movements during the milling process. To illustrate, consider the following table summarizing the main components and their functions:
| Component | Function | Material |
|---|---|---|
| Base | Mounts to milling machine table; provides foundational support and arc-shaped slots for angular adjustment. | Mild Steel |
| Inclined Plate | Set at the gear root cone angle; ensures correct orientation of the workpiece relative to the cutter. | Hardened Steel |
| Connection Disk | Interfaces between the base and indexing plate; allows for secure attachment via screws. | Cast Iron |
| Indexing Plate | Contains number of slots equal to gear teeth; enables manual indexing for each tooth space. | Tool Steel |
| Spindle | Holds the gear blank; centered for rotational accuracy. | Alloy Steel |
| Clamping Cover | Secures the workpiece onto the spindle; applies uniform pressure. | Steel |
| Bolts | Fasten components together; include T-slot bolts for adjustable connections. | High-Strength Steel |
| Positioning Pin | Locks the indexing plate after rotation; ensures repeatable positioning. | Hardened Steel |
The fixture operates on the principle of simulating the gear geometry during cutting. For miter gears, the pitch cone angle is typically 45 degrees for a 90-degree shaft intersection, but variations can occur based on design requirements. The inclined plate’s angle is set to match the gear’s root cone angle, which is derived from the pitch cone angle and addendum/dedendum calculations. This alignment ensures that the cutter engages the blank at the correct orientation, producing the desired tooth profile. The mathematical relationship for the pitch cone angle $\gamma$ in miter gears is straightforward: for equal tooth counts on both gears, $\gamma = 45^\circ$. However, when dealing with non-standard miter gears or those with slight modifications, the angle can be calculated using the gear ratio. If $N_1$ and $N_2$ are the tooth counts of the two mating miter gears, the pitch cone angles $\gamma_1$ and $\gamma_2$ satisfy:
$$\tan \gamma_1 = \frac{\sin \Sigma}{N_2/N_1 + \cos \Sigma}, \quad \tan \gamma_2 = \frac{\sin \Sigma}{N_1/N_2 + \cos \Sigma}$$
where $\Sigma$ is the shaft angle, typically $90^\circ$ for miter gears. In the common case of $N_1 = N_2$ and $\Sigma = 90^\circ$, this simplifies to $\gamma_1 = \gamma_2 = 45^\circ$. The root cone angle $\gamma_f$ is then given by $\gamma_f = \gamma – \theta_f$, where $\theta_f$ is the dedendum angle, calculated as:
$$\theta_f = \arctan\left(\frac{b}{R}\right)$$
Here, $b$ is the dedendum and $R$ is the pitch cone distance. For standard miter gears with module $m$, the addendum $a = m$, dedendum $b = 1.25m$ (assuming common standards), and pitch cone distance $R = \frac{m N}{2 \sin \gamma}$. Thus, setting the inclined plate requires precise computation, which I often tabulate for different miter gear sizes. Below is a sample table for miter gears with module $m=3$ and tooth counts from 20 to 30, assuming a 90-degree shaft angle:
| Tooth Count (N) | Pitch Cone Angle ($\gamma$) | Pitch Cone Distance (R, mm) | Dedendum Angle ($\theta_f$, degrees) | Root Cone Angle ($\gamma_f$, degrees) |
|---|---|---|---|---|
| 20 | 45.00 | 42.43 | 2.86 | 42.14 |
| 22 | 45.00 | 46.67 | 2.60 | 42.40 |
| 24 | 45.00 | 50.91 | 2.38 | 42.62 |
| 26 | 45.00 | 55.15 | 2.20 | 42.80 |
| 28 | 45.00 | 59.40 | 2.04 | 42.96 |
| 30 | 45.00 | 63.64 | 1.91 | 43.09 |
This tabular approach streamlines the setup process for various miter gears. In practice, I mount the fixture onto the milling machine table using bolts through the arc-shaped slots. These slots allow the entire fixture to be pivoted, enabling fine adjustment of the offset relative to the cutter. This offset is critical for achieving the correct tooth depth and profile, especially when using a standard milling cutter shaped to approximate the gear tooth space. The offset $E$ can be derived from the gear geometry: for a miter gear, the offset often relates to the cutter position relative to the pitch cone apex. If $d$ is the pitch diameter, given by $d = mN$, and $\gamma$ is the pitch cone angle, the theoretical offset for a plain milling cutter might be $E = \frac{d}{2} \sin \gamma$. However, in actual milling, iterative adjustments are made based on trial cuts. The flexibility of the fixture’s arc slots accommodates this, making it adaptable for different miter gear designs.
The indexing mechanism is central to the fixture’s functionality. The indexing plate has a number of slots equal to the tooth count of the miter gear being produced. After milling one tooth space, I manually rotate the indexing plate so that the next slot aligns with the positioning pin. This action advances the workpiece by one tooth interval, ensuring uniform division. The angular rotation per index $\theta_i$ is simply $\theta_i = \frac{360^\circ}{N}$. For a miter gear with $N=24$, $\theta_i = 15^\circ$. The positioning pin then locks the plate in place, preventing movement during cutting. This manual indexing is remarkably precise for small to medium batches, and the indexing plate can be swapped out for different miter gears—a cost-effective alternative to complex dividing heads. The clamping cover secures the gear blank onto the spindle using bolts, ensuring no slippage under cutting forces. The spindle itself is centered accurately to minimize runout, which is vital for the smooth operation of miter gears in service.
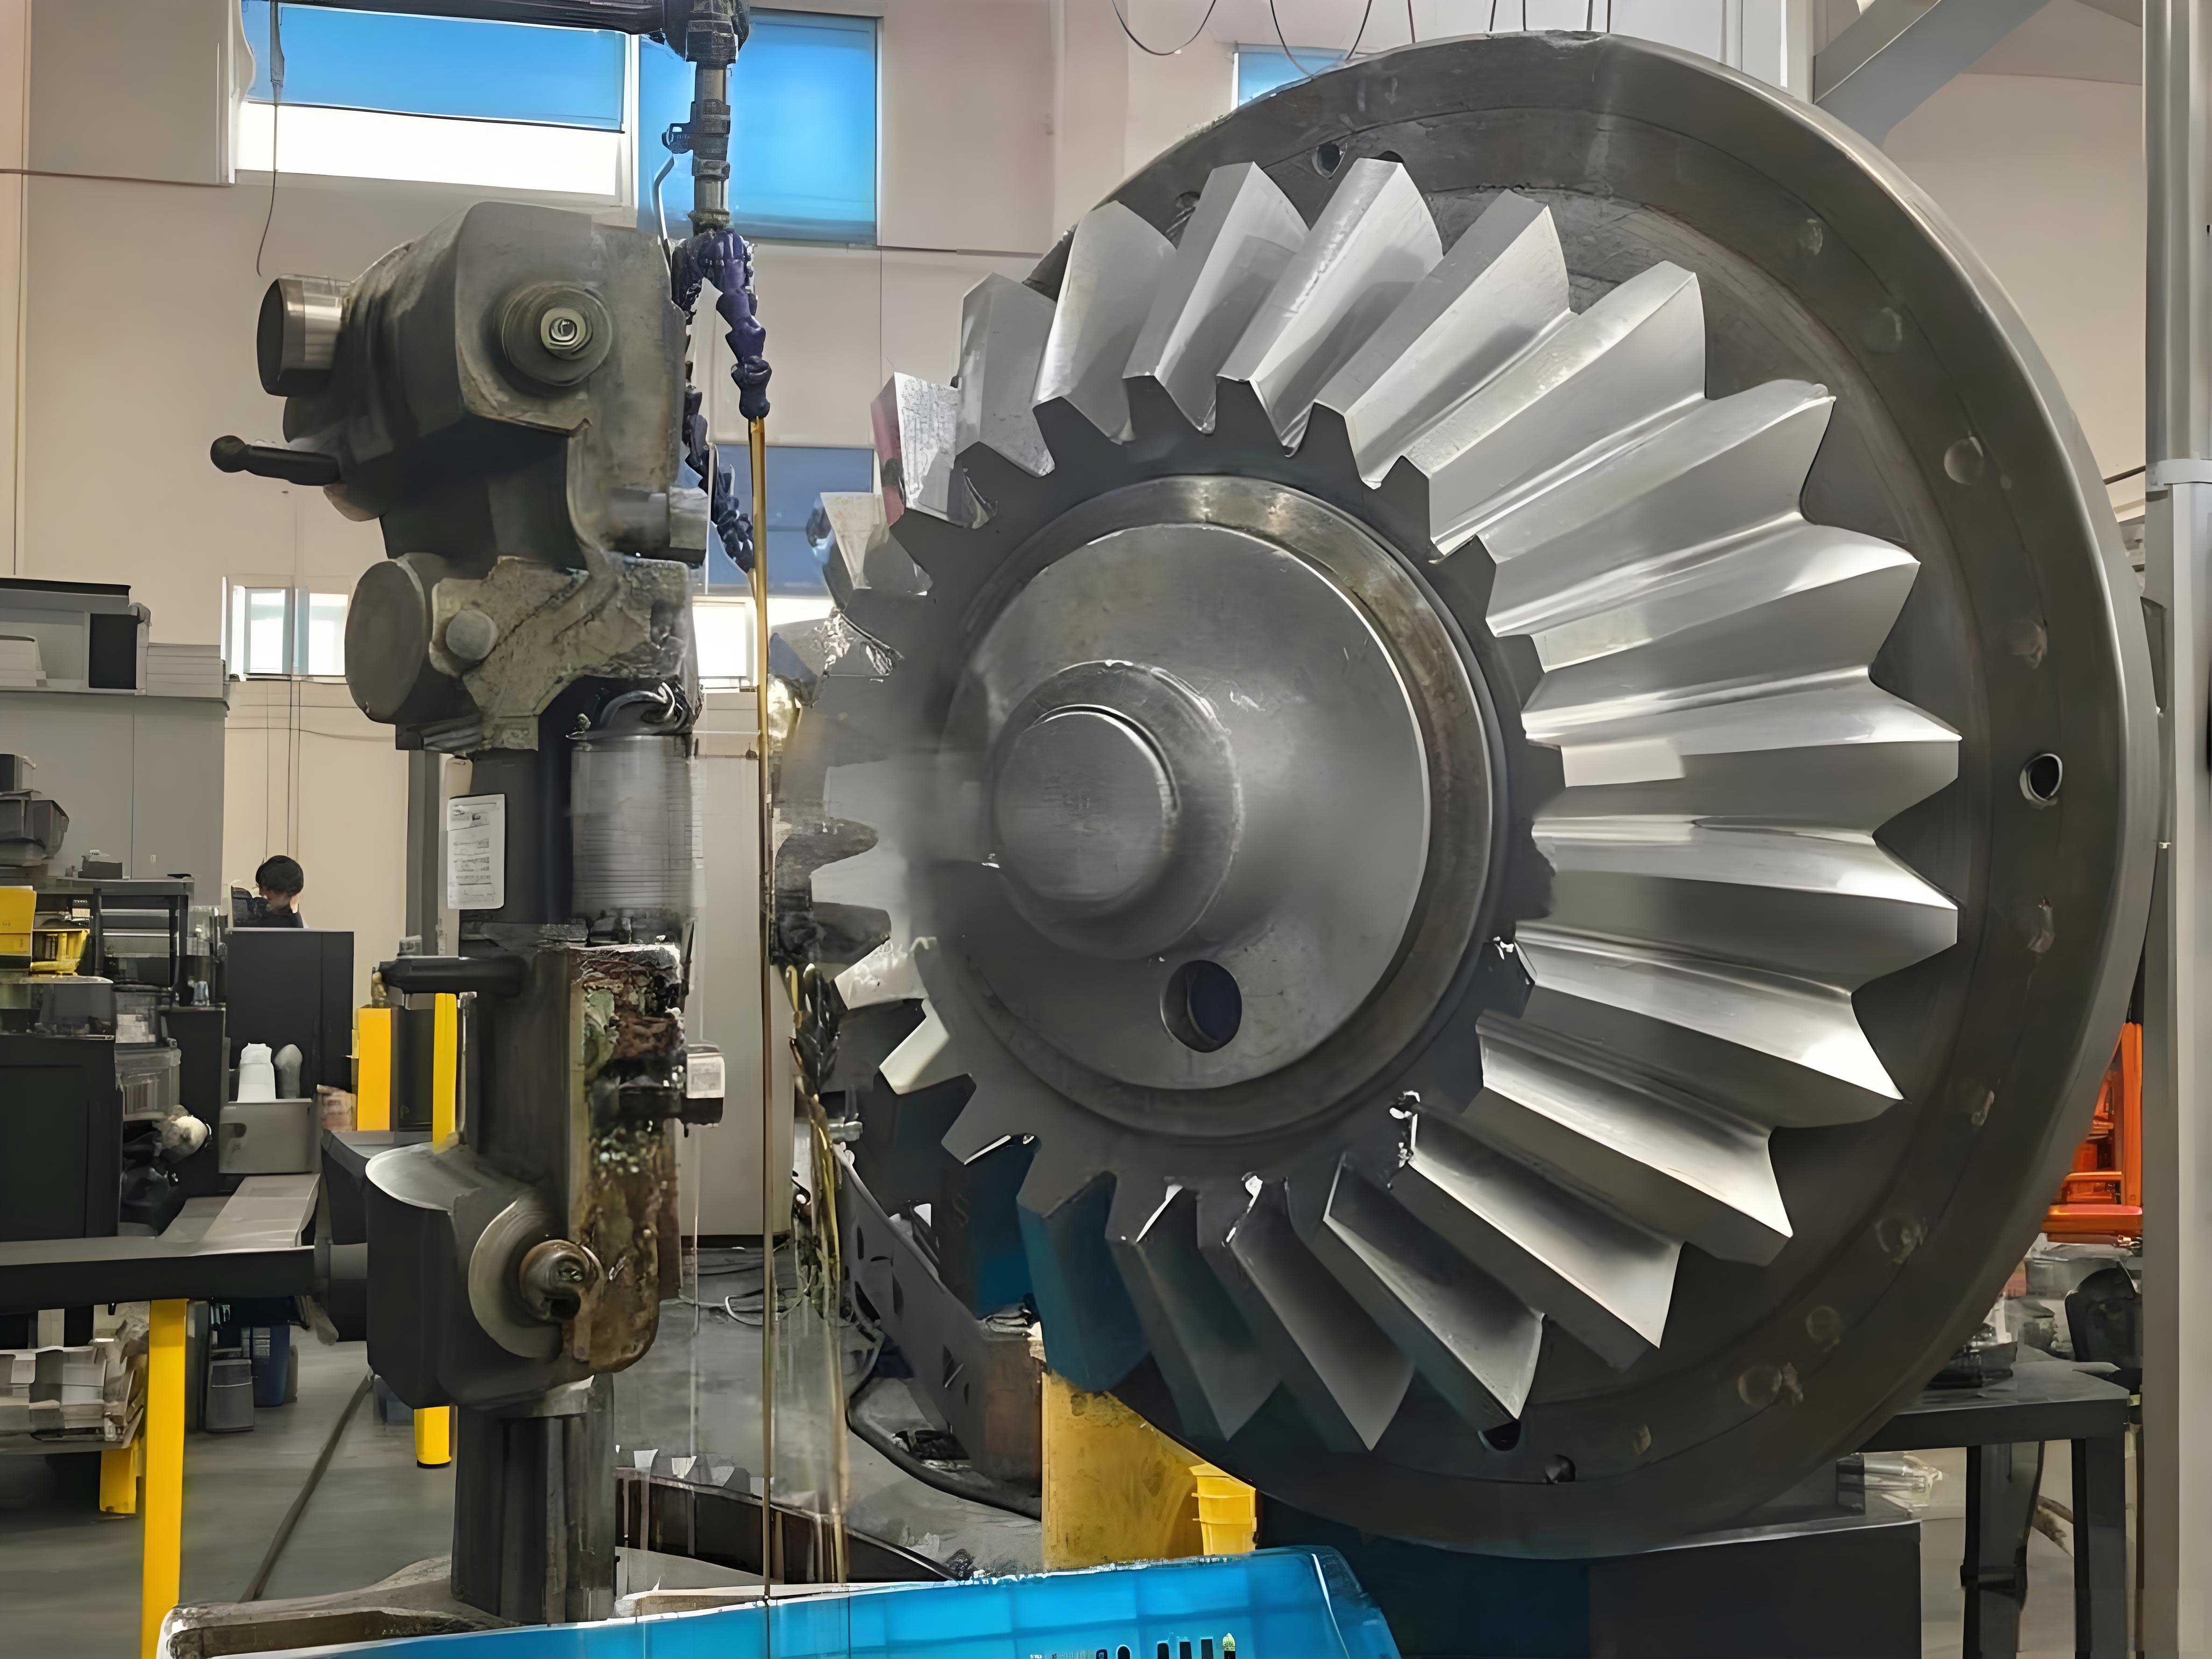
In terms of operational procedure, I begin by selecting the appropriate indexing plate for the desired miter gear tooth count. I then set the inclined plate angle to match the calculated root cone angle, using a precision angle gauge or sine bar. The fixture is bolted to the milling table, and the offset is adjusted via the arc slots while referencing the cutter position. The gear blank, typically a pre-turned conical piece, is mounted on the spindle and clamped. I initiate the milling process by taking light initial cuts, checking the tooth profile with gauges or optical comparators. After each tooth space is milled, I index the plate, reposition the pin, and repeat until all teeth are cut. For miter gears requiring high accuracy, I often perform a finishing pass to remove any tool marks. This method has proven effective for producing miter gears with modules from 2 to 5 and diameters up to 300 mm, which covers a wide range of industrial applications. The simplicity of the fixture means that maintenance and adjustments are straightforward, reducing downtime.
The advantages of this fixture are multifaceted, especially when compared to dedicated gear-cutting machines or more complex fixtures. Firstly, it leverages existing milling machines, which are common in most workshops, thereby eliminating the need for expensive specialized equipment. This makes it ideal for prototyping, small-batch production, or repair jobs involving miter gears. Secondly, the modular design allows quick changeovers: by swapping the indexing plate and adjusting the base angle, I can produce miter gears with different tooth counts and cone angles within minutes. This flexibility is crucial in job-shop environments where variety is constant. Thirdly, the fixture enhances safety and control, as the manual indexing and clamping provide a direct, tactile feedback that reduces the risk of errors common in automated setups. Additionally, the fixture’s rigidity minimizes vibrations, leading to better surface finishes on the miter gear teeth. I have used this setup to produce miter gears for applications such as right-angle drives in conveyor systems, differential units in vintage vehicles, and adjusting mechanisms in industrial valves. In each case, the gears performed reliably, with smooth engagement and minimal backlash, attesting to the fixture’s precision.
From a mathematical perspective, the design of miter gears involves several key formulas that inform the fixture setup. Beyond the angles discussed, the tooth dimensions are critical. For a straight bevel gear like a miter gear, the tooth thickness $t$ at the pitch circle is approximately $t = \frac{\pi m}{2}$, assuming standard tooth proportions. However, due to the conical shape, the actual thickness varies along the tooth length. The chordal thickness $t_c$ at the large end of the miter gear can be approximated as $t_c = mN \sin\left(\frac{90^\circ}{N}\right)$, which guides the cutter selection. The cutter width should match this thickness to avoid undercutting or excessive clearance. In practice, I use standard involute gear cutters adjusted for the virtual number of teeth $N_v$, given by $N_v = \frac{N}{\cos \gamma}$. For a miter gear with $\gamma=45^\circ$, $N_v = \sqrt{2}N$, which influences the cutter number selection from standard sets. These calculations ensure that the milled teeth approximate the ideal involute profile, even with a simple fixture. To summarize common parameters for miter gears, consider the following table based on AGMA standards:
| Parameter | Symbol | Formula for Miter Gears ($\Sigma=90^\circ$, $N_1=N_2=N$) | Example (N=20, m=3) |
|---|---|---|---|
| Module | m | Design choice | 3 mm |
| Pitch Diameter | d | $d = mN$ | 60 mm |
| Pitch Cone Angle | $\gamma$ | $\gamma = 45^\circ$ | 45° |
| Pitch Cone Distance | R | $R = \frac{d}{2 \sin \gamma}$ | 42.43 mm |
| Addendum | a | $a = m$ | 3 mm |
| Dedendum | b | $b = 1.25m$ (common) | 3.75 mm |
| Tooth Thickness at Pitch | t | $t \approx \frac{\pi m}{2}$ | 4.71 mm |
| Virtual Tooth Count | $N_v$ | $N_v = \frac{N}{\cos \gamma}$ | 28.28 |
These formulas are integral to configuring the fixture correctly. For instance, the pitch cone distance R determines the size of the gear blank, while the dedendum angle informs the inclined plate setting. In my work, I often create such tables for common miter gear sizes to expedite setup. Additionally, the cutting speed and feed rates must be optimized for milling miter gears. Based on material properties—typically steel or cast iron for durable miter gears—I use the following empirical formula for cutting speed $V_c$ in meters per minute: $V_c = \frac{\pi d_c n}{1000}$, where $d_c$ is the cutter diameter and $n$ is the spindle speed in RPM. For a HSS milling cutter, $V_c$ might range from 20 to 40 m/min for steel. The feed per tooth $f_z$ is chosen to balance productivity and finish, often around 0.05 to 0.1 mm per tooth for fine-toothed miter gears. These parameters ensure efficient material removal without compromising the accuracy of the miter gear teeth.
The fixture’s design also incorporates considerations for ease of use and adaptability. For example, the arc slots on the base allow for not only angular offset but also for tilting the entire fixture if needed for helical or spiral miter gears—though this article focuses on straight miter gears. The T-slot bolts on the connection disk provide a secure yet adjustable joint, enabling fine-tuning during setup. I have found that adding a dial indicator to the spindle helps verify concentricity, further enhancing precision. Over time, I have refined the fixture by incorporating quick-release clamps for faster workpiece changes, which is beneficial when producing multiple identical miter gears. Moreover, the fixture can be scaled; for larger miter gears beyond 300 mm, I simply increase the dimensions of the base and components, maintaining the same design principles. This scalability underscores the fixture’s utility across a spectrum of gear sizes.
In broader applications, the ability to mill miter gears in-house has proven invaluable. For instance, in maintenance scenarios where a failed miter gear halts production, this fixture enables rapid replacement without waiting for external suppliers. Similarly, in custom machinery design, I can prototype miter gears quickly, test them, and iterate designs without significant cost. The fixture also educates apprentices on gear geometry and machining principles, as the hands-on process demystifies the production of miter gears. I frequently conduct workshops where trainees use the fixture to make small miter gears, reinforcing theoretical knowledge with practical skill. This aligns with industry trends towards decentralized manufacturing and skill development.
To delve deeper into the geometric intricacies, the tooth profile generation for miter gears on a milling machine involves an approximation. Since a standard milling cutter produces a cycloidal or involute shape based on its form, the resulting tooth space is not a perfect conjugate profile. However, for many applications, especially where slight backlash is acceptable, this approximation suffices. The error can be minimized by using a cutter that matches the virtual tooth count closely. The maximum profile error $\epsilon$ can be estimated using the formula $\epsilon \approx \frac{m}{2} (1 – \cos \phi)$, where $\phi$ is the pressure angle, typically 20° for modern miter gears. For m=3 and $\phi=20°$, $\epsilon \approx 0.09$ mm, which is often within tolerance for general-purpose miter gears. For higher precision, I sometimes employ a two-step process: roughing with a standard cutter and finishing with a custom-ground form cutter, though this adds complexity. The fixture accommodates such refinements due to its stable platform.
Another aspect is the material selection for the miter gears themselves. Common materials include carbon steels (e.g., AISI 1045) for strength, brass for corrosion resistance, or plastics like nylon for quiet operation. The fixture handles all these materials effectively, as the clamping force is adjustable via the bolt torque. I recommend using a torque wrench to ensure consistent clamping without distorting the blank. The cutting parameters, of course, vary with material: for brass, I increase cutting speeds, while for hardened steels, I reduce feeds to prolong cutter life. This adaptability makes the fixture suitable for a wide range of miter gear applications, from light-duty instruments to heavy-duty transmissions.
In terms of economic impact, this fixture reduces the cost per miter gear significantly. Dedicated gear hobbing or shaping machines involve high capital investment and maintenance, whereas this fixture uses existing mills with minimal added cost. The material cost for the fixture is low, as it can be fabricated from scrap steel in many cases. The indexing plates, being the only custom parts for each tooth count, are simple to manufacture using wire EDM or even manual machining. I estimate that for batches of less than 50 pieces, this method is more cost-effective than outsourcing or using specialized gear cutters. Moreover, it reduces lead times, as I can produce miter gears on-demand without supply chain delays. This is particularly advantageous in remote or resource-limited settings, where access to advanced gear manufacturing is scarce.
To further illustrate the process, consider a step-by-step case study for producing a miter gear with N=28, m=2.5, and material as mild steel. First, I calculate the root cone angle using the formulas earlier: $\gamma = 45^\circ$, $R = \frac{2.5 \times 28}{2 \sin 45^\circ} \approx 49.50$ mm, $\theta_f = \arctan(1.25 \times 2.5 / 49.50) \approx 3.62^\circ$, so $\gamma_f = 45 – 3.62 = 41.38^\circ$. I set the inclined plate to 41.38° using a sine bar. Next, I select an indexing plate with 28 slots and mount it. The gear blank, with a pre-machined cone matching the pitch cone, is clamped. I set the offset by aligning the cutter to the blank’s large end, using a trial cut to verify depth. After milling each tooth space, I index the plate by 12.86° (360/28), lock it with the pin, and continue. The entire process takes about 4 hours for one gear, including setup, which is reasonable for small quantities. The resulting miter gears have been tested in 90-degree power transmission setups, showing efficient torque transfer with minimal noise.
In conclusion, the simple fixture for milling miter gears represents a pragmatic solution that bridges the gap between specialized gear manufacturing and general machining capabilities. Its design, rooted in fundamental gear geometry, allows for precise production of miter gears with varying specifications. The use of modular components like interchangeable indexing plates and adjustable bases enhances versatility, while the mathematical foundations ensure accuracy. Through tables and formulas, I have summarized key parameters and procedures to aid practitioners. The fixture not only reduces costs and lead times but also empowers machinists to tackle gear production in-house, fostering innovation and self-reliance. As industries continue to value adaptability and sustainability, such grassroots innovations in manufacturing miter gears will remain relevant. I encourage others to experiment with similar fixtures, adapting them to local needs and advancing the art of gear making.
Reflecting on my journey, this fixture has evolved through iterative improvements based on feedback from real-world applications. Each set of miter gears produced has taught me something new about tolerances, material behavior, or setup tricks. For example, I learned that adding a slight relief angle to the clamping cover prevents marking on delicate gear blanks. Also, using a lubricant during milling improves the finish on steel miter gears. These nuances are best discovered through hands-on experience, which this fixture facilitates. Looking ahead, I plan to integrate digital readouts for angular adjustments and explore CNC adaptations for higher-volume production of miter gears. However, the manual version will always have a place for its simplicity and educational value. Ultimately, the goal is to make gear manufacturing more accessible, and this fixture for miter gears is a step in that direction.