
Throughout my career in mechanical design and maintenance, I have frequently encountered the worm gear system, a compact and powerful mechanism for transmitting motion and power between non-intersecting, perpendicular shafts. In this article, I will share a comprehensive analysis of worm gear transmissions, drawing from both theoretical foundations and practical experience. I will cover the distinctive features, structural types, efficiency calculations, lubrication strategies, thermal balance, and installation & maintenance procedures. My aim is to provide a deep understanding that can guide engineers and technicians in selecting, designing, and maintaining worm gear drives effectively.
1. Distinctive Characteristics of Worm Gear Drives
Compared with conventional gear systems, the worm gear offers several unique advantages and limitations that I have observed in applications ranging from heavy machinery to precision instruments.
| Feature | Description | Practical Implication |
|---|---|---|
| Large Transmission Ratio | Typical ratios from 10:1 to 80:1; up to 1000:1 for motion-only applications. | Compact design eliminates multiple gear stages; ideal for space-constrained systems. |
| Smooth and Quiet Operation | Continuous line contact between worm and worm gear teeth; gradual engagement. | Low noise and vibration; suitable for precision machinery and passenger elevators. |
| Self-Locking Capability | When lead angle λ is smaller than equivalent friction angle ρv, the drive becomes irreversible. | Frequently used in hoists and conveyors to prevent back-driving without brakes. |
| Low Efficiency | Typically 70%–80% for non-self-locking drives; below 50% for self-locking ones. | High frictional losses generate heat; limits power transmission to moderate levels (usually ≤ 50 kW). |
| Higher Manufacturing Cost | Worm gear rims often made from bronze; requires precision machining. | Increases initial investment but extends service life under proper lubrication. |
One of the most remarkable properties I have utilized is the self-locking feature. For instance, in a lifting mechanism I maintained, a single-start worm gear with λ = 4° and ρv = 6° ensured that the load could not descend under gravity, eliminating the need for an expensive brake system. However, this came at the cost of efficiency—only about 45%.
2. Types and Structures of Worm Gear Drives
2.1 Classification by Worm Geometry
Worm gear drives are primarily categorized by the shape of the worm. I have worked with all three main types: cylindrical, enveloping (hourglass), and conical.
| Type | Worm Profile | Key Characteristics | Application Example |
|---|---|---|---|
| Cylindrical (ZA, ZI, ZN, ZC) | Straight or curved generatrix on a cylinder | Most common; ZA (Archimedes) easy to grind; ZI (involute) better meshing; ZN (normal straight-sided); ZC (arc-contact) has higher load capacity | General industrial reducers, machine tools |
| Enveloping (Hourglass) | Worm tooth flank wraps around the worm gear | Multiple teeth in contact simultaneously; excellent oil film formation; load capacity 2–4 times higher than cylindrical; efficiency up to 90% | Heavy-duty rolling mills, large hoists |
| Conical (Beveloid) | Both worm and worm gear have conical tooth surfaces | High ratio range (10–360); good lubrication; asymmetric – different performance in forward/reverse | Specialized automotive steering systems |
Among cylindrical types, the arc-contact worm gear (ZC type) deserves special mention. In a recent design project for a conveyor drive, I chose ZC because its combined curvature radius increased load capacity by 70% over a standard ZA worm gear, while maintaining efficiency above 90%. The only trade-off was a stricter requirement for center distance and alignment.
2.2 Structural Configurations
In practice, the worm is usually integral with its shaft (worm shaft), machined from hardened steel (e.g., 40Cr, 20CrMnTi) and ground after heat treatment. The worm gear, on the other hand, is often a composite structure to save cost:
- Solid construction: For small diameters (d2 < 100 mm) or when made from cast iron.
- Rim-and-hub design: Bronze ring shrunk-fit or bolted onto a cast iron or steel hub. I have frequently used H7/s6 interference fits for this purpose, ensuring torque transmission without relative motion.
- Cast-in-place: Molten bronze is cast around a steel core; suitable for large series production.
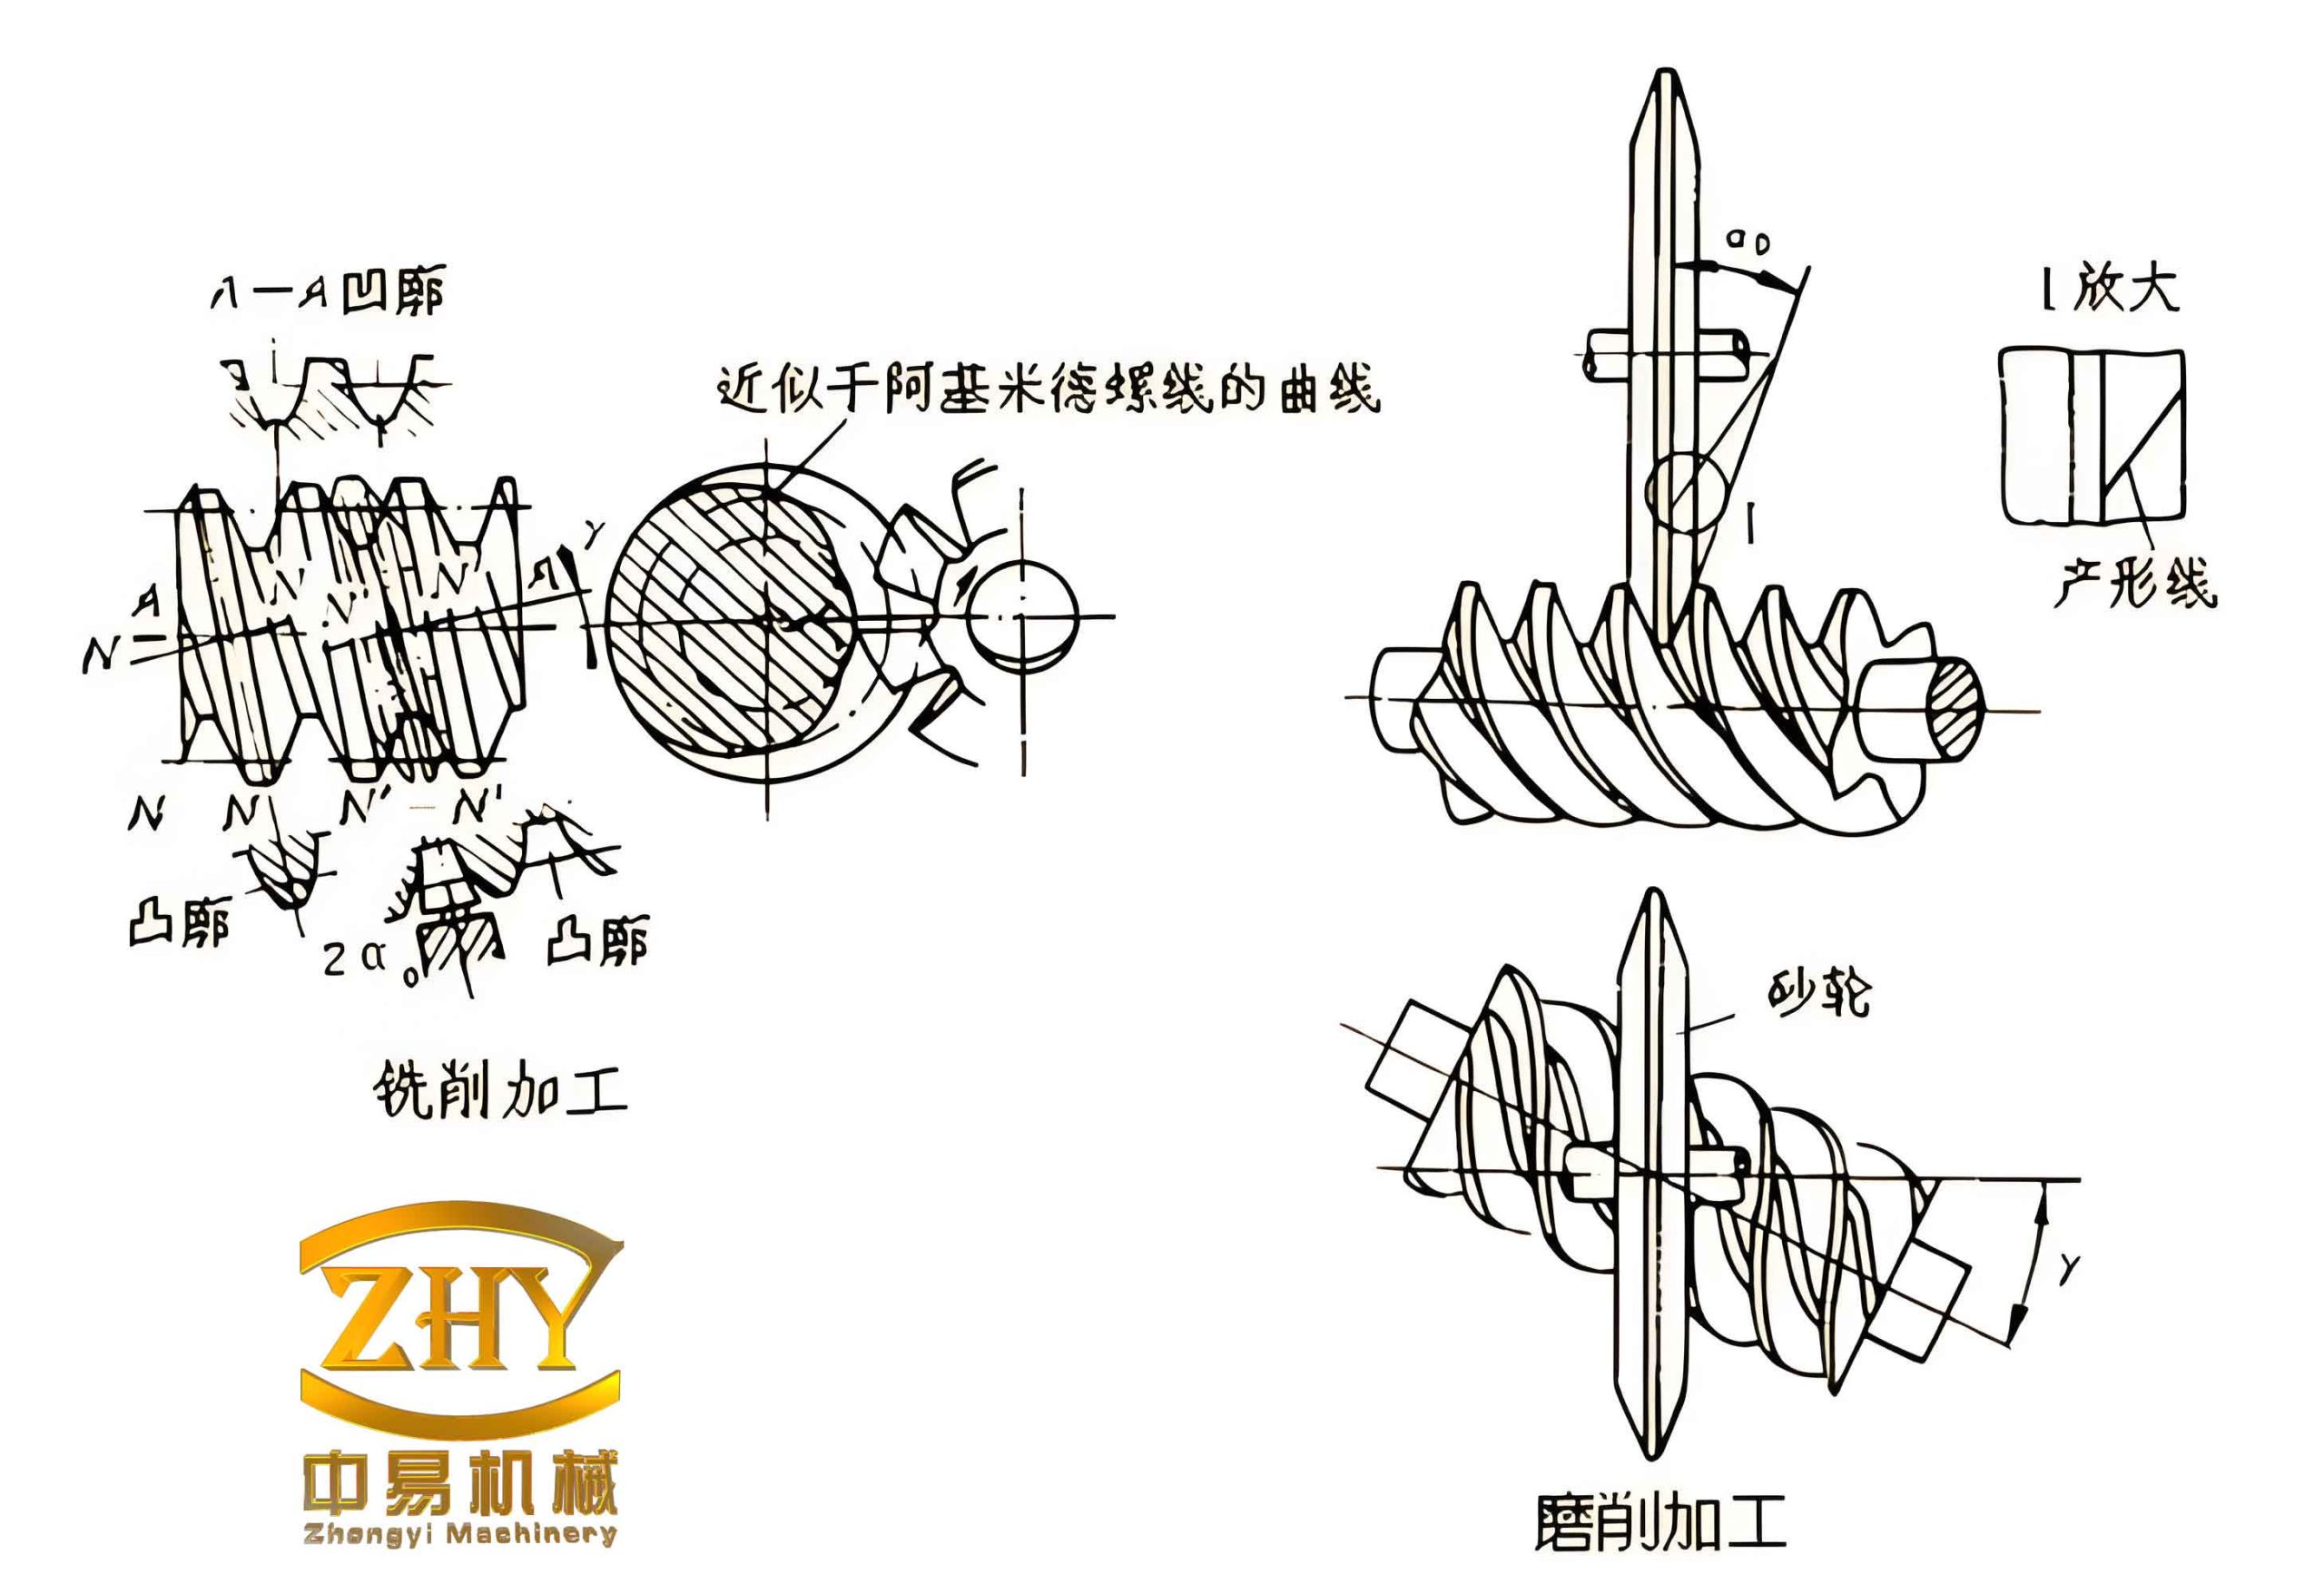
The image above shows a typical worm and worm gear set, illustrating the continuous helical contact that defines this transmission.
3. Efficiency of Worm Gear Transmissions
The overall efficiency of a worm gear drive is the product of three components:
$$ \eta = \eta_1 \cdot \eta_2 \cdot \eta_3 $$
Where:
- η1 – meshing efficiency (dominant factor)
- η2 – bearing efficiency (≈ 0.95–0.96)
- η3 – oil churning efficiency (≈ 0.95–0.96)
When the worm is the driving element, η1 is given by the screw-jack formula:
$$ \eta_1 = \frac{\tan\lambda}{\tan(\lambda + \rho_v)} $$
Here, λ is the worm lead angle, and ρv is the equivalent friction angle derived from:
$$ \rho_v = \arctan f_v $$
The sliding velocity vs has a significant effect on fv. Higher sliding speeds promote better oil film formation, reducing friction. I have compiled typical values based on experiments:
| vs (m/s) | fv | ρv (degrees) |
|---|---|---|
| 0.1 | 0.08–0.12 | 4.6–6.8 |
| 0.5 | 0.05–0.07 | 2.9–4.0 |
| 1.0 | 0.035–0.055 | 2.0–3.2 |
| 2.0 | 0.028–0.045 | 1.6–2.6 |
| 5.0 | 0.020–0.035 | 1.1–2.0 |
| 10.0 | 0.015–0.025 | 0.9–1.4 |
From the efficiency formula, it is clear that η1 increases with λ up to a point. In practice, multi-start worms (z1 = 2, 4) have larger λ and thus higher efficiency. However, when λ exceeds 27°, the gain becomes marginal, and manufacturing difficulty rises. For self-locking drives, λ must be less than ρv, which forces efficiency below 50%.
For preliminary design, I often use the following rule-of-thumb efficiencies from Table 4 (closed drives):
| Number of Worm Starts (z1) | Efficiency η |
|---|---|
| 1 | 0.70–0.75 |
| 2 | 0.75–0.82 |
| 4 | 0.82–0.92 |
For open drives (e.g., simple winches), efficiency drops to 0.60–0.70 regardless of starts.
4. Lubrication of Worm Gear Drives
Due to the high sliding velocities and heat generation, lubrication is critical for worm gear longevity. I have learned from field experience that inadequate lubrication is the primary cause of premature failure—either scoring or adhesive wear (galling).
4.1 Oil Viscosity and Additives
High-viscosity mineral oils with extreme-pressure (EP) additives are preferred. The choice depends on the sliding speed vs and load. A common selection guideline is:
| Sliding Speed vs (m/s) | ISO Viscosity Grade | Typical Use |
|---|---|---|
| < 1.5 | 460–680 | Heavy loads, low speed |
| 1.5–3.5 | 320–460 | General purpose |
| 3.5–10 | 220–320 | Moderate speeds |
| > 10 | 150–220 | High-speed, may require forced circulation |
4.2 Lubrication Methods
For closed gearboxes, two methods dominate:
- Splash lubrication: When the worm is located below the worm gear (worm-under configuration), the worm dips into the oil sump. The immersion depth should be at least one tooth height but not exceed the lowest rolling element center of the worm bearings. For vs > 5 m/s, oil churning losses become excessive, and the worm should be positioned above (worm-over) with forced oil spray.
- Pressure spray lubrication: Required when vs > 10 m/s or when the worm is mounted above. Oil is pumped through nozzles directed at the meshing zone. I have successfully used this on a high-speed packaging machine where vs reached 12 m/s, extending gear life by 3× compared to splash.
For open drives, high-viscosity gear grease or heavy residual oils are applied periodically. However, I always recommend enclosing the drive whenever possible to prevent contamination and retain lubricant.
5. Thermal Balance Calculation
The low efficiency of worm gear drives leads to significant heat generation. If heat dissipation is insufficient, oil temperature rises, reducing viscosity and potentially causing film breakdown and seizure. I always perform a thermal balance calculation during design to ensure the oil temperature stays below the allowable limit (usually 70–90 °C).
The heat generation rate Q1 (in Watts) is:
$$ Q_1 = P_1 (1 – \eta) \times 1000 $$
where P1 is the input power in kW.
The heat dissipation rate Q2 from the gearbox housing surface is:
$$ Q_2 = K_s A (t_1 – t_0) $$
where:
- Ks – overall heat transfer coefficient (W/(m²·°C)), typically 10–17; higher with good ventilation.
- A – effective cooling surface area (m²), includes fins and ribs (counted as 50% of their actual area).
- t1 – oil sump temperature (°C).
- t0 – ambient air temperature (°C), usually taken as 20 °C.
At thermal equilibrium, Q1 = Q2, giving the steady-state oil temperature:
$$ t_1 = \frac{1000 \cdot P_1 (1-\eta)}{K_s A} + t_0 $$
If calculated t1 exceeds the allowable [t1] (70–90 °C), corrective measures must be taken. I have applied the following solutions in various projects:
- Increase housing surface area by adding cooling fins or using a larger housing.
- Mount a fan on the worm shaft to increase air flow over the housing (effective for moderate overheating).
- Install a cooling coil in the oil sump with circulating water or forced air.
- Use an external oil pump and cooler (oil-to-air or oil-to-water heat exchanger) for high-power drives.
To illustrate, consider a real example: a 5 kW worm gear reducer with η = 0.75, Ks = 12 W/(m²·°C), A = 0.5 m². The calculated t1 = [1000×5×(1-0.75)]/(12×0.5) + 20 = 208.3 + 20 = 228.3 °C, which is far too high. Clearly, this small housing cannot dissipate the heat; we would need either to increase A to at least 2 m² or add a cooling fan.
6. Installation and Maintenance
6.1 Installation Guidelines
Precise alignment is paramount for worm gear performance. The most critical requirement is that the worm gear’s central plane must pass through the worm axis. I have developed a rigorous procedure:
- Mount the worm shaft and housing first, ensuring the worm axis is level and true.
- Position the worm gear on its shaft with temporary shims.
- Rotate the assembly by hand and check the contact pattern using marking compound. The pattern should be centered on the worm gear tooth flank.
- Adjust the worm gear axially using shims or adjustable spacer sleeves until the pattern is symmetrical.
- Lock the axial position with locknuts or set screws.
During initial run-in, I always run the drive at low speed (n1 = 50–100 rpm) and gradually increase the load to rated torque over 1–5 hours. If any bronze particles adhere to the worm, I stop immediately, clean with fine emery paper, and continue. After run-in, drain the oil, flush with clean oil, and refill with fresh lubricant. It is wise to mark the relative axial positions of worm and worm gear for future reassembly.
6.2 Maintenance Practices
Based on years of field service, I recommend the following maintenance schedule for worm gear drives:
| Interval | Action |
|---|---|
| Weekly | Check oil level; inspect for leaks; monitor operating temperature. |
| Monthly | Listen for abnormal noise; sample oil for contamination (metal particles). |
| Every 2000–4000 hours | Replace oil entirely; clean sump; inspect worm gear tooth surfaces for pitting, scoring, or wear. |
| Annually | Check bearing preload; measure backlash; record changes. |
Oil replacement must use the same brand and grade. Mixing different types can cause additive incompatibility and reduce protection. I also advise using a magnetic drain plug to capture ferrous wear debris—this gives early warning of gear or bearing distress.
7. Design Considerations and Practical Tips
7.1 Material Selection
For the worm, I prefer case-hardened alloy steels (e.g., 20CrMo, 20CrNiMo) with surface hardness 58–62 HRC, ground after heat treatment. The worm gear is typically made from phosphor bronze (CuSn12Ni2) or tin bronze (CuSn10P1) for good anti-scoring properties. For light-duty or low-speed applications, aluminum bronze or even cast iron may be acceptable.
7.2 Determining Key Parameters
The primary design parameters for a worm gear pair include:
- Center distance a
- Axial module mx
- Number of worm starts z1 and worm gear teeth z2
- Worm pitch diameter d1 (often d1 ≈ 2a0.875/2? Actually standard: d1 = 2a – d2)
- Lead angle λ = arctan(z1 mx / d1)
I use the following check for strength: the contact stress at the worm gear tooth root must be below the allowable value. The tangential force on the worm gear:
$$ F_{t2} = \frac{2000 \cdot T_2}{d_2} $$
where T2 = output torque (Nm) and d2 = worm gear pitch diameter (mm). Then the bending stress and contact stress are evaluated according to standards like ISO 10828 or AGMA 6034.
7.3 Backlash and Accuracy
For positioning applications, minimizing backlash is critical. I recommend adjusting the center distance or using a split-worm design (one worm half fixed, the other axially adjustable) to eliminate clearances. However, for power transmission, some backlash (0.1–0.3 mm) is acceptable to allow for thermal expansion and lubrication.
8. Common Failure Modes and Troubleshooting
Over my career, I have diagnosed several recurring problems with worm gear drives:
| Symptom | Probable Cause | Remedy |
|---|---|---|
| Scoring on worm gear tooth flanks | Insufficient lubrication; too low viscosity; excessive temperature | Use higher viscosity EP oil; improve cooling; check oil level |
| Excessive wear (bronze dust) | Abrasive particles in oil; misalignment | Replace oil and filter; realign worm gear |
| Noisy operation | Low stiffness in housing; worn bearings; improper contact pattern | Check bearing condition; adjust axial position; stiffen housing |
| Overheating | Overload; insufficient cooling; churning due to high oil level | Reduce load; add cooling fan; check oil level |
9. Conclusion
Worm gear transmissions remain a fundamental component in countless machines, from simple hoists to high-precision rotary tables. Their unique blend of high reduction ratio, quiet operation, and self-locking capability makes them irreplaceable in many applications, despite their lower efficiency compared to other gear types. Through careful selection of worm geometry, proper lubrication, accurate installation, and diligent maintenance, the limitations can be managed, and the worm gear drive will deliver reliable service for many years. I hope this detailed analysis provides a solid reference for any engineer or technician working with worm gear systems.