
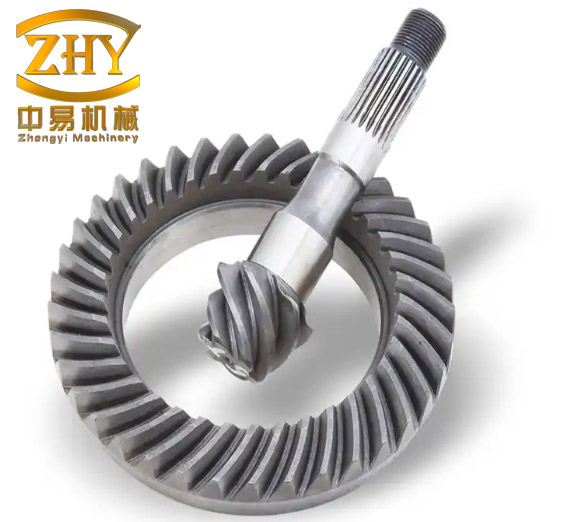
Spiral bevel gears form the right-angle stage in many underground conveyor reducers. Their curved, oblique teeth engage gradually, allowing a compact pair to carry high torque in an armored face conveyor drive. The same curvature also makes the tooth surface sensitive to the generating setup: the flank is not produced by a single form tool but is enveloped by a rotating cutter head while the workpiece and cradle roll in a timed relationship. Cutter radius, cutter position, workpiece setting, bed position, and roll ratio therefore leave a distinct signature on the flank. That signature is read as the contact pattern.
At Shanxi Coal Mine Machinery Manufacturing Co., average annual output of self-made reducer units and accessory sets was more than 40 in 2021. At that volume, contact-pattern consistency is a production issue rather than a one-off fitting problem. A pattern that drifts from pair to pair changes the bearing position, noise, and service life of the reducer, and ultimately affects the conveyor drive.
The contact pattern as a functional measurement
The contact pattern is the footprint left by marking compound when a gear pair is rolled under a light braking load. It is judged in three directions: along the tooth length from toe, the small end, to heel, the large end; along the tooth height from root to tip; and diagonally across the flank. Each direction carries different information about the generating settings.
A pattern displaced toward the toe or heel usually indicates a spiral-angle error. A pattern concentrated toward the root or tip indicates a pressure-angle error. A diagonal ellipse indicates a twist between the two generating motions. A pattern that is too short or too long points to a curvature mismatch, while one that is too narrow or too wide points to a width-setting problem. These are not independent defects: a change made to correct one direction can move the pattern in another.
On a rolling tester, the pair is mounted at nominal mounting distances and the spindle box is displaced vertically or horizontally. Vertical movement translates the pattern along the tooth height; horizontal movement translates it along the tooth length. The direction is not the same for a right-hand gear and a left-hand pinion, nor for the convex and concave flanks. The tester is therefore used to establish the sign for the actual pair, not to apply a universal left-or-right rule.
The bench pattern is also a light-load pattern. Under torque, the contact area grows and migrates toward the loaded side of the tooth. A setting that is acceptable at light load can become edge-loaded in service, so the final pattern must leave allowance for elastic deflection and load growth.
Machine settings and their first-order effects
Five generating-machine settings dominate contact-pattern correction. They differ in both the direction and the scale of the correction they produce. Table 1 summarizes the usual adjustment ranges and the interactions that must be checked afterward.
| Setting | What it changes | Typical correction | Dominant pattern effect | Interaction to check |
|---|---|---|---|---|
| Cutter position, radial offset or eccentric setting | Spiral angle of the generated flank | 1–3 mm | Moves the pattern along the tooth length | Recheck tooth-height position and both flanks; the sign reverses with hand and flank |
| Horizontal workpiece setting with bed setting | Workpiece axial mounting and cradle slide, hence pressure angle | Paired adjustment, set by the pattern | Moves the pattern along the tooth height | Adjust cutter position to hold the midpoint spiral angle |
| Roll ratio | Timing between generating gear and workpiece | 0.003–0.03 change in ratio | Changes pressure angle, especially for large corrections | Spiral angle also shifts; recheck pattern length and diagonal bias |
| Cutter-head radius | Tooth curvature along the face width | Spacer change; head-body change if required | Changes contact-pattern length | Reset cutter position after the radius change |
| Vertical workpiece offset | Lateral conformity of the pair | 1–5 mm | Changes contact-pattern width | Touch up cutter position and roll ratio; recheck diagonal contact |
The values in Table 1 are adjustment magnitudes, not universal signs. A cutter-position increase on one hand and flank can produce the same pattern movement as a decrease on the mirror case. The same applies to the vertical offset and to the paired horizontal and bed settings.
Correcting position along the tooth length
When the pattern sits too close to the toe or heel, the usual cause is a spiral-angle error. Changing cutter position alters the spiral angle of the generated tooth and moves the pattern along the face width. In production, a cutter-position change of 1–3 mm is normally sufficient. The adjustment is made on the pinion in most cases, because the pinion has fewer teeth and requires less cutting time than the gear.
A common cutter-position change moves both flanks in the same direction. If the pattern is too far toward the toe on one flank and too far toward the heel on the other, the problem is not a simple mean spiral-angle error. It is a flank split that requires a different combination of settings, and the tester should be used to identify which flank is leading the error. After the cutter position is changed, the tooth-height position must be rechecked, because the correction is not completely isolated from pressure angle.
Correcting position along the tooth height
A pattern concentrated at the root or tip is primarily a pressure-angle error. Two methods are used. The standard method changes the horizontal workpiece setting and the bed setting together: the workpiece axial mounting distance is changed, and the bed is displaced correspondingly. This is the most common pressure-angle correction. Because the horizontal workpiece setting also changes the spiral angle, the cutter position is adjusted at the same time to keep the midpoint spiral angle unchanged.
The second method changes the roll ratio. It is used when the pressure-angle correction is large. A roll-ratio change alters both pressure angle and spiral angle, but the pressure-angle response is more pronounced. The correction amount is typically 0.003–0.03. It can be set from operator experience or estimated from the change in pinion mounting distance observed on the rolling tester. Table 2 compares the two methods.
| Method | Typical use | Correction scale | Dominant effect | Secondary effect |
|---|---|---|---|---|
| Horizontal workpiece setting plus bed setting | Standard pressure-angle correction | Paired adjustment set by the pattern | Moves the pattern toward root or tip | Spiral angle shifts; compensate with cutter position |
| Roll ratio | Large pressure-angle errors | 0.003–0.03 change in ratio | Changes pressure angle strongly | Spiral angle and diagonal bias also change; recheck length |
Diagonal contact
Diagonal contact is a pattern that runs along a diagonal line across the flank rather than across the mid-height of the tooth. It is classified as inner or outer. In inner diagonal contact, the pattern on the convex flank runs from the large-end addendum to the small-end dedendum, while on the concave flank it runs from the large-end dedendum to the small-end addendum. Outer diagonal contact is the opposite: on the convex flank it runs from the large-end dedendum to the small-end addendum, and on the concave flank from the large-end addendum to the small-end dedendum.
A diagonal pattern is undesirable because it reduces the effective contact area and makes the pair more sensitive to mounting error and deflection. It cannot be removed by a single cutter-position move. It requires a coordinated change of roll ratio, horizontal workpiece setting, cutter position, and bed position. The direction reverses with the type of diagonal and with the flank, as summarized in Table 3.
| Diagonal type | Flank | Roll ratio | Horizontal workpiece setting | Cutter position | Bed setting |
|---|---|---|---|---|---|
| Inner | Concave | Increase | Decrease | Decrease | Increase |
| Inner | Convex | Decrease | Increase | Increase | Decrease |
| Outer | Concave | Decrease | Increase | Increase | Decrease |
| Outer | Convex | Increase | Decrease | Decrease | Increase |
The table gives coordinated directions, not equal magnitudes. Because the concave and convex flanks are generated by opposite sides of the cutter head, a move that corrects one flank can worsen the other if applied alone. The pattern must be optimized as a pair, with the tester used to confirm that the diagonal has been reduced rather than shifted to the opposite flank.
Contact length and contact width
Contact length is controlled by the cutter-head radius. The radius is changed with a cutter-head spacer, and if the required change is larger than the spacer range, the head body is changed. A radius change alters the radial reference of the cutter, so the cutter position must be reset afterward. The required direction is not a universal increase or decrease: it depends on whether the existing pattern is too short or too long and on which flank is being read. The rolling tester determines the direction, and the cutter position restores the length position.
Contact width is controlled by the vertical workpiece offset, normally with an adjustment of 1–5 mm. The vertical offset is not a standalone width control. It also tends to rotate the pattern into a diagonal, so it is paired with cutter position and roll ratio, and the diagonal is rechecked after the width change. A wider pattern reduces edge loading but can run off the tooth if taken too far; a narrow pattern concentrates stress and reduces the effective load-bearing area.
A practical correction sequence
Correction is normally applied to the pinion and not to the gear. The pinion has fewer teeth and shorter cutting time, so a pinion change is the economical way to bring the pair into specification. The gear is touched only when complete interchangeability is required and the pair must assemble with any mating pinion.
One workable sequence is to establish a baseline pattern on both flanks at nominal mounting distance, correct the mean tooth-height position with the horizontal and bed settings, correct the mean tooth-length position with cutter position, remove diagonal bias with the paired changes in Table 3, and then set contact length with cutter radius and contact width with vertical offset. The order is not rigid, but it reflects the interactions: a roll-ratio change disturbs spiral angle, a cutter-radius change disturbs cutter position, and a vertical-offset change disturbs diagonal orientation. One setting should be changed at a time, and both flanks should be rechecked before the next move.
The final pattern should be centered enough to grow under load without moving to the tooth edge, free of strong diagonal bias, and sized to use the available flank without running off the ends. The adjustment ranges of 1–3 mm for cutter position, 0.003–0.03 for roll ratio, and 1–5 mm for vertical offset give the scale of the correction; the rolling tester gives the direction for the actual hand, flank, and mounting condition.
Conclusion
Contact-pattern adjustment of spiral bevel gears is a sign-sensitive mapping from generating settings to tooth-surface geometry. Cutter position controls position along the tooth length, horizontal and bed settings control position along the tooth height, roll ratio provides a larger pressure-angle correction, cutter radius controls pattern length, and vertical offset controls pattern width. Diagonal contact requires a coordinated combination of these settings rather than a single offset. When the pattern is centered, free of diagonal bias, and dimensioned to grow under load, the pair achieves the load distribution and smoothness expected of a mining reducer, and the service life of the conveyor drive is protected.