1. Decomposition inspection
When disassembling, it can be seen that the two halves of the bevel gear bearing for the lower drive of the oblique drive have been completely separated, and the upper half of the cage can be taken out directly. All 9 rivets used for riveting the two halves of the cage are broken. The morphology during decomposition is shown in Figure 1. The outer ring is metallic in overall color, no obvious wear and macroscopic peeling are found on the runway surface, and slight circumferential wear marks are found on the shoulder, as shown in Figure 2. The inner ferrule is in metallic color as a whole, no obvious wear and macroscopic peeling phenomenon is found on the runway surface, and there is slight contact extrusion trace in the middle area of the inner circle surface.

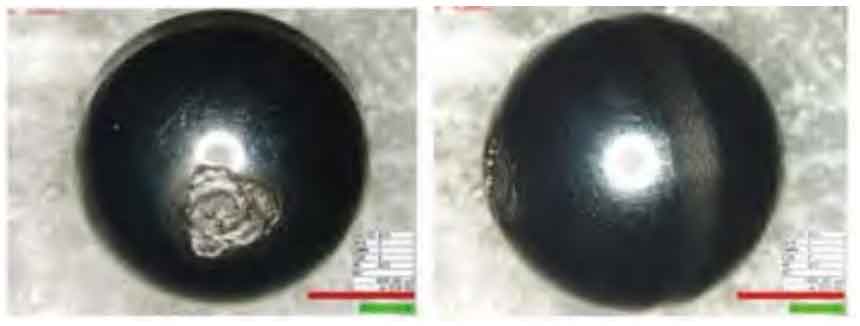
There are 9 steel balls in total, and the surface is metallic. There are circumferential wear marks with a width of about 2mm on the surface of 3 steel balls. Among them, there is one obvious macroscopic peeling on the surface of 1 steel ball in a 90 ° direction from the circumferential wear mark, and the size is about 4 × 3.5mm, there are slight scratches on the surface of the other six steel balls, and no macroscopic peeling phenomenon is found, as shown in Figure 3.

The cage is separated into two halves, the surface is silver white, and the worn part is copper yellow. The nine rivets of the cage on the side of the driving bevel gear (the rivet head is flat) are not dislodged. There are slight circumferential wear marks on the outer circular surface of the cage, and the corners of the pocket hole and the mating surface of the cage are severely worn, of which two mating surfaces have been completely polished. Three rivets are retained on the cage on the side of the nut (the rivet head is in a circular shape), and the remaining six have been completely removed from the rivet hole. Two rivets have been collected. The whole circle of the fitting surface and pocket hole of the cage are severely worn (Fig. 4).

The 9 rivets in the whole circle of the cage are broken in the rivet hole on the side of the driving bevel gear. Take out the 2 rivets with wear on the fitting surface for macroscopic observation. The surface of the rivets is dark gray, and the length is 5.4mm and 5.8mm respectively (including the rivet head). The lock washer is black as a whole, with macroscopic plastic deformation. The circumferential wear marks are visible on the upper and lower end faces. The two short claws have obvious circumferential wear. The two long claws with 180 ° distribution break along the root. The section is rough, and the wear and scratch are serious.
2. Dimension measurement
The dimension of the faulty parts and related parts was measured. Except for the diameter of the inner hole of the bearing seat cover, the other measurement results were qualified.
3. Metallurgical analysis
Metallographic inspection, composition inspection, hardness inspection, etc. were carried out for the faulty parts, and the conclusions are as follows:
① The material and metallurgical quality of the inner and outer rings and balls of the bevel drive gear bearing of the oblique transmission are normal, and the chemical composition of the rivets, cages and stop washers meet the requirements of the corresponding technical conditions.
② The bearing rivet of the bevel drive gear is the first broken part, and the fracture property is fatigue. The fatigue starts from the surface of the rivet. Broken rivets caused cage separation and bearing wear failure. The fracture nature of the lock washer is overload.
