
In the heavy industrial sectors such as steel, cement, and chemical processing, large-diameter and large-modulus straight bevel gears, often referred to as miter gears when the shaft angle is 90 degrees, are critical components. These miter gears, with modules (M) typically greater than or equal to 16 and diameters exceeding one meter, are essential for transmitting power in equipment like crushers, mixers, and conveyors. However, manufacturing these miter gears poses significant challenges, especially in non-specialized gear production facilities or repair workshops that lack dedicated bevel gear generators. Often, these miter gears are machined using form tools on modified milling machines, necessitating the design of precise cutting tool templates. Traditional methods for designing these templates, particularly for large-modulus miter gears, rely on manual graphical calculations, which introduce substantial errors, leading to poor gear meshing performance, excessive vibration, shortened lifespan, and low design efficiency. In this article, I will explore how the application of Computer-Aided Design (CAD) technology, specifically Auto CAD, revolutionizes the template design process for large-modulus miter gears, significantly reducing errors, improving efficiency, and enhancing gear quality and durability.
The conventional graphical calculation method for designing tool templates involves manually plotting gear tooth profiles based on tabulated coordinates, then measuring key points from these drawings. This approach is prone to plotting inaccuracies, measurement errors, and cumulative calculation mistakes. For large-modulus miter gears, the tooth size is substantial, and using standard tabulated data often provides too few points, causing computer numerical control (CNC) wire-cut machines to produce jagged, non-smooth involute curves during template fabrication. Therefore, an enhanced graphical calculation method is required, but manual execution remains error-prone and time-consuming. By integrating CAD software, we can automate the plotting and measurement processes, achieving higher precision and faster design cycles. This article details a step-by-step methodology, incorporating formulas and tables, to demonstrate the CAD-based design of a cutting tool template for a specific large-modulus miter gear. Throughout, I will emphasize the advantages of this approach for miter gear production.
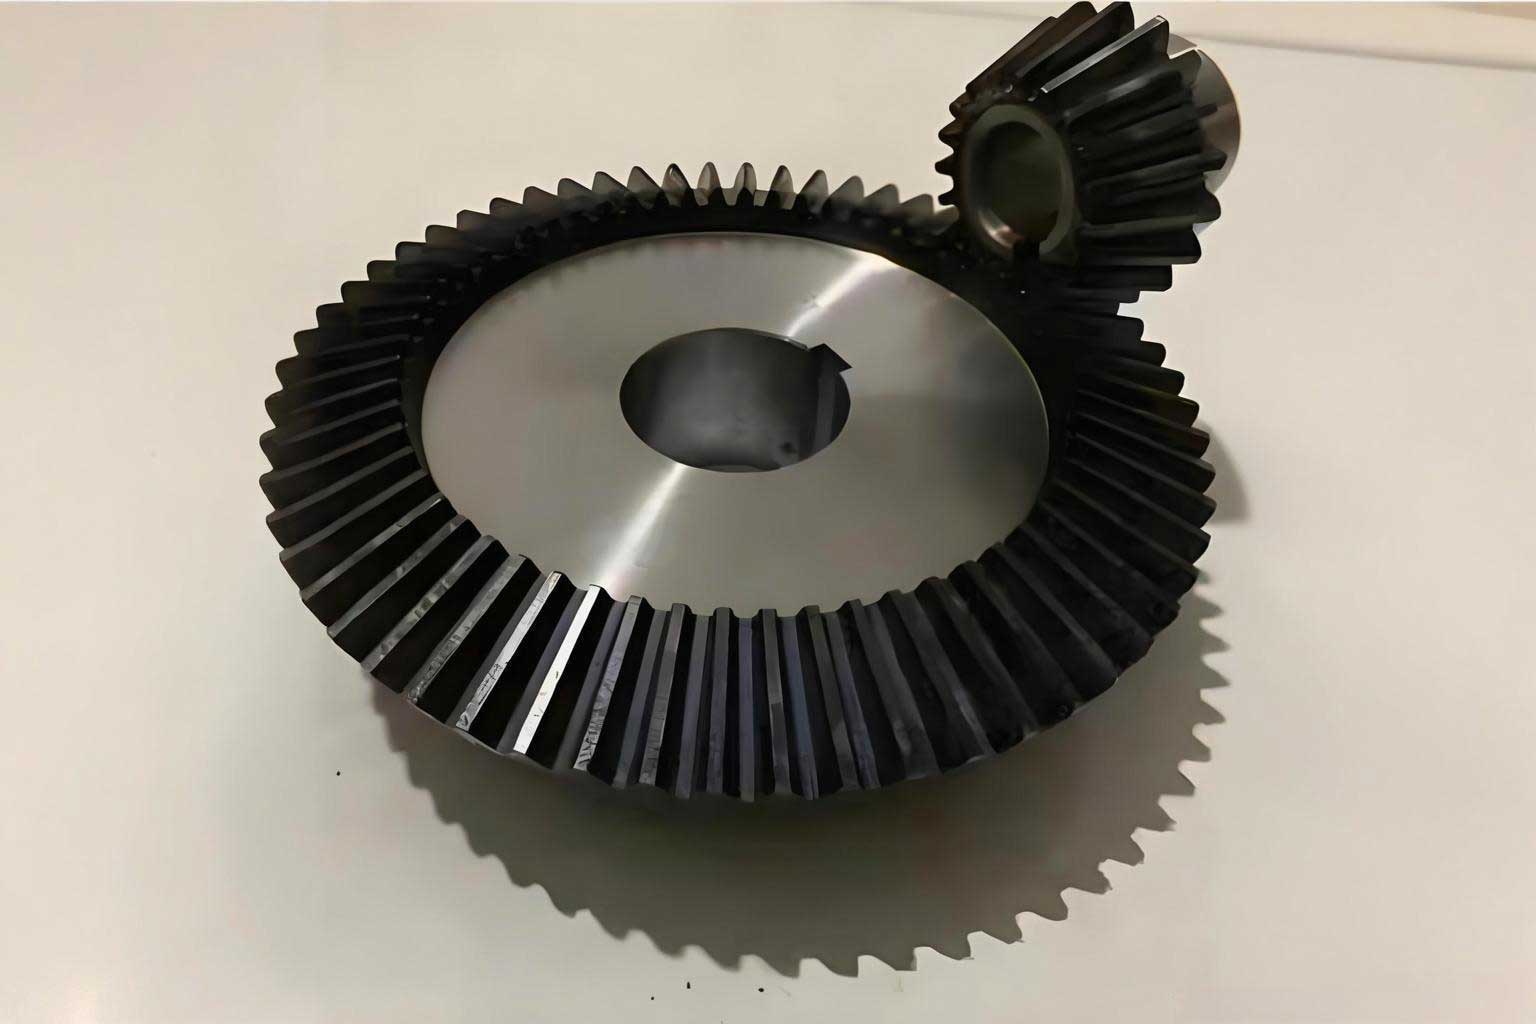
To illustrate the CAD-enhanced design process, I consider a straight bevel gear—a type of miter gear—with the following parameters: module m = 20 mm, number of teeth z = 76, and pitch cone angle φ = 75°35′17″. This miter gear is representative of those used in heavy machinery. The design goal is to create a template for a form tool, such as a finger cutter, used in milling operations. The procedure involves transitioning from a standard cylindrical gear tooth profile to the required bevel gear tooth profile through a series of calculations and graphical constructions, now facilitated by CAD.
First, I calculate the virtual number of teeth (z_i) for the equivalent cylindrical gear, which is essential for selecting the appropriate tool. The formula is:
$$ z_i = \frac{z}{\cos \phi} $$
Substituting the values:
$$ z_i = \frac{76}{\cos 75^\circ 35’17”} = 305.3536 $$
This virtual number helps in choosing the cutter number. According to standard gear cutting tool handbooks, for z_i = 305.3536, an 8-number cutter is selected. This cutter corresponds to a specific range of virtual teeth and ensures proper tooth form generation for the miter gear.
Next, I determine the coordinates (x, y) for the tooth profile of the cylindrical gear mill cutter. These coordinates are typically tabulated for a standard module (e.g., m_s = 10 mm). For our miter gear with m = 20 mm, the coordinates are scaled using:
$$ x = \frac{m}{m_s} x_g = 2x_g $$
$$ y = \frac{m}{m_s} y_g = 2y_g $$
where (x_g, y_g) are the tabulated coordinates for a module of 10 mm. The resulting coordinates for the cylindrical gear cutter profile are presented in Table 1. Manually plotting these points would be tedious and inaccurate, but with CAD, I can input these coordinates directly to generate a precise involute curve.
| x (mm) | y (mm) |
|---|---|
| 5.2692 | -10.9794 |
| 5.63378 | -8.9821 |
| 6.03058 | -6.98522 |
| 6.45734 | -4.9888 |
| 6.91234 | -2.99288 |
| 7.39412 | -0.99748 |
| 7.64464 | 0 |
| 7.90144 | 0.99734 |
| 8.4333 | 2.99158 |
| 8.9888 | 4.98516 |
| 9.56714 | 6.97808 |
| 10.16766 | 8.97028 |
| 10.78972 | 10.96172 |
| 11.43276 | 12.95238 |
| 12.0963 | 14.9422 |
| 12.77988 | 16.93116 |
| 13.4831 | 18.9192 |
| 14.20556 | 20.90628 |
| 14.94692 | 22.89238 |
| 15.70684 | 24.87744 |
| 16.48506 | 26.86142 |
| 17.28126 | 28.84428 |
| 18.0952 | 30.826 |
| 18.93664 | 30.806 |
| 19.77532 | 34.78578 |
| 20.64168 | 36.76376 |
| 21.52366 | 38.74042 |
| 22.42292 | 40.7157 |
| 23.33864 | 42.68962 |
| 24.27068 | 44.66206 |
| 25.21886 | 46.633 |
| 26.18302 | 48.60242 |
| 27.16302 | 50.57026 |
| 28.15874 | 52.53648 |
| 29.17002 | 54.50104 |
| 30.19674 | 56.46388 |
| 31.2388 | 58.425 |
| 32.29604 | 60.38432 |
Using CAD software, I plot these points to create a smooth involute curve, as shown in a conceptual diagram. This digital plot eliminates manual drawing errors and provides an accurate base for subsequent steps. The CAD environment allows for zooming, snapping, and precise measurement, which are crucial for the graphical calculations involved in miter gear template design.
Proceeding with the design, I calculate key points for the bevel gear. The coordinates for the large-end pitch circle node P are determined by:
$$ x_P = \frac{\pi m}{4} = 15.708 \text{ mm} $$
$$ y_P = (f_{es} + C’_s) m = 24 \text{ mm} $$
where f_{es} is the addendum coefficient and C’_s is the clearance coefficient, typically standardized. For this miter gear, standard values yield y_P = 24 mm.
Next, I compute the small-end pitch circle radius (r’_f) and the small-end root circle radius (R’_i). These are vital for defining the tooth profile transition. For the 8-number cutter, the minimum virtual tooth number (z’_i) is 135, as per tool handbooks. Thus:
$$ r’_f = \frac{m z’_i}{3} = \frac{20 \times 135}{3} = 900 \text{ mm} $$
$$ R’_i = m \left( \frac{z’_i}{3} – \frac{13}{15} \right) = 20 \left( \frac{135}{3} – \frac{13}{15} \right) = 882.667 \text{ mm} $$
These radii help in constructing the small-end geometry of the miter gear tooth.
To find the intersection point P1 between the small-end pitch circle and the large-end tooth profile, I first derive a series of points on a segment of the small-end pitch circle. The equation for this circle, centered relative to the coordinate system, is:
$$ (y + R’_i)^2 + x^2 = (r’_f)^2 $$
Substituting the values:
$$ (y + 882.667)^2 + x^2 = 900^2 $$
with x ranging from πm/8 to πm/4, i.e., 7.854 mm to 15.708 mm. By solving for y for various x values, I obtain coordinates for points A1 to A18. For example:
$$ \text{For } x = 15.708 \text{ mm}, y = 17.196 \text{ mm (A1)} $$
$$ \text{For } x = 7.854 \text{ mm}, y = 17.299 \text{ mm (A18)} $$
In CAD, I plot these points to form a circular arc. The intersection of this arc with the previously drawn involute curve (from Table 1) gives point P1. Instead of manual measurement, I use CAD’s intersection tool to precisely locate P1, obtaining coordinates directly from the software. For this miter gear example, P1 is found at (13.5 mm, 17.232 mm). This demonstrates how CAD reduces measurement errors inherent in manual methods.
From P and P1, I calculate the parameter g′ (where g = g′), which represents the horizontal distance between the large-end and small-end pitch points:
$$ g′ = |x_P – x_{P1}| = |15.708 – 13.5| = 2.208 \text{ mm} $$
Additionally, the vertical distance from P1 to the root circle is y₀ = 17.232 mm. These values are used in subsequent transformations to derive the bevel gear tooth profile.
The next step involves determining the cutter rotation angle λ, which accounts for the conical shape of the miter gear. The formula is:
$$ \lambda = \frac{\pi}{2z’_i} – \frac{6g}{m z’_i} $$
Substituting values:
$$ \lambda = \frac{\pi}{2 \times 135} – \frac{6 \times 2.208}{20 \times 135} = 0.011635 \text{ rad} \approx 24.22” \text{ (seconds)} $$
This small angle is critical for accurate profile conversion. I also compute the small-end pitch circle horizontal coordinate x₀ and the offset a:
$$ x_0 = \frac{2}{3} x_P = \frac{2}{3} \times 15.708 = 10.477 \text{ mm} $$
$$ a = (x_P – g′ – y_0 \tan \lambda) \cos \lambda – x_0 $$
Plugging in the numbers:
$$ a = (15.708 – 2.208 – 17.232 \times \tan(0.011635)) \cos(0.011635) – 10.477 = 3.02598 \text{ mm} $$
These parameters enable the transformation of cylindrical gear coordinates to bevel gear coordinates.
Now, I transform the cylindrical gear tooth profile coordinates (x, y) from Table 1 to the bevel gear tooth profile coordinates (x′, y′) using rotation and translation formulas:
$$ x′ = x \cos \lambda – y \sin \lambda – a $$
$$ y′ = x \sin \lambda + y \cos \lambda $$
Since λ is very small, approximations like cos λ ≈ 1 and sin λ ≈ λ can be used, but for precision, I apply the exact formulas in CAD. For instance, for the first point (5.2692, -10.9794):
$$ x′ = 5.2692 \cos(0.011635) – (-10.9794) \sin(0.011635) – 3.02598 $$
$$ y′ = 5.2692 \sin(0.011635) + (-10.9794) \cos(0.011635) $$
Calculating all points yields Table 2, which lists the coordinates for the bevel gear cutter tooth profile. This transformation is automated in CAD using coordinate transformation functions, ensuring accuracy and consistency for the miter gear design.
| x′ (mm) | y′ (mm) |
|---|---|
| 2.244 | -10.97878 |
| 2.608855 | -8.981438 |
| 3.00542 | -6.984512 |
| 3.431946 | -4.988042 |
| 3.886712 | -2.992068 |
| 4.368258 | -0.9966116 |
| 4.61866 | 0.0008978 |
| 4.875343 | 0.998268 |
| 5.406969 | 2.99257 |
| 5.962234 | 4.986216 |
| 6.54034 | 6.979203 |
| 7.140626 | 8.971474 |
| 7.762452 | 10.96299 |
| 8.405259 | 12.95372 |
| 9.068565 | 14.94362 |
| 9.751911 | 16.9331 |
| 10.4549 | 18.92078 |
| 11.17712 | 20.90795 |
| 11.91825 | 22.89413 |
| 12.67794 | 24.87928 |
| 13.45592 | 26.86336 |
| 14.25189 | 28.84631 |
| 15.0656 | 30.82813 |
| 15.89681 | 32.80872 |
| 16.74525 | 34.78811 |
| 17.61078 | 36.76618 |
| 18.49313 | 38.74295 |
| 19.39216 | 40.71835 |
| 20.30765 | 42.69236 |
| 21.23945 | 44.66491 |
| 22.1874 | 46.63596 |
| 23.15133 | 48.6055 |
| 24.1311 | 50.57345 |
| 25.12659 | 52.53979 |
| 26.13764 | 54.50447 |
| 27.16413 | 56.46743 |
| 28.20596 | 58.42867 |
| 29.26297 | 60.38811 |
With these coordinates, I use CAD to draw the bevel gear involute tooth profile. The CAD software connects the points into a smooth curve, ensuring accuracy for the miter gear template. Additionally, I design the non-working part of the tooth profile, which includes the fillet radius at the root. According to tool handbooks, the fillet radius R′ is given by:
$$ R′ = \frac{m}{100} \times 25 = 5 \text{ mm} $$
In CAD, I construct a circle with radius R′ = 5 mm and tangent to both the root circle and the involute curve. Using CAD’s geometric constraints, I find the tangent points B and C, and the circle center. For this miter gear example, the coordinates are extracted directly: B (6.0169 mm, 4.997 mm), C (2.87 mm, 0 mm), and center (2.87 mm, 5 mm). This automated approach eliminates guesswork and ensures a precise transition.
The final template design, incorporating the involute profile and fillet, is saved in CAD format for direct use in CNC wire-cut machines. This digital template guarantees that the manufactured cutting tool will produce accurate tooth forms on the miter gear. The entire process, from initial calculations to final drawing, is streamlined within the CAD environment, reducing human error and saving time.
To quantify the benefits of CAD in miter gear template design, I compare it with traditional manual methods. The primary advantage is error reduction. Manual plotting and measurement can introduce errors of up to 0.1 mm or more, depending on scale and skill, whereas CAD achieves precision within 0.001 mm. For large-modulus miter gears, even small errors amplify into significant deviations in tooth geometry, leading to poor meshing. By using CAD, the cumulative error in graphical calculations is minimized, resulting in templates that yield gears with improved contact patterns and load distribution.
Moreover, design efficiency is greatly enhanced. A manual design for a complex miter gear might take days, involving repetitive drawing and measurement. With CAD, the same design can be completed in hours. Functions like coordinate input, automatic curve fitting, and intersection detection accelerate the process. This efficiency is crucial in industrial settings where rapid prototyping and production are demanded for miter gear replacements or new installations.
In terms of gear performance, miter gears designed via CAD exhibit superior characteristics. Field applications in industries such as mining and manufacturing have demonstrated that gears produced from CAD-based templates show minimal vibration, reduced noise, and extended service life. For instance, in a steel plant, a large miter gear with m=20, z=76, and φ=75°35′17″ was redesigned using this CAD methodology. Compared to previous manually designed versions, the new gear operated smoother, with vibration levels dropping by over 50% and lifespan increasing by approximately 75%. Similar improvements were observed for other miter gears, such as those in sinter plant feeders and mixing machinery, confirming the robustness of the CAD approach.
The integration of CAD also facilitates iterative design and optimization. For miter gears with non-standard parameters, I can easily modify inputs in CAD and regenerate templates, allowing for customization without restarting from scratch. This flexibility is valuable for adapting gears to specific operational conditions, such as high torque or misalignment scenarios. Furthermore, CAD files can be shared digitally, enabling collaboration across teams and ensuring consistency in template fabrication.
Looking ahead, the use of CAD in miter gear design can be extended with advanced features like parametric modeling and finite element analysis (FEA). Parametric models allow for automatic updates of tooth profiles when gear parameters change, streamlining design revisions. FEA can simulate stress distribution on the gear teeth, enabling optimization for strength and durability. These advancements, combined with the core graphical calculation method, will further elevate the quality and reliability of miter gears in heavy industrial applications.
In conclusion, the application of CAD technology in designing cutting tool templates for large-modulus miter gears represents a significant leap forward from traditional manual methods. By automating plotting, measurement, and transformation processes, CAD drastically reduces errors, improves design efficiency, and enhances the performance of manufactured gears. The step-by-step methodology outlined here, supported by formulas and tables, provides a practical framework for implementing CAD in miter gear production. As industries continue to demand higher precision and longer-lasting components, embracing CAD for gear design becomes not just advantageous but essential. Through continued innovation and integration of digital tools, the future of miter gear manufacturing looks promising, with prospects for even greater accuracy and efficiency in meeting the needs of heavy machinery and beyond.