
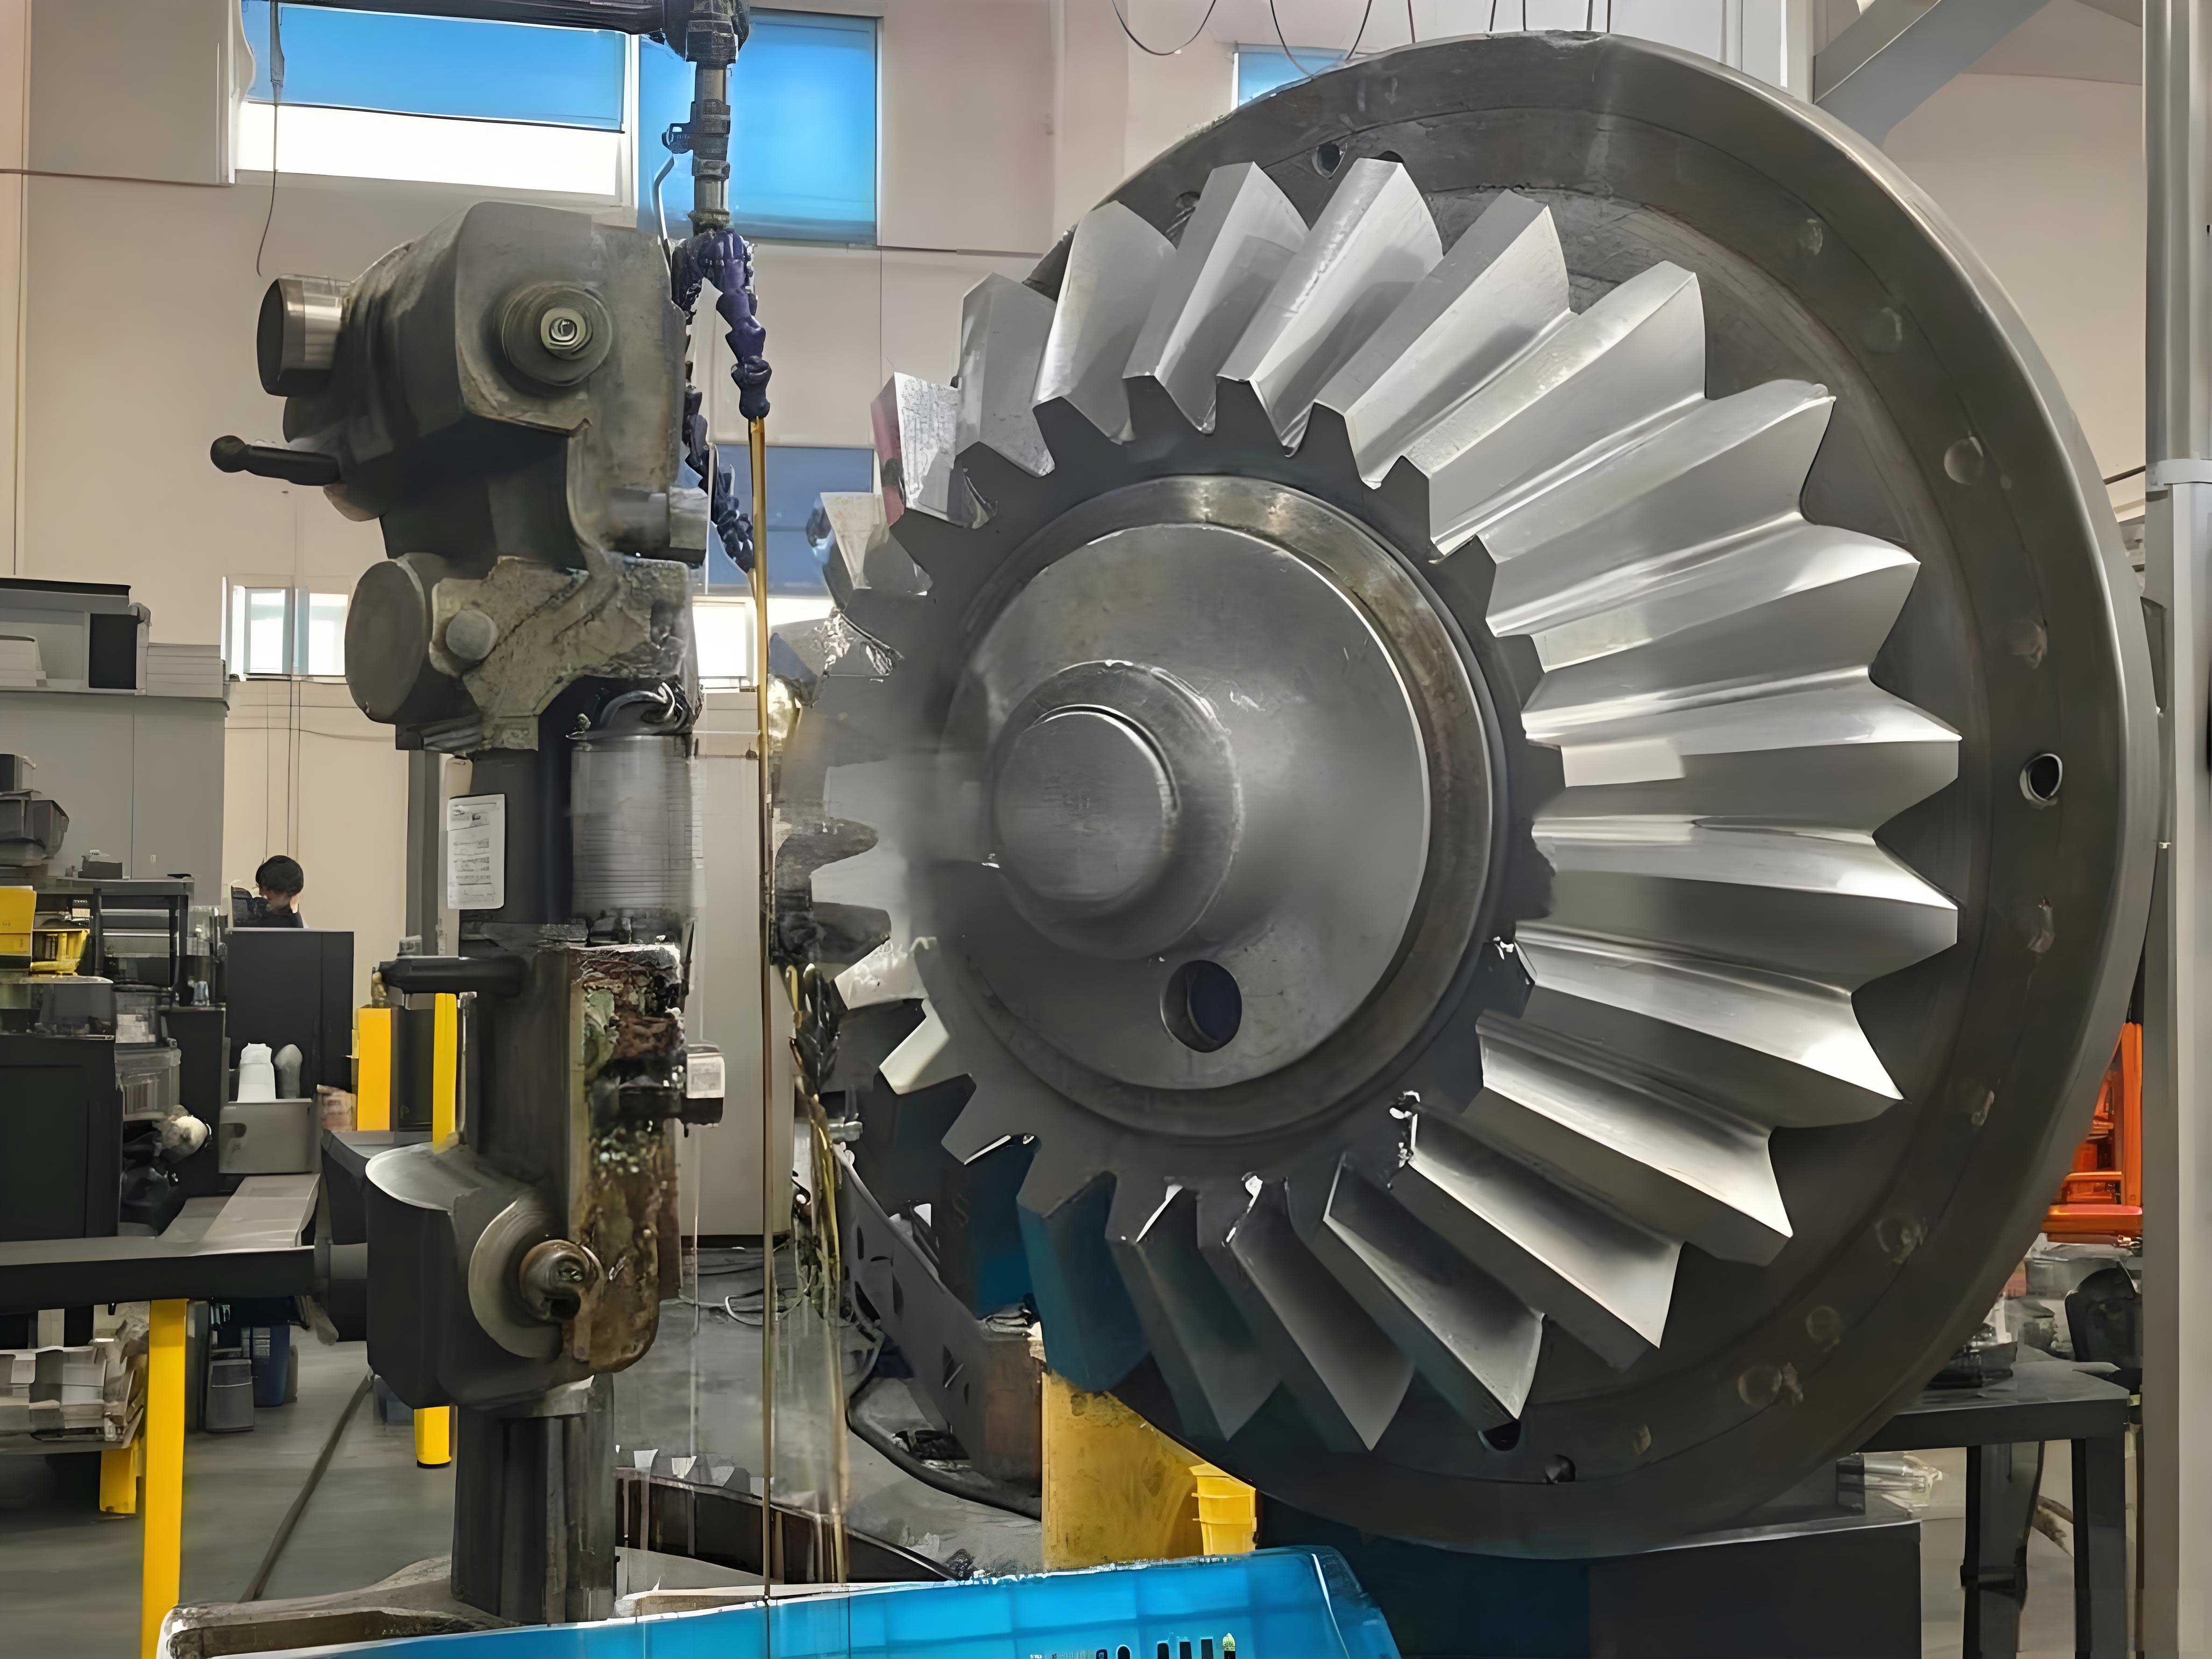
In the realm of heavy machinery, the manufacturing of large bevel gears, particularly large miter gears where shaft axes intersect at 90 degrees, presents unique challenges. My extensive experience in gear manufacturing has shown that for特大规格 (very large规格) straight bevel gears operating at low speeds, form milling with a指形铣刀 (finger-type milling cutter) remains a prevalent and economically viable method. This preference stems primarily from two factors: the significantly higher production efficiency and lower cost compared to traditional gear shaping or generation methods, and the acute scarcity of ultra-large gear generating machines capable of handling such dimensions. This article will delve into the fundamental principles, critical design methodologies for cutter profiles, and practical strategies for managing inherent machining errors in the form milling of large miter gears.
1. The Fundamental Principle of Form Milling for Bevel Gears
The core principle of form milling, as implemented on machines like the OKU50铣齿机 (gear milling machine), involves a specific spatial relationship between the rotating指形铣刀 (finger cutter) and the workpiece. The axis of rotation of the finger cutter and the axis of the gear blank lie in the same plane and intersect. After one tooth space is completely milled, the workpiece is indexed automatically to machine the next tooth space. A crucial adjustable parameter is the angle between the workpiece axis and the feed direction ‘S’ of the cutter. This setup is illustrated in the following conceptual diagram.
This angular adjustment alters the depth of cut at the heel (large end) and toe (small end) of the gear tooth. However, a fundamental limitation arises: the tooth profile generated by a single-point cutting tool (or a form cutter) is identical at all points along the tooth length. This contradicts the essential geometry of a bevel gear, where the module (and consequently the tooth profile) varies continuously from the large end to the small end. The large end has a larger module, while the small end has a smaller module, following the关系 (relationship):
$$ m_{large} = \frac{R}{R} m = m, \quad m_{small} = \frac{R – b}{R} m $$
where $m$ is the module at the large end, $R$ is the outer cone distance (pitch cone radius), and $b$ is the face width.
Therefore, compelling a single, constant cutter profile to satisfy the differing meshing requirements at the two ends of a miter gear is intrinsically problematic. The resultant tooth form is only an approximation of the true involute profile required for conjugate action. Consequently, form milling is categorically an approximate machining method. Its application is justified primarily for low-speed, heavy-duty applications where absolute kinematic accuracy is secondary to robustness and manufacturability.
2. Design and Analysis of the Finger Cutter Tooth Profile Curve
The heart of achieving a functional form-milled miter gear lies in the intelligent design of the cutter’s tooth profile curve. Based on practical shop-floor methodologies, two principal design approaches are employed: the Mid-Length Module Method and the Paired Design Method. The following analysis, grounded in a typical案例 (case), highlights their differences and applications.
Example Gear Pair Parameters:
$$ m = 45 \text{ mm}, \quad z_1 = 24, \quad z_2 = 40, \quad R = 1050 \text{ mm}, \quad b = 350 \text{ mm} $$
$$ h_a^* = 1, \quad x = 0, \quad \delta_1 = 30^\circ 58′, \quad \delta_2 = 59^\circ 2′ $$
(Where $z$ is tooth count, $h_a^*$ is addendum coefficient, $x$ is profile shift coefficient, and $\delta$ is pitch cone angle. For a perfect miter gear, $\delta_1 = \delta_2 = 45^\circ$; here we use a general case for illustration.)
2.1 Mid-Length Module Method
This method selects the module at the midpoint of the tooth face width as the reference for designing the cutter profile. The tooth profile will theoretically be correct only at this mid-length section, with maximum profile error and depth-of-cut variation occurring at the large and small ends.
Calculation Steps:
- Small-end Module: $$ m_i = m \frac{R – b}{R} = 45 \times \frac{1050 – 350}{1050} = 30 \text{ mm} $$
- Virtual (Equivalent) Tooth Numbers (for selecting standard cutter profiles):
$$ z_{v1} = \frac{z_1}{\cos \delta_1} = \frac{24}{\cos(30^\circ 58′)} \approx 27.88 \quad \text{(Take } z_{v1} = 28\text{)} $$
$$ z_{v2} = \frac{z_2}{\cos \delta_2} = \frac{40}{\cos(59^\circ 2′)} \approx 77.71 \quad \text{(Take } z_{v2} = 78\text{)} $$ - Mid-Length Module: $$ m_0 = \frac{m + m_i}{2} = \frac{45 + 30}{2} = 37.5 \text{ mm} $$
- The standard tooth profile for both pinion and gear is then calculated for three modules: large-end ($m=45$ mm, profiles $a_1$, $a_2$), mid-length ($m_0=37.5$ mm, profiles $b_1$, $b_2$), and small-end ($m_i=30$ mm, profiles $c_1$, $c_2$).
Profile Error Analysis:
The analysis involves comparing the theoretical profiles at the ends with the profile generated by the mid-length module cutter ($b_1$, $b_2$). A practical adjustment is to conceptually reduce the cutting depth at the small end by $0.2m_i$ and increase it at the large end by $0.2m$ to balance errors.
- Small-End Error: Compare small-end profiles ($c_1$, $c_2$) with cutter profiles ($b_1$, $b_2$). Let $x_{11}$ be the undercut at the pinion tip and $x_{22}$ be the overcut at the gear root in this comparison. Their difference indicates meshing clearance.
$$ \Delta_{11} = x_{22} – x_{11} $$
Similarly, for the other flank: $\Delta_{12} = x_{12} – x_{21}$.
In our example calculation, typical values might yield $\Delta_{11} = -1 \text{ mm}$, indicating potential interference (negative clearance). - Large-End Error: Compare large-end profiles ($a_1$, $a_2$) with cutter profiles ($b_1$, $b_2$). Let $d_{11}$ be the overcut at the pinion tip and $d_{22}$ be the undercut at the gear root.
$$ \Delta_{21} = d_{11} – d_{22} $$
For the other flank: $\Delta_{22} = d_{21} – d_{12}$.
Example values: $\Delta_{21} = 3 \text{ mm}$, $\Delta_{22} = -2 \text{ mm}$.
The distribution of these errors along the active tooth profiles can be mapped, revealing areas where the actual milled tooth space is narrower than the theoretical tooth thickness (potential interference). These areas, often shaded in analysis diagrams, are unacceptable and must be removed via a subsequent corrective milling operation. This corrective milling typically requires four separate single-flank cuts: left and right flanks at the pinion’s small-end tip and large-end root regions. This process is time-consuming and adds cost.
| Location | Error Comparison | Symbolic Difference | Example Value (mm) | Interpretation |
|---|---|---|---|---|
| Small End | Gear Root overcut vs. Pinion Tip undercut | $\Delta_{11} = x_{22} – x_{11}$ | -1.0 | Potential interference (negative clearance) |
| Pinion Root overcut vs. Gear Tip undercut | $\Delta_{12} = x_{12} – x_{21}$ | -1.0 | Potential interference (negative clearance) | |
| Large End | Pinion Tip overcut vs. Gear Root undercut | $\Delta_{21} = d_{11} – d_{22}$ | +3.0 | Excessive clearance |
| Gear Tip overcut vs. Pinion Root undercut | $\Delta_{22} = d_{21} – d_{12}$ | -2.0 | Potential interference (negative clearance) |
2.2 Paired Design Method
This method is an optimization of the Mid-Length Module approach, specifically aimed at eliminating or reducing the need for corrective milling on the pinion. The core idea is to transfer the necessary metal removal from the pinion’s error zones to the mating flanks of the gear during its initial milling. The reference module for designing the cutter can be chosen at any point along the face width, not necessarily the midpoint.
Design Steps and Strategy:
The process starts with an analysis using the Mid-Length Module Method. The error analysis then informs a three-pronged strategy to modify the cutter design for the mating gear to achieve proper meshing without pinion correction:
- Change the Reference Module: Shifting the reference point changes the location along the tooth length where the profile is theoretically exact.
- Adjust Depth of Cut Profile: Intentionally vary the cutting depth along the tooth length during setup—shallower towards the toe and deeper towards the heel relative to the standard depth for the chosen reference module.
- Modify the Cutter Tooth Profile Curve: The selected reference profile (e.g., for $z_v=78$) is intentionally altered—”corrected” in the cutter manufacturing stage—to satisfy large-end meshing requirements while keeping the profile near the reference point largely unchanged.
2.3 Paired Design Example
Let’s outline the corrective logic based on the previous error analysis.
1. Addressing Small-End Interference:
Assuming the initial analysis showed small-end interference ($\Delta_{11}=-1$ mm), we can adjust the setup by increasing the small-end cutting depth by, say, 1.5 mm. This transforms the errors, potentially yielding $\Delta_{11}^{new} = +0.4$ mm and $\Delta_{12}^{new} = +1.8$ mm, thus ensuring positive clearance and avoiding interference at the small end.
2. Compensating for Induced Large-End Errors:
The above adjustment reduces the effective cutting depth at the large end, which might worsen large-end interference (e.g., $\Delta_{22}^{new} = -3.0$ mm). To fix this, the cutter profile for the gear is modified. The original mid-module profile (a虚线/dotted line) is systematically altered to a new profile (a实线/solid line). This modification typically involves adding material to the cutter’s tip region and/or adjusting its flank curvature, which in turn removes more metal from the root and/or flank of the gear tooth, creating the necessary clearance for the pinion’s large-end tooth thickness.
3. Fine-tuning Small-End Clearance:
To ensure adequate backlash at the small end, the cutter profile may also be slightly relieved at its very tip. This ensures the small-end啮合间隙 (meshing clearance) is satisfactory.
The Paired Design Method is iterative and relies heavily on the designer’s experience. It successfully consolidates error compensation into the gear cutter design and setup, often saving the costly corrective milling step for the pinion member of the miter gear pair.
3. Error Compensation Strategies and Practical Considerations
The successful application of form milling for large miter gears hinges on proactive error management. The following table summarizes key compensation strategies derived from the two design methods.
| Design Method | Primary Strategy | Advantages | Disadvantages | Best Suited For |
|---|---|---|---|---|
| Mid-Length Module | Post-milling corrective cuts on pinion (and/or gear). | Conceptually simple. Uses standard or easily calculated cutter profiles. | Additional machining operations increase time and cost. Requires skilled setup for corrective milling. | One-off or very low-volume production; repair work. |
| Paired Design | Pre-compensation via modified cutter design and adjusted machine setup for the gear. | Eliminates/minimizes corrective milling. More efficient for batch production. | Requires sophisticated, iterative design calculation. Needs custom, non-standard cutters. | Batch production of paired gears; when lead time for corrective milling is prohibitive. |
Furthermore, several critical practical considerations must be emphasized, especially when dealing with large miter gears:
- Paired Manufacturing: The methodologies described are fundamentally intended for the simultaneous consideration and manufacturing of a mating pair of bevel gears. They are not suitable for machining a single gear in isolation without knowledge of its mate.
- Common Reference Module: The reference module $m_{ref}$ must be identical for both the pinion and gear cutter designs. It represents the point on both tooth faces where conjugate action is theoretically achieved. Its location is given by a distance $R_{ref}$ from the apex:
$$ R_{ref} = R – k \cdot b $$
where $k$ is a factor between 0 (large end) and 1 (small end). For the mid-length method, $k=0.5$. - Control of Pitch Line Chordal Thickness: During error compensation, the alteration of the cutter profile or cutting depth must be performed with careful attention to the resulting chordal thickness at the pitch line. Excessive variation can lead to improper backlash or weakened teeth. The goal is to minimize change in the pitch line thickness.
- Tip Relief Consideration: For the purpose of profile error comparison and cutter design modification, the top $0.1m$ of the tooth height (from the tip downwards) can be considered as a tip relief or chamfer zone. Minor discrepancies in this region have negligible impact on the functional meshing of large, slow-speed miter gears.
4. Conclusion
Form milling with a finger cutter remains a vital, practical solution for manufacturing large-diameter, low-speed straight bevel and miter gears where capital equipment for generative processes is unavailable or economically unjustified. The process is inherently approximate, but its accuracy can be managed effectively through two principal cutter design philosophies: the Mid-Length Module Method and the Paired Design Method. The former offers simplicity at the cost of additional corrective operations, while the latter integrates error compensation into the initial cutter design and setup, enhancing overall efficiency for batch production.
The key to success lies in a thorough understanding of the geometric mismatches introduced by using a constant-profile tool on a tapered tooth form. By rigorously analyzing profile errors at both the heel and toe, and by strategically employing adjustments in reference module location, machine setup depths, and custom cutter profiles, acceptable meshing performance can be reliably achieved. For engineers managing the production of heavy-duty miter gears, mastering these principles and trade-offs is essential for balancing manufacturing cost, lead time, and final gear performance in demanding industrial applications.