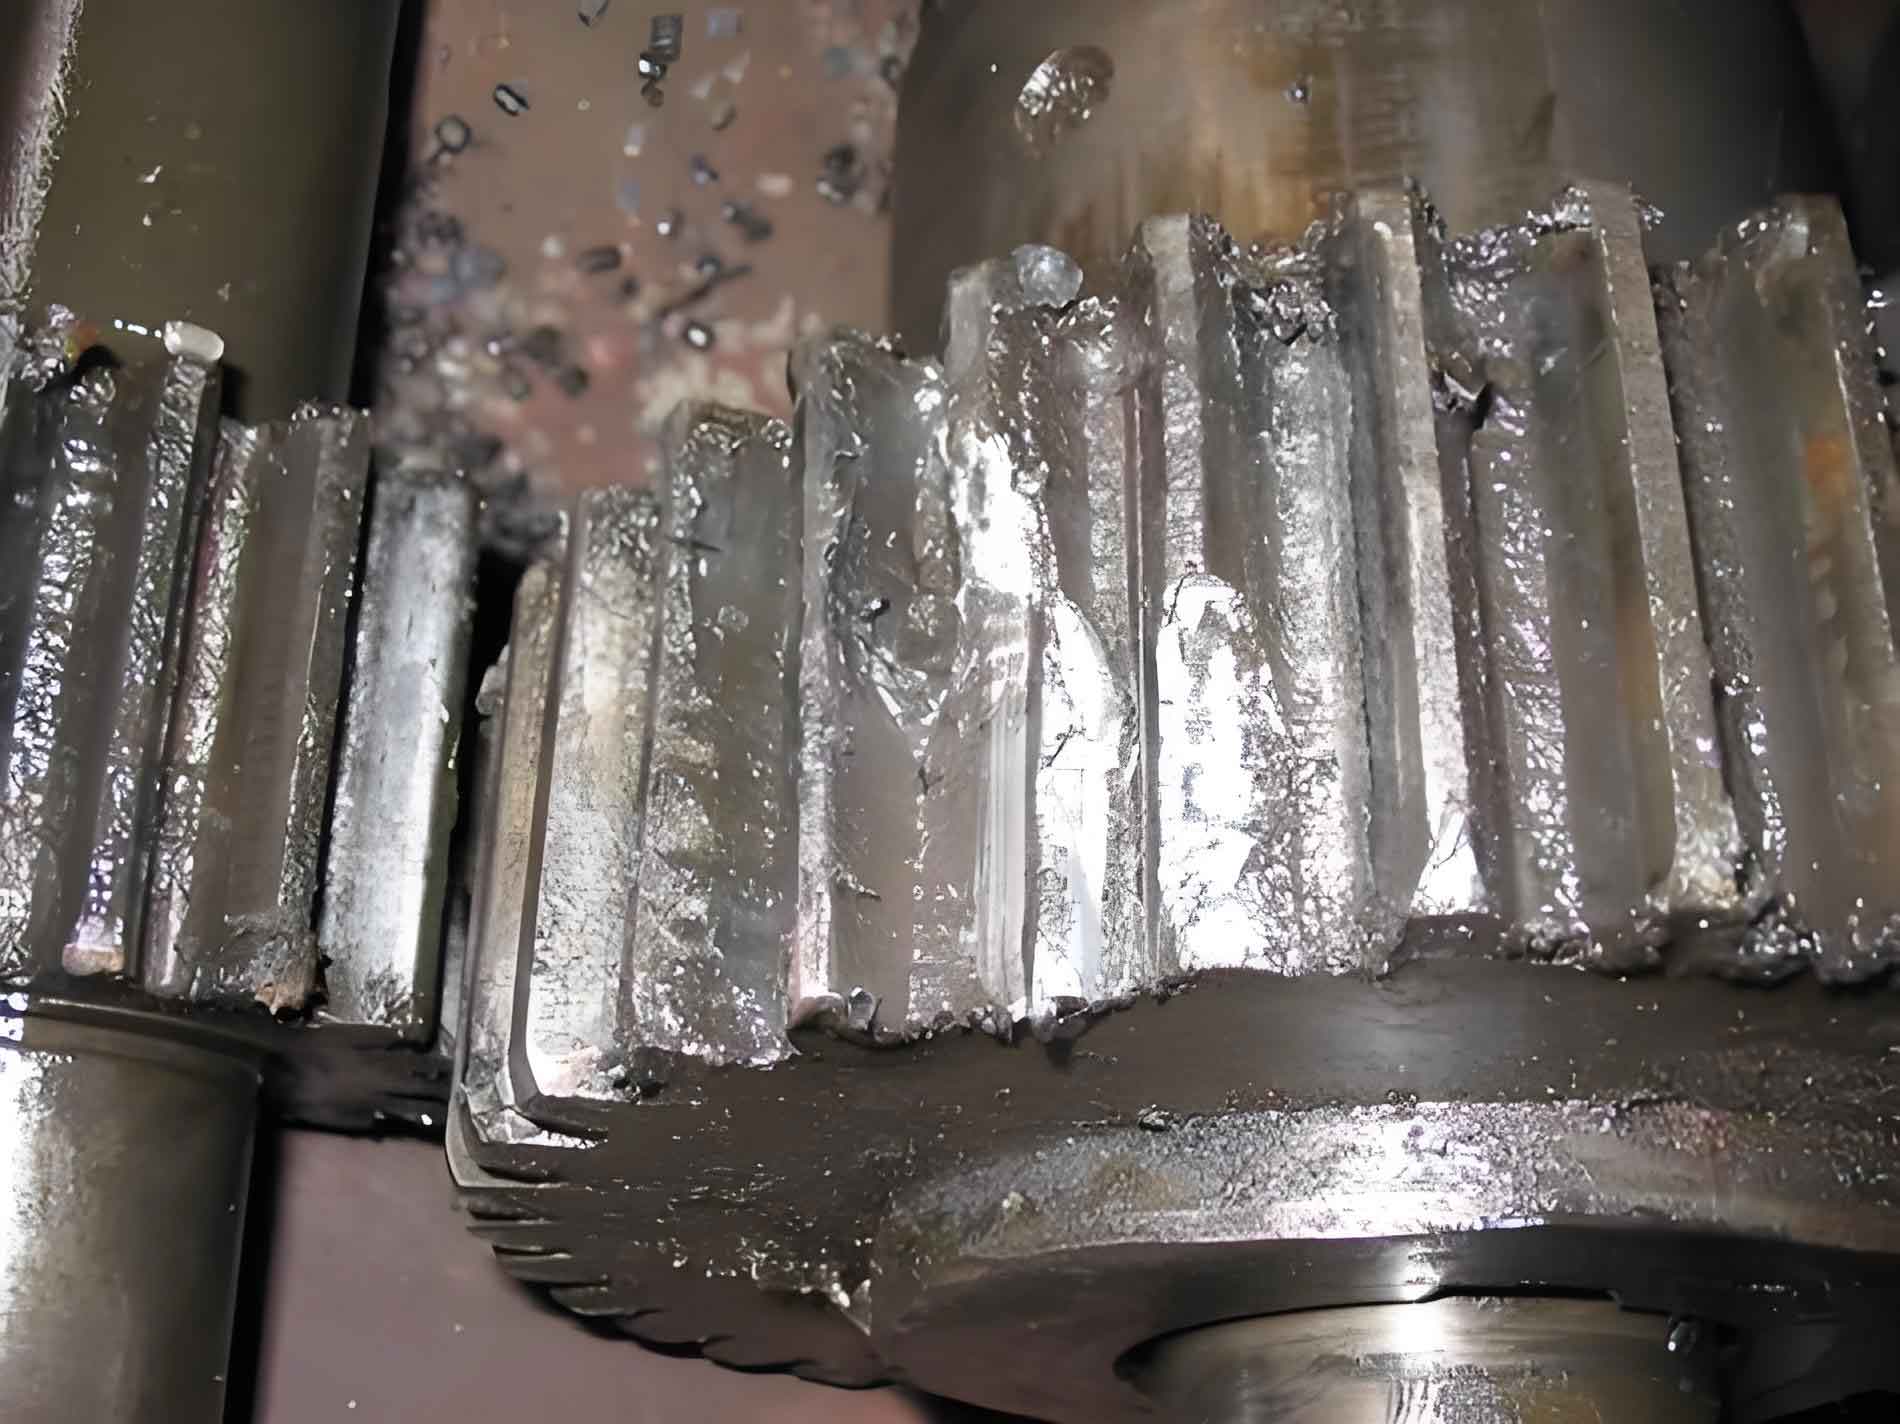
Gears constitute critical components in mechanical systems, where grinding serves as a precision finishing process to correct machining deviations and enhance transmission accuracy. However, improper grinding operations induce thermal damage, with 60-95% of grinding heat instantly transferring to the workpiece surface. This localized overheating beyond critical thresholds causes grinding burns and subsequent grinding cracks – network-like or crescent-shaped fractures severely compromising gear integrity. These grinding cracks typically manifest after severe grinding burns when combined thermal stress, tensile stress, and microstructural stress exceed the material’s fracture strength at the surface.
The formation mechanism involves three distinct microstructural zones: a brittle untempered secondary-quenched cryptocrystalline martensite layer (white-etching layer), an overtempered softened layer, and the base material. The hardness profile exhibits a characteristic high-low-high distribution due to phase transformations during grinding. Surface hardness $H_s$ follows:
$$H_s = H_0 + \Delta H_{quench} – \Delta H_{temper}$$
Where $H_0$ is base hardness, $\Delta H_{quench}$ is hardening from rapid cooling, and $\Delta H_{temper}$ is softening from overtempering. Residual stresses $\sigma_{res}$ develop according to:
$$\sigma_{res} = E \cdot \alpha \cdot \Delta T + \sigma_{trans}$$
With $E$ as Young’s modulus, $\alpha$ the thermal expansion coefficient, $\Delta T$ the thermal gradient, and $\sigma_{trans}$ the transformation stress from martensite formation.

Metallurgical Root Causes of Grinding Cracks
Two failure cases in 17CrNiMo6 steel gears reveal consistent mechanisms. Chemical compositions met GB/T 3077-2015 specifications:
| Element | C | Cr | Ni | Mo | Si | Mn | S | P |
|---|---|---|---|---|---|---|---|---|
| Measured | 0.18 | 1.59 | 1.51 | 0.29 | 0.25 | 0.80 | 0.003 | 0.009 |
| Standard | 0.15-0.21 | 1.50-1.80 | 1.40-1.70 | 0.25-0.35 | ≤0.40 | 0.50-0.90 | ≤0.015 | ≤0.015 |
Microstructural analysis identified critical factors promoting grinding cracks:
- Surface carbon content >0.9 wt% increasing martensite brittleness
- Retained austenite exceeding 20 area%
- Coarse carbide networks acting as stress concentrators
- Insufficient tempering before grinding operations
Hardness gradients confirmed grinding burn signatures:
| Depth (mm) | Non-cracked Surface (HRC) | Cracked Surface (HRC) |
|---|---|---|
| 0.00-0.05 | 60.5 | 64.2 (white layer) |
| 0.10-0.15 | 59.8 | 52.3 (overtempered) |
| 0.30-0.35 | 58.2 | 58.7 |
| 0.50-0.55 | 54.1 | 54.3 |
Thermomechanical Process Modeling
The critical grinding energy density $E_c$ for crack initiation follows:
$$E_c = \frac{F_t \cdot v_s}{a_e \cdot v_w} > K_{IC}^2 / \pi(1-\nu^2)$$
Where $F_t$ is tangential force, $v_s$ is wheel speed, $a_e$ is engagement depth, $v_w$ is workpiece speed, $K_{IC}$ is fracture toughness, and $\nu$ is Poisson’s ratio. Thermal penetration depth $\delta_T$ determines affected zone thickness:
$$\delta_T = \sqrt{\alpha \cdot t_c} \quad \text{with} \quad t_c = \frac{l_c}{v_s} \quad \text{and} \quad l_c = \sqrt{d_e \cdot a_p}$$
Here $\alpha$ is thermal diffusivity, $t_c$ is wheel-contact time, $l_c$ is contact length, $d_e$ is equivalent wheel diameter, and $a_p$ is depth of cut.
Preventive Strategies for Grinding Cracks
Integrated controls across heat treatment and grinding operations effectively eliminate grinding cracks:
| Parameter | Critical Range | Control Method |
|---|---|---|
| Surface Carbon | 0.7-0.9 wt% | Atmosphere carbon potential regulation |
| Retained Austenite | <20 area% | Cryogenic treatment or multiple tempering |
| Martensite Structure | Cryptocrystalline/fine acicular | Optimized quenching rate |
| Grinding Stock | 0.25-0.35 mm/side | Pre-grinding distortion measurement |
| Rough Grinding Depth | <0.12 mm/pass | Real-time current monitoring |
| Coolant Flow | >40 L/min·kW | Nozzle alignment verification |
Implementation requires coordinated process adjustments:
- Heat Treatment Optimization: Surface carbon control through diffusion stages minimizes brittle phases. Double tempering at 180-200°C for 4+ hours reduces residual stresses below critical thresholds: $\sigma_{res} < 0.6\sigma_y$.
- Grinding Parameter Strategy: Initial rough grinding depths must not exceed $a_{p,max}$:
$$a_{p,max} = \frac{0.1 \cdot d_g^{0.25} \cdot K_{IC}^{1.5}}{E^{0.75} \cdot HRC^{1.2}}$$
Where $d_g$ is grain size. Progressive depth reduction from rough to finish grinding prevents localized overheating. - Stress Relief Protocol: When grinding burns are detected, immediate stress relief within 2 hours at 160-180°C for 4 hours prevents delayed cracking through stress relaxation:
$$\frac{d\sigma}{dt} = -A\cdot\sigma^n\cdot\exp\left(-\frac{Q}{RT}\right)$$
With $A$ as material constant, $n$ the stress exponent, $Q$ activation energy, $R$ gas constant, and $T$ temperature.
Industrial Validation
Implementing these measures eliminated grinding cracks in production gears. Process modifications included:
- Reducing grinding depth from 0.18mm to 0.12mm during rough grinding
- Increasing coolant pressure from 0.8MPa to 1.5MPa
- Introducing intermediate stress relief after rough grinding
Post-modification hardness distributions showed elimination of the high-low-high profile, with surface hardness maintained at 60±1 HRC without white layer formation. The grinding cracks occurrence rate dropped from 12.7% to zero in subsequent production batches.
Conclusion
Grinding cracks in carburized gears originate from thermomechanical process interactions where grinding parameters induce surface transformations exceeding material limits. The characteristic high-low-high hardness profile confirms grinding burn damage preceding crack initiation. Successful prevention requires integrated control of carburizing thermodynamics, phase transformation kinetics, and grinding thermomechanics. Maintaining surface carbon below 0.9wt%, retained austenite under 20%, and martensite in cryptocrystalline form establishes crack-resistant substrates. Complementary grinding controls – particularly depth-of-cut limitation and coolant optimization – prevent surface transformations. Real-time thermal monitoring and immediate stress relief upon burn detection provide critical safety margins against grinding cracks. These systematic approaches resolve grinding cracks while maintaining precision gear manufacturing efficiency.
