1. Introduction
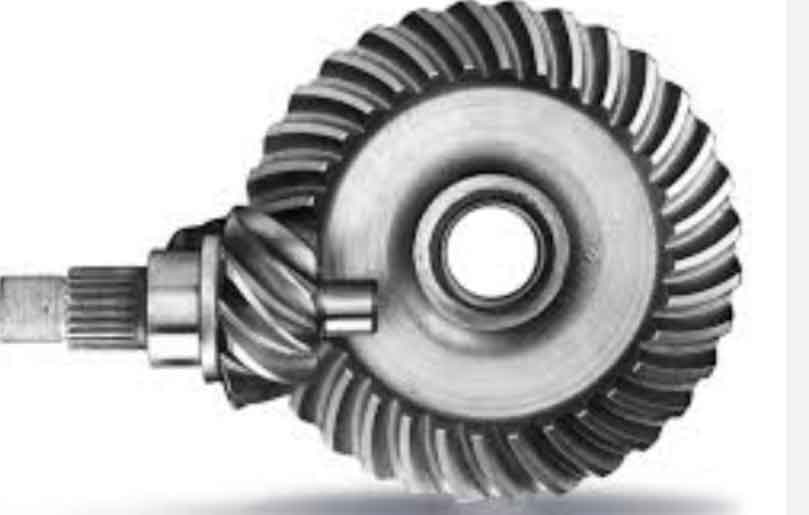
Hypoid gear is widely used in automotive, aerospace, and industrial machinery due to their ability to transmit motion between non-parallel, non-intersecting axes with high load capacity and smooth operation. However, their complex geometry and sensitivity to manufacturing parameters pose significant challenges in achieving optimal meshing performance. This study investigates the relationship between machine tool adjustment parameters and hypoid gear meshing characteristics, focusing on contact trajectory, transmission error (TE), and tooth profile mismatch.
The machining of hypoid gear involves intricate adjustments to parameters such as radial blade position, vertical wheel position, cutter tilt angle, and spiral motion coefficient. Even minor deviations in these parameters can lead to edge contact, noise, and premature wear. While prior research has explored the effects of installation errors and finite element analysis (FEA) on hypoid gear performance, this work emphasizes machine tool parameter optimization through tooth contact analysis (TCA) and mismatch diagram modeling.

2. Mathematical Modeling of Hypoid Gear Tooth Surfaces
2.1 Coordinate Systems and Tool Geometry
The tooth surface of the hypoid gear pinion is generated using a 5-axis CNC machine. Key coordinate systems include:
- Tool coordinate system (Sp): Defines the cutter’s geometry.
- Machine coordinate system (Sm1): Represents the spatial motion of the machine tool.
- Workpiece coordinate system (S1): Fixed to the pinion.
The cutter’s cutting edge is modeled as a conical surface. In Sp, the position vector rp and unit normal vector np are expressed as:rp=(rg1+u1sinα1)cosβ1(rg1+u1sinα1)sinβ1−u1cosα1,np=cosα1cosβ1cosα1sinβ1sinα1
where u1 is the cutter blade parameter, α1 is the blade pressure angle, and β1 is the rotation angle.
2.2 Tooth Surface Generation
The pinion tooth surface r1 in S1 is derived through coordinate transformations and meshing conditions:r1=M1prp,n1=L1pnp
Here, M1p and L1p are transformation matrices accounting for machine tool adjustments. The meshing equation f1=n1⋅∂φ∂r1=0 ensures conjugate motion between the cutter and workpiece.
3. Tooth Contact Analysis (TCA) Model
3.1 Meshing Coordinate Systems
The TCA model evaluates the contact between the pinion and gear in a fixed assembly coordinate system (Sh). Key equations include:
- Pinion surface in Sh:
rh1=Mh1r1,nh1=Lh1n1
- Gear surface in Sh:
rh2=MheMe2r2,nh2=LheLe2n2
3.2 Contact Conditions
The contact trajectory and TE are determined by solving:⎩⎨⎧rh1=rh2nh1=nh2f1=0
This system of equations yields the contact points and transmission error across the meshing cycle.
4. Effects of Machine Tool Parameters on Meshing Performance
4.1 Displacement-Type Parameters
Displacement parameters (e.g., vertical wheel position, radial blade position) primarily influence the contact trajectory’s lengthwise direction.
| Parameter | Direction of Change | Contact Trajectory Shift | TE Change (%) |
|---|---|---|---|
| Vertical Wheel Position (+0.1 mm) | + | Toward toe | 0.42 |
| Vertical Wheel Position (-0.1 mm) | – | Toward heel | 0.33 |
| Radial Blade Position (+0.1 mm) | + | Toward heel | 12.08 |
| Radial Blade Position (-0.1 mm) | – | Toward toe | 23.6 |
| Axial Wheel Position (+0.1 mm) | + | Toward toe | 1.08 |
Key Findings:
- Radial blade position has the strongest impact on TE and contact trajectory.
- Vertical wheel position adjustments are critical for avoiding edge contact.
4.2 Angular-Type Parameters
Angular parameters (e.g., blade pressure angle, cutter tilt angle) affect both lengthwise and profile directions.
| Parameter | Direction of Change | Contact Trajectory Shift | TE Change (%) |
|---|---|---|---|
| Blade Pressure Angle (+0.1°) | + | Toward toe and root | 10.0 |
| Blade Pressure Angle (-0.1°) | – | Toward heel and tip | 14.4 |
| Cutter Tilt Angle (+0.1°) | + | Toward toe | 0.33 |
| Machine Root Angle (+0.1°) | + | Toward heel and root | 5.6 |
Key Findings:
- Blade pressure angle errors cause asymmetric TE changes between drive and coast sides.
- Machine root angle adjustments are effective for correcting profile mismatches.
5. Tooth Profile Mismatch Analysis
5.1 Mismatch Diagram Methodology
The mismatch mijk between theoretical and actual tooth surfaces is calculated as:mijk=(rijk−rij1)⋅nij1
where rij1 and nij1 are the reference surface’s position and normal vectors.
5.2 Parameter-Specific Mismatch Patterns
- Blade Pressure Angle: Induces pressure angle deviations, altering tip/root contact.
- Radial Blade Position: Causes spiral angle errors, shifting contact toward the toe or heel.
- Machine Root Angle: Generates combined pressure-spiral angle mismatches, leading to edge contact.
6. Practical Recommendations for Hypoid Gear Manufacturing
Based on the analysis, the following adjustments are recommended:
| Parameter | Adjustment Strategy | Expected Outcome |
|---|---|---|
| Radial Blade Position | Optimize to balance TE and contact trajectory | Avoid edge contact, reduce noise |
| Blade Pressure Angle | Correct via cutter regrinding or software补偿 | Improve load distribution |
| Machine Root Angle | Fine-tune to align contact toward the center | Enhance durability |
7. Conclusion
This study establishes a comprehensive framework for analyzing the impact of machine tool parameters on hypoid gear meshing performance. Key takeaways include:
- Radial blade position and blade pressure angle are the most sensitive parameters.
- Mismatch diagrams provide直观 insights into tooth profile deviations.
- TCA-driven optimization significantly improves contact patterns and reduces TE.
