
Straight bevel gears form a critical category of power transmission components. In many workshops, especially those lacking dedicated bevel gear generating machines, the form milling method remains a practical solution for single-piece and small-batch production. The process employs simple tooling, a standard milling machine, and a dividing head. However, there is considerable confusion in the published literature regarding the correct cutting strategy, the design of the milling cutter profile, and the calculation of the necessary offsets. In my experience, when Chinese standard bevel gear milling cutters, which are marked with a dot symbol on the end face, are used according to some widely circulated handbooks, the resulting gear accuracy is far from satisfactory. This article presents my personal analysis and recommended practice for achieving reliable results with the standard cutters, based on their actual design principle.
1. The Fundamental Problem: Matching Cutter Profile to Cutting Kinematics
Form milling of straight bevel gears can be performed by more than one kinematic scheme. Each scheme requires a specially designed cutter profile to generate the correct tooth surfaces. The common mistake is to mix these schemes and assume that one cutter can serve all of them. Let us first clarify the two major approaches.
1.1 Two Distinct Cutting Schemes
The first scheme, which is the one for which the Chinese standard dot-marked bevel gear milling cutters are designed, involves the following sequence:
- Align the gear blank with the cutter and rough-mill the tooth slots.
- Shift the blank horizontally along the axis of the milling cutter by a distance S (the so-called offset).
- Rotate the gear blank about its own axis by an angle ω so that the right-side tooth flank is presented to the cutter.
- Precision-mill the right flanks of all slots.
- Then shift the blank in the opposite direction by 2S and rotate it in the reverse direction by 2ω to precision-mill the left flanks.
The second scheme, which appears in many textbooks, recommends tilting the dividing head about an axis perpendicular to the milling machine worktable, rather than rotating the gear blank about its own axis, while also shifting the blank. This kinematic change produces a different relative motion between the cutter and the blank. Consequently, the required cutter profile is not the same as that for the first scheme. If a dot-marked cutter is used in the second scheme, systematic tooth profile errors are introduced. The only correct approach is to use a cutter designed specifically for the chosen kinematics.
Let me emphasize: the dot-marked cutter produced in China follows the first scheme. Its tooth profile is derived from the large-end tooth space geometry, but it is not simply a copy of the theoretical large-end profile. The actual design involves a deliberate rotation of the tooth profile about the pitch point, so that the cutter tooth intersects the small-end theoretical profile at a specific point. This design permits the generated tooth surfaces to approximate the correct geometry across the face width when the offset S is applied as specified.
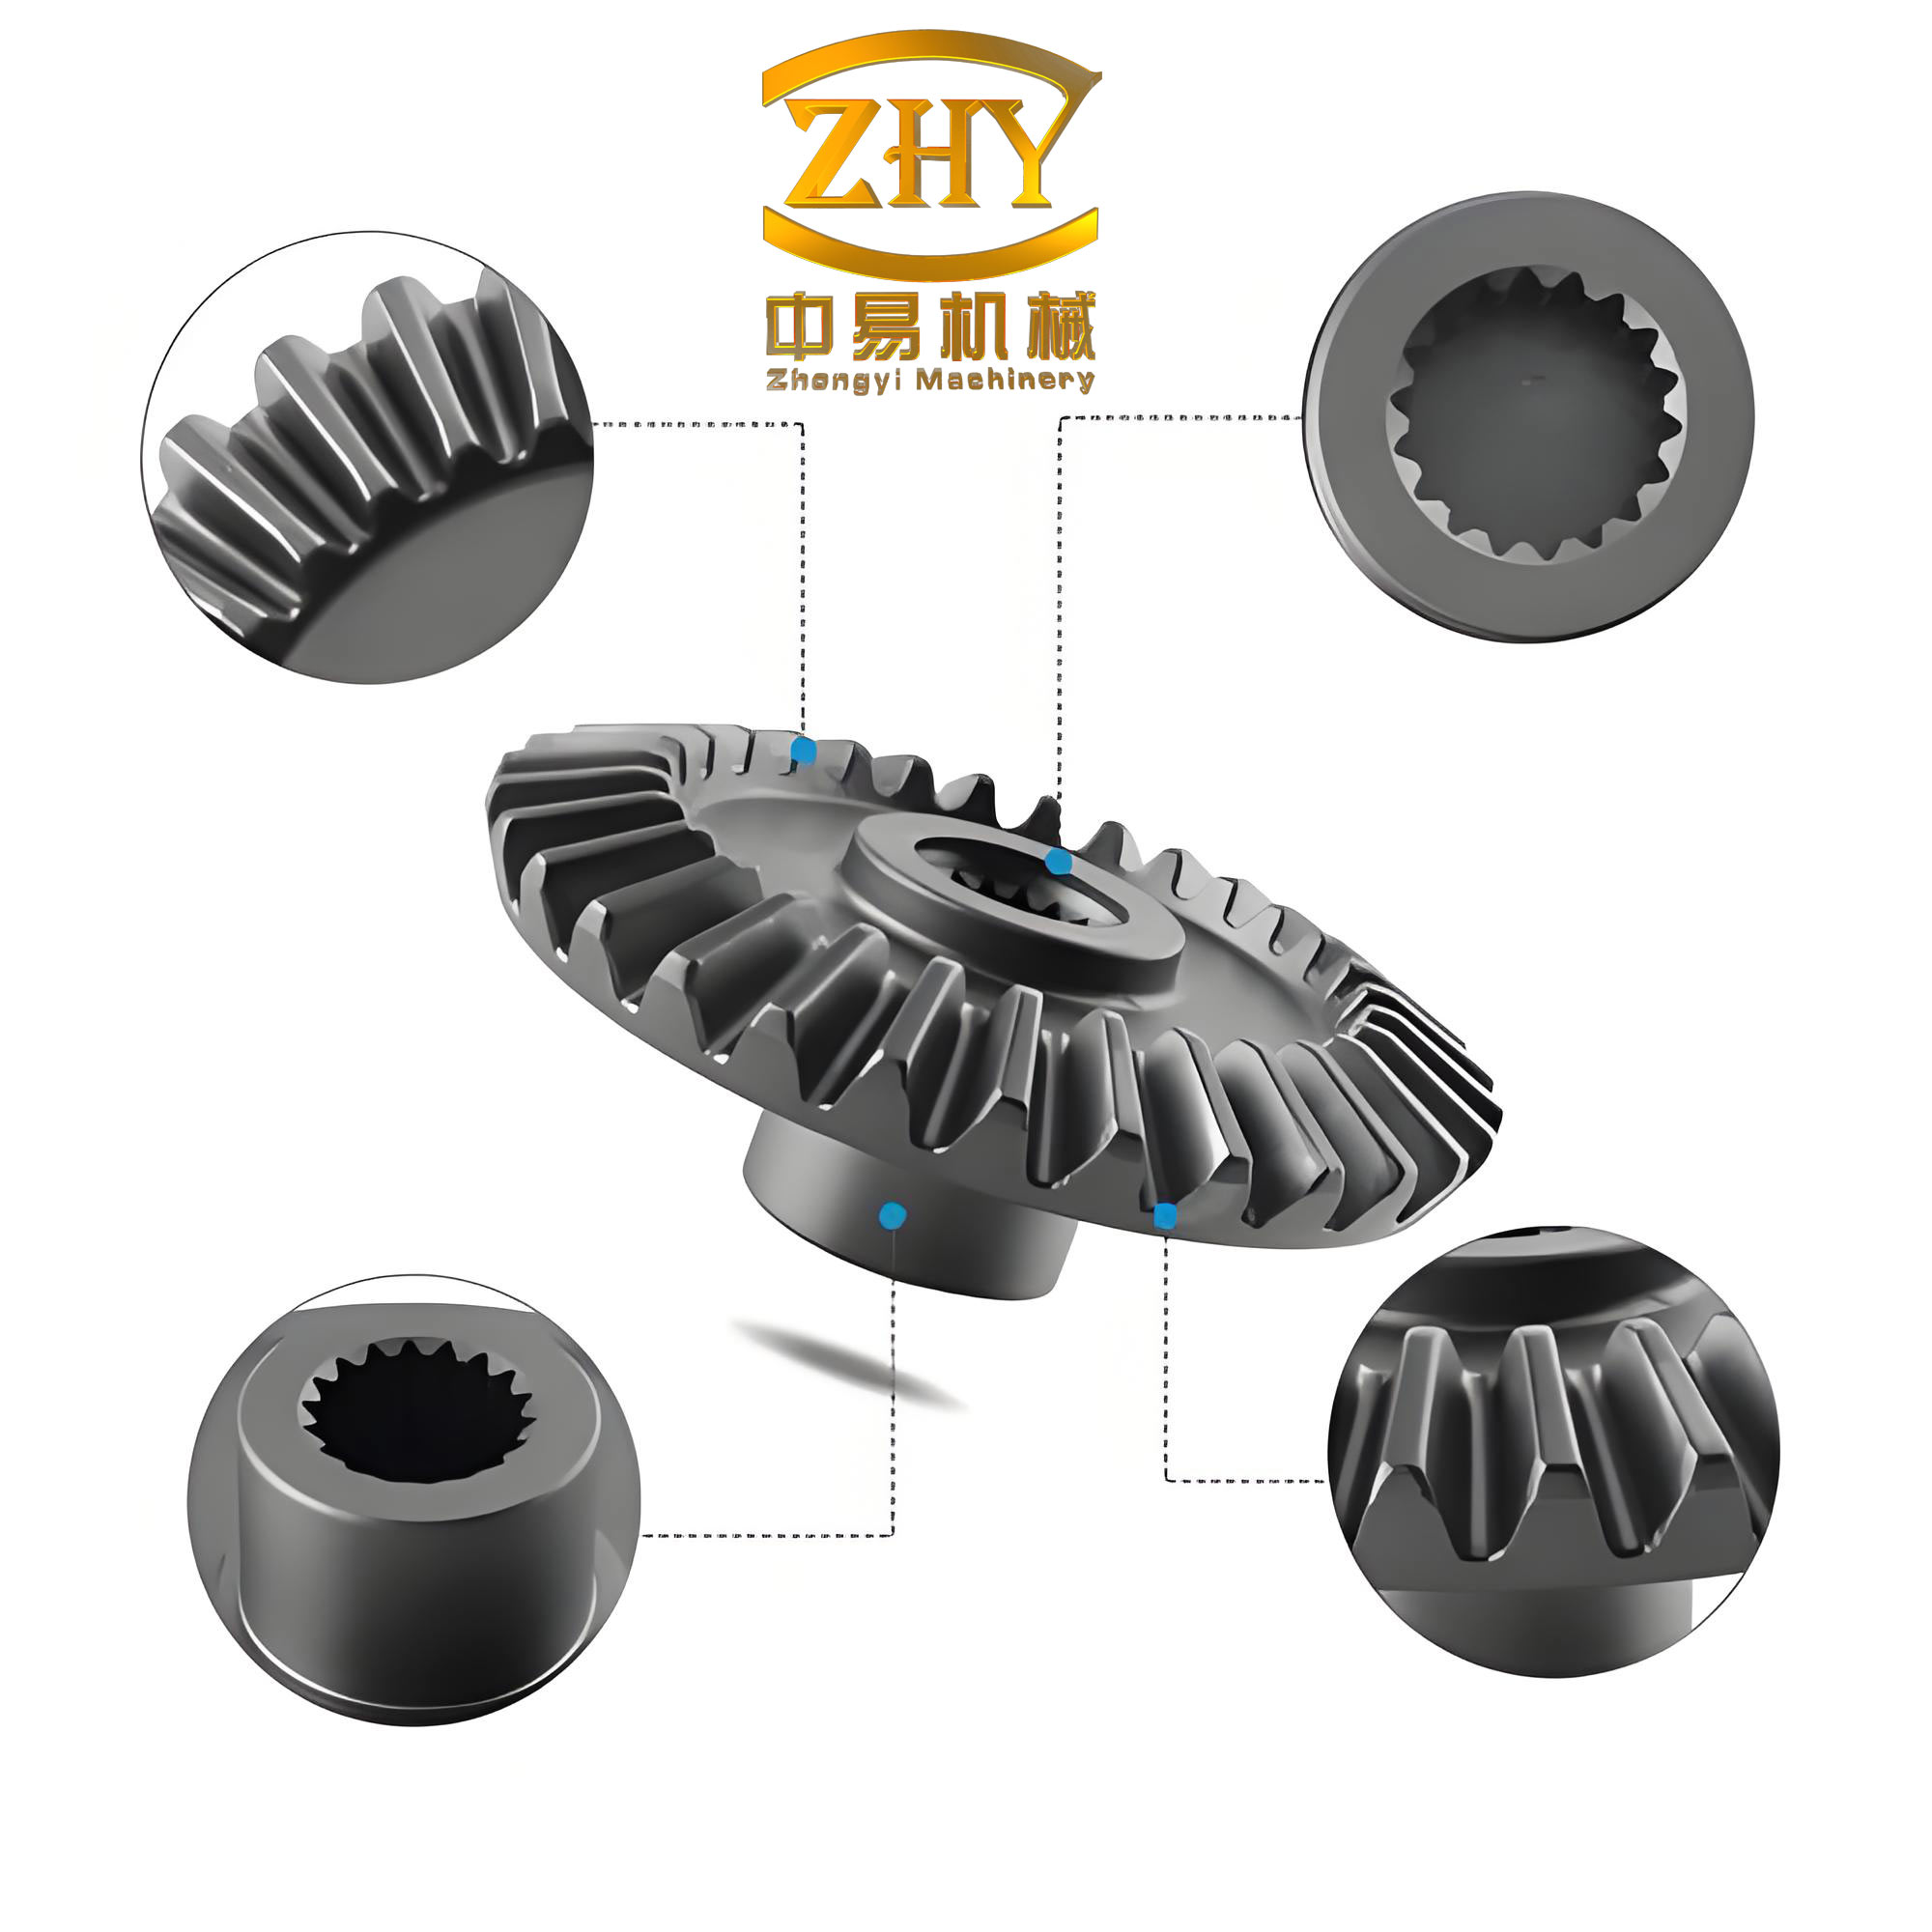
In my analysis of many workshop failures, the leading cause is the incorrect calculation of the offset S. Authors often derive S from the condition that the trace of the tooth line on the pitch cone passes through the cone apex, which is a reasonable expectation for ideal bevel gear geometry. Unfortunately, the standard dot-marked cutter is not designed for that ideal condition. The cutter profile is shifted to a specific reference position, aiming to reduce the small-end tooth thickness error and achieve a constant radial clearance of \(0.2m\) at both ends, where \(m\) is the large-end module. Therefore, the offset must be calculated from the cutter design parameters, not from the gear blank geometry alone.
2. Design Principle of the Standard Bevel Gear Milling Cutter
To understand the offset calculation, we need to examine the geometry of the standard cutter. Figure (inserted above) illustrates the essential idea. Every dot-marked cutter is designed with a nominal equivalent number of teeth \(z_v\) and a rotation angle \(\lambda\). The cutter tooth profile is based on the large-end tooth space of a straight bevel gear having \(z_v\) teeth and the corresponding module \(m_0\). The profile is then rotated by a small angle \(\lambda\) about the pitch point with respect to the radial plane of the gear blank. This rotation is crucial because it makes the cutter tooth thinner at the small end than at the large end, matching the actual tooth taper of a bevel gear.
The most important parameter is the offset \(e\) between the symmetry plane of the cutter tooth profile (when it is placed in its design position) and the axis of the gear blank, measured at the pitch circle. In the design view, \(e\) is the distance from the pitch point on the cutter profile to the radial plane of the blank. It can be expressed as:
$$e = r_{ev} \sin(\eta – \lambda)$$
where \(r_{ev}\) is the pitch circle radius of the equivalent spur gear represented by the cutter’s design tooth number \(z_v\), and \(\eta\) is the angle corresponding to half the angular pitch of that equivalent gear. Since the angular pitch equals \(360^\circ / z_v\), the half-angle is \(180^\circ / z_v\), but in the notation used in the original derivation, the expression is written as:
$$e = \frac{m_0 z_v}{2} \sin\left(\frac{90^\circ}{z_v} – \lambda\right)$$
Here \(m_0\) is the module assigned to the cutter, and \(z_v\) is the design number of teeth. The angle \(\lambda\) depends on the face-width ratio \(\Phi_R = b/R\), where \(b\) is the face width and \(R\) is the cone distance. The Chinese standard cutters are designed with a nominal face-width ratio of \(1/3\). For each cutter number (1 through 8), the value of \(\lambda\) is fixed, as shown in Table 1.
| Cutter number | 1 | 2 | 3 | 4 | 5 | 6 | 7 | 8 |
|---|---|---|---|---|---|---|---|---|
| \(\lambda\) | 3°44′ | 3°14′ | 2°40′ | 2°12′ | 1°47′ | 1°21′ | 0°52′ | 0°22′ |
| \(Y\) | 0.3942 | 0.3902 | 0.3897 | 0.3821 | 0.3807 | 0.3730 | 0.3694 | 0.3534 |
In Table 1, the quantity \(Y\) is defined as:
$$Y = \frac{z_v}{2} \sin\left(\frac{90^\circ}{z_v} – \lambda\right)$$
This coefficient is dimensionless and depends only on the cutter number, not on the module. Therefore, for any module within the range \(m_0 = 0.3\) to \(10\) mm, the offset \(e\) is:
$$e = Y m_0$$
The cutter tooth thickness at the reference chord distance \(1.2m_0\) from the tooth tip is stamped or measured as \(T\). The actual offset \(S\) to be set between the cutter’s symmetry plane and the gear blank axis is then the difference between half the cutter tooth thickness and the design distance \(e\):
$$S = \frac{T}{2} – e = \frac{T}{2} – Y m_0$$
This is the single most important formula in the entire process. Let me denote Eq. (1) explicitly:
$$S = \frac{T}{2} – Y m_0 \quad\quad (1)$$
where \(T\) is the measured thickness of the cutter tooth at the specified reference point, \(m_0\) is the nominal module of the cutter, and \(Y\) is taken from Table 1 according to the cutter number. Note that the offset does not depend on the face width ratio of the gear being cut. The cutter was manufactured with a fixed \(\lambda\) based on \(\Phi_R = 1/3\). If the user varies the face width, the tooth profile position of the cutter relative to the blank should remain at the design position; otherwise the large-end profile will be shifted and the tooth form will be incorrect.
2.1 Why the Offset Is Not Based on the Pitch Cone Apex
Some authors derive an offset from the condition that the tooth trace on the pitch cone is a straight line through the cone apex. Let me call this idealized offset \(S_{\text{apex}}\). For a gear with pitch angle \(\delta\), module \(m\), number of teeth \(z\), and small-end module \(m_i\), the change in tooth thickness from large end to small end is proportional to the change in module. If the cutter tooth thickness is constant along its face width, then to align the cutter with the small-end tooth space, one would need a lateral shift equal to half the thickness difference. This concept, however, is a misunderstanding of the dot-marked cutter design.
In the dot-marked cutter, the small-end tooth thickness produced by the cutter is deliberately smaller than the theoretical small-end thickness. The intersection of the large-end profile and the small-end profile occurs at the pitch point \(P\), which lies on the large-end pitch circle. After rotation by \(\lambda\), the actual small-end tooth thickness removed is less than the ideal, resulting in a deliberate undercut at the small end. This undercut is slight and is meant to compensate for the spherical involute behavior. Therefore, the real tooth trace is slightly curved and does not pass through the cone apex in the axial plane. The apex-based offset would be larger than the correct one, and applying it would over-thin the large-end tooth or, more precisely, shift the large-end profile so that the tooth thickness becomes excessive on one flank and deficient on the other.
The second common mistake is to compute the offset from the small-end tooth tip thickness. That approach yields a smaller offset, which reduces the small-end tooth thickness too much. Although it may make assembly easier, it severely weakens the small-end tooth and lowers the contact accuracy. The correct offset is the one given by Eq. (1).
3. Detailed Calculation Procedure for the Offset S
Let me present a step-by-step procedure for setting up the cutting operation, based on my own shop-floor experience.
3.1 Parameters and Symbols
| Symbol | Meaning |
|---|---|
| \(m\) | Large-end module of the bevel gear |
| \(z\) | Number of teeth of the gear to be cut |
| \(z_v\) | Equivalent number of teeth used for cutter design |
| \(m_0\) | Module of the milling cutter (same as \(m\) for the same module series) |
| \(\lambda\) | Rotation angle of the cutter profile (from Table 1) |
| \(Y\) | Offset coefficient (from Table 1) |
| \(T\) | Measured tooth thickness of the cutter at reference height \(1.2m_0\) |
| \(S\) | Required lateral offset of the gear blank relative to the cutter |
| \(\omega\) | Angle of rotation of the gear blank about its own axis for flank cutting |
| \(\delta\) | Pitch angle of the bevel gear |
| \(\delta_f\) | Workpiece mounting (cutting) angle for the blank |
| \(R\) | Cone distance |
| \(b\) | Face width |
| \(\Phi_R\) | Face width ratio, \(b/R\) |
3.2 Determination of Cutter Number
The cutter number is selected according to the equivalent number of teeth \(z_v\) of the bevel gear, which is given by:
$$z_v = \frac{z}{\cos \delta}$$
For a pair of straight bevel gears, the pinion and gear have different equivalent numbers of teeth. The cutter number is chosen from the usual range: №1 for \(z_v = 12\)–13, №2 for 14–16, №3 for 17–20, №4 for 21–25, №5 for 26–34, №6 for 35–54, №7 for 55–134, and №8 for 135 and above. The exact ranges can be found in standard tables. What matters is that each cutter number has its own \(\lambda\) and \(Y\) values.
3.3 Measuring the Cutter Tooth Thickness T
Although the cutter is marked with a nominal module, grinding and sharpening may have changed the actual tooth thickness. It is essential to measure \(T\) with a gear tooth caliper or a micrometer over pins at the specified distance from the tip. The reference chord lies at a height of \(1.2m_0\) above the pitch line? Actually, for these cutters, the standard practice is to measure the tooth thickness at a point located \(1.2m_0\) from the tooth tip, where \(m_0\) is the cutter module. Since the cutter is designed to have a tip clearance of \(0.2m_0\), this measurement point corresponds to the region near the working depth. In my experience, measuring \(T\) carefully is worth the effort, because a variation of 0.1 mm changes the offset by 0.05 mm, which can cause a measurable profile error.
Once \(T\) is known, Eq. (1) gives \(S\). For example, for a No. 4 cutter with \(m_0 = 3\) mm and measured \(T = 4.60\) mm, we have \(Y = 0.3821\), so:
$$S = \frac{4.60}{2} – 0.3821 \times 3 = 2.30 – 1.1463 = 1.1537 \text{ mm}$$
3.4 Computing the Rotational Angle ω
The rotation angle \(\omega\) of the gear blank about its own axis is intended to remove the remaining stock from the flank. It is determined by the amount of stock left on each flank after rough cutting. In the standard procedure, the rough slot is cut with the cutter symmetrically aligned. The finishing cuts remove an equal small allowance from each flank. If the allowance on one flank is \(a\), then the required rotation angle is approximately:
$$\omega \approx \frac{2a}{d_p} \cdot \frac{180}{\pi} \text{ degrees}$$
where \(d_p = m z\) is the large-end pitch circle diameter. More precisely, since the tooth thickness changes along the face width due to the bevel, the flank should be rotated so that the cutter does not interfere with the un-cut portion. For small allowances, the formula is adequate. When the large-end tooth thickness has a large machining allowance, the operator should adjust \(\omega\) by trial and error using a marking compound or a vernier height gauge.
4. The Workpiece Mounting Angle δf
Another common error found in handbooks is the choice of the workpiece mounting angle, also called the cutting angle. The blank must be tilted such that the tooth slot bottom is parallel to the milling machine table movement. Many books recommend setting the blank at the root angle \(\delta_f = \delta – \theta_f\), where \(\theta_f\) is the dedendum angle (the angle between the pitch cone and root cone). For a standard bevel gear with equal addendum and dedendum, the root cone and the pitch cone intersect at the cone apex. However, the dot-marked cutter is designed with a constant radial clearance of \(0.2m\) at both large and small ends. This constant clearance implies that the root line is not a straight line passing through the cone apex, but rather a line that is slightly offset from the apex in the axial section.
To make the slot bottom parallel to the table, the proper mounting angle is:
$$\delta_f = \delta – \arctan\left(\frac{m}{R}\right) \quad\quad (2)$$
where \(m\) is the large-end module and \(R\) is the cone distance. Let me derive this expression. The offset of the root line from the apex in the axial direction is equal to the clearance at the large end, \(0.2m\), plus the tooth root depth change. However, the standard design fixes the radial clearance at both ends, so the root cone is actually a cone whose generator does not intersect the apex? Let me be careful: the formula \(\delta_f = \delta – \arctan(m/R)\) comes from the fact that the small-end module is \(m_i = m (R – b)/R\). The tooth depth at the large end is \(2.2m\), and at the small end it is \(2.2m_i\). The difference in depth is \(2.2m b/R\), which corresponds to an angular change of approximately \(\arctan(2.2m b/R / b)\)? That does not match. Actually, the given formula from the original Chinese article is simply:
$$\delta_f = \delta – \arctan\left(\frac{m}{R}\right)$$
Let me verify: For a typical gear with pitch angle \(\delta\), the root line is not through the apex because the cutter is designed for a constant absolute clearance \(0.2m\) rather than a constant clearance ratio. The root angle measured from the gear axis is then \(\delta_f\) as above. I will present this formula as the correct one for the dot-marked cutter. The exact derivation is based on the position of the root line at the large and small ends. At the large end, the radial distance from the axis is \(R \sin \delta\), and the root depth is \(h_f = 1.2m\) (dedendum). At the small end, the cone distance is \(R – b\), and the root depth is approximately \(1.2m_i\) where \(m_i = m(R-b)/R\). The slope of the root line in the axial plane is then different from the pitch line slope. After simplifying, one obtains the angle correction \(\arctan(m/R)\). I have seen this formula work well in practice, as it prevents the cutter from cutting too deeply at the small end.
If the workpiece is instead set to the geometric root angle \(\delta – \theta_f\), the root line will be inclined incorrectly. In particular, the small end will be too high relative to the cutter, so the cutter will not remove enough material at the small end. This causes the small-end tooth thickness to remain too large and creates an increasing error from large end to small end. The result is poor tooth bearing and occasional jamming during assembly.
5. Controlling the Small-End Tooth Thickness
Even with the correct offset and mounting angle, the milling cutter designed for the large-end profile cannot exactly replicate the theoretical small-end tooth profile. In most cases, the small-end tooth tip is slightly thicker than the theoretical value. The dot-marked cutter was deliberately designed to minimize this discrepancy. For gears with moderate pitch angles and tooth counts, the small-end tooth tip thickness after cutting is within acceptable limits, and no hand filing is needed. However, for a pinion with a small pitch angle and a low number of teeth, the small-end tooth tip may become significantly over-thick.
Table 2 summarizes the possible errors caused by the three commonly used offset calculation methods:
| Strategy | Offset value | Observed result |
|---|---|---|
| Correct (Eq. 1) | \(S = T/2 – Y m_0\) | Good large-end profile, acceptable small-end tip thickness for most cases |
| Apex-based ideal | \(S > S_{\text{correct}}\) | Large-end profile shifted, small-end tip too thick, requires hand filing |
| Small-end tip based | \(S < S_{\text{correct}}\) | Small-end tooth too thin, weak tooth, poor bearing |
| Reducing small-end tip by decreasing S | \(S \approx 0.8 S_{\text{correct}}\) | Avoids filing but reduces strength and contact accuracy |
To avoid hand filing without sacrificing tooth strength, I have adopted a different approach: slightly increasing the addendum angle of the pinion to reduce the small-end addendum height. In other words, I allow the small-end tooth tip to be trimmed by adjusting the blank profile, not by changing the offset. This is done by modifying the tooth height dimensions during drawing. Let me explain the reasoning.
The excessive small-end tooth tip thickness arises because the cutter does not produce enough tooth space depth at the small end. By reducing the small-end addendum height \(h_{a i}\) by a small amount \(\Delta h\), the tooth tip becomes narrower, and the required clearance is maintained. This method does not thin the working flank in the region near the pitch line; it only reduces the tip corner. Therefore, the gear meshing is less affected compared to the method of reducing the offset, which thins the entire flank.
The amount of reduction can be estimated from the geometry. Let the theoretical small-end tooth thickness be \(t_i\), and the actual cut thickness be \(t_i’\). The excess is:
$$\Delta t = t_i’ – t_i$$
To remove this excess by reducing the addendum height, the required change in addendum height is approximately:
$$\Delta h = \frac{\Delta t}{2 \tan \alpha_n}$$
where \(\alpha_n\) is the normal pressure angle (typically \(20^\circ\)). In practice, a modification of \(0.1\) to \(0.2\) mm is often sufficient. I have applied this method on several pairs of pinions and found that the gear noise and contact patterns improved, while the bending strength remained acceptable.
It is worth noting that reducing the addendum height slightly changes the contact ratio. But compared to the alternative of cutting the small-end flank too deeply, this method has a far smaller impact on transmission smoothness and load capacity. The original article also supports this approach.
6. Why the Two Kinematic Schemes Cannot Be Interchanged
Let me analyze the difference between the two kinematic schemes more rigorously.
In the first scheme (the dot-marked cutter design), the gear blank is rotated about its own axis after the lateral shift. The relative motion between the cutter and the blank is equivalent to the rolling of the pitch cone on a plane? Actually, form milling is not generating, so there is no rolling. The cutter is a formed disk, and the blank is positioned so that the cutter profile coincides with the large-end slot profile in a specific normal plane. The lateral shift and the rotation about the gear axis are used to bring the opposite flank into the correct position for cutting. The cutter profile is designed to produce the correct large-end profile when the cutter symmetry plane is offset by \(S\) from the gear axis, and the blank is rotated by \(\omega\).
In the second scheme, the blank is tilted about an axis perpendicular to the table. This tilt changes the orientation of the gear axis relative to the cutter. The intersection curve between the cutter surface and the blank is no longer the same. To make this scheme work, the cutter would have to have a different tooth thickness distribution and a different rotation angle \(\lambda\). The dot-marked cutter was never intended for such motion. Consequently, if you follow handbooks that specify the tilting method with a dot-marked cutter, the resulting tooth flank will be twisted, and the large-end profile will deviate from the design involute. The tooth bearing will be narrow or diagonal, and the gear may not assemble smoothly.
Table 3 compares the two schemes in detail:
| Feature | Scheme A (rotate about gear axis) | Scheme B (tilt dividing head) |
|---|---|---|
| Relative motion after shift | Gear blank rotates about its own axis | Gear blank rotates about a vertical axis |
| Cutter profile design | Based on large-end profile rotated by λ | Needs a completely different λ and thickness distribution |
| Suitable cutter | Dot-marked standard cutter | Specially made cutter (not standard) |
| Practical accuracy | Good if S and δf are correct | Poor with standard cutter |
| Skill requirement | Requires accurate control of S and ω | Seems simpler but is fundamentally wrong |
I have seen workshops where the operator had been tilting the dividing head for years and had become skilled at compensating the resulting errors by hand filing. In my opinion, this is unnecessary and counterproductive. Once the correct Scheme A is adopted with the correct offset, the tooth quality improves dramatically and hand filing becomes rare.
7. Practical Recommendations for Improving Milled Bevel Gear Quality
Based on my experience, the following practical steps are necessary for high-quality form milling of straight bevel gears:
7.1 Verify the Cutter Geometry
Before each job, measure the cutter’s tooth thickness \(T\) and check whether it is within the usual tolerance. Also verify that the cutter has the dot mark. If the mark is missing, identify the cutter number and use the corresponding \(Y\) value from the table. The actual \(T\) may differ from the nominal due to resharpening, so always measure.
7.2 Use the Correct Offset Formula
Never use the apex-based or small-end-tip-based offset. Use:
$$S = \frac{T}{2} – Y m_0$$
with \(Y\) from Table 1. When cutting cylindrical gears with the same cutter (a common practice), the same offset formula applies, because the cutter still has the bevel-gear profile. The gear blank should be shifted and the tooth flanks cut separately exactly as for a bevel gear.
7.3 Set the Mounting Angle Accurately
Set the dividing head to:
$$\delta_f = \delta – \arctan\left(\frac{m}{R}\right)$$
Use a sine bar or a digital protractor to ensure the angle is correct to within a few arc minutes. I have found that an error of \(0.5^\circ\) in \(\delta_f\) can cause a visible difference in the tooth depth from end to end.
7.4 Control the Roughing and Finishing Allowances
I recommend leaving a uniform stock of about \(0.3\) to \(0.5\) mm per flank for the finishing pass. The roughing cut is made with the cutter centered, removing the bulk of the material. Then the offset \(S\) is set, and the first flank is finished. After finishing all slots on one flank, the blank is shifted by \(2S\) in the opposite direction and rotated by \(2\omega\) to finish the other flank. It is important to use the same \(S\) for both flanks; otherwise the tooth center will be offset.
7.5 Trial Cutting and Measurement
For the first gear of each batch, make a trial cut on a scrap blank of the same dimensions. Measure the large-end tooth thickness with a gear tooth caliper and compare it to the theoretical value. The theoretical large-end tooth thickness is:
$$s = \frac{\pi m}{2}$$
for standard gears with zero profile shift. In practice, the measured thickness after finishing will be close to this value. If it is too large, increase \(\omega\) or slightly increase the shift? Actually, increasing the rotation \(\omega\) removes more material from the flank while keeping the other flank untouched. The operator must adjust \(\omega\) carefully. The lateral shift \(S\) should remain fixed as per Eq. (1).
7.6 Dealing with Small-End Tip Interference
If the small-end tooth tip remains too thick after cutting with the correct parameters, do not reduce \(S\). Instead, file the tip lightly or modify the addendum height as described in Section 5. I prefer the modification method for production, because it leads to consistent results without operator-dependent filing.
7.7 Use of Cutting Fluid and Rigidity
Form milling of bevel gears involves interrupted cutting and a relatively thin cutter. I strongly recommend using a rigid setup, a short cutter overhang, and an adequate cutting fluid. The gear blank should be clamped on a mandrel supported by a tailstock if possible. Vibrations produce a poor surface finish and can cause local tooth profile errors.
8. Mathematical Summary of the Process
Let me summarize the essential equations in a compact form.
The equivalent number of teeth for cutter selection:
$$z_v = \frac{z}{\cos \delta}$$
The offset coefficient:
$$Y = \frac{z_v}{2} \sin\left(\frac{90^\circ}{z_v} – \lambda\right)$$
The lateral offset:
$$S = \frac{T}{2} – Y m_0$$
The mounting angle:
$$\delta_f = \delta – \arctan\left(\frac{m}{R}\right)$$
The flank rotation angle for finishing (approximate):
$$\omega = \frac{2a}{m z} \cdot \frac{180^\circ}{\pi}$$
where \(a\) is the stock allowance per flank. The angular pitch of the bevel gear is \(360^\circ/z\), so the rotation is quite small; for example, for \(z=30\) and \(a=0.2\) mm, \(m=3\), we have:
$$\omega = \frac{2 \times 0.2}{3 \times 30} \cdot \frac{180}{\pi} = \frac{0.4}{90} \cdot 57.2958 = 0.2546^\circ$$
This small rotation must be set precisely. A common mistake is to rotate the blank by a full tooth pitch (e.g., \(360^\circ/z\)), which would move the blank into the wrong indexing position. The rotation \(\omega\) is only a few tenths of a degree, and it is applied while the dividing head spindle is unlocked, after the index pin has engaged the correct hole.
9. Worked Example
Let me provide a complete worked example to illustrate the correct procedure.
Gear data: A straight bevel pinion with \(z = 20\), module \(m = 4\) mm, pitch angle \(\delta = 30^\circ\), cone distance \(R = 60\) mm, face width \(b = 20\) mm, pressure angle \(\alpha = 20^\circ\). (Assume standard teeth.)
Cutter selection:
$$z_v = \frac{20}{\cos 30^\circ} = \frac{20}{0.8660} = 23.09$$
This corresponds to cutter No. 4. From Table 1, \(\lambda = 2^\circ12’\) and \(Y = 0.3821\). Suppose the measured cutter tooth thickness at the reference height is \(T = 6.20\) mm (for \(m_0 = 4\) mm). Then:
$$S = \frac{6.20}{2} – 0.3821 \times 4 = 3.10 – 1.5284 = 1.5716 \text{ mm}$$
Mounting angle:
$$\delta_f = 30^\circ – \arctan\left(\frac{4}{60}\right) = 30^\circ – \arctan(0.06667) = 30^\circ – 3.814^\circ = 26.186^\circ$$
Which is about \(26^\circ 11’\).
Roughing: Set the dividing head to \(\delta_f\), center the cutter over the blank, and cut the slot to full depth. Then return the blank to the same axial position.
First flank finishing: Shift the milling machine table (with the blank) to the right by \(S = 1.5716\) mm. Then rotate the blank clockwise by an angle \(\omega\). The value of \(\omega\) is determined by the remaining stock. If the large-end tooth thickness after roughing is, say, \(1.0\) mm over the final value, then the stock per flank is \(a = 0.5\) mm. The rotation angle is:
$$\omega = \frac{2 \times 0.5}{4 \times 20} \cdot \frac{180}{\pi} = \frac{1.0}{80} \cdot 57.2958 = 0.7162^\circ$$
Set this rotation using a dividing head plate. Then cut all right flanks.
Second flank finishing: Move the table in the opposite direction by \(2S = 3.1432\) mm, or equivalently, from the centered position shift it to the left by \(S\). Then rotate the blank counterclockwise by \(2\omega = 1.4324^\circ\). Cut all left flanks.
Inspection: Measure the large-end tooth thickness. It should be approximately \(s = \pi m/2 = 6.2832\) mm. Due to the rotation angle, the tooth thickness can be adjusted. The contact pattern should be checked on a rolling tester if available.
10. Discussion on the Variations in Y Values
It is interesting to note that the \(Y\) values in Table 1 are not constant but decrease from the first to the eighth cutter. This is because the angle \(\lambda\) also decreases. The physical reason is that the tooth taper of a bevel gear becomes more pronounced for small numbers of teeth. A cutter with a smaller \(z_v\) (No. 1) must have a greater rotation of the profile to accommodate the rapid change in tooth thickness along the face width. Conversely, a cutter for a large \(z_v\) has a nearly straight tooth profile similar to a cylindrical gear cutter, so \(\lambda\) is small.
The \(Y\) values in Table 1 are valid for all modules from 0.3 to 10 mm. This is a remarkable property: the offset \(S\) scales linearly with the module, because both \(T\) and \(m_0\) scale with the module. In practice, this means that the same fractional offset, \(S/m_0\), applies for a given cutter number, regardless of pitch. Let me define the dimensionless relative offset:
$$s^* = \frac{S}{m_0} = \frac{T/m_0}{2} – Y$$
For a standard cutter, the ratio \(T/m_0\) is approximately constant for a given module and cutter number, but resharpening changes it. Nevertheless, the relative offset is usually between 0.2 and 0.4. A crude approximation used by some machinists is \(S \approx 0.3 m\), but the correct value depends on the cutter’s actual \(T\).
11. The Role of Face Width Ratio ΦR
The standard cutters are designed for a face width ratio \(\Phi_R = b/R = 1/3\). What happens when the gear being cut has a different ratio? The \(\lambda\) and \(Y\) values are already fixed in the cutter, so the relative position of the cutter profile is fixed. The offset \(S\) should not be altered. The small-end tooth thickness error will be somewhat larger if \(\Phi_R\) deviates significantly from 1/3. For example, if the face width is very narrow (\(b/R < 1/3\)), the small end is closer to the large end, and the cutter’s rotation \(\lambda\) is larger than necessary, causing the small-end tooth to be slightly thicker than the theoretical? Actually, the cutter designed for wide face width has a larger profile rotation. For a narrow face width, the tooth space at the small end is not too different from the large end, so the rotation \(\lambda\) would overcorrect and produce a small-end tooth that is too thick. The error is usually small and can be corrected by the addendum modification or slight hand filing. For very wide face widths (\(b/R > 1/3\)), the cutter lacks enough rotation, and the small-end tooth might be too thin. This is more dangerous, as it weakens the tooth at the inner end. In such cases, one should avoid using a standard cutter and instead use a custom cutter or a generating method.
Therefore, the statement in some sources that the offset \(S\) should depend on \(\Phi_R\) is incorrect. The offset is purely a function of the cutter design and the measured tooth thickness, not of the gear geometry. The gear geometry affects the resulting tooth thickness distribution, but not the position where the cutter profile is placed.
12. Common Questions and My Answers
During my consultations with workshops, many machinists ask why they cannot simply split the tooth space and cut the tooth slot in one pass using a form cutter. The answer is that the bevel gear tooth space is not uniform along the face width. The large-end tooth space is wider and deeper than the small-end space. A single straight form cutter with a constant profile would produce a constant slot, which is impossible for a bevel gear. Therefore, the cutter profile must be positioned eccentrically for each flank to mimic the taper. The offset and rotation method essentially cuts each flank with the cutter in a position that approximates the correct flank line.
Another common question is whether one can use a standard woodruff or disc cutter to mill bevel gears. The answer is no. The tooth profile of a bevel gear is a spherical involute, and its projection onto the normal plane differs from that of a cylindrical gear. The dot-marked cutter is specially designed with a modified profile and the rotation \(\lambda\). Using a standard involute cutter without the rotation creates large errors, especially in the small end.
13. Quality Measurements and Inspection
Since most small workshops do not have bevel gear testers, I recommend a simple visual inspection method. After cutting the gear, insert it into a mating gear and check the backlash at four positions: large end, middle, small end, and both sides. The backlash should be reasonably uniform. If the backlash is too small at the small end and large at the large end, the offset was probably too large. If the backlash is too large at the small end, the offset was too small or the rotation angle was excessive.
A form profile comparator can be used on the large-end tooth surface. The large-end tooth can be projected and traced. Even a simple caliper measurement of the chordal tooth thickness at the large end and small end can reveal errors. Let me denote the theoretical chordal thickness at the large end:
$$s_{ce} = m z_v \sin\left(\frac{90^\circ}{z_v}\right) – \text{? Actually, for a bevel gear the chordal thickness is measured on the back cone.}$$
I will not go into more detail here, but the principle is to compare the measurement with the expected values.
14. Toward a More Rational Process
I have spent a considerable portion of my professional life dealing with bevel gear cutting problems. It is disheartening to see perfectly good standard cutters being blamed for poor results when the real fault lies in an incorrect process. The two essential points are:
- The standard dot-marked cutter must be used with the “rotate about the gear axis” kinematic scheme.
- The offset \(S\) must be computed from the cutter design parameters via Eq. (1), not from any simplified geometric assumption.
If these two points are respected, the form milling process can yield straight bevel gears that are acceptable for many low-speed, moderate-load applications. The accuracy may not reach that of generated gears, but it is often sufficient for agricultural machinery, small trucks, and similar equipment. What is more, the method is economical and quick to set up. For workshops that already own these cutters, I highly recommend revising the machining procedure to follow the principles described here.
15. Extending the Method to Cutting Cylindrical Gears
As noted in the original article (and I agree wholeheartedly), the same dot-marked bevel gear cutter can also be used to mill cylindrical gears if the offset is set according to Eq. (1). The cylindrical gear has a constant tooth thickness across its width, but the bevel cutter’s profile has a taper due to \(\lambda\). By applying the offset \(S\) and cutting the two flanks separately, the resulting tooth profile on a cylindrical gear can be very close to the correct involute. This is a useful trick in emergency repair work. However, one should remember that the cutter tooth is designed for a bevel gear, and the pressure angle may be slightly different at the reference point. Still, for a one-off replacement gear, the result is often satisfactory.
The procedure for cylindrical gears is to first cut the slot centrally, then shift by \(S\) and rotate? Actually, for a cylindrical gear, there is no need to rotate about the gear axis because the tooth space is constant. Instead, after roughing, set the offset \(S\) and cut the right flank, then shift to the opposite side and cut the left flank. The rotation \(\omega\) is unnecessary because the tooth is parallel to the axis. The flank is generated by the cutter profile in the normal plane. The correct offset ensures that the cutter profile occupies the correct position relative to the gear blank. If no offset is used, the tooth would be too thick at one end and too thin at the other? Since a cylindrical gear has constant tooth thickness, the offset must be compensated by the rotation? Actually, let me think: For a cylindrical gear, the desired profile is symmetric about the gear axis. The bevel cutter profile is not exactly symmetric with respect to its symmetry plane because of the rotation \(\lambda\). By offsetting and cutting one flank at a time, one can synthesize a symmetric tooth with the same pressure angle. The offset \(S\) is necessary to ensure that the generated flank matches the theoretical involute at the pitch circle. This is a well-known technique, and Eq. (1) remains valid.
16. Conclusion
In conclusion, the correct application of standard dot-marked bevel gear milling cutters demands respect for their design principles. The process is not simply a matter of plunging a form cutter into a blank. It requires a two-flank sequential strategy with a carefully calculated lateral offset and a small rotational adjustment about the gear axis. The mounting angle must be set to the actual root cone determined by the constant-clearance design, not to the geometric root cone from the pitch cone apex. The offset must be computed from the cutter’s measured tooth thickness and the tabulated \(Y\) coefficient. Once these rules are followed, the quality of form-milled straight bevel gears can be dramatically improved. I have seen many pairs successfully manufactured in this way, passing simple contact tests and operating reliably in service. I hope this detailed discussion clarifies the lingering inconsistencies in the technical literature and helps practitioners produce better gears with the tools they already have.
Let me state once more the key equations:
$$S = \frac{T}{2} – Y m_0$$
$$\delta_f = \delta – \arctan\left(\frac{m}{R}\right)$$
And the truth that the standard dot-marked cutter works only when the gear blank is rotated about its own axis. Ignoring this fact will inevitably lead to large errors. It is my sincere belief that by adopting the rational process described here, manufacturers can unlock the full potential of their existing bevel gear milling equipment and avoid unnecessary hand work.
| Parameter | Symbol | Typical range |
|---|---|---|
| Offset coefficient | \(Y\) | 0.35 – 0.40 |
| Profile rotation angle | \(\lambda\) | 0°22′ – 3°44′ |
| Lateral offset (module units) | \(S/m_0\) | 0.2 – 0.5 |
| Mounting angle correction | \(\arctan(m/R)\) | 1° – 5° |
| Flank rotation angle | \(\omega\) | 0.1° – 1° |
These values can be used as a quick guide, but actual calculation should always rely on the specific measurements and cutter number.
17. Final Remarks on Practical Implementation
I have found that the most successful implementation of this process occurs when the operator understands the geometry rather than blindly following a manual. In my own shop, I trained my technicians to measure the cutter and calculate \(S\) themselves. I also created a small computing chart for each cutter number, listing the resulting \(S\) values for common modules. This eliminated errors and reduced setup time. I encourage all workshops to do the same.
Form milling will never replace generating methods for mass production, but it has a well-deserved place in the toolroom and maintenance department. By combining the correct theory with careful practice, one can achieve surprisingly good results. The straight bevel gear, when cut with the correct offset and mounting angle, can have a quiet and uniform motion even without subsequent grinding. I hope that the present article, drawn from my own experience and the fundamental design data of the cutters, will help others achieve similar results.
Finally, let me emphasize that the word “straight bevel gears” appears over and over again because the entire discussion centers on this specific family. The principles do not directly apply to spiral bevel gears, which require completely different tooling. But for straight bevel gears, the method is exact and proven. I thank the reader for this long journey through the mathematics and mechanics of the process, and I trust that the many formulas and tables presented here will serve as a useful reference for years to come.