
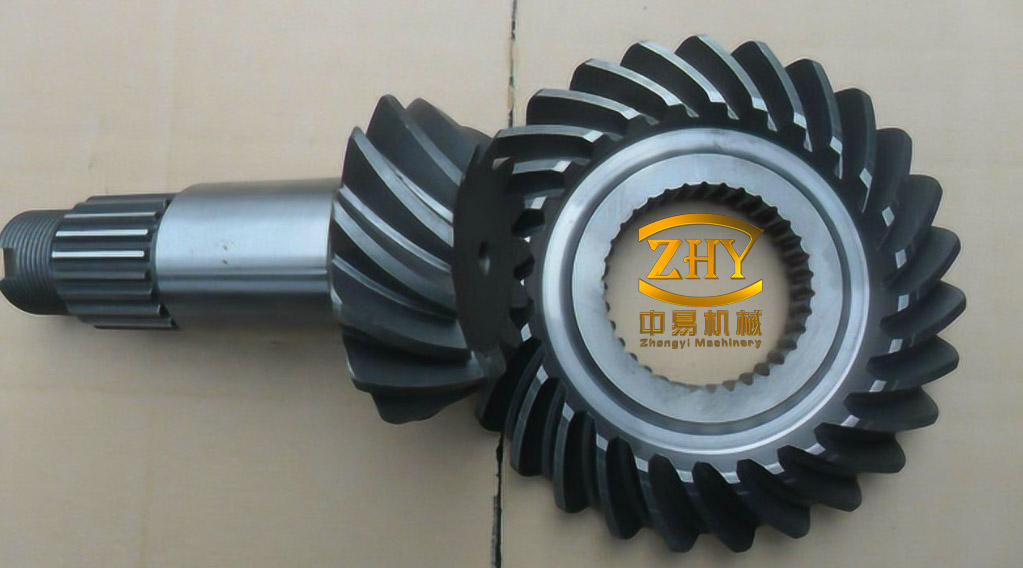
Spiral bevel gears transmit motion between intersecting shafts and are widely used in automotive rear axles, aerospace drives, and industrial reducers. Their curved teeth engage gradually along the face width, which supports high load capacity and smooth transmission. The same curvature that makes the gear effective also makes its flank difficult to model: a spiral bevel tooth surface is not a simple profile swept along a path, but the envelope of a cutter family moving relative to the workpiece. A visually plausible CAD tooth may therefore differ from the surface that a real machine tool generates.
Why the flank must be tied to generating motion
In face-milling, a rotating cutter head is carried by a cradle while the workpiece rotates in a timed relationship. The cutter and workpiece therefore reproduce the meshing motion of a virtual generating gear. At each instant, the cutting edge contacts the workpiece along a line or point; the collection of these contact positions forms the tooth surface. Machine settings—radial and angular cutter positions, vertical offset, sliding base, workpiece mounting angle, and roll ratio—are not secondary corrections. They define the surface itself.
This is the reason a manufacturing-linked model is more useful than a purely geometric one. The same parameters that generate the CAD flank can be transferred to the machine tool, inspected against the nominal surface, and used as the basis for finite-element analysis or motion simulation. The modeling problem is thus one of kinematic geometry, not merely of drawing a gear-shaped solid.
Cutter geometry and the generated flank
The cutter blade is represented in a cutter coordinate system \(S_g(x_g,y_g,z_g)\). For the straight portion of the blade, which cuts the working flank, the position vector and unit normal are
$$
\mathbf r_g(s_g,\theta_g)=
\begin{bmatrix}
(R_g \pm s_g\sin\alpha_g)\cos\theta_g\\
(R_g \pm s_g\sin\alpha_g)\sin\theta_g\\
-s_g\cos\alpha_g\\
1
\end{bmatrix},
\qquad
\mathbf n_g(\theta_g)=
\begin{bmatrix}
\cos\alpha_g\cos\theta_g\\
\cos\alpha_g\sin\theta_g\\
\mp\sin\alpha_g
\end{bmatrix}
$$
where \(R_g\) is the cutter tip radius, \(\alpha_g\) is the blade profile angle, \(s_g\) is the distance along the straight blade, and \(\theta_g\) is the angular coordinate about the cutter axis. The upper and lower signs correspond to the two flank sides.
The tip of the blade is rounded. This arc is not a cosmetic detail: it generates the root fillet, which controls the transition from the working flank into the tooth root. In cutter coordinates, the arc portion is described by
$$
\mathbf r_g(\theta,\theta_g)=
\begin{bmatrix}
(C_x \pm \rho_g\sin\theta)\cos\theta_g\\
(C_x \pm \rho_g\sin\theta)\sin\theta_g\\
-\rho_g(1-\cos\theta)\\
1
\end{bmatrix},
\qquad
\mathbf n_g(\theta,\theta_g)=
\begin{bmatrix}
\sin\theta\cos\theta_g\\
\sin\theta\sin\theta_g\\
\pm\cos\theta
\end{bmatrix}
$$
Here \(C_x\) is the horizontal coordinate of the tip-arc center, \(\rho_g\) is the tip-arc radius, and \(\theta\) parameterizes the arc. Including this arc in the model avoids replacing the fillet with a sharp-root approximation, which would distort stress analysis and contact simulation.
For the large gear, a double-sided cutter can cut both flanks in one operation: the straight blade sections produce the working flanks and the tip arcs produce the fillets. The pinion is treated differently. Its concave and convex flanks are cut in separate passes, so each side has its own machine settings. This asymmetry is visible in the demonstration values later: the pinion uses different cutter radii, profile angles, radial settings, and roll ratios for the two sides.
Coordinate transformation and the meshing condition
The cutter geometry must be transformed into the workpiece coordinate system \(S_2(x_2,y_2,z_2)\). The transformation chain passes through the cutter mounting, the machine cradle, the machine frame, and the workpiece mounting. In compact form, the workpiece position and normal vectors are
$$
\mathbf r_2=\mathbf M_{2c2}\mathbf M_{c2b2}\mathbf M_{b2m2}\mathbf M_{m2a2}\mathbf M_{a2g}\mathbf r_g
$$
$$
\mathbf n_2=\mathbf L_{2c2}\mathbf L_{c2b2}\mathbf L_{b2m2}\mathbf L_{m2a2}\mathbf L_{a2g}\mathbf n_g
$$
The matrices \(\mathbf M\) are homogeneous transformation matrices, and the matrices \(\mathbf L\) are their \(3\times3\) rotation parts. The machine settings enter through this chain: radial cutter position \(S_{r2}\), angular cutter position \(q_2\), vertical offset \(E_{m2}\), sliding base \(X_{b2}\), workpiece mounting angle \(\gamma_2\), and axial setting \(X_{G2}\), together with the cradle angle \(\Phi_g\) and workpiece rotation angle \(\Phi_2\).
The generating motion is completed by the meshing condition. In the machine coordinate system \(S_{m2}\), the normal vector of the generating surface must be perpendicular to the relative velocity between the cutter and the workpiece:
$$
\mathbf n_{m2}\cdot\mathbf v_{m2}^{(g2)}=0,
\qquad
\mathbf n_{m2}=\mathbf L_{m2a2}\mathbf L_{a2g}\mathbf n_g
$$
This equation enforces tangency at the contact point. Combined with the transformed surface equations, it gives a nonlinear system for the surface parameters. For a specified cutter position, the solution identifies the contact point; as the generating motion advances, the envelope of these points becomes the tooth flank. The numerical solution is obtained iteratively, with Newton iteration used to recover the three-dimensional coordinates of the surface points.
Discretizing the flank for solid modeling
A CAD solid cannot be built directly from a continuous envelope equation. The flank is therefore discretized. The tooth surface is projected onto a two-dimensional plane, where its boundary is formed by the addendum, dedendum, toe, and heel edges. A regular grid is then placed inside this boundary. In the default implementation, nine positions are used along the face width and five along the tooth height, giving 45 points \(P_{mn}\), with \(1\le m\le9\) and \(1\le n\le5\). The grid can be refined when a smoother surface fit or a more demanding contact analysis is required.
Each grid point is mapped back to the three-dimensional tooth surface by solving the surface equations at the corresponding parameters. The resulting point set is exported as a plain-text file. In the CAD environment, the points are fitted with splines and surface patches. Because the fitted flank does not cover the root region, a separate root surface is created. The flank patch and root surface are trimmed and stitched into a closed cutting body, which is then used to remove the tooth space from the gear blank. The cut feature is repeated around the axis according to the tooth count.
This sequence matters for model quality. The solid is not generated by sweeping an arbitrary tooth profile; it is built from points that satisfy the same generating geometry as the machine setup. The spline fit still introduces a small approximation, and the density of the point grid controls that approximation. A coarse grid is sufficient for a visual model but may be inadequate for high-curvature regions or detailed contact analysis.
Software architecture: from parameters to part, assembly, and drawing
The parametric system is organized around two connected layers. The first is a design-calculation layer that computes gear geometry, machine settings, and tooth-surface data. The second is a CAD automation layer that builds the three-dimensional model, assembles the gear pair, and creates an engineering drawing. The implementation is a Windows Forms application developed with Visual Studio 2017 and SolidWorks 2018, using VB.NET and the SolidWorks application programming interface (API).
The user supplies basic inputs such as tooth count, module, and spiral angle. The software then calculates cone distance, pitch angles, diameters, and other geometry, followed by the machine settings for the pinion concave side, pinion convex side, gear concave side, and gear convex side. The calculated parameters can be stored in a rich-text file, while the tooth-surface point coordinates are stored as a text file for later CAD import. Keeping these outputs separate makes the chain traceable: a change in the machine setting is reflected in the point data and hence in the solid model.
For three-dimensional modeling, the program first creates a two-dimensional sketch of the gear blank from the calculated geometry and builds the blank solid. It then imports the surface points, fits curves and patches, constructs the root surface, trims and stitches the surfaces, cuts the tooth space, and patterns the cut by the number of teeth. The API calls handle document creation, sketch geometry, surface creation, Boolean operations, and feature patterning.
The assembly module uses feature-based automatic mating. One gear is fixed while rotation about its axis is retained; the program retrieves the relevant body faces, indexes the selected features, and applies mating constraints so that the remaining degrees of freedom are removed. Representative API methods include NewDocument, AddComponent5, GetBody, GetFaces, IndexOf, and AddMate5. An interference check is then performed to confirm that the assembly does not contain unintended overlap.
The drawing module starts from a drafting template with line weights, dimension and annotation styles, a title block, and a gear parameter table. Model views are inserted, dimensions are generated automatically, and annotations are added. The API’s default dimension placement is not reliable—dimensions can be misplaced or incomplete—so the program retrieves the view outline, selects displayed dimensions, and resets their positions at preset offsets from the frame. Annotation objects are then located and edited. The module therefore automates most of the drawing workflow but still relies on rule-based post-processing rather than accepting the default layout unchanged.
Demonstration case: heavy-truck rear-axle gear set
The workflow was applied to a spiral bevel gear set for a heavy-truck rear-axle reducer. The pinion has 23 teeth and the gear has 42 teeth; both use a module of 4.00 mm, a spiral angle of 35.00°, a pressure angle of 20.00°, and a face width of 27.36 mm. The pitch cone angles are 28.70° for the pinion and 61.29° for the gear, consistent with a nominal right-angle drive. The pinion is left-hand and the gear is right-hand.
| Component | Teeth \(Z\) | Module \(m\) (mm) | Spiral angle \(\beta\) (°) | Pressure angle \(\alpha\) (°) | Face width \(b\) (mm) | Pitch cone angle \(\delta\) (°) | Hand |
|---|---|---|---|---|---|---|---|
| Pinion | 23 | 4.00 | 35.00 | 20.00 | 27.36 | 28.70 | Left |
| Gear | 42 | 4.00 | 35.00 | 20.00 | 27.36 | 61.29 | Right |
The corresponding machine settings are listed below. The pinion’s two flanks have different cutter radii—96.95 mm for the concave side and 93.55 mm for the convex side—and slightly different profile angles. The gear uses a 190.50 mm cutter radius on both sides, but its concave and convex profile angles are also reversed. The roll ratio is 2.04 and 2.09 for the pinion flanks and 1.14 for the gear.
| Machine setting | Pinion, concave flank | Pinion, convex flank | Gear, concave flank | Gear, convex flank |
|---|---|---|---|---|
| Cutter radius (mm) | 96.95 | 93.55 | 190.50 | 190.50 |
| Blade profile angle (°) | 20.14 | 19.86 | 19.86 | 20.14 |
| Radial setting (mm) | 81.23 | 84.52 | 82.80 | 82.80 |
| Angular setting (°) | 73.03 | 68.21 | 70.57 | 70.57 |
| Roll ratio | 2.04 | 2.09 | 1.14 | 1.14 |
| Vertical offset (mm) | 0 | 0.00 | 0 | 0 |
| Axial setting (mm) | −1.25 | 1.25 | 0 | 0 |
| Sliding base (mm) | 0.50 | −0.50 | 0 | 0 |
| Blank mounting angle (°) | 26.88 | 26.88 | 58.17 | 58.17 |
Using these settings, the software generated the tooth-surface point set, built the pinion and gear solids, assembled the pair, and produced an engineering drawing. The calculated machine settings were also applied on a machine tool to cut a sample gear. This confirms that the parameter chain can be carried from calculation to manufacturing, although the case is primarily a demonstration of geometry generation and CAD automation rather than a controlled study of transmission performance.
The resulting solid and assembly can support motion simulation, interference checking, and finite-element analysis. The gear drawing provides a conventional manufacturing document, while the stored point data preserve the link between the CAD surface and the generating calculation. That link is the practical advantage of the workflow: the model is not merely a representation of a gear, but a digital record of how the flank is produced.
Scope, validation, and practical implications
The method applies to face-milled spiral bevel gears whose flank is generated by the cutter geometry and machine kinematics described above. It is not a universal gear model. A change in cutter head, blade profile, or machine configuration requires the corresponding generator model and settings to be recalculated. The kinematic model also assumes ideal generating motion; it does not by itself include elastic deflection, thermal distortion, cutter wear, or assembly error. Those effects require separate analysis or process measurements.
Several approximations remain inside the CAD chain. The surface is represented by a finite point grid, fitted with splines, and trimmed against a separately constructed root surface. A finer grid reduces the fitting error but increases computation and file size. The drawing module also needs rule-based adjustment of automatically inserted dimensions. These are implementation limits rather than conceptual barriers, but they matter when the model is used for tolerance analysis or detailed stress prediction.
The main technical value of the approach is integration. Established generating kinematics are connected to a parametric CAD workflow, so that geometry calculation, machine settings, solid modeling, assembly, and drafting share a consistent data chain. For small and medium manufacturers, an API-based front end on a widely used CAD platform can reduce the manual repetition associated with gear modeling and make the design process more traceable. The same architecture can be adapted to other gear types by replacing the cutter and generating model while retaining the CAD automation layer.
The demonstration establishes that a complete digital chain—from tooth count, module, and spiral angle to machine settings, tooth-surface points, solid model, assembly, and drawing—can be executed for a representative automotive gear set. It does not establish contact pattern, transmission error, noise, or fatigue life. Those attributes depend on loaded contact, manufacturing deviation, surface finish, and heat treatment, and they require meshing analysis, metrology, and bench or vehicle testing. The manufacturing-linked model provides the geometric starting point for those evaluations, not a substitute for them.