
In the production of worm gears used in the segment adjustment mechanism of continuous casting machines, I have developed a comprehensive manufacturing and assembly process to ensure high transmission accuracy and reliable performance. This article details the critical components, their machining challenges, and the systematic solutions I implemented. The worm gears are the core transmission elements in the gearbox that drives the lead screw adjustment system, enabling precise control of the segment roll gap.
1. Segment Structure and Worm Gears Function
The horizontal segment supports the cast strand during further cooling until solidification. Its mechanical parts include inner and outer arc frames, movable beams, free roller assemblies, drive roller assemblies, adjustment devices, and guide wheel assemblies. The worm gears gearbox is the key transmission component in the adjustment device, connected to the lower frame through a trapezoidal thread lead screw. The segment roll gap is adjusted by the vertical movement of four lead screws, which are driven by an external motor through the worm gears gearbox. The worm shaft transmits rotation to the worm wheel, and the trapezoidal thread converts rotary motion into linear movement of the lead screw.
2. Structure of the Worm Gears Gearbox
The worm gears gearbox consists of a worm shaft, a worm wheel, a housing, a locating sleeve, a threaded sleeve, bearings, seals, and flanges. The worm shaft is supported by two single-row tapered roller bearings (type 30211) mounted in the housing via end covers. The worm wheel has an upper flange fixed to the housing and a lower part supported on a thrust ball bearing (type 51156) and a locating sleeve. The locating sleeve contains a copper bushing pressed into the housing, and internally houses a threaded sleeve that engages with the lead screw through trapezoidal threads. Both the worm shaft and the threaded sleeve have internal trapezoidal threads matching the lead screw.
3. Manufacturing Challenges of Worm Gears Components
During the production of worm gears, I identified several critical difficulties that required careful process planning:
| Component | Material | Key Challenges |
|---|---|---|
| Lead Screw | 45 steel (Class IV forging) | Trapezoidal thread machining, hard chrome plating on intermediate section, high dimensional accuracy |
| Housing | ZG230-450 cast steel | Precision machining of multiple bores, interference fit for copper bushings |
| Threaded Sleeve | Steel | Internal trapezoidal thread accuracy, external gear teeth for locking plate engagement |
| Worm Shaft | 20CrMnTi (carburizing steel) | Gear mesh accuracy with worm wheel, case hardening depth control |
| Worm Wheel | ZCuAl10Fe3 (cast copper alloy) | Center distance deviation control, internal trapezoidal thread, mesh with worm shaft |
| Gearbox Assembly | — | Simultaneous control of thread fit and worm gears mesh, bidirectional adjustment |
4. Solutions for Worm Gears Component Manufacturing
4.1 Lead Screw
To meet the strength and precision requirements of the lead screw, I implemented the following manufacturing sequence:
- Ultrasonic testing per DIN EN 10228-3, class 2
- Quenching and tempering to 242–287 HB, with test bar verification
- Rough turning, semi-finish turning, then grinding of cylindrical surfaces
- Trapezoidal thread Tr180×20-9c machined after grinding, with tooth thickness controlled to lower tolerance (9.70-0.1 mm at pitch diameter)
- Hard chrome plating on Ø220e8 surface, with test coupons (10mm×20mm×20mm) plated simultaneously; hardness checked 950–1050 HV
- Thread inspection using profile gauge (Figure 8 in original) and tooth thickness caliper
The key formula for thread measurement:
$$t = 9.7\ \text{mm (tooth thickness at pitch diameter, tolerance } 0_{-0.1})$$
$$h = 5.51\!-\!5.69\ \text{mm (tooth height at pitch diameter)}$$
4.2 Housing
The housing machining steps I defined:
- Marking and rough machining of the bottom inspection hole face
- Positioning with V-blocks, boring the copper bushing bore Ø305J7 and the worm shaft bore Ø100J7 with a center distance of 200±0.036 mm
- Pressing the copper bushing after liquid nitrogen cooling to -70°C for 2 hours
- Finish boring all bores and faces in one setup, ensuring perpendicularity and parallelism
- Drilling and tapping all threaded holes
Critical dimension:
$$C = 200 \pm 0.036\ \text{mm (center distance between worm shaft and worm wheel bores)}$$
4.3 Threaded Sleeve
For the threaded sleeve, I adopted a similar trapezoidal thread machining approach. The internal thread Tr180×20 is cut to match the lead screw. Inspection uses a profile gauge (Figure 9 in original) referenced on the inner bore Ø160H7. Tooth thickness at pitch diameter: 9.750-0.1 mm; tooth height: 4.2–4.4 mm. The external gear teeth are machined in coordination with the locking plate.
4.4 Worm Shaft
Being a carburized component, the worm shaft required careful heat treatment and grinding:
| Step | Description |
|---|---|
| 1. Turning | Add 25mm extra length at both ends for center holes (DIN332-DS M16). Leave 0.4–0.6mm grinding allowance on the tooth tip diameter. |
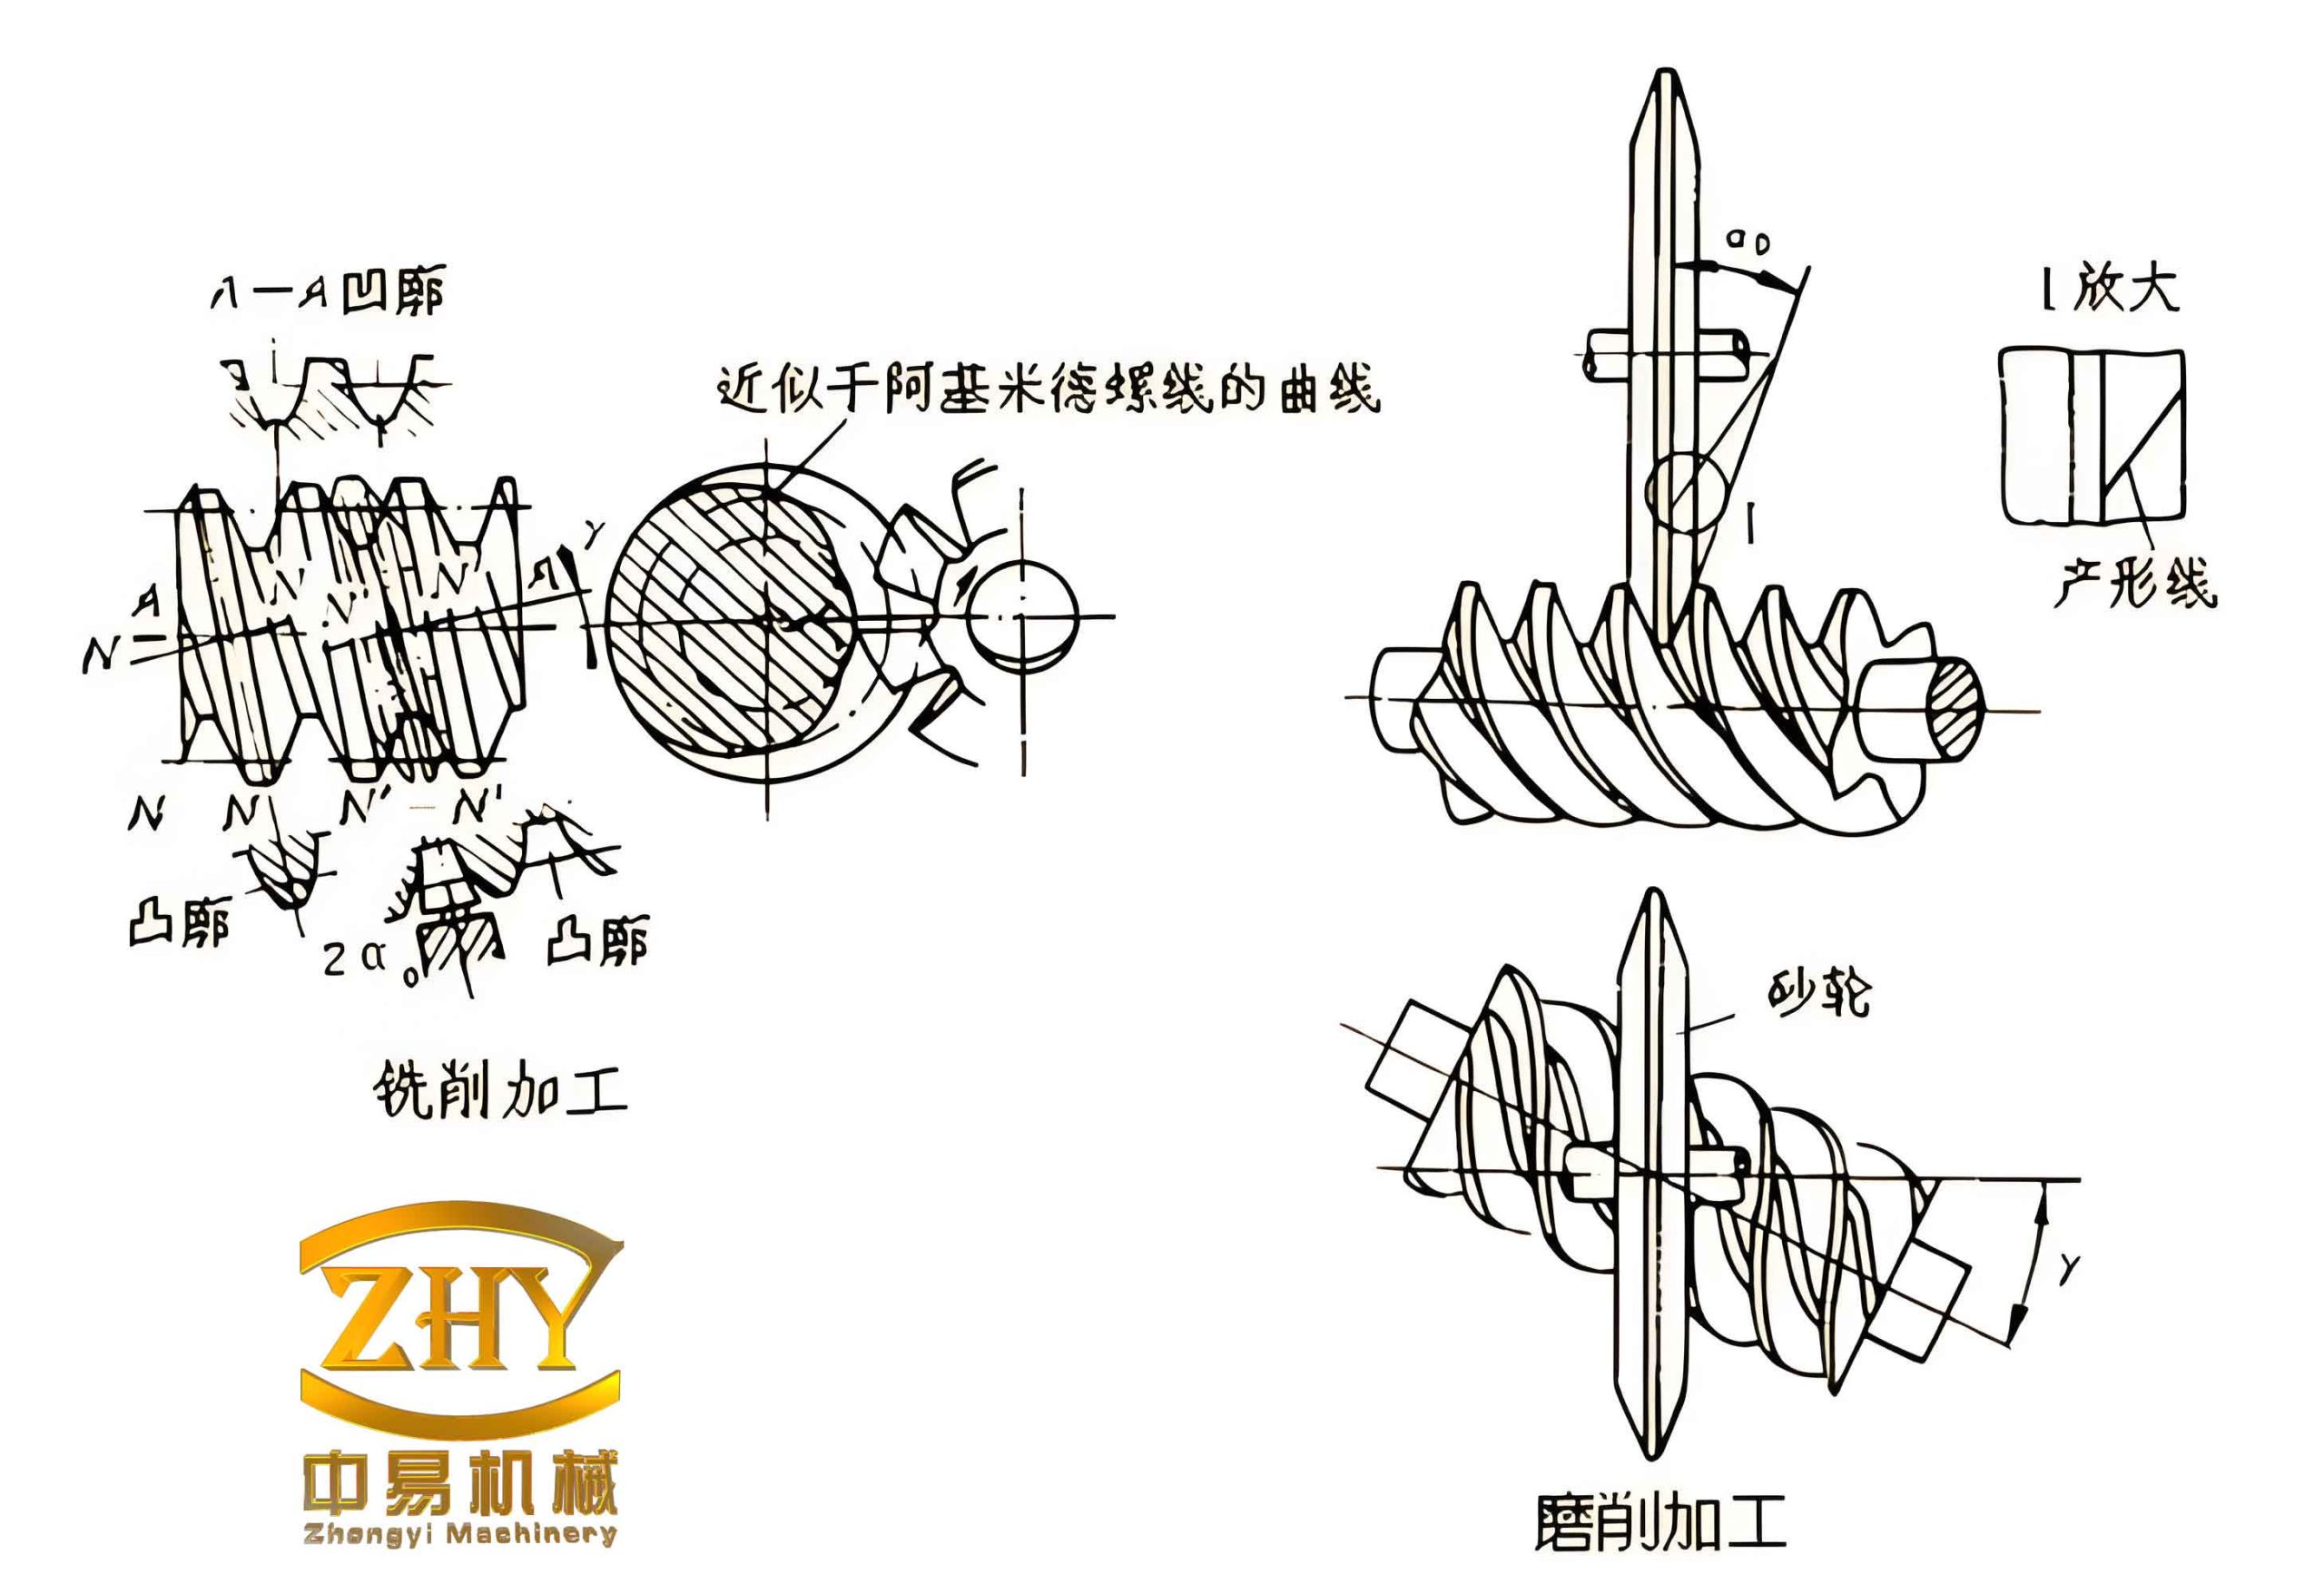
| 2. Grinding | Grind tooth tip diameter to final size. Grind short reference bands (30–50mm) on shaft journals for alignment during gear cutting. |
| 3. Gear hobbing | Check radial runout ≤0.015mm over 90mm span; parallelism of tip diameter to cutter travel ≤0.01mm/100mm. Leave 0.3–0.4mm per side on tooth thickness for grinding. |
| 4. Carburizing | Case depth 1+0.2mm, surface hardness 60±0.2 HRC. |
| 5. Re-turning & grinding | Re-cut center holes, Grind all journal diameters to final size. |
| 6. Gear tooth grinding | Machine top and bottom center runout ≤0.003mm. After grinding, check center distance with mating worm wheel: 200±0.036mm. Contact pattern: ≥55% along tooth height, ≥50% along tooth length; pattern biased toward exit side. |
4.5 Worm Wheel
The worm wheel is a copper alloy casting (ZCuAl10Fe3). The machining sequence I adopted:
- Rough and finish turning: clamp on the large bore end, machine the small bore end, outer diameter, step, and tip diameter. Leave the trapezoidal thread Tr180×20 unmachined.
- Drill all holes and tap threads.
- Gear hobbing: correct the workpiece with inner bore radial runoff ≤0.002mm and tip diameter runout ≤0.003mm. After hobbing, check the backlash with the mating worm shaft: 0.03–0.05mm.
- Cut the internal trapezoidal thread Tr180×20 in coordination with the lead screw. Tooth thickness at pitch diameter: 9.50-0.1 mm; tooth height: 4.96–5.0 mm.
Inspection gauge for worm wheel trapezoidal thread:
$$t_{wheel} = 9.5^{+0.05}_{0}\ \text{mm (tooth thickness at pitch diameter)}$$
$$h_{wheel} = 4.96\!-\!5.0\ \text{mm (tooth height)}$$
5. Assembly Process of Worm Gears Gearbox
The assembly of worm gears gearboxes is the most critical step because it simultaneously dictates the trapezoidal thread fit accuracy and the worm gears mesh quality. I developed the following sequential procedure:
| Step | Action | Verification Criteria |
|---|---|---|
| 1 | Inspect all incoming parts: trapezoidal threads of lead screw, threaded sleeve, and worm wheel (0.05mm feeler gauge must not pass). Check dimensions and surface finish of worm shaft, housing, flanges, etc. | Thread fit: no clearance detectable with 0.05mm gauge |
| 2 | Mount tapered roller bearings (30211) on worm shaft. Install bearing outer rings later with matching marks. Ensure bearing inner ring contacts shaft shoulder (gap ≤0.05mm). | Bearing axial clearance: 0.05–0.1mm (measured by dial indicator on outer ring movement) |
| 3 | Install thrust ball bearing (51156) in housing (loose ring in housing, tight ring on worm wheel). Place worm shaft into housing, mount outer rings, install end covers and seals. Adjust axial clearance via end cover shimming. | Measured axial movement of bearing outer ring: 0.1–0.2mm |
| 4 | Install worm wheel into housing. Use shims between thrust bearing and housing to align worm wheel center line with worm shaft center line. Manually rotate to find best contact. | Dial indicator on housing end face: fluctuation <0.025mm per revolution of worm wheel. Contact pattern: height ≥55%, length ≥50%, biased toward exit side. |
| 5 | Place O-rings on worm wheel and flange. Insert 0.2mm temporary shim between flange and worm wheel. Mount flange and use temporary shim set (process shim) to adjust assembly. Later replace with ground final shim. | After adjustment, remove the 0.2mm temporary shim. |
| 6 | Install seals on locating sleeve, insert sleeve into housing, fix with countersunk bolts (use Loctite for locking). | Bolt torque secure. |
| 7 | Place gearbox on a level pad (flatness error <0.05mm). Eliminate thrust bearing clearance using a jack (≥60kN) applied at three equally spaced positions (120° apart). Measure the combined clearance a (average of 9 readings). | Each reading: 0.1–0.2mm; max-min difference <0.03mm. Calculate required shim thickness: H = B + a − 0.13 |
| 8 | Install lead screw, screw it until it protrudes 190mm below housing. Mount threaded sleeve on locating sleeve, tighten with 300 N·m torque. Adjust gap between threaded sleeve and locating sleeve to 0.17mm by rotating sleeve half a turn back. | Actual gap = 0.17mm (measured by feeler gauge). Lock using toothed plate. |
| 9 | Repeat step 7 measurement: measure 9 gaps b between threaded sleeve and locating sleeve. All b values must be in range 0.1–0.17mm, max-min <0.03mm. Calculate average b for each gearbox. For four gearboxes on one segment, the b averages must differ ≤0.04mm. | Record average b; remove toothed plate, threaded sleeve, and lead screw before final segment assembly. |
The key formula for determining the adjusting shim thickness:
$$H = B + a – 0.13$$
where:
- \(H\) – required thickness of the final adjusting shim (mm)
- \(B\) – actual thickness of process shim used during measurement
- \(a\) – average measured combined clearance from the nine indicator readings (mm)
- 0.13 – ideal designed combined clearance for the worm gears assembly (mm)
6. Summary and Experience with Worm Gears
Through detailed process planning and strict execution during machining and assembly, the worm gears gearboxes produced achieved smooth transmission and met all performance requirements on the first attempt. The systematic approach I developed addresses the critical challenges of both trapezoidal thread fitting and worm gears meshing, ensuring the bidirectional adjustment necessary for segment roll gap control. This methodology has been successfully applied in production, resulting in significant economic benefits for the company.
Key lessons learned for manufacturing high-precision worm gears:
- Always machine the trapezoidal threads on the worm wheel and lead screw in coordination, using matched gauges.
- Control the center distance between worm shaft and worm wheel housing bores to within ±0.036mm; this directly affects mesh quality.
- For carburized worm shafts, leave sufficient grinding allowance on teeth and carefully control case depth to avoid distortion.
- During assembly, use temporary process shims and systematic jacking measurements to determine the final shim thickness; this eliminates guesswork and ensures consistent axial clearance.
- Nine-point measurement technique across three directions provides reliable statistical data for gap uniformity.
Since implementing this process, the worm gears gearboxes have demonstrated reliable operation in the field, with consistent transmission accuracy and extended service life. The experience gained from this project provides a solid foundation for future production of worm gears used in similar heavy-duty adjustment mechanisms.