
In modern mechanical design, the integration of three-dimensional (3D) parametric modeling with two-dimensional (2D) engineering drawing remains a critical workflow for efficiently translating conceptual designs into manufacturable products. The worm gears reducer, widely used in power transmission applications requiring high reduction ratios and compact layouts, exemplifies a typical component that benefits from such integrated design approach. While SolidWorks offers robust parametric solid modeling and assembly capabilities, its engineering drawing module is less flexible compared to the industry-standard AutoCAD. Conversely, AutoCAD excels in 2D detailing but lacks intuitive 3D modeling functions. This article presents our methodology for combining SolidWorks and AutoCAD to achieve a complete parametric design workflow for worm gears reducers. We focus on step-by-step parametric modeling, assembly simulation, and final drawing output, emphasizing the extensive use of mathematical formulations and tabular summaries to encapsulate design parameters. The term “worm gears” appears repeatedly throughout the discussion to underscore the core subject.
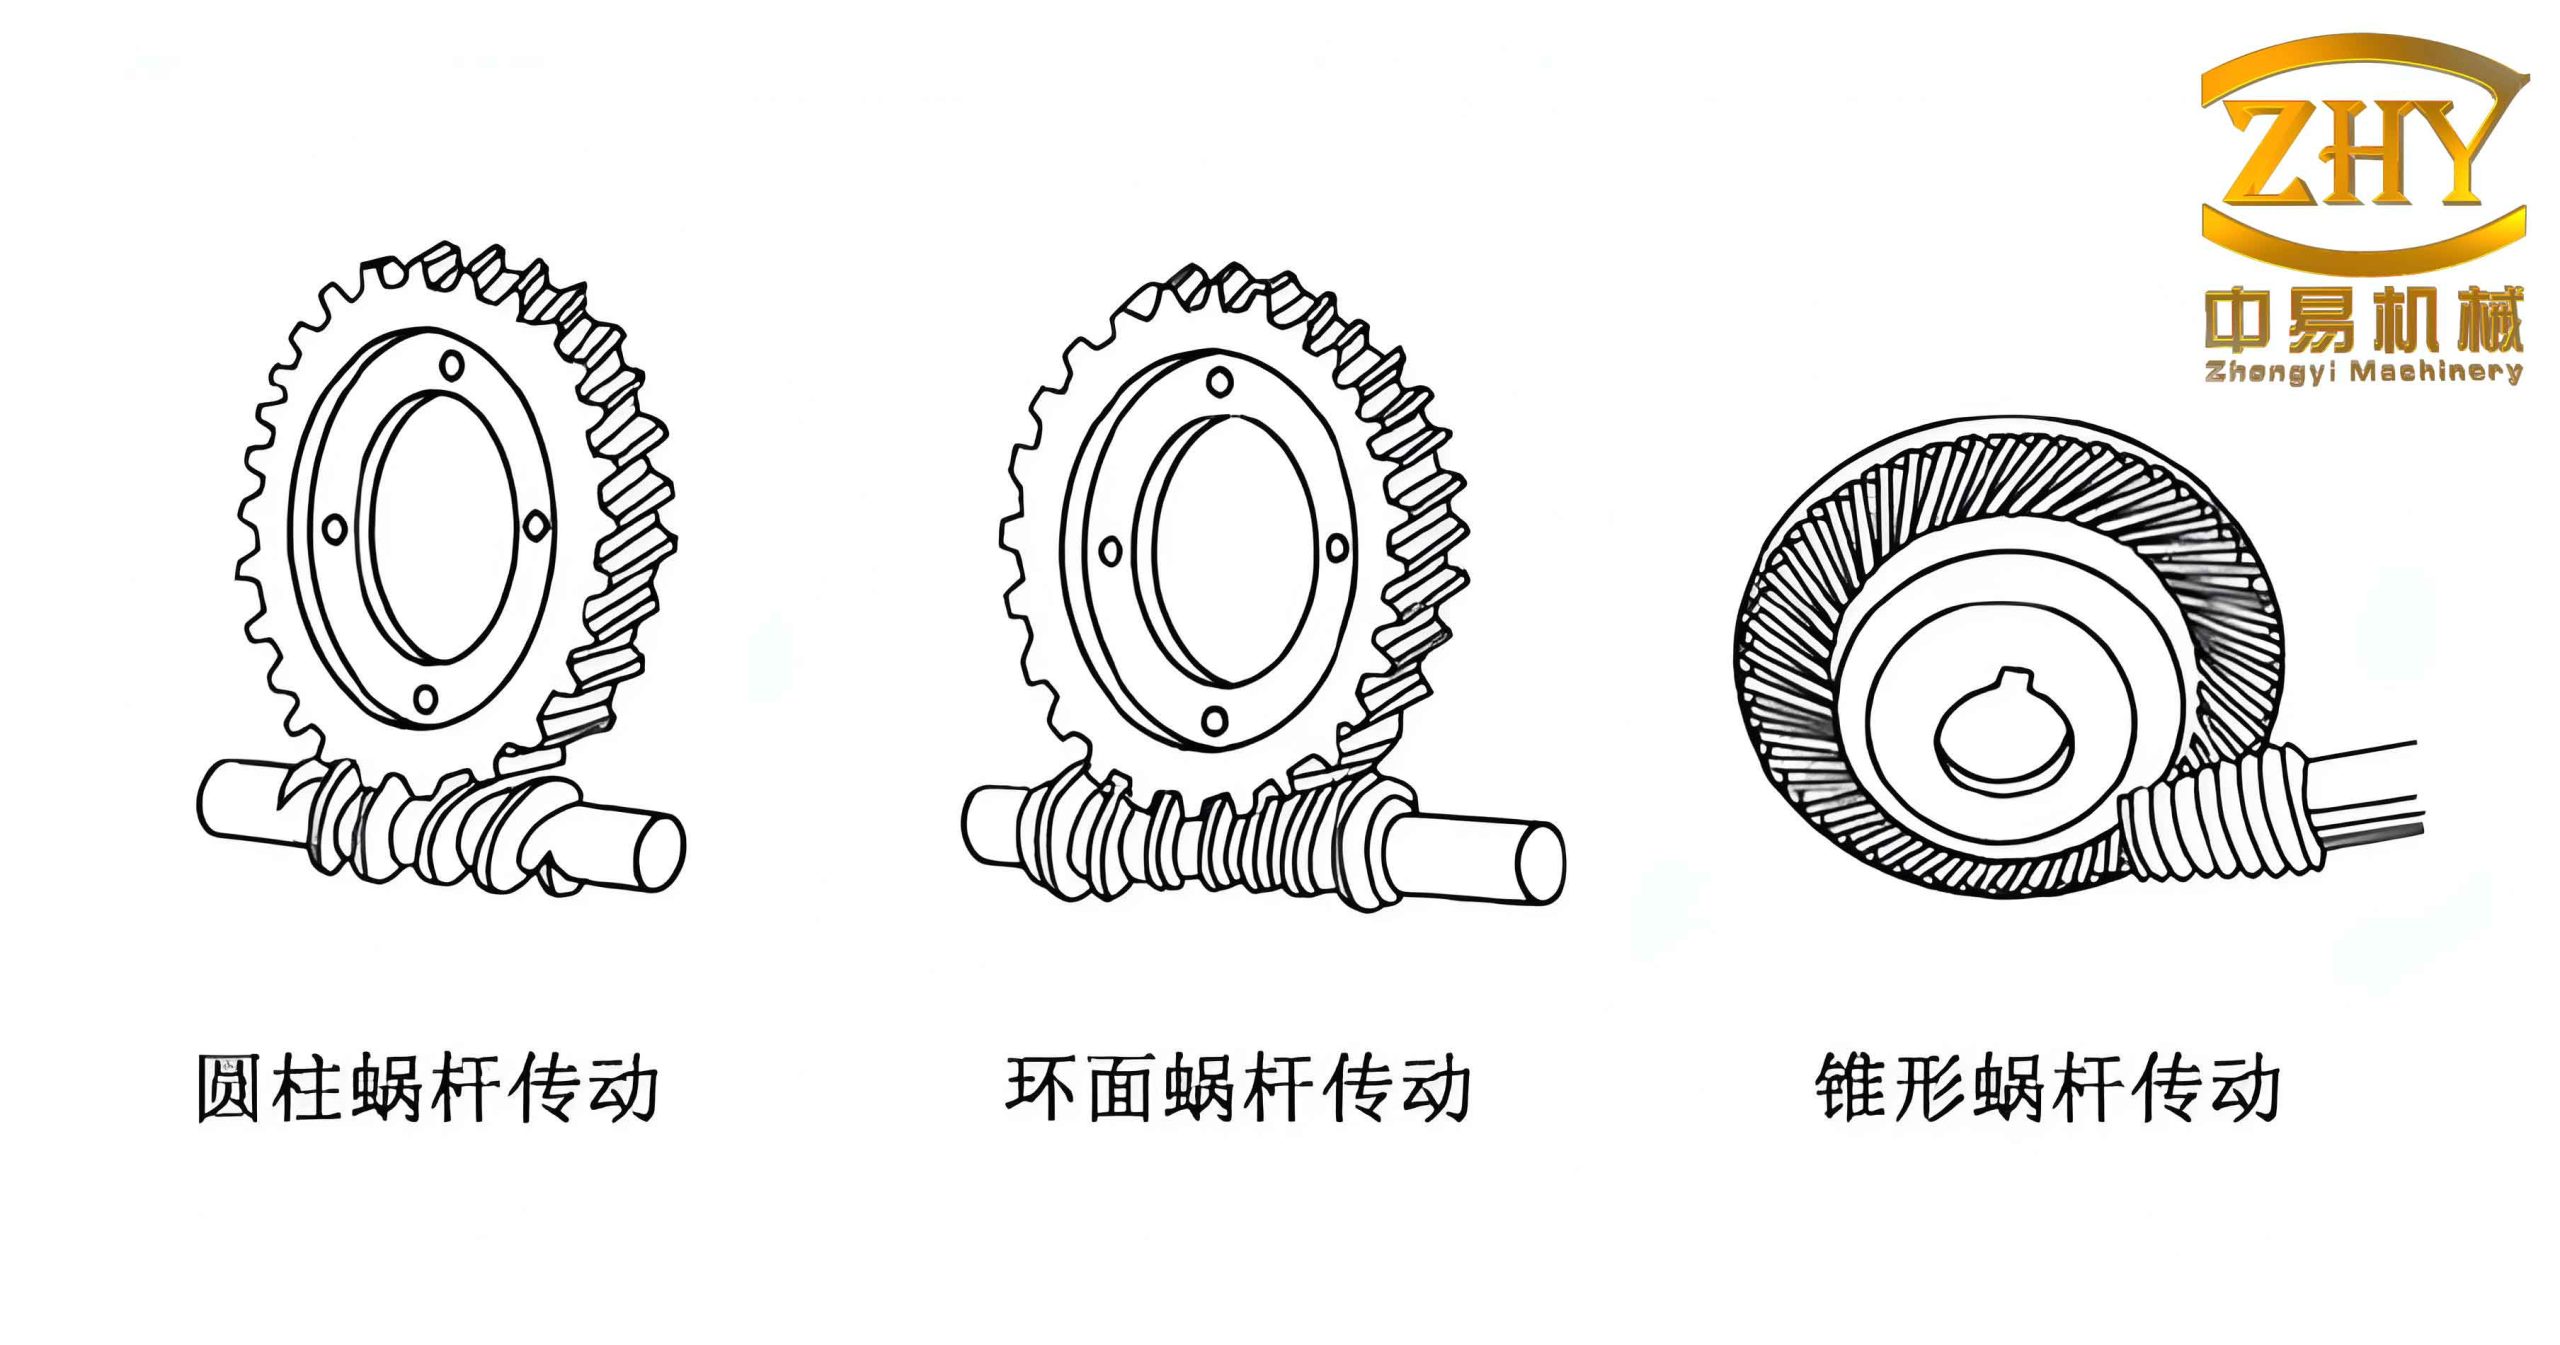
1. Parametric 3D Modeling of Worm Gears Components in SolidWorks
The foundation of any parametric design lies in the creation of accurate and modifiable 3D solid models. Our approach starts with a thorough structural analysis of the worm gears reducer. The reducer typically consists of several key components: the upper casing, lower casing, worm shaft (worm), worm gear (worm wheel), bearings, seals, and fasteners. Among these, the worm gears pair—the worm and the worm wheel—is the most critical subassembly. In SolidWorks, we utilize a variety of feature-based modeling commands: extrusion, revolution, sweep, loft, hole wizard, fillet, chamfer, and pattern. To ensure parametric flexibility, we define global variables and equations that control critical dimensions. For instance, the geometry of worm gears is governed by standard formulas involving the module \(m\), number of threads \(z_1\), number of teeth \(z_2\), pressure angle \(\alpha\), and lead angle \(\gamma\). Table 1 summarizes the main components and the corresponding SolidWorks features we employed.
| Component | Primary SolidWorks Features | Key Parametric Variables |
|---|---|---|
| Worm (Shaft) | Revolution, Sweep (helical cut), Fillet | \(m\), \(z_1\), \(d_1 = m \cdot q\) (pitch diameter), lead angle \(\gamma = \arctan(z_1 / q)\) |
| Worm Wheel | Revolution, Cut-Sweep (tooth profile), Circular Pattern, Fillet | \(m\), \(z_2\), center distance \(a = \frac{m}{2}(q + z_2)\), face width |
| Upper Casing | Extrude, Shell, Rib, Hole Wizard, Fillet | Boss thickness, rib height, hole patterns |
| Lower Casing | Extrude, Cut-Extrude, Mirror, Fillet | Wall thickness, bearing seat dimensions |
| Bearing (simplified) | Revolution, Cut-Extrude (for races), Pattern | Inner/outer diameter, width |
Creating the worm geometry requires special attention because of its helical thread. The worm is essentially a screw-like component. In SolidWorks, we generate the helical cut using the Helix and Spiral curve and a Swept Cut. The helix parameters are derived from the lead \(L = \pi \cdot m \cdot z_1\). The axial tooth profile of the worm corresponds to a trapezoidal shape defined by the pressure angle \(\alpha\) (typically 20°). For the worm wheel, the tooth space is generated by a Cut-Sweep following a circular path that matches the worm’s thread. The parametric equations we used to drive the geometry are listed in Table 2.
| Parameter | Symbol | Formula | Example (Module \(m=4\), \(z_1=2\), \(z_2=30\)) |
|---|---|---|---|
| Worm pitch diameter | \(d_1\) | \(d_1 = m \cdot q\) (where \(q\) is diameter quotient, typically 10–16) | \(d_1 = 4 \times 12 = 48\) mm |
| Worm wheel pitch diameter | \(d_2\) | \(d_2 = m \cdot z_2\) | \(d_2 = 4 \times 30 = 120\) mm |
| Center distance | \(a\) | \(a = \frac{m}{2}(q + z_2)\) | \(a = 2 \times (12+30) = 84\) mm |
| Lead angle | \(\gamma\) | \(\gamma = \arctan\left(\frac{z_1}{q}\right)\) | \(\gamma = \arctan(2/12) \approx 9.46^\circ\) |
| Axial pitch | \(p_x\) | \(p_x = \pi m\) | \(p_x = 12.566\) mm |
| Lead | \(L\) | \(L = p_x \cdot z_1\) | \(L = 12.566 \times 2 = 25.133\) mm |
| Tooth depth (full depth) | \(h\) | \(h = 2.25 m\) | \(h = 9\) mm |
| Addendum | \(h_a\) | \(h_a = m\) | \(h_a = 4\) mm |
| Dedendum | \(h_f\) | \(h_f = 1.25 m\) | \(h_f = 5\) mm |
To achieve true parametric control, we defined global variables in SolidWorks (e.g., “Module,” “Z1,” “Z2,” “Quotient”) and linked all sketches and feature dimensions to these variables. For example, the helix pitch was set to \( \text{“Lead”} = \text{“Module”} * \pi * \text{“Z1”} \). This allowed us to regenerate the entire worm gears model instantly by modifying only the module or tooth counts. The modeling of casings also followed parametric rules: the bearing seat diameters and bolt hole patterns were linked to the worm gears’ center distance and bearing sizes. Figure 1 in the original article (not reproduced here due to citation restrictions) illustrated the solid models of the main reducer components. In our workflow, each component’s model was saved as a separate part file with fully defined parameters.
One crucial aspect is the correct generation of the worm wheel tooth profile. Since the worm wheel is essentially an enveloping gear, its tooth profile is not a simple involute but rather an arc generated by the worm’s thread. In SolidWorks, we used a Cut-Sweep with a Solid Sweep option, where the tool body is a copy of the worm thread rotated around the worm wheel axis. This method ensures exact conjugate action and is widely used in virtual prototyping of worm gears. The number of teeth \(z_2\) and the module \(m\) are the primary driving parameters. After generating one tooth space, we used a Circular Pattern to replicate it around the wheel’s circumference. The pattern angle is \(360^\circ / z_2\).
To further enhance the parametric depth, we incorporated design equations for strength and wear. For instance, the tangential force on the worm wheel \(F_t\) relates to torque \(T_2\) and pitch radius: \(F_t = 2T_2 / d_2\). The load capacity of worm gears is often evaluated using the Buckingham equation or AGMA standards. However, for our parametric model, we only embed the geometric parameters; load calculations are performed externally and then fed back as constraints. Table 3 summarizes the linkage between parametric dimensions and performance parameters.
| Design Variable | Related Performance | Typical Constraint |
|---|---|---|
| Module \(m\) | Tooth strength, wear rate | Minimum module based on torque: \(m \geq \sqrt[3]{\frac{2T_2}{\sigma_{b} \cdot b \cdot Y}}\) |
| Diameter quotient \(q\) | Worm rigidity, lead angle | \(q \geq 8\) for steel worms, recommended 10–16 |
| Face width of wheel \(b_2\) | Contact stress, load distribution | \(b_2 \leq 0.75 d_1\) |
| Center distance \(a\) | Overall reducer size | Standardized values (e.g., 100, 125, 160 mm) |
With these parametric definitions, we were able to rapidly iterate different worm gears designs, adjusting the module and tooth counts to meet specific torque and speed requirements. The SolidWorks model acted as a digital twin that could be automatically updated.
2. Assembly and Simulation of Worm Gears Reducer
After all parts were modeled, we imported them into a SolidWorks assembly file. The assembly procedure simulates the actual manufacturing and assembly sequence. We selected the lower casing as the base (fixed) component. Then, we inserted the worm shaft, worm wheel, bearings, and upper casing sequentially, applying mates to constrain their relative motions. For the worm gears pair, the most critical mate is a Gear Mate with a specified gear ratio. In SolidWorks, the gear mate defines the relationship between the angular motion of two components. For worm gears, the gear ratio \(i\) is given by:
$$i = \frac{\omega_1}{\omega_2} = \frac{z_2}{z_1}$$
where \(\omega_1\) is the angular velocity of the worm and \(\omega_2\) is that of the worm wheel. We set the gear mate using this ratio. Additionally, we added a Coincident Mate between the worm’s pitch cylinder and the worm wheel’s pitch cylinder to ensure proper meshing. The worm’s axis and worm wheel’s axis were positioned at a distance equal to the center distance \(a\). To allow motion simulation, we also applied Revolute Mates to the worm shaft (relative to the lower casing bearing seats) and to the worm wheel shaft. Table 4 lists the mates we used for the worm gears reducer assembly.
| Component Pair | Mate Type | Purpose |
|---|---|---|
| Worm shaft ↔ Lower casing bearing bore | Concentric, Coincident (face) | Position worm rotation axis |
| Worm wheel shaft ↔ Lower casing (other bearing bore) | Concentric, Coincident | Position wheel rotation axis |
| Worm ↔ Worm wheel | Gear (ratio = \(z_2/z_1\)) | Enforce kinematic relationship |
| Worm pitch cylinder ↔ Worm wheel pitch cylinder | Tangent (or Distance = 0) | Ensure correct meshing depth |
| Upper casing ↔ Lower casing | Coincident (mating faces), Concentric (dowel pins) | Align and fix casing halves |
| Fasteners (bolts) ↔ Casing holes | Concentric, Coincident | Simulate bolted connections |
After completing the assembly, we ran a Motion Study to verify the interference-free motion of the worm gears. The gear mate ensures that when we rotate the worm by one revolution, the worm wheel rotates by \(1/i\) revolutions. We set a constant speed motor on the worm shaft and observed the output. No interference was detected after tuning the tooth profiles. This simulation validates the parametric design before any physical prototype is built.
For manufacturing and assembly documentation, we also created an Exploded View of the worm gears reducer. The exploded view separates each component along a linear or radial direction, clearly revealing the assembly order. In SolidWorks, we used the Explode Line Sketch tool to add trails indicating how parts come together. The exploded view is especially useful for creating instructional manuals and for verifying that every component fits correctly. The original article’s Figure 4 (not shown) demonstrated such an exploded view. In our workflow, we saved the exploded configuration as a named view, which later could be exported to 2D drawings.
Another valuable feature of SolidWorks is the ability to generate Interference Detection reports. For the worm gears reducer, we ran this tool and found no interferences in the nominal position. However, we also studied the effect of manufacturing tolerances by adjusting the center distance slightly (within allowable limits) and rechecking. The parametric model allowed us to quickly evaluate different clearance scenarios.
3. Engineering Drawing Generation and Refinement with AutoCAD
Despite the excellence of SolidWorks in 3D modeling, its 2D drawing capabilities—while functional—are often less familiar or less flexible for engineers who have spent years using AutoCAD. Consequently, we adopted a hybrid workflow: generate initial 2D views from SolidWorks, export to AutoCAD as DWG files, and then perform detailed editing, dimensioning, and formatting in AutoCAD to meet national standards (e.g., Chinese GB standards or ISO). This method combines the accuracy of model-derived views with the powerful annotation tools of AutoCAD.
The process begins in SolidWorks: from a part or assembly, we create a new drawing document. We insert standard views (front, top, right, and isometric) and section views if needed. For the worm gears reducer, we typically produced an assembly drawing with a bill of materials (BOM) and detailed drawings for the worm, worm wheel, and casings. SolidWorks automatically generates dimensions from the model, but these often require manual adjustment for clarity. We then save the drawing as a DWG file using the Save As command, selecting the appropriate DWG version compatible with our AutoCAD version.
Once imported into AutoCAD, we perform the following refinements:
- Layer management: assign geometry to appropriate layers (e.g., “Visible,” “Hidden,” “Center,” “Dimension”) according to standard line types and colors.
- Line weight and type adjustment: ensure hidden lines are dashed (e.g., ISO dash), center lines are long-dashed short-dashed, and visible outlines are continuous thick.
- Dimensioning: replace automatic dimensions with properly placed linear, angular, and diametral dimensions. For worm gears, we explicitly dimension the center distance \(a\), the worm pitch diameter \(d_1\), the worm wheel pitch diameter \(d_2\), the lead angle \(\gamma\), and the tooth thickness. We also add surface finish symbols and geometric tolerances.
- Annotations: add notes for material, heat treatment, and manufacturing instructions. For worm gears, lubrication requirements and backlash specifications are critical.
Table 5 provides a comparison of line standards typically applied in worm gears reducer drawings.
| Layer Name | Line Type | Line Weight (mm) | Color | Used For |
|---|---|---|---|---|
| 0 (default) | Continuous | 0.5 (thick) | White/Black | Visible outlines, borders |
| HIDDEN | Dashed | 0.25 (thin) | Blue | Hidden edges |
| CENTER | Center | 0.25 (thin) | Red | Axis lines, pitch circles |
| DIMENSION | Continuous | 0.18 (thin) | Green | Dimension lines, extension lines, arrows |
| HATCH | Continuous | 0.18 (thin) | Magenta | Section hatching |
| ANNOTATION | Continuous | 0.18 (thin) | Cyan | Text notes, symbols |
Special attention is paid to the worm gears meshing area. In the assembly drawing, we add a detail view showing the tooth engagement, with callouts indicating the contact pattern and backlash. Backlash \(j_n\) for worm gears is often specified in the normal plane and is related to the module: typical values range from \(0.02m\) to \(0.05m\). We include this information in the drawing notes.
AutoCAD’s block and attribute features are also utilized to create a parametric BOM that can be linked to external databases. However, for simplicity, we often populate the BOM manually after export. The final drawing is plotted to scale, and a PDF is generated for distribution.
This hybrid approach significantly reduces the time spent on drawing creation compared to drafting from scratch in AutoCAD. The 3D model ensures geometric accuracy, while AutoCAD provides the mature editing environment that expert drafters prefer. Furthermore, any design changes in SolidWorks can be propagated to the drawing by re-exporting the views, and only the annotations need to be adjusted in AutoCAD. To manage this, we maintain a consistent file naming convention and keep the SolidWorks model as the master.
4. Conclusion
We have presented a comprehensive parametric design workflow for worm gears reducers that seamlessly integrates SolidWorks and AutoCAD. By employing SolidWorks for 3D solid modeling with global variables and equations, we achieved rapid regeneration of worm gears components under varying design parameters. The assembly environment allowed us to simulate gear meshing and verify motion without interference. The creation of exploded views assisted in assembly planning. Subsequently, we transferred the initial 2D drawings to AutoCAD, where we applied strict line standards, detailed dimensions, and annotations to produce final engineering documents. Throughout the process, we emphasized the central role of worm gears and their associated formulas. The summarized tables and equations in this article serve as a quick reference for designers embarking on similar projects.
The benefits of this integrated approach are manifold: reduced design cycle time, improved accuracy, easy design iterations, and compatibility with existing drafting standards. While the article focused on worm gears reducers, the same methodology can be extended to other gearboxes or mechanical systems. Future work could involve automating the AutoCAD editing steps using scripts (e.g., AutoLISP) to further streamline the workflow. Additionally, the parametric model could be linked to finite element analysis (FEA) software for stress validation of worm gears under load. Nevertheless, the current framework already demonstrates a practical and efficient path from concept to drawing.
In summary, the combination of SolidWorks and AutoCAD provides a robust environment for the parametric design of worm gears and their assemblies. The careful use of mathematical modeling and structured documentation ensures that the final product meets functional and manufacturing requirements. Our experience confirms that this hybrid procedure is highly effective for engineering practice.