
In modern mechanical design, the use of miter gears, particularly those with equal backlash contracting teeth, has become increasingly prevalent due to their superior performance in transmitting motion between intersecting shafts. As an engineer specializing in gear design, I have extensively utilized Siemens NX6.0 for parametric modeling, which allows for efficient customization and analysis. This article details my first-person approach to creating a fully parametric model of an equal backlash miter gear, emphasizing the iterative process and mathematical foundations. The equal backlash miter gear design ensures constant clearance along the tooth length, enhancing strength and reducing the risk of interference, making it a recommended type for straight bevel gears. Throughout this discussion, the term miter gear will be repeatedly emphasized to underscore its significance in power transmission systems.
The core advantage of equal backlash miter gears lies in their geometric configuration: the tip cone generatrix of one miter gear is parallel to the root cone generatrix of its mating miter gear. This parallelism results in equal tip angles and root angles between the pair, specifically, for miter gear 1, the tip angle \(\theta_{a1}\) equals the root angle \(\theta_{f2}\) of miter gear 2, and vice versa. This relationship can be expressed as:
$$ \theta_{a1} = \theta_{f2} $$
$$ \theta_{a2} = \theta_{f1} $$
These equations are fundamental to achieving uniform backlash, which minimizes stress concentration and increases tooth root strength. In contrast to unequal backlash miter gears, where clearance diminishes toward the small end, equal backlash miter gears maintain consistent performance across the tooth profile. My modeling journey begins with setting up parameters and expressions in NX6.0, a critical step for driving the entire geometry.
Upon entering the part interface of NX6.0, I navigate to the “Tools” menu and select the “Expressions” command to open the expressions dialog. Here, I click the “Import Expressions from File” icon, which triggers the “Import Expression File” dialog. I select the pre-prepared expression file, named appropriately for miter gear parameters, and confirm the import. This file contains all necessary variables and relational formulas that define the miter gear’s dimensions. The imported parameters include key geometric values such as tip radius, root radius, base radius, pitch radius, pitch angle, and face width, which are essential for controlling the miter gear’s shape. Below is a summary table of these primary parameters and their roles:
| Parameter | Description | Typical Symbol |
|---|---|---|
| \( r_a \) | Tip radius at the large end | Controlled by gear geometry |
| \( r_f \) | Root radius at the large end | Derived from tooth depth |
| \( r_b \) | Base radius for involute generation | Calculated from module and pressure angle |
| \( r \) | Pitch radius at the large end | Central to gear sizing |
| \( \delta_1 \) | Pitch angle of miter gear 1 | Determines cone orientation |
| \( b \) | Face width of the miter gear | Affects tooth length and strength |
| \( \delta_{f2} \) | Root angle for miter gear 2 | Linked to tip angle of miter gear 1 |
These parameters are interlinked through mathematical relationships that ensure the miter gear operates correctly. For instance, the pitch radius \( r \) is derived from the module \( m \) and number of teeth \( z \), expressed as \( r = \frac{m \cdot z}{2} \). Similarly, the base radius \( r_b \) is calculated using the pressure angle \( \alpha \): \( r_b = r \cdot \cos(\alpha) \). By importing these expressions, I establish a dynamic model where any change propagates automatically, streamlining the design process for miter gears.
With parameters in place, I proceed to create the fundamental sketches for the miter gear cross-section. I select the XOZ plane as the reference and develop a sketch that represents the cross-section of miter gear 1. This sketch includes critical lines such as the tip line, root line, base cone line, and pitch line, all positioned using the imported parameters. For example, the tip line is controlled by \( r_a \), the root line by \( r_f \), and the pitch line by \( r \). Additionally, the root line for miter gear 2 is defined by \( \delta_{f2} \), which aligns with the tip angle of miter gear 1 per the equal backlash principle. This step lays the groundwork for the three-dimensional shape of the miter gear.
Next, I generate reference planes at the large and small ends of the miter gear. From the cross-section sketch, I construct planes perpendicular to the cone generatrix at both ends, which will serve as bases for the equivalent spur gear profiles. These planes are essential for developing the tooth flanks, as they allow me to treat the miter gear teeth as segments of equivalent spur gears at different cross-sections. On the large-end reference plane, I sketch the basic circles for the equivalent gear: the root circle, base circle, pitch circle, and tip circle. Their diameters are driven by parameters such as \( d_{f1\_max} \), \( d_{b1\_max} \), \( d_{max} \), and \( d_{a1\_max} \), which are calculated from the miter gear geometry. Similarly, on the small-end reference plane, I create corresponding circles with diameters like \( d_{f1\_min} \), \( d_{b1\_min} \), \( d_{min} \), and \( d_{a1\_min} \). The relationship between these diameters and the cone distance can be summarized in the following table:
| Circle Type | Large-End Diameter | Small-End Diameter | Formula |
|---|---|---|---|
| Tip Circle | \( d_{a1\_max} \) | \( d_{a1\_min} \) | \( d_a = d + 2h_a \cos \delta \) |
| Pitch Circle | \( d_{max} \) | \( d_{min} \) | \( d = m z \) |
| Base Circle | \( d_{b1\_max} \) | \( d_{b1\_min} \) | \( d_b = d \cos \alpha \) |
| Root Circle | \( d_{f1\_max} \) | \( d_{f1\_min} \) | \( d_f = d – 2h_f \cos \delta \) |
In these formulas, \( h_a \) is the addendum, \( h_f \) is the dedendum, \( \delta \) is the pitch angle, and \( \alpha \) is the pressure angle. These calculations ensure that the miter gear teeth are accurately represented across the face width, accounting for the tapering nature of bevel gears.
To form the tooth profile, I need to create involute curves on both the large-end and small-end reference planes. I begin by repositioning the coordinate system: I move the origin to the center of the large-end circles, aligning the large-end reference plane with the XOY plane and setting the Z-axis upward. This transformation simplifies the involute generation. Using the “Law Curve” tool from the “Insert” menu, I define the X, Y, and Z coordinates with parametric equations for the involute. For the large end, the coordinates are given by:
$$ x_t1 = r_{b\_max} (\cos(t) + t \sin(t)) $$
$$ y_t1 = r_{b\_max} (\sin(t) – t \cos(t)) $$
$$ z_t1 = 0 $$
where \( t \) is a parameter ranging from 0 to the involute roll angle. This produces the involute curve on the large-end plane. I then sketch the single-tooth profile on this plane, trimming it with the tip and root circles to define the exact tooth shape. Similarly, I transform the coordinate system to the small-end reference plane and repeat the process, using parameters like \( r_{b\_min} \) to generate the small-end involute. The resulting profiles represent the tooth flanks at the two extremes of the miter gear, ensuring proper taper and engagement.
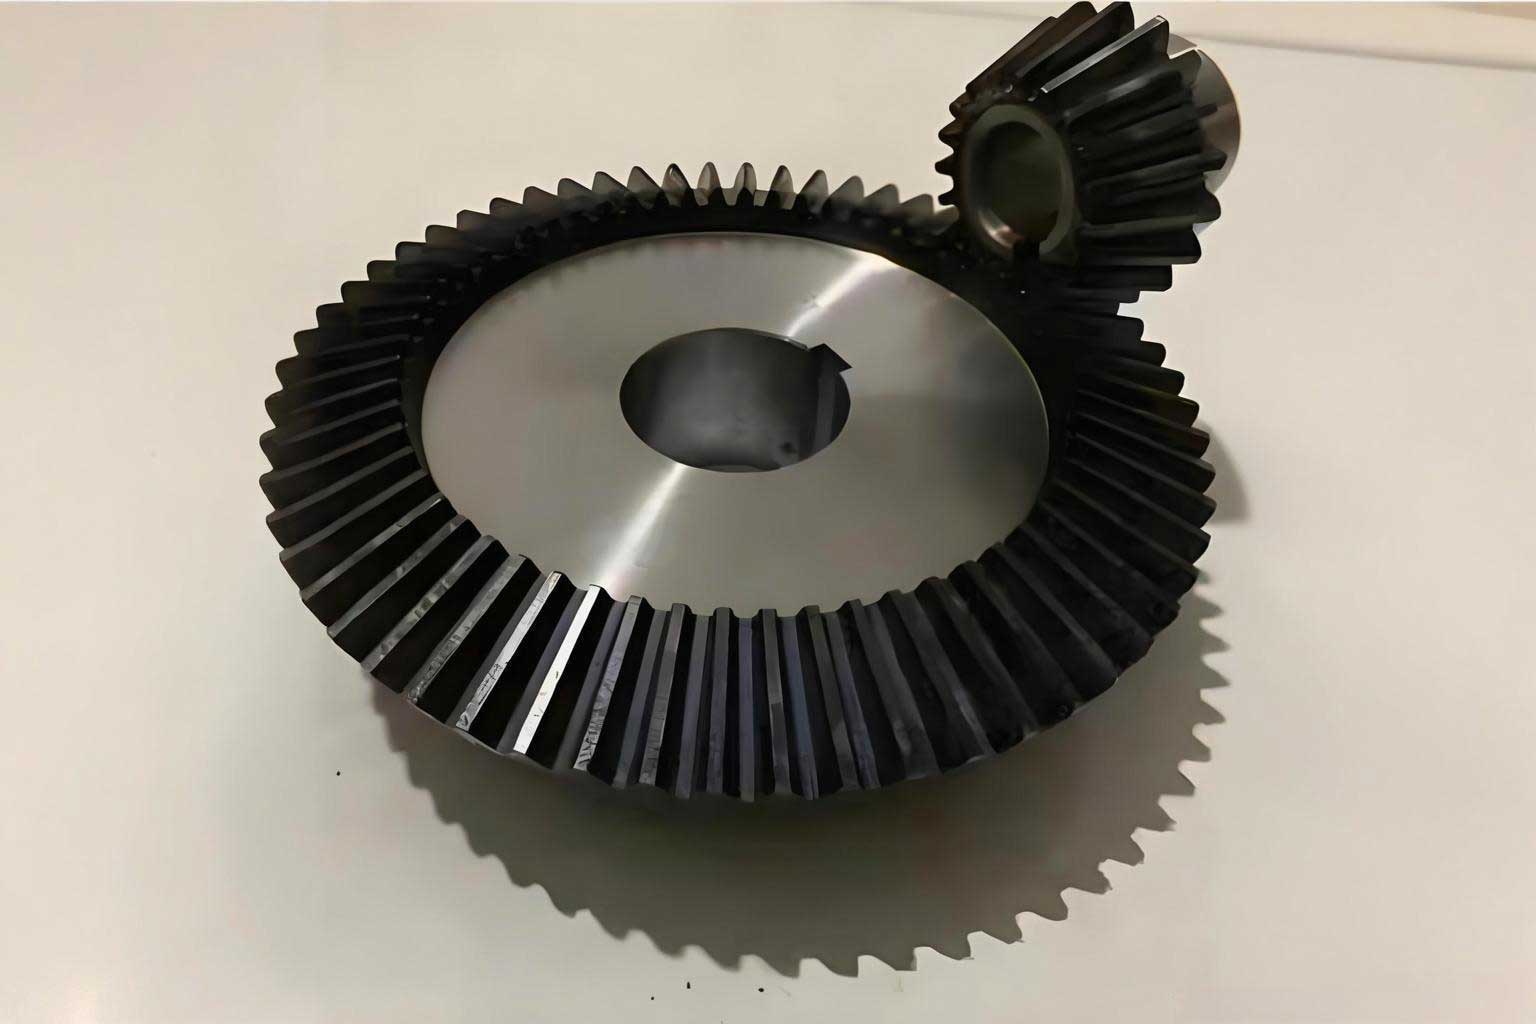
The visual representation above illustrates a typical miter gear configuration, highlighting the conical shape and tooth arrangement. This image underscores the importance of accurate modeling to achieve functional miter gears in mechanical assemblies.
After establishing the tooth profiles, I focus on creating the gear blank or base body. I select the XOY plane as a sketch plane and draw the cross-section of the miter gear blank, which typically includes the back cone and mounting features. This sketch is constrained by parameters such as the pitch angle and face width. Using the “Revolve” command, I rotate this sketch around the gear axis to generate a solid conical body. This base body serves as the foundation onto which the teeth will be added, and it is crucial for ensuring the structural integrity of the miter gear. The revolve operation is defined by an angle of 360 degrees, resulting in a full rotational solid that mimics the actual gear blank used in manufacturing.
With the base body ready, I proceed to create a single tooth entity. I employ the “Sweep” tool from the “Insert” menu, where I specify the large-end and small-end tooth profiles as section curves and the pitch cone line as the guide curve. This sweep operation generates a surface that represents the tooth flank, conforming to the taper of the miter gear. To convert this surface into a solid, I use the “Extract” command to create a solid body of the single tooth. This solid tooth is then positioned correctly on the base body, ensuring it aligns with the pitch cone and root lines. The sweep path is critical here, as it dictates the tooth orientation and ensures the equal backlash condition is maintained along the entire tooth length.
Once the single tooth is created, I replicate it around the gear axis to form the complete set of teeth. I use the “Instance Geometry” command (specifically the “Rotate” type) from the “Insert” menu. I select the single tooth as the object to instance, specify the gear axis as the rotation axis, set the angle increment to \( \frac{360}{z_1} \) degrees (where \( z_1 \) is the number of teeth on miter gear 1), and input the number of instances as \( z_1 \). This action generates all teeth uniformly spaced around the miter gear. Following this, I apply finishing touches such as fillets at the tooth roots to reduce stress concentration and chamfers on edges for safety. These features enhance the durability and performance of the miter gear, making it suitable for high-load applications.
To validate the design, I also model the mating miter gear (miter gear 2) using a similar parametric approach. The process mirrors that of miter gear 1, but with adjusted parameters to account for the gear ratio and equal backlash relationships. For instance, the pitch angle \( \delta_2 \) is complementary to \( \delta_1 \) for a 90-degree shaft angle, and the tip and root angles are swapped as per the equations earlier. After modeling both miter gears, I assemble them in NX6.0 using constraints to align their axes and ensure proper meshing. The assembly reveals the interaction between the two miter gears, showcasing the equal backlash characteristic. To visually confirm this, I create a section view by cutting the assembly along the plane defined by the two gear axes. This section allows me to inspect the tooth engagement and clearance along the entire face width.
Upon examining the section, I observe that the backlash (or clearance) between the tip of one miter gear and the root of the other remains constant from the large end to the small end. This is a direct result of the parallel tip and root cone generatrices, as designed. The uniformity of backlash is crucial for smooth operation and noise reduction in miter gear transmissions. The mathematical assurance of this feature stems from the parametric relationships embedded in the model. For example, the tip angle \( \theta_a \) and root angle \( \theta_f \) are derived from the cone distances and addendum/dedendum values, expressed as:
$$ \theta_a = \arctan\left(\frac{h_a}{R}\right) $$
$$ \theta_f = \arctan\left(\frac{h_f}{R}\right) $$
where \( R \) is the cone distance. For equal backlash miter gears, these angles are matched between the pair, ensuring parallelism. This parametric control allows for quick adjustments; if I modify a parameter like the module or pressure angle, the entire miter gear updates automatically, maintaining geometric consistency.
Throughout this modeling exercise, I have leveraged NX6.0’s robust parametric capabilities to create a flexible and accurate representation of equal backlash miter gears. The use of expressions and sketches driven by mathematical formulas ensures that the model is not only precise but also adaptable to different design requirements. The key to success lies in understanding the underlying geometry of miter gears and translating it into parametric constraints. Below, I provide a comprehensive table summarizing the major steps and corresponding tools in NX6.0 for modeling miter gears:
| Step | Action | NX6.0 Tool/Command | Parameters Involved |
|---|---|---|---|
| 1 | Import parameters and expressions | Expressions dialog, Import from File | All geometric and relational variables |
| 2 | Create cross-section sketch | Sketch on XOZ plane | \( r_a, r_f, r_b, r, \delta_1, b \) |
| 3 | Generate reference planes | Plane creation tools | Cone distances and angles |
| 4 | Draw equivalent gear circles | Sketch on reference planes | \( d_{a1\_max}, d_{b1\_max}, etc.\) |
| 5 | Create involute curves | Law Curve | \( r_{b\_max}, r_{b\_min}, t \) |
| 6 | Sketch tooth profiles | Sketch trimming | Tip and root circle diameters |
| 7 | Build gear base body | Revolve | Cross-section sketch, axis |
| 8 | Sweep single tooth | Sweep | Section and guide curves |
| 9 | Create solid tooth | Extract | Swept surface |
| 10 | Array teeth around axis | Instance Geometry (Rotate) | \( z_1, \frac{360}{z_1} \) |
| 11 | Apply finishing features | Fillet, Chamfer | Radii and angles |
| 12 | Model mating miter gear | Similar parametric process | \( z_2, \delta_2, \theta_{a2}, \theta_{f2} \) |
| 13 | Assemble and verify backlash | Assembly constraints, Section View | Clearance measurements |
This table serves as a quick reference for engineers aiming to replicate the parametric modeling of miter gears in NX6.0. Each step is interdependent, with parameters flowing seamlessly to ensure the miter gear design is coherent and functional.
In conclusion, parametric modeling of equal backlash miter gears in NX6.0 is a systematic process that combines geometric principles with software tools. By emphasizing parameters such as tip angles, root angles, and cone distances, I can create accurate models that adhere to the equal backlash criterion. The ability to import expressions and use law curves for involute generation is particularly powerful, allowing for rapid iterations and customization. This approach not only streamlines the design of miter gears but also ensures they meet performance standards for various applications, from automotive differentials to industrial machinery. As miter gears continue to evolve, parametric modeling will remain essential for innovation and efficiency in gear engineering.
To further illustrate the mathematical rigor, consider the fundamental equations governing miter gear geometry. The pitch diameter \( d \) is related to the module \( m \) and number of teeth \( z \) by \( d = m z \). The cone distance \( R \) is calculated from the pitch diameter and pitch angle: \( R = \frac{d}{2 \sin \delta} \). The addendum and dedendum are typically standard values based on the module, but for equal backlash miter gears, they are adjusted to ensure parallel tip and root cones. The tip and root angles are then derived as mentioned earlier. These relationships can be encapsulated in a set of formulas that drive the parametric model:
$$ \text{For miter gear 1:} \quad \theta_{a1} = \arctan\left( \frac{h_{a1}}{R_1} \right) = \theta_{f2} $$
$$ \text{For miter gear 2:} \quad \theta_{a2} = \arctan\left( \frac{h_{a2}}{R_2} \right) = \theta_{f1} $$
$$ \text{Where } R_1 = \frac{m z_1}{2 \sin \delta_1}, \quad R_2 = \frac{m z_2}{2 \sin \delta_2} $$
By embedding these equations into the NX6.0 expressions, the model automatically enforces the equal backlash condition, reducing manual errors and saving time. This parametric methodology is not limited to miter gears; it can be extended to other gear types, showcasing the versatility of modern CAD systems. As I refine my models, I continuously explore new ways to optimize miter gear designs for weight reduction, noise minimization, and load capacity improvement, all while maintaining the critical equal backlash feature that defines this superior class of miter gears.