
Spiral bevel gears transfer power between intersecting shafts, usually at a 90° angle. Their teeth are curved and inclined relative to the pitch cone, so meshing starts at one end of the tooth and moves progressively across the face. The resulting contact pattern is smoother than that of a straight bevel gear, giving high load capacity, low noise, and stable high-speed operation. These properties make the spiral bevel gear a common choice in machine-tool drives, aerospace mechanisms, automotive differentials, and other compact transmission systems.
The manufacturing advantages come with a modeling penalty. A spiral bevel gear is defined by a pitch cone, face cone, root cone, spiral angle, pressure angle, addendum and clearance coefficients, face width, and tooth count. The tooth flanks are spatial curved surfaces, and a change in any major parameter alters the tooth space along the entire cone. A purely manual solid model is therefore difficult to revise. A parametric model is more appropriate: dimensions are tied to user parameters, the tooth space is generated from controlled sketches and relations, and the solid is rebuilt when the parameters change.
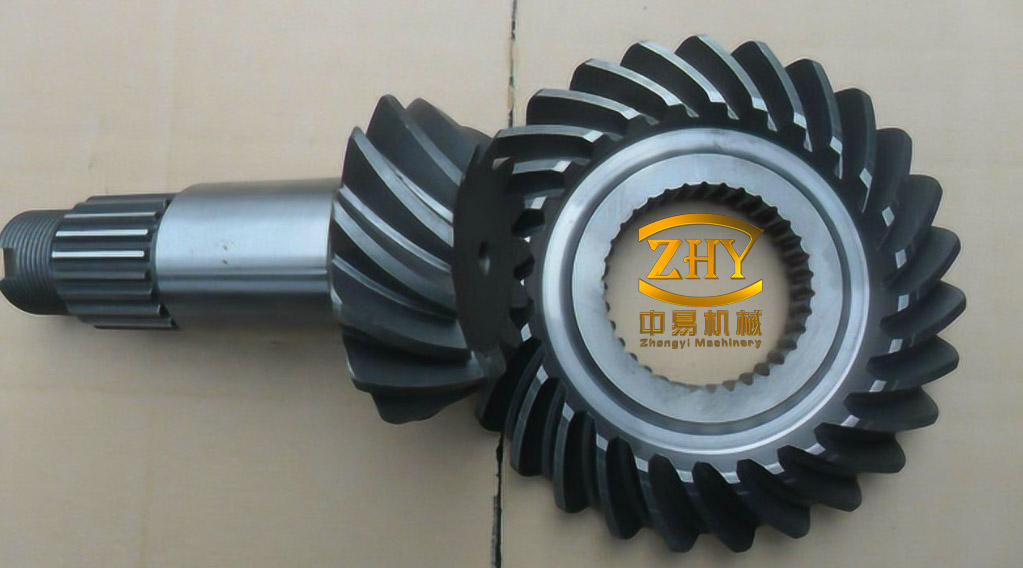
Parameter set and basic cone geometry
The modeling example uses a 25-tooth pinion and a 54-tooth gear. The pressure angle is 20°, the addendum coefficient is 1, the clearance coefficient is 0.25, the face width is 28 mm, and the spiral angle is 31°. The module is treated as a user input in the same parameter block, so the absolute tooth size can be changed without rewriting the modeling sequence.
| Parameter | Pinion | Gear | Unit or note |
|---|---|---|---|
| Number of teeth | 25 | 54 | — |
| Pressure angle | 20 | 20 | degree |
| Addendum coefficient | 1 | 1 | dimensionless |
| Clearance coefficient | 0.25 | 0.25 | dimensionless |
| Face width | 28 | 28 | mm |
| Spiral angle | 31 | 31 | degree |
The first geometric step is to establish the pitch cone from the required shaft angle and rotation direction. The tooth trace is represented as an arc on the pitch cone; projecting that arc onto a reference plane produces a guide curve. This projected curve is not the final tooth flank. It provides the path along which the tooth-space section is swept, so the cut follows the intended spiral direction around the cone.
At the large end and the small end, the addendum circle, pitch circle, and base circle are sketched. Relations connect their radii to the user parameters, which keeps the tooth height and cone proportions consistent when the tooth count or module changes. The large end and small end are handled separately because the cone tapers: the same angular tooth form corresponds to a smaller linear section at the small end.
Involute profiles and tooth-space generation
Pro/E’s “From Equation” curve command can create the large-end involute from a relation. In the relation below, \(d_b\) is the base-circle diameter, \(\delta\) is the pitch cone angle, and \(\theta\) is the roll angle in degrees. The factor \(\pi/180\) converts the roll angle to radians inside the involute terms, and \(z=0\) keeps the curve in the sketch plane.
$$
\begin{aligned}
r &= \frac{d_b}{2\cos\delta},\\
\theta &= 60^\circ,\\
x &= r\cos\theta + r\sin\theta\left(\theta\frac{\pi}{180}\right),\\
y &= -r\sin\theta + r\cos\theta\left(\theta\frac{\pi}{180}\right),\\
z &= 0.
\end{aligned}
$$
The resulting curve defines one side of the tooth space. Mirroring it about the tooth-space center plane completes the opposite flank. The small-end involute is generated in the same way with a reduced base radius derived from the face width and cone angle. Using a separate small-end radius is necessary because a bevel tooth is tapered; a profile copied directly from the large end would not close correctly at the small end.
The solid tooth space is then produced as a swept cut. The tooth-space section is swept along the projected guide curve, removing material from the cone blank. A mirror operation completes the tooth-space geometry where the construction uses half of the space, and a circular pattern repeats the cut around the gear axis. For a gear with \(N\) teeth, the angular increment is \(360^\circ/N\); the pattern count must be linked to the tooth-count parameter so that a change from 25 to another value rebuilds the correct number of teeth.
This cut-and-pattern sequence is more robust than building each tooth as an independent solid. The root region remains a continuous surface of the blank, the pattern is easy to update, and the model history stays readable. The final solid contains the tooth spaces, root cone, face cone, and central bore or hub features required by the assembly. Because the dimensions are relation-driven, editing the parameter block regenerates the gear rather than forcing a manual rebuild of every sketch.
Virtual assembly and joint constraints
Virtual assembly in Pro/E is the placement of the pinion and gear in a common coordinate system so that axes, cone apices, clearances, and degrees of freedom can be checked before manufacture. Two placement strategies are useful. Rigid constraints—mate, align, insert, and similar commands—remove degrees of freedom and fix the components in space. They are appropriate for static fit checks, interference detection, and datum verification. Joint connections—such as pin or cylinder joints—retain selected degrees of freedom. They are appropriate when the assembly must rotate for motion analysis.
For a spiral bevel gear pair, the two axes must intersect at the pitch apex. Datum axes and planes are used to align the cone apices and to set the axial position of each gear. A pin joint on each member leaves one rotational degree of freedom, and a gear-pair relation can couple the two rotations at the tooth-count ratio. For the 25/54 parameter set, the nominal ratio is
$$
i=\frac{N_2}{N_1}=\frac{54}{25}=2.16.
$$
This ratio is a kinematic property of the tooth counts; it does not by itself define the contact pattern or the load distribution. The assembly should also leave the intended backlash and clearance. If the CAD models are placed with zero backlash and perfectly theoretical flanks, the motion study will show a tight mesh that is not representative of a production gear pair. Clearance and tooth-thickness tolerance must therefore be included in the parameter set or in the assembly offsets.
A joint-based assembly also supports parametric update. When the pinion or gear tooth count changes, the pattern, the pitch radii, and the gear-pair ratio can be regenerated from the same parameter block. This is the practical value of virtual assembly: the designer can check whether the cone apices coincide, whether the axes intersect at the required angle, whether the gear blanks interfere with the housing, and whether the ratio is correct before committing to a physical prototype.
Scope and engineering limitations
The procedure produces a coherent parametric solid, but it should be understood as a design-level representation. A production spiral bevel gear tooth flank is generated by a cutter head and a timed rolling motion; the final flank is a conjugate surface determined by machine settings, cutter geometry, and the generating roll. A CAD construction based on projected arcs and involute sections is useful for envelope layout, mass properties, assembly checks, motion visualization, and finite-element preprocessing, but it is not automatically a manufacturing tooth-flank model. Release for cutting requires verification against a dedicated bevel-gear design method or against measured tooth-flank data.
The same limitation applies to performance prediction. A solid model can supply geometry for bending-stress or contact analysis, and a jointed assembly can show gross kinematic behavior. Neither replaces a loaded contact-pattern test, transmission-error measurement, or noise evaluation on the actual gear pair. The appropriate use of the Pro/E model is to reduce geometric uncertainty early in the design cycle: establish the parameter set, verify the cone and tooth-space construction, assemble the pair with the correct degrees of freedom, and then pass a validated geometry to the detailed analysis or manufacturing stage.