
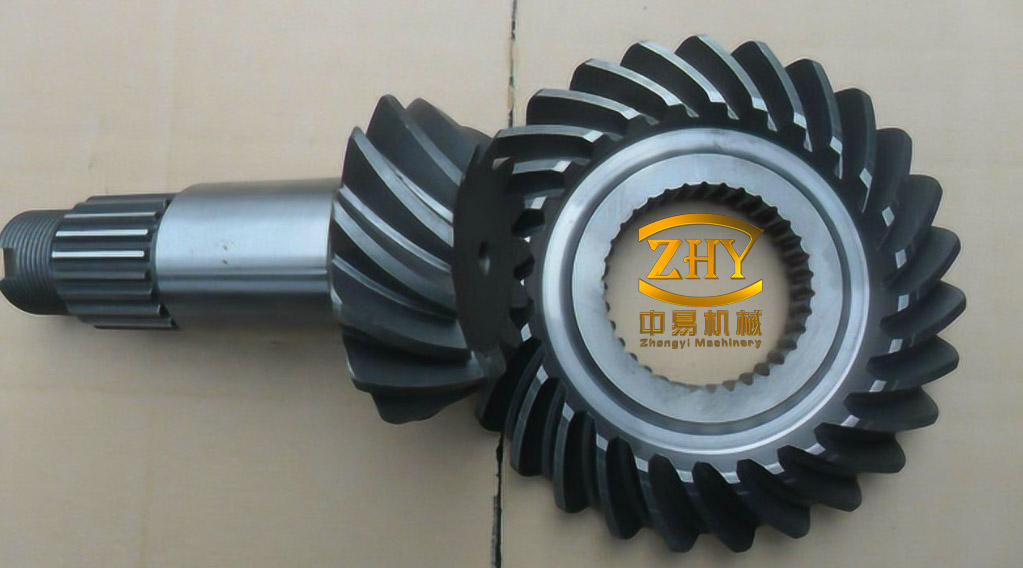
Spiral bevel gears transmit torque between intersecting shafts in tractor rear axles. Their teeth are curved along the pitch cone, so contact begins at one end of the flank and progresses across the tooth rather than loading the full face at once. That geometry supports smoother transmission and higher load capacity, but it also makes the gear difficult to represent in a physics engine. A visual CAD mesh is not enough for virtual assembly: the simulation must detect contact between the flanks, and the collision body must preserve the concave space between teeth. A convex envelope around the whole gear would bridge those spaces and prevent realistic meshing.
Desktop CAD systems such as SolidWorks, Unigraphics NX, and CATIA can produce accurate visual models of spiral bevel gears. Unity3D, however, does not automatically generate suitable mesh colliders for complex concave parts, including the concave flank of a spiral bevel gear. The surface has to be tessellated into a mesh solid, and collision geometry has to be built from the same tooth-surface data. The approach described here derives that geometry from the generating motion of a Gleason-type spiral bevel gear and then checks the tessellated contour against a CAD model of identical parameters.
Why the tooth trace governs the whole model
A spiral bevel gear has two distinct geometric systems: the involute profile in each transverse section and the curved tooth trace along the pitch cone. In a straight bevel gear, the tooth trace lies on a radial line. In a spiral bevel gear, it is a circular arc on the developed pitch cone, and its position is controlled by the spiral angle at the mid-face. The validation case used a mid-face spiral angle of 35°.
The Gleason generating process can be understood as a coupled motion between the cutter head and the gear blank. The cutter head is mounted at an angle on the cradle and rotates about its own axis; the blank rotates about its axis while the cutter sweeps through the tooth space. The resulting envelope is equivalent to the meshing action of a hypothetical mating gear pair. For geometric modeling, the process is decomposed into the absolute motion of the blank, the absolute motion of the cutter, and the mapping of the resulting planar tooth trace onto the pitch cone.
In the developed plane, the cutter center is fixed so that the arc passes through the mid-face point at the specified spiral angle. For a tooth-line point at distance \(\rho\) from the cone apex, the angle subtended at the apex by the cutter center and the point follows the triangle formed by the apex, the cutter center, and the point:
\[
\alpha=\arccos\left(\frac{\rho_0^2+\rho^2-R_0^2}{2\rho_0\rho}\right),
\qquad
\theta=\theta_0\pm\alpha
\]
where \(\rho_0\) is the distance from the apex to the cutter center in the developed plane, \(R_0\) is the cutter radius, \(\theta_0\) is the angular position of the cutter center, and the sign is set by the gear hand and by the side of the mid-face. The rotation angle is zero at the mid-face and increases toward the toe and heel with opposite signs. This is why the tooth trace cannot be generated by a simple radial extrusion.
Differential subdivision of the tooth profile
The profile calculation starts from the straight bevel gear because its tooth trace lies in a radial plane. The tooth form is an equal-clearance tapered tooth, so the section parameters scale with distance from the cone apex. The face width is divided into \(A_r\) intervals, and each section is indexed from the small end to the large end. For section \(i\),
\[
L’_i=L-T+\frac{iT}{A_r},\qquad i=0,1,\ldots,A_r
\]
\[
H’_i=L’_i\tan\theta,\qquad
M’_i=M\frac{L’_i}{L},\qquad
R’_i=\frac{M’_iZ}{2}
\]
where \(T\) is the face width along the tooth trace, \(L\) is the large-end cone distance, \(M\) is the large-end module, \(Z\) is the number of teeth, \(R’_i\) is the pitch radius of the section, and \(H’_i\) is the addendum or dedendum at that section, with \(\theta\) the corresponding addendum or dedendum angle. For a standard pressure angle of 20°, the base radius of the section is
\[
R’_{b,i}=R’_i\cos 20^\circ.
\]
Each section profile is then sampled as an involute between the base circle and the addendum circle:
\[
x_i(\phi)=R’_{b,i}\left(\cos\phi+\phi\sin\phi\right),
\qquad
y_i(\phi)=R’_{b,i}\left(\sin\phi-\phi\cos\phi\right).
\]
The involute is divided into a finite number of segments, and the two flanks are generated as mirror images about the tooth centerline. At the pitch circle, the circular tooth thickness is
\[
B_i=\frac{\pi M’_i}{2}.
\]
This thickness fixes the angular offset between the two involute flanks. The result of the section calculation is a set of contour points, not a continuous surface. Each pair of adjacent sections and adjacent involute samples defines a mesh cell. As the number of sections and the number of involute samples increase, the polygonal cell set converges to the smooth tooth surface. The same cell set later provides the geometry for the collision body.
Wrapping the planar arc onto the pitch cone
After the section profiles have been arranged along the planar tooth trace, the cell set is wrapped onto the pitch cone. A cone is a developable surface, so the arc can be mapped without changing its arc-length relationships. Using the cone apex as the origin, with the cone axis along the negative \(z\) direction, a point on the cone is
\[
\mathbf{p}(R,\theta)=
\left(
R\sin\delta\cos\theta,\;
R\sin\delta\sin\theta,\;
-R\cos\delta
\right),
\]
where \(R\) is the distance from the apex, \(\delta\) is the pitch cone angle, and \(\theta\) is the angular coordinate around the axis. At a given \(R\), the radius of the circular section is \(r=R\sin\delta\), and the arc length along that section is
\[
S=R\sin\delta\,\theta.
\]
The planar tooth trace is adjusted point by point so that these arc-length relations are preserved. Each mesh cell is rotated and translated with its corresponding tooth-line point, keeping the relative position of adjacent cells unchanged. The complete gear is then obtained by copying the single-tooth contour around the cone axis at the angular pitch \(2\pi/Z\). This produces a closed tooth set with the correct hand and spacing.
From mesh solid to collision body
A render mesh and a collision body serve different purposes. The render mesh can contain thin triangles and concave details that are visually useful but expensive or unstable in contact simulation. The collision body must represent the surfaces that actually touch: the tooth flanks, the root region, and the tip. If the entire gear is replaced by one convex hull, the tooth spaces are filled in, and two gears cannot mesh. The collider therefore has to follow the tessellated tooth surface rather than a simplified outer envelope.
The method constructs the collision body from the same contour point set used for the mesh solid. The tooth surface is divided into finite cells, and the collider is built on those cells, so the contact geometry and the visible geometry remain consistent. In Unity3D, this can be implemented as a mesh collider for static or kinematically constrained parts, or as a compound of convex pieces for moving parts, depending on the physics setup. The important requirement is that the concave tooth space remains open.
In the rear-axle assembly test, the gear pair was placed in a Unity3D scene with the generated colliders and simulated with the built-in physics collision system. The constructed colliders produced tooth-to-tooth meshing contact, indicating that the mesh solid was not only visually correct but also usable for contact simulation during virtual assembly.
Accuracy against CAD geometry
Validation compared the mesh solid with a SolidWorks model of a Gleason spiral bevel gear having the same parameters. Four tooth-profile edge curves were extracted from each model. The mesh used 12 subdivisions, and the CAD edge curves were divided into 12 equal segments for comparison. Two measurements were taken: the position vector from the curve start to each division point, which tests spatial location, and the curvature radius from three adjacent points, which tests local bending. The largest observed relative errors are listed in Tables 1 and 2.
| Mesh point vector components | CAD model point vector components | Relative error (%) |
|---|---|---|
| (0.58, 0.33, 0.80) | (0.59, 0.28, 0.81) | 0.289 |
| (0.65, 0.34, 0.67) | (0.67, 0.28, 0.68) | 0.329 |
| (0.62, 0.28, 0.73) | (0.63, 0.24, 0.74) | 0.157 |
| (0.55, 0.36, 0.82) | (0.57, 0.30, 0.84) | 0.257 |
| Mesh curvature radius (mm) | CAD model curvature radius (mm) | Relative error (%) |
|---|---|---|
| 14.224 | 14.312 | 0.615 |
| 38.415 | 39.429 | 2.572 |
| 25.701 | 25.868 | 0.646 |
| 13.536 | 13.353 | 1.370 |
The position-vector error remained below 1% at all sampled points, and the curvature-radius error remained below 3%. The largest curvature error was 2.572%, on a mesh radius of 38.415 mm against a CAD radius of 39.429 mm. That is consistent with a polyline approximation of a curved flank: the point positions can be close while the local radius is slightly under- or overestimated. With these errors, the constructed mesh remained above the 97% contour-accuracy threshold used in the validation.
The two metrics are complementary. Position-vector error shows whether a sampled flank point lies in the correct place; curvature error shows whether the local shape is bending correctly. A mesh can have small positional error but distorted curvature if the sampling is uneven. At 12 subdivisions, the mesh retained both the global tooth form and the local flank curvature within the stated tolerance. Increasing the subdivision count would reduce the error further, but it would also increase collider complexity and simulation cost.
What the method provides for virtual assembly
The result is a process-based geometry pipeline rather than a surface fitted after the fact. The tooth trace comes from the Gleason generating motion, the transverse profile comes from involute sections scaled along the cone, and the mesh solid and collision body come from the same contour point set. This consistency is important in virtual assembly: the visible tooth flank and the contact surface are not separate approximations that can drift apart when the design changes.
The validation case covers a Gleason-type spiral bevel gear with a 35° mid-face spiral angle, a 20° pressure angle, and a 12-subdivision mesh. Within that scope, the mesh solid reproduced the CAD contour with position errors below 1% and curvature errors below 3%, and the generated colliders completed meshing contact in a Unity3D rear-axle assembly. The approach is intended for virtual assembly, collision simulation, and design-parameter iteration. It is not a substitute for loaded tooth contact analysis, manufacturing inspection, or fatigue testing; those require separate mechanical and metrological models.
For tractor rear-axle development, the practical value is that a gear variant can be regenerated from its process parameters and inserted into an interactive assembly scene without manually rebuilding a collision representation. That shortens the loop between design modification and assembly trial, and it gives the physics engine geometry that respects the defining feature of a spiral bevel gear: the curved, concave tooth space.