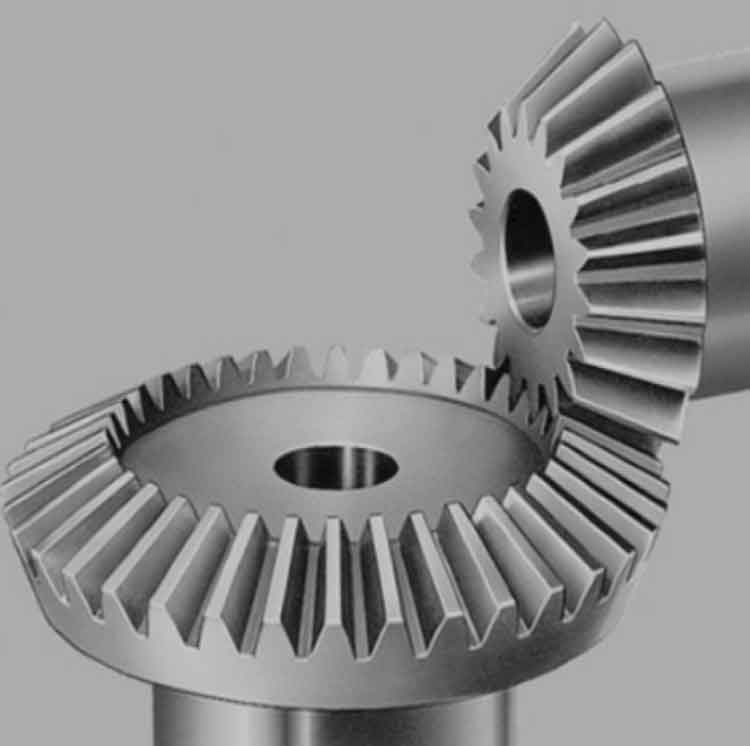
Precision manufacturing of straight bevel gear for automotive transmissions is critical to ensure high performance, efficiency, and durability. The following techniques represent the state-of-the-art methods used to achieve the high precision required for these components.
1. Advanced Machining Techniques
CNC Machining:
- High-Precision CNC Milling: Utilizes multi-axis CNC milling machines to cut straight bevel gear with high accuracy and consistency. Advanced CNC machines are capable of producing complex geometries with minimal errors.
- Adaptive Control Systems: Modern CNC machines are equipped with adaptive control systems that automatically adjust machining parameters in real-time to maintain precision and compensate for tool wear and temperature variations.
Gear Shaping:
- Precision Gear Shapers: Gear shaping machines use a reciprocating cutter to progressively form the straight bevel gear teeth. Advanced shapers with computer control can produce gears with very tight tolerances and excellent surface finishes.
- Automated Alignment: Automated systems ensure precise alignment and positioning of the workpiece, enhancing the accuracy of the straight bevel gear teeth formation.
Gear Hobbing:
- High-Speed Hobbing: Utilizes high-speed rotating hobs to cut straight bevel gear teeth. High-speed hobbing machines with precise control systems can produce high-quality gears efficiently.
- Tool Wear Compensation: Automated systems monitor tool wear and adjust the hobbing process to maintain consistent quality.
2. Grinding and Finishing Techniques
Gear Grinding:
- Profile Grinding: Uses specialized grinding wheels to finish the straight bevel gear teeth to exact specifications. Profile grinding ensures high precision in the tooth profile and pitch.
- Continuous Generating Grinding: A high-precision method where the grinding wheel and the straight bevel gear rotate in synchrony. This technique allows for the efficient finishing of high-accuracy gears.
Superfinishing:
- Honing: Involves the use of fine abrasive stones to remove surface imperfections and achieve a very smooth surface finish. Honing improves straight bevel gear performance by reducing friction and wear.
- Lapping: Uses a mixture of abrasive particles and lubricants to polish the straight bevel gear teeth to a mirror-like finish. Lapping enhances the gear’s contact surface, improving efficiency and reducing noise.
Hard Turning:
- Precision Hard Turning: Conducted after heat treatment, hard turning uses a single-point cutting tool to achieve high surface quality and tight tolerances. This method is suitable for finishing hardened gear surfaces.
3. Heat Treatment and Material Optimization
Advanced Heat Treatment:
- Case Hardening: Techniques such as carburizing and nitriding are used to harden the straight bevel gear surface while maintaining a tough core. Controlled atmosphere furnaces and precision temperature control ensure consistent results.
- Induction Hardening: Localized heat treatment using induction coils provides precise hardening of specific areas, improving wear resistance and fatigue strength without affecting the entire gear.
Material Selection:
- High-Performance Alloys: Use of advanced alloy steels such as AISI 9310, AISI 8620, and AISI 4340 that offer excellent hardenability and toughness. These materials are optimized for heat treatment to achieve desired mechanical properties.
- Composite Materials: For specialized applications, composite materials with high strength-to-weight ratios can be used, providing both durability and efficiency.
4. Quality Control and Inspection
Non-Destructive Testing (NDT):
- Ultrasonic Testing: Uses high-frequency sound waves to detect internal defects and ensure the integrity of the straight bevel gear material.
- Magnetic Particle Inspection: Detects surface and near-surface flaws in ferromagnetic materials, ensuring the surface quality of the straight bevel gear.
Coordinate Measuring Machines (CMM):
- 3D Measurement: CMMs provide precise three-dimensional measurements of straight bevel gear dimensions and profiles, ensuring they meet design specifications.
- Automated Inspection: Automated CMMs enable rapid and accurate inspection of large batches, ensuring consistent quality.
Surface Roughness Measurement:
- Profilometers: Measure the surface roughness of straight bevel gear teeth to ensure they meet the required smoothness for optimal performance.
- Optical Interferometry: Uses light waves to measure surface texture with high precision, providing detailed surface roughness data.
5. Design and Simulation
Computer-Aided Design (CAD):
- Detailed Modeling: Advanced CAD software enables the creation of detailed 3D models of straight bevel gear, allowing for precise design and modification.
- Simulation: Finite Element Analysis (FEA) and other simulation tools predict the performance of straight bevel gear designs under various load conditions, optimizing the design for durability and performance.
Computer-Aided Manufacturing (CAM):
- Toolpath Optimization: CAM software generates optimized toolpaths for CNC machines, ensuring efficient and precise machining of straight bevel gear.
- Process Simulation: Simulates the entire manufacturing process, allowing for the identification and correction of potential issues before actual production.
Conclusion
The precision manufacturing of straight bevel gear for automotive transmissions involves a combination of advanced machining techniques, grinding and finishing methods, heat treatment processes, material optimization, and rigorous quality control. By leveraging these state-of-the-art methods, manufacturers can produce high-quality gears that meet the stringent requirements of modern automotive applications. These advancements ensure that straight bevel gear is not only durable and efficient but also capable of withstanding the demanding conditions of automotive transmissions.
