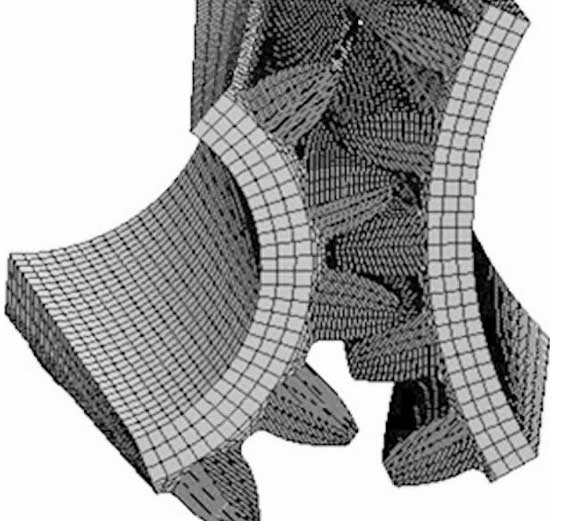
The contact fatigue performance of gears is critical to the reliability and longevity of mechanical transmission systems. Among the factors influencing this performance, surface integrity parameters—such as residual stress distribution, surface hardness, and surface roughness—play a pivotal role. This study investigates the quantitative relationship between surface integrity and the contact fatigue limit of carburized gears (18CrNiMo7-6 and 16Cr3NiWMoVNbE) subjected to grinding, shot peening, dual shot peening, and hybrid surface enhancement processes. By combining experimental characterization, Pearson correlation analysis, and CatBoost machine learning algorithms, a predictive model for contact fatigue limits is established, enabling optimized surface integrity design for high-performance gear carburizing applications.
1. Experimental Setup and Surface Integrity Characterization
1.1 Gear Specimens and Surface Enhancement Processes
Gear specimens were manufactured according to GB/T 14229-2021, with geometric parameters summarized in Table 1. Post-carburizing heat treatment (case hardening followed by low-temperature tempering) was applied to achieve surface hardness levels of 58–65 HRC. Surface enhancement techniques included:
- Grinding: Initial surface preparation with a grinding wheel (speed: 30 m/s, depth: 60 μm, feed rate: 2000 μm/min).
- Shot Peening: Single/double-stage peening using wire-cut steel shots (diameter: 0.2–0.6 mm, intensity: 0.1–0.4 mmA, coverage: 200%).
- Barrel Finishing: Polishing with TP3×3 white alumina abrasives (74 min, spindle speed: 100 rpm).
- Fine Particle Peening (FPP): Micro-scale peening using 0.05-mm-diameter particles (intensity: 0.1 mmN).
Table 1: Geometric Parameters of Test Gears
| Parameter | Pinion | Wheel |
|---|---|---|
| Module (mm) | 4.5 | 4.5 |
| Number of Teeth | 27 | 28 |
| Pressure Angle (°) | 20 | 20 |
| Face Width (mm) | 25 | 25 |
1.2 Surface Integrity Measurement
Surface integrity parameters were quantified as follows:
- Surface Roughness: 3D topography analysis using white light interferometry (Sa, Sq, Str, Kt).
- Residual Stress: Depth profiling via X-ray diffraction (Cr-Kα radiation, 30 kV, 1.5 mA).
- Microhardness: Vickers hardness measurements (load: 0.5 N, depth: 0–1050 μm).
Equation (1): Stress Concentration FactorKt=1+4(SmSz)1.3(for Sz/Sm≤0.15)Kt=1+2.1SmSz(for Sz/Sm≤0.3)
where Sz = maximum profile height, Sm = mean spacing between peaks.
2. Surface Integrity and Contact Fatigue Performance
2.1 Effect of Surface Enhancement on Surface Integrity
Table 2: Surface Roughness and Residual Stress Under Different Processes (18CrNiMo7-6)
| Process Code | Sa (μm) | SRCS (MPa) | MRCS (MPa) | SH (HV) |
|---|---|---|---|---|
| Grinding | 0.75 | -551 | -551 | 659 |
| CSP | 1.60 | -797 | -1237 | 681 |
| DSP | 0.89 | -734 | -1285 | 685 |
| DSPBF | 0.33 | -1159 | -1159 | 689 |
Key observations:
- Dual Shot Peening (DSP): Maximized subsurface residual compressive stress (−1285 MPa) and surface hardness (685 HV).
- Barrel Finishing (BF): Reduced surface roughness (Sa = 0.23 μm) but limited residual stress depth.
- Hybrid Processes (DSPFPP): Combined high residual stress (−1231 MPa) with moderate roughness (Sa = 0.85 μm).
2.2 Contact Fatigue Limit Testing
Contact fatigue tests were conducted using a Locati rapid determination method on an STRAMA MPS test rig. Results revealed:
- 18CrNiMo7-6 Gears: Fatigue limits ranged from 1570 MPa (grinding) to 1941 MPa (DSPFPP), a 24% improvement.
- 16Cr3NiWMoVNbE Gears: Limits increased from 1817 MPa (grinding) to 1989 MPa (DSP), a 9.5% enhancement.
Equation (2): Miner’s Linear Damage Rule for Fatigue Limit Calculationi=1∑nNf,iNi=1
where Ni = cycles at stress level σi, Nf,i = cycles to failure at σi.
3. Machine Learning-Based Fatigue Limit Prediction
3.1 Feature Selection via Pearson Correlation
Pearson coefficients identified critical surface integrity parameters:
- Strong Correlations: MRCS vs. DECRS (ρ=0.91), Sa vs. Kt (ρ=0.86).
- Selected Features: Sa, SRCS, MRCS, SH.
Equation (3): Pearson Correlation CoefficientρX,Y=∑i=1n(Xi−Xˉ)2∑i=1n(Yi−Yˉ)2∑i=1n(Xi−Xˉ)(Yi−Yˉ)
3.2 CatBoost Algorithm for Contribution Analysis
A CatBoost regression model (iterations: 445, learning rate: 0.062, depth: 4) quantified parameter contributions:
Table 3: Surface Integrity Parameter Contributions
| Parameter | Contribution (%) |
|---|---|
| SH | 39.5 |
| MRCS | 24.7 |
| SRCS | 23.5 |
| Sa | 12.3 |
Equation (4): CatBoost Feature ImportanceImportance(X)=trees∑splits∈tree∑ΔL
where ΔL = reduction in loss function per split.
3.3 Multivariate Regression Model
The derived predictive equation for contact fatigue limit (σHlim) integrates exponential and power-law relationships:
Equation (5): Contact Fatigue Limit PredictionσHlim=15.8e−0.0016×MRCS−4.2×Sa2.1−550e0.0045×SRCS−2.3×10⁷e−0.018×SH+1817.5
Table 4: Model Performance Metrics
| Metric | Value |
|---|---|
| R2 | 0.75 |
| MRE (%) | 2.9 |
| Max Error (%) | 4.9 |
4. Discussion: Optimizing Gear Carburizing Processes
4.1 Role of Surface Hardness (SH)
Surface hardness (39.5% contribution) directly inhibits wear and plastic deformation. Post-shot peening, SH increased by 40 HV (18CrNiMo7-6) and 55 HV (16Cr3NiWMoVNbE), correlating with 12–19% fatigue limit improvements.
4.2 Residual Stress Effects
- MRCS: High subsurface residual stress (−1285 MPa in DSP) suppresses crack initiation.
- SRCS: Surface compressive stress (−1166 MPa in DSPBF) delays crack propagation.
4.3 Surface Roughness Trade-offs
While barrel finishing minimized Sa (0.23 μm), excessive roughness reduction sacrifices residual stress benefits. Hybrid processes (e.g., DSPBF) balance Sa (0.33 μm) with high SH (689 HV) and MRCS (−1159 MPa).
4.4 Comparative Analysis of Gear Carburizing Techniques
Table 5: Fatigue Limit Improvements by Process
| Process | Δσ (MPa) | Improvement (%) |
|---|---|---|
| DSP | +307 | 19.6 |
| DSPBF | +341 | 21.7 |
| DSPFPP | +315 | 20.1 |
5. Conclusion
This study establishes a data-driven framework for predicting the contact fatigue limits of carburized gears using surface integrity parameters. Key findings include:
- Dual shot peening and hybrid processes (e.g., DSPBF) optimize surface integrity, achieving residual stresses >1250 MPa and hardness >685 HV.
- Surface hardness (39.5%) and residual stresses (MRCS: 24.7%, SRCS: 23.5%) dominate fatigue performance.
- The CatBoost-derived predictive model achieves a mean relative error of 2.9%, enabling precision design in gear carburizing applications.
By integrating advanced surface enhancement techniques with machine learning, this work provides a roadmap for developing high-performance, fatigue-resistant gears in aerospace, automotive, and energy systems. Future studies will explore real-time monitoring of surface integrity during gear carburizing to further refine predictive accuracy.
