
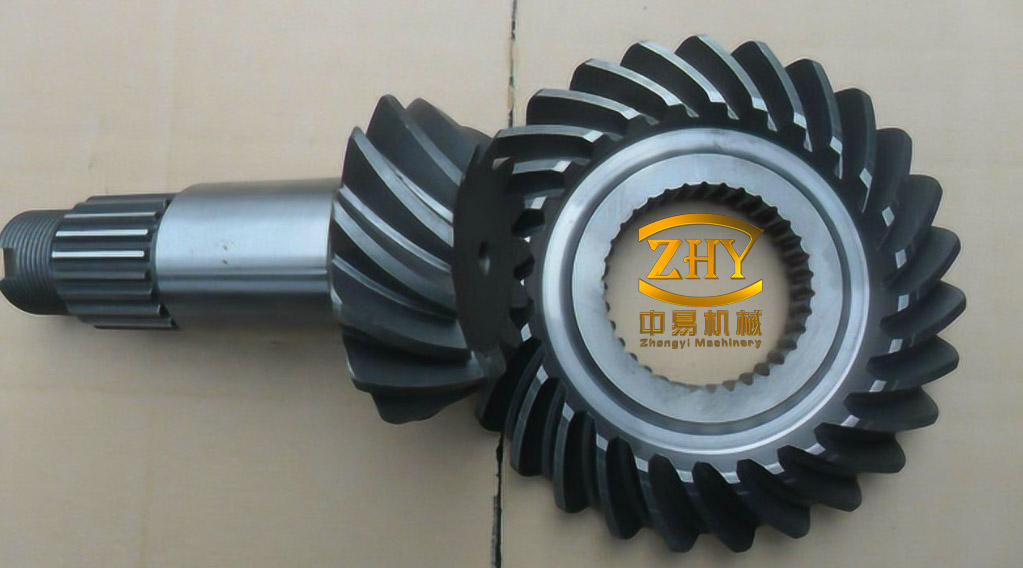
Spiral bevel gears transmit motion between intersecting or crossed shafts and are used in mining, petroleum, machine-tool, rail, marine, and helicopter drive systems because of their high contact ratio, load capacity, smooth transmission, and low noise. Cold precision forging of the toothed form shortens the manufacturing chain: it produces a continuous metal flow line along the tooth profile, reduces machining allowance, and improves material utilization. In the open-die variant, the flash land is not simply an escape path for excess metal. The narrow flash gap generates a back-pressure that forces the remaining material into the tooth cavities. The design problem is therefore to distribute the billet volume so that the tooth flanks and corner regions fill completely before the forming load or die stress becomes excessive.
Gear geometry and forging constraints
The process design targets a left-hand spiral bevel gear with 37 teeth and a module of 1.28 mm. Its mating gear has 10 teeth. The cold-forged teeth serve as the datum for subsequent machining, so the die must produce a stable tooth form without a separate trimming die for the flash. Unspecified fillets are R1 mm and unspecified draft is 5°. The main geometric parameters are listed below.
| Parameter | Value |
|---|---|
| Number of teeth | 37 |
| Mating gear teeth | 10 |
| Module | 1.28 mm |
| Spiral direction | Left-hand |
| Spiral angle | 35° |
| Pressure angle | 20° |
| Face cone angle | 77.06° |
| Pitch cone angle | 74.88° |
| Root cone angle | 70.86° |
The final tooth-forming operation controls the fill of the tooth flanks, tooth tips, and corner regions at the large and small ends. The preform must supply enough material to these regions while leaving a relief volume for small fluctuations in billet volume. Without such a relief, volume variation can raise die stress sharply and cause incomplete filling or overload.
Finite-element model and process assumptions
The forging sequence was analyzed with Deform-3D. Because the spiral bevel gear is quasi-axisymmetric, a 1/5 sector model with rotational boundary conditions was used to reduce computation cost. The upper and lower dies were treated as rigid bodies, and the preform was treated as a plastic body. The simulation workpiece material was AISI-4120 steel, with a Poisson’s ratio of 0.3, an elastic modulus of 206 GPa, and a density of 7.85 × 10³ kg/m3. Forging was simulated at room temperature, 20 °C, with a friction coefficient of 0.12. The upper die and upper ejector moved along the Z axis at 20 mm/s.
The preform was meshed with tetrahedral elements. The minimum element size was 0.3 mm at the face-cone boss and 1 mm elsewhere. This local refinement was necessary because the face-cone boss controls the volume of metal available for tooth filling.
Center-hole relief versus die-cavity relief
Two relief methods were compared. In the first, the preform contains a central through hole of diameter 10 mm. In the second, the preform has no central hole; instead, a relief cavity of diameter 10 mm is placed at the center of the upper die. The cavity depth is set to 2.4 mm by adjusting the upper ejector length. Both designs provide space for volume fluctuation, but they impose different flow paths and stress states.
| Design variant | Relief element | Flow path from tooth large end | High-stress region | Design implication |
|---|---|---|---|---|
| Center-hole preform | 10 mm through hole in the preform | Direct inward flow toward the center | Mainly the flash fillet | Shorter flow path, lower tooth-tip stress concentration |
| Die-cavity relief | 10 mm cavity, 2.4 mm deep, in the upper die | Convoluted path from the large end to the upper-die center | Tooth tip and flash fillet | Higher stress concentration at the tooth tip |
At the same forming load of 3,635 kN, the die-cavity design concentrates stress at the tooth tip and at the flash fillet. The center-hole design concentrates stress mainly at the flash fillet; the tooth-tip stress concentration is less pronounced. The velocity fields explain the difference. With die-cavity relief, metal at the large end must follow a tortuous route to reach the cavity. With center-hole relief, metal can flow directly from the large end toward the center. The shorter path reduces flow resistance and relieves the stress concentration at the tooth tip.
For this gear, the center-hole relief therefore gives a more favorable stress state for die life. It was selected as the relief method for the final forging die.
Preform face-cone volume distribution
The tooth region is the main deformation zone in the final forging operation, so the volume distribution at the preform face cone directly affects tooth filling and forming load. The face cone angle of the preform is equal to that of the gear. The face-cone center is aligned with the tooth-width center, at a mid-face radius Rm = 19 mm. The face-cone boss has height H and width W. Its width-to-height ratio is defined as
$$\eta=\frac{W}{H}$$
A larger \(\eta\) corresponds to a wider, flatter boss; a smaller \(\eta\) corresponds to a taller, narrower boss. Simulations were run for \(\eta\) = 1.0, 2.0, and 3.0, with complete filling of the upper die as the termination condition. In all three cases, the load first rises gradually and then increases steeply near the end of the stroke.
The minimum forming load at complete fill occurred at \(\eta\) = 2.0 and reached 4,238 kN. The flow behavior explains the non-monotonic load trend. At \(\eta\) = 1.0, the preform face-cone material first contacts the small-end tooth root of the die and then flows toward the large end. This flow direction creates high resistance and raises the load. At \(\eta\) = 3.0, the material first contacts the large-end side wall and then flows upward along the wall to fill the large end. Because the face-cone boss is wider, more material is diverted toward the center hole and the flash, while less material enters the tooth cavities; the flash width also increases. The result is a higher forming load. At \(\eta\) = 2.0, the material contacts the small-end tooth root and the large-end side wall almost simultaneously and then fills the large-end corner regions. This distribution is more balanced than either extreme, so the forming load is lower.
For this gear and billet volume, \(\eta\) = 2.0 provides the most effective preform volume distribution. The result is geometry-specific: a change in tooth count, module, spiral angle, or billet volume would require a new flow analysis.
Experimental validation
Forging trials were carried out on an 8,000 kN CNC double-action hydraulic extrusion press. The dies were heat treated to 60–62 HRC, and the die cavity was polished to Ra = 0.4 µm. The billets were made of 20CrMo, spheroidize annealed to 15 HRC. The preforms were phosphated and soap-lubricated before forging. The trials used the center-hole relief design and a preform face-cone ratio of \(\eta\) = 2.0. The upper die moved downward at 20 mm/s.
| Quantity | Simulation | Forging trial |
|---|---|---|
| Relief method | 10 mm center hole | 10 mm center hole |
| Preform width-to-height ratio | 2.0 | 2.0 |
| Final forming load | 4,238 kN | 3,860 kN |
| Tooth fill | Complete in the model | Large-end and small-end corners completely filled |
The press indicated a final forging load of 3,860 kN, lower than the simulated 4,238 kN. The overprediction was attributed to the rotational-symmetry boundary condition applied to the side of the workpiece. Mesh distortion at this boundary makes the simulated deformation more severe than in the actual forging. The trial forging showed complete filling at both the large-end and small-end corner regions of the teeth, and the tooth form was sound.
Design rules and scope
The process optimization leads to three practical rules for this class of spiral bevel gear. First, the relief method should shorten the flow path from the tooth large end to the relief volume. A central through hole in the preform is more effective than a relief cavity in the upper die because it reduces flow resistance and avoids a pronounced stress concentration at the tooth tip. Second, the preform face-cone boss should be sized so that the small-end root and the large-end side wall are engaged at nearly the same stage of the stroke. For the present gear, \(\eta\) = 2.0 gives this balance and the lowest simulated load at complete fill. Third, press trials remain necessary: the sector model with rotational symmetry can overpredict the forming load because of boundary mesh distortion, even when it correctly predicts the filling pattern.
The resulting forging route combines a center-hole preform, a face-cone width-to-height ratio of 2.0, and a flash-controlled open die. It produces complete tooth-corner filling at a load within the capacity of an 8,000 kN press. The approach is relevant to spiral bevel gears in which tooth fill, die stress, and forming load are the limiting design factors, but the numerical optimum must be re-established for each gear geometry and billet volume.