
I began this work from a practical problem in heavy-duty transmission: a miter gear of the double helical type must transmit high torque with smooth motion, but the traditional manufacturing route forces a recess between the left-hand and right-hand tooth sections. That recess increases axial length, weakens the central region, and makes left-right alignment of the miter gear less accurate. My objective was to machine a recess-free miter gear on a multi-axis numerical control machining center using a general-purpose end mill, then optimize the finishing tool path so that the miter gear reaches the required grade while reducing programming and machining time. The miter gear studied here is not a simple bevel miter gear; it is a recess-free double helical miter gear, and throughout this work I treat the miter gear as the target component whose left-hand and right-hand helical flanks meet without an undercut relief.
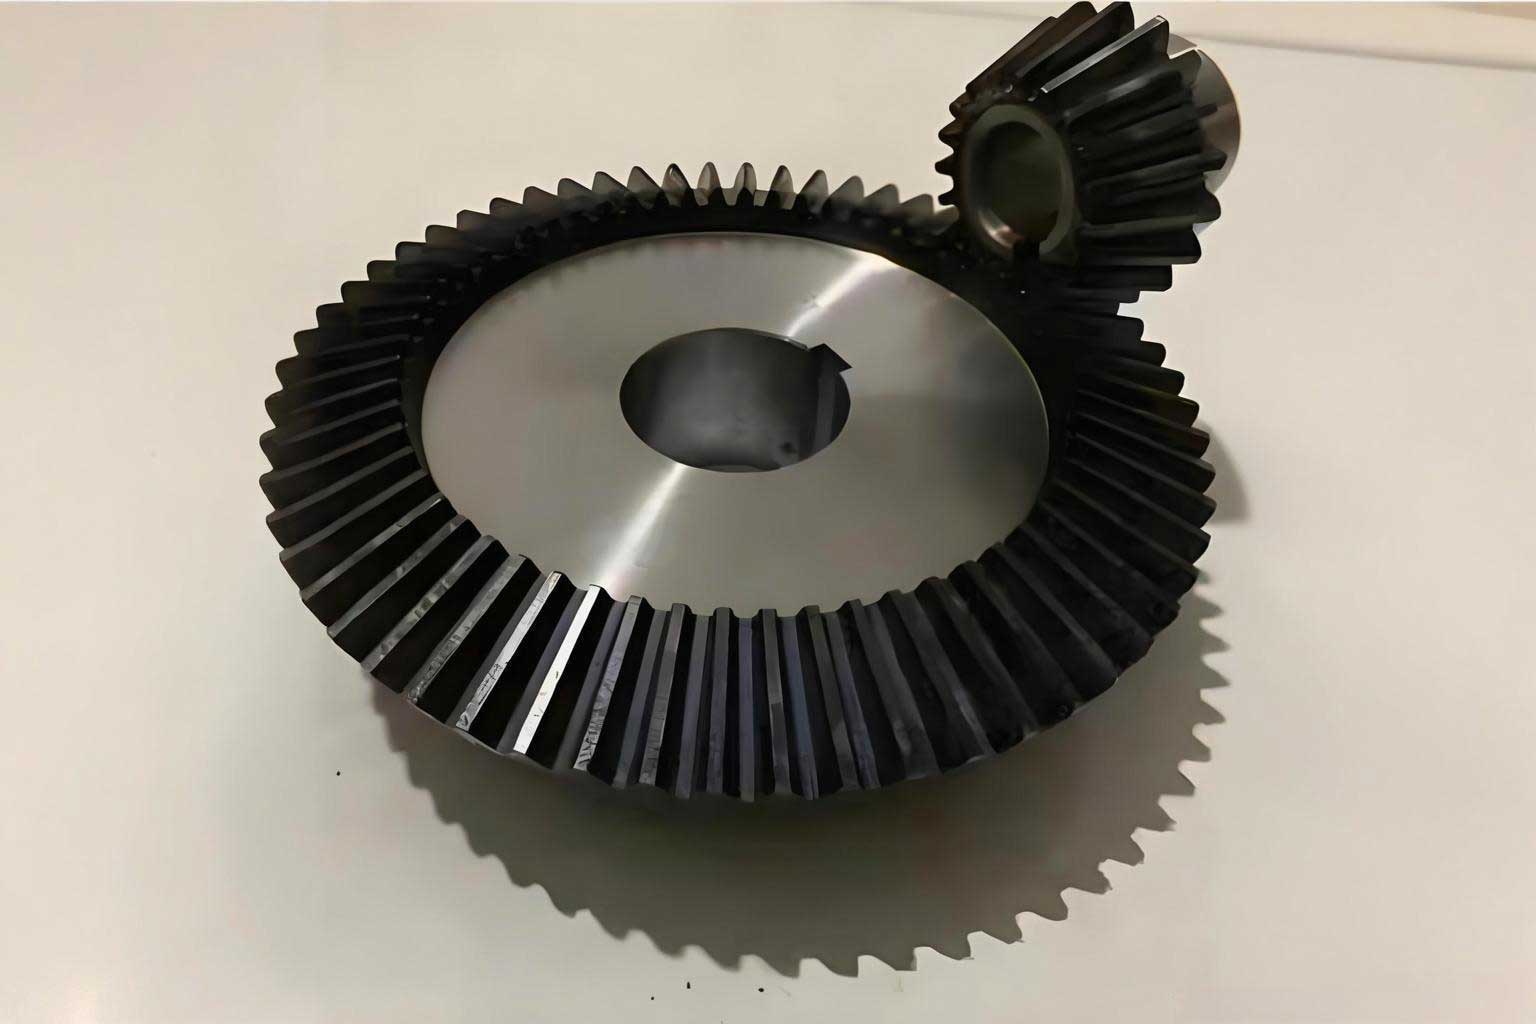
For the miter gear geometry, I used a standard involute helical tooth surface. The involute equation in a plane can be written as
$$
\begin{aligned}
x &= r_b(\cos\phi+\phi\sin\phi),\\
y &= r_b(\sin\phi-\phi\cos\phi),\\
z &= 0,
\end{aligned}
$$
where the involute polar angle is
$$
\phi = \tan\alpha + \theta,
$$
with pressure angle \(\alpha\), polar angle \(\theta\), and base radius \(r_b\). For a point on the involute at parameter \(\phi_0\), the planar involute point is
$$
\begin{aligned}
x_0 &= r_b(\cos\phi_0+\phi_0\sin\phi_0),\\
y_0 &= r_b(\sin\phi_0-\phi_0\cos\phi_0),\\
z_0 &= 0.
\end{aligned}
$$
When that point is moved along a helix around the miter gear axis, the helical trace is
$$
\begin{aligned}
x &= x_0\cos\mu-y_0\sin\mu,\\
y &= x_0\sin\mu+y_0\cos\mu,\\
z &= z_0+\frac{h}{2\pi}\mu,
\end{aligned}
$$
where \(h\) is the lead of the helix and \(\mu\) is the helix parameter. Substituting the involute point into the helical trace gives the involute helical surface used by the miter gear:
$$
\begin{aligned}
x &= r_b[\cos(\phi+\mu)+\phi\sin(\phi+\mu)],\\
y &= r_b[\sin(\phi+\mu)-\phi\cos(\phi+\mu)],\\
z &= \frac{h}{2\pi}\mu.
\end{aligned}
$$
The lead and helix angle of the miter gear are related by
$$
h = \frac{2\pi r}{\tan\beta},
$$
so for a point at radius \(r_i\), the local helix angle is
$$
\beta_i = \arctan\left(\frac{2\pi r_i}{h}\right).
$$
This relation is important for the miter gear because the involute radius changes from the root region to the tip region, and therefore the helical path used for finishing must be generated with the correct local helix angle at every contact point.
I selected the miter gear parameters from the design requirement and then built the three-dimensional model. The miter gear had a normal module, a number of teeth, a pressure angle, and opposite helix angles on the two sides. The main parameters are summarized in Table 1. I used a knowledge-based gear modeling tool inside the CAD environment to create one helical side, then mirrored it to obtain the recess-free miter gear without a groove between the two hands of the teeth.
| Parameter | Symbol | Value | Unit |
|---|---|---|---|
| Normal module | m | 16 | mm |
| Number of teeth | z | 30 | — |
| Addendum coefficient | h_a^* | 1.0 | — |
| Pressure angle | \alpha | 20 | deg |
| Helix angle | \beta | +30 / -30 | deg |
| Clearance coefficient | c^* | 0.25 | — |
For the miter gear machining strategy, I compared ball-end mills and flat-end mills. A ball-end mill has a constant radius from the tool center to every cutting point, which makes normal offset calculations simple, but its cutting speed approaches zero near the tool axis and the effective row spacing is often small. A flat-end mill, by contrast, has a cylindrical cutting edge and can remove material with a wider effective cut when the surface is convex and smoothly curved. The involute helical flank of the miter gear is a convex ruled-like surface with moderate curvature change, so I chose flat-end mills for roughing, semi-finishing, and finishing of the flanks, and I reserved a ball-end mill for the root fillet and the bottom of the tooth space.
I used climb milling for the miter gear flanks. In climb milling, the cutter rotation and the feed direction produce a chip thickness that decreases from maximum to zero, which reduces rubbing, improves surface integrity, and helps hold the miter gear firmly against the fixture. Conventional milling was avoided because it tends to rub the surface and can lift the miter gear blank. For the finishing pass, I used unidirectional milling to keep the miter gear flank in a consistent climb condition, while for semi-finishing I used zig-zag motion to reduce air time.
The miter gear material was a medium-carbon steel that was carburized and hardened. The flank hardness after heat treatment was in the range HRC 58 to 62, while the core hardness was HRC 30 to 40. Because of this hardness, I selected PVD-coated solid carbide tools. The tool material and geometry are listed in Table 2. The tool diameter was limited by the space at the bottom of the tooth space. I measured the minimum gap at the root region and selected a 20 mm end mill for the open upper part, a 12 mm end mill for the flank semi-finishing and finishing, a 10 mm end mill for the narrow bottom region, and an 8 mm ball-end mill for the root fillet.
| Tool | Type | Diameter | Material | Helix angle | Rake angle | Clearance angle | Application |
|---|---|---|---|---|---|---|---|
| T1 | Flat end mill | 20 mm | PVD carbide | 40 deg | 10 deg | 12 deg | Roughing of upper tooth space |
| T2 | Flat end mill | 12 mm | PVD carbide | 30 deg | 10 deg | 15 deg | Semi-finishing and finishing of flanks |
| T3 | Flat end mill | 10 mm | PVD carbide | 30 deg | 10 deg | 15 deg | Roughing and semi-finishing of bottom region |
| T4 | Ball-end mill | 8 mm | PVD carbide | 30 deg | 10 deg | 15 deg | Root fillet and bottom finishing |
The cutting parameters were calculated from the tool diameter, tooth count, spindle speed, and feed per tooth. The feed speed is
$$
f_v = f n = z f_z n,
$$
where \(f_v\) is feed speed, \(f\) is feed per revolution, \(n\) is spindle speed, \(z\) is the number of teeth, and \(f_z\) is feed per tooth. The cutting speed is
$$
v_c = \frac{\pi d n}{1000},
$$
where \(d\) is tool diameter in millimeters and \(v_c\) is in meters per minute. For roughing, I used a feed per tooth of about 0.15 mm, and for finishing I used about 0.10 mm. The spindle speed was set between 800 and 1200 rpm for roughing and around 2500 rpm for finishing. The feed speed was approximately 500 mm/min for the miter gear operations. The selected depth of cut was moderate for roughing and small for finishing, as summarized in Table 3.
| Operation | Machining stage | Programming method | Tool | Spindle speed | Feed speed |
|---|---|---|---|---|---|
| Roughing of tooth space | Roughing | Variable contour milling | 20 mm flat end mill | 800–1200 rpm | 500 mm/min |
| Roughing of bottom region | Roughing | Variable contour milling | 10 mm flat end mill | 800–1200 rpm | 500 mm/min |
| Semi-finishing of flanks | Semi-finishing | Variable contour milling | 12 mm flat end mill | 2300–3000 rpm | 500 mm/min |
| Semi-finishing of bottom | Semi-finishing | Variable contour milling | 10 mm flat end mill | 2300–3000 rpm | 500 mm/min |
| Semi-finishing of root fillet | Semi-finishing | Variable contour milling | 8 mm ball-end mill | 2500 rpm | 500 mm/min |
| Finishing of flanks | Finishing | Variable contour milling | 12 mm flat end mill | 2500 rpm | 500 mm/min |
| Finishing of root and bottom | Finishing | Variable contour milling | 8 mm ball-end mill | 2500 rpm | 500 mm/min |
I programmed the miter gear in the CAM module of a CAD environment. The programming sequence was: create the program node, create the coordinate system, define the geometry and blank, set the safety plane, create the tools, create the operations, generate the tool path, simulate, and post-process. The coordinate origin was placed at the center of the miter gear on one end face, and the blank was a cylinder whose diameter was equal to the tip diameter and whose height was equal to the gear width. The safety plane was set 100 mm away from the tooth surface.
For the roughing operation, I used the variable contour milling operation. I created an auxiliary plane in the middle of the tooth space as the drive surface, set the projection vector to the tool axis, and used a four-axis relative-to-drive tool axis. The drive surface was swept along the tooth direction with a zig-zag pattern. The same operation was copied for the narrow bottom region, but the start and end percentages of the drive surface were limited to 60% to 95% so that the 10 mm end mill could reach the bottom without interference. This allowed the miter gear tooth space to be opened efficiently while protecting the root region.
For semi-finishing and finishing of the flanks, I again used variable contour milling. I selected the flank surface as the drive surface, set the cutting direction along the tooth trace, and used a 12 mm flat end mill. For semi-finishing, I added a positive offset in the drive surface method to leave finishing allowance. For finishing, I set the offset to zero and used unidirectional milling to maintain climb milling. The tool axis was controlled so that the cylindrical flank of the end mill contacted the miter gear flank along a line rather than at a single point. This is the key advantage of flank milling for the miter gear: the effective row spacing can be much larger than that of a ball-end mill, and the miter gear flank can be finished with fewer passes.
The bottom and root fillet of the miter gear were machined with an 8 mm ball-end mill. The drive surface was the bottom of the tooth space, and the surface percentage was adjusted so that the ball-end mill finished the R4 fillet. I avoided using the center of the ball-end mill for cutting because the cutting speed becomes very small near the tool axis. The simulation view confirmed that the ball-end mill contacted the fillet with a safe tool attitude and that no interference occurred between the tool holder and the miter gear.
After the initial CAM programming, I focused on the finishing tool path. The involute flank of the miter gear has a changing curvature radius. Near the root, the curvature radius is small, and near the tip, the curvature radius is large. If I used a constant parameter method, I would have to choose the row spacing according to the smallest curvature radius to satisfy the residual height requirement. That choice would make the tool path unnecessarily dense near the tip, where the surface could tolerate a larger row spacing. The result would be a redundant miter gear finishing path and a longer machining time.
The constant scallop height method solves this problem. The basic relation between curvature radius \(r\), residual height \(\lambda\), and row spacing \(l\) is
$$
\lambda = r – \sqrt{r^2 – \left(\frac{l}{2}\right)^2}.
$$
Solving for row spacing gives
$$
l = 2\sqrt{2r\lambda – \lambda^2}.
$$
When the residual height is much smaller than the curvature radius, the approximate form is
$$
l \approx 2\sqrt{2r\lambda}.
$$
This relation shows that the allowable row spacing increases with the curvature radius and with the permitted residual height. For the miter gear, the curvature radius at the start of the involute was about 77.366 mm, and at the tip it was about 143.821 mm. With a residual height of 0.0025 mm for grade-six accuracy, the row spacing varied from approximately 1.2346 mm to 1.6864 mm. A constant parameter method would have to use the smaller value over the whole flank, which would waste time. The constant scallop height method uses the local curvature radius to distribute the miter gear finishing paths efficiently.
I implemented the constant scallop height method for the miter gear flank. The procedure was as follows. First, I selected the tip boundary of the involute flank as the initial tool contact path. Second, I generated a plane tangent to the flank along that initial path. Third, I offset the flank by the residual height value and intersected the offset surface with the tangent plane to obtain the first constant scallop height curve. Fourth, I generated a new tangent plane through that curve and intersected it with the original flank to obtain the next tool contact path. I repeated these steps until the tool contact paths covered the whole miter gear flank from the tip to the start of the involute.
For the flank milling case, the tool contact points are not the tool center points. After the tool contact paths were obtained, I offset each contact point along the normal direction of the involute by the tool radius. Then I created a helical path through the offset points. The helix through a point at radius \(r_i\) uses the local helix angle
$$
\beta_i = \arctan\left(\frac{2\pi r_i}{h}\right),
$$
and the helical path is
$$
\begin{aligned}
x_i(\mu) &= x_i\cos\mu-y_i\sin\mu,\\
y_i(\mu) &= x_i\sin\mu+y_i\cos\mu,\\
z_i(\mu) &= z_i+\frac{h}{2\pi}\mu.
\end{aligned}
$$
This produced a set of constant scallop height tool paths for the miter gear. In the example, the constant scallop height method required 21 tool paths for one flank, while the constant parameter method required 25 tool paths. The saving was four tool paths per flank. Because the length of each path is almost the same, the reduction in path number directly reduces the finishing time. The row spacing values obtained from the constant scallop height calculation are listed in Table 4.
| Row spacing number | Row spacing value | Unit |
|---|---|---|
| 1 | 1.6864 | mm |
| 3 | 1.6499 | mm |
| 6 | 1.5908 | mm |
| 10 | 1.5063 | mm |
| 14 | 1.4094 | mm |
| 18 | 1.2989 | mm |
| 20 | 1.2346 | mm |
The calculation of the constant scallop height contact points can be expressed as a search problem. Let the involute be \(g(x)\). For a known contact point \(A(x_A,y_A)\), the tangent line at \(A\) is
$$
L_A: y-y_A = g'(x_A)(x-x_A).
$$
For a candidate next contact point \(B(x_B,y_B)\), the tangent line at \(B\) is
$$
L_B: y-y_B = g'(x_B)(x-x_B).
$$
The intersection of \(L_A\) and \(L_B\) is \(P\). The next contact point \(B\) is chosen so that the distance from \(P\) to the involute is equal to the required residual height \(\lambda\):
$$
\left| \operatorname{dist}(P,g(x)) – \lambda \right| = 0.
$$
In practice, I solved this condition numerically. I started from the tip of the involute, stepped along the involute, and checked the residual height condition. When the condition was satisfied, I stored the point and continued until the involute start radius was reached. This gave a discrete set of miter gear contact points. The points were then imported into the CAD environment, offset by the tool radius, and connected by helical splines to create the final miter gear finishing path.
Because the constant scallop height calculation and helical path generation are repetitive, I developed a secondary development program for the miter gear finishing path. The program had two possible strategies: a modeling method and a point-line method. The modeling method used offset surfaces and intersection curves directly on the miter gear flank. It was convenient for a straight spur gear but less suitable for a helical miter gear because the tooth trace is a helix. The point-line method was more general. I used MATLAB to compute the contact points from the involute and the residual height condition, then imported the points into the CAD system and used a knowledge-fusion program to generate helical tool paths. This method was applicable to both helical and spur miter gear flanks.
The secondary development interface included a menu and a user interface. The menu allowed the user to start the miter gear constant scallop height finishing program from the main menu. The user interface contained a selection group for the contact points, a parameter group for base radius, helix angle, lead, and tool radius, and a diagram group to show the intended miter gear finishing path. The program used a loop and a spline-through-points command to create the helical paths. For each contact point, the local helix angle was calculated from the lead and radius, so the generated path followed the miter gear tooth trace correctly. This reduced the programming effort for the miter gear and made the optimized finishing path easier to reuse.
After programming, I verified the miter gear machining process with simulation. I built models of the tools, tool holders, fixture, and blank in a machining simulation environment. The tool models included a 20 mm flat end mill, a 12 mm flat end mill, a 10 mm flat end mill, and an 8 mm ball-end mill. The tool holder was represented by a combination of cylinders and a cone. The fixture was a cylinder that supported the miter gear blank and kept the blank concentric with the machine table. I imported the NC code, set the workpiece coordinate system, and ran the simulation. The simulation showed that the tool paths were correct, the machine strokes were sufficient, and no collision occurred between the tool holder and the miter gear.
I also used the simulation to compare the constant parameter finishing path and the constant scallop height finishing path for the miter gear. The simulated time for one tooth was 48.73 minutes with the constant parameter method and 38.00 minutes with the constant scallop height method. In the actual machining trial, the corresponding times were 63.0 minutes and 51.2 minutes per tooth. The constant scallop height method reduced the finishing time by about 11.8 minutes per tooth. For a miter gear with 30 teeth, the total saving was about 354 minutes, or 5 hours and 54 minutes. This was about a 19% reduction in finishing time compared with the constant parameter method. The comparison is given in Table 5.
| Method | Simulated time per tooth | Actual time per tooth | Unit |
|---|---|---|---|
| Constant parameter method | 48.73 | 63.0 | min |
| Constant scallop height method | 38.00 | 51.2 | min |
| Saving per tooth | 10.73 | 11.8 | min |
| Total saving for 30 teeth | 321.9 | 354.0 | min |
For the machining trial, I used a five-axis turn-mill machining center with a Siemens control. The miter gear blank was clamped on a fixture with a key and pressure plates. I aligned the blank so that the radial runout and axial runout were both within 0.01 mm. I first ran the program in air to check the motion. Then I performed roughing and semi-finishing according to the process plan. For finishing, I used both the constant parameter path and the constant scallop height path on different flanks so that I could compare them directly. The spindle speed was 2500 rpm, and the feed speed was 500 mm/min. I monitored the cutting sound, chip evacuation, and tool wear. After finishing, the miter gear was removed and inspected.
The inspection was performed on a gear measuring instrument. The instrument used a comparison method: I entered the miter gear parameters, and the software generated a reference model. The probe then measured the actual flank and compared it with the reference. The measured items included profile total deviation, profile form deviation, profile slope deviation, helix total deviation, helix form deviation, and helix slope deviation. The results are given in Table 6. All measured values were within the grade-six limits. The maximum profile total deviation was 11.3 micrometers, the maximum helix total deviation was 11.5 micrometers, and the maximum helix slope deviation was 0.0054 degrees. These results confirmed that the recess-free miter gear machined by the proposed process met the design requirement.
| Parameter | Maximum | Minimum | Average | Grade-six limit | Result |
|---|---|---|---|---|---|
| Profile total deviation | 11.3 | 7.6 | 9.7 | 23 | Pass |
| Profile form deviation | 9.2 | 3.8 | 5.8 | 18 | Pass |
| Profile slope deviation | 10.0 | 5.7 | 7.6 | ±15 | Pass |
| Helix total deviation | 11.5 | 10.3 | 10.8 | 18 | Pass |
| Helix form deviation | 3.3 | 2.6 | 3.0 | 13 | Pass |
| Helix slope deviation | 11.7 | 10.5 | 11.1 | ±13 | Pass |
I examined the measurement report and found that the helix deviations had a consistent trend along the tooth width. I attributed this to three possible causes. First, the helical path generated from the contact points may not have matched the ideal miter gear helix perfectly. Second, the three-dimensional model of the miter gear may have introduced a small lead error. Third, the key connection in the fixture may have had a small clearance that allowed a slight rotation of the miter gear during cutting. To improve the result, I would increase the accuracy of the helical spline in the CAD program, replace worn tools more frequently, and adjust the cutting parameters to reduce chatter. Even with these small deviations, the miter gear passed the grade-six inspection.
I also compared the NC machining route with the traditional route. In the traditional route, a hob and a grinding wheel are used, and a relief groove is required between the two hands of the miter gear. The traditional route has a shorter cutting time once the special tools are available, but the tooling lead time is long and the tooling is dedicated to one module, one pressure angle, and one tooth form. In my NC route, the miter gear is machined with general-purpose end mills. The roughing time was about 30 hours, the semi-finishing time was about 25 hours, and the finishing time was about 25 hours, for a total of about 80 hours. The traditional route required about 50 hours of cutting time, but it also required a special tool order that could take from twenty days to two months. For small-batch miter gear production with different modules, tooth numbers, and pressure angles, the NC route with general-purpose tools is more flexible and avoids the recess entirely. The comparison is summarized in Table 7.
| Item | NC machining route | Traditional hobbing and grinding route |
|---|---|---|
| Recess requirement | No recess required | Recess required |
| Tool type | General flat and ball-end mills | Special hob and grinding wheel |
| Tool lead time | Short, standard tools | Long, twenty days to two months |
| Cutting time | About 80 h | About 50 h |
| Batch suitability | Small batch and varied specifications | Large batch with fixed specifications |
| Alignment of left and right flanks | Good because the flanks are connected | Affected by the recess |
The core contribution of this work is the combination of recess-free miter gear geometry, five-axis NC machining, and constant scallop height tool path optimization. I showed that a general-purpose end mill can machine the miter gear flank by flank milling without a recess. I derived the involute helical surface equations, computed the local helix angle, and used the curvature-radius relation to distribute the miter gear finishing paths. I also built a secondary development program that generates the constant scallop height path from discrete contact points, which reduces the programming burden for the miter gear. Simulation and machining trials confirmed the correctness of the NC program and the efficiency of the optimized path.
There are still several improvements that I would pursue for the miter gear. The ball-end mill finishing of the root fillet should be further optimized because the cutting speed near the tool axis is low. A better tool-axis vector could keep the contact point away from the center of the ball-end mill. In addition, the finishing pass currently uses unidirectional climb milling. If a combination of climb and conventional milling could be used while still meeting the grade-six requirement, the miter gear finishing time could be reduced further. Finally, the current constant scallop height method assumes a standard involute miter gear. If the miter gear has profile or lead modification, the mathematical model must be extended, and the tool path should be generated along a modified helix rather than a standard helix. These extensions would make the method more general for miter gear design and manufacturing.
In summary, I developed a complete NC machining process for a recess-free miter gear, optimized the finishing tool path with the constant scallop height method, created a secondary development program for path generation, verified the process with simulation, and validated the result with actual machining and gear measurement. The miter gear reached grade-six accuracy, and the constant scallop height path reduced the finishing time by about 19% compared with the constant parameter path. The work provides a practical route for small-batch, high-precision, recess-free miter gear production and supports the design of more compact heavy-duty miter gear transmissions.