
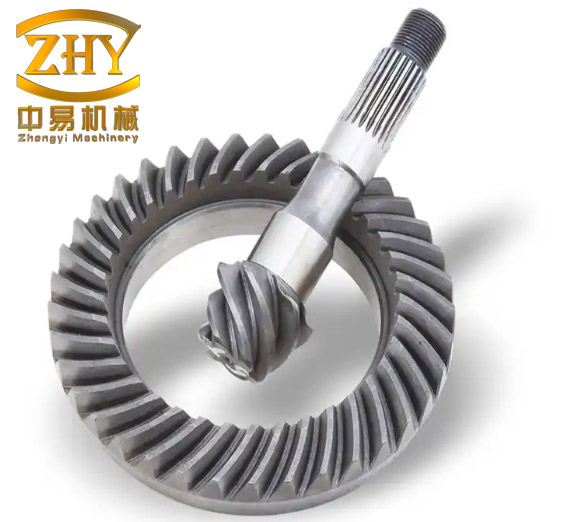
Spiral bevel gears transmit rotation between intersecting or offset axes. Their curved teeth engage gradually, giving a high contact ratio, high load capacity, smooth running and low noise, which is why they dominate final drives in mining and petroleum equipment, coal machinery, machine tools, railway locomotives, ships and helicopters. The same geometry that makes them quiet and strong makes them expensive to cut: each tooth flank is a complex curved surface, and machining removes the continuous grain flow that gives the part its fatigue resistance.
Precision forging avoids that trade-off. A forged gear develops an uninterrupted metal flow line along the tooth profile, which raises fatigue strength, while the near-net shape cuts machining allowance, improves material utilization and lowers unit cost. In the open-die variant used for cold precision forging, the die is not fully closed: a flash gap is deliberately left at the periphery. As the punch descends, the flash land imposes a back-pressure that forces the remaining metal into the tooth cavities, so flash acts as a process control element rather than waste. The success of the operation therefore depends on how the workpiece volume is distributed before the final stroke — a preform that puts too much material where it is not needed raises the load; too little leaves the tooth corners unfilled.
Part Definition and Forging Scheme
The workpiece considered here is a small spiral bevel gear with the geometry listed in Table 1. The forged teeth serve directly as the machining datum for subsequent operations, so no trimming die is required to remove flash. Undimensioned fillets are R1 mm and undimensioned draft is 5°.
| Parameter | Value |
|---|---|
| Number of teeth | 37 |
| Mating teeth | 10 |
| Module | 1.28 mm |
| Spiral direction | Left-hand |
| Spiral angle | 35° |
| Pressure angle | 20° |
| Face cone angle | 77.06° |
| Pitch cone angle | 74.88° |
| Root cone angle | 70.86° |
A relief volume is normally incorporated so that small fluctuations in billet mass do not translate into a sharp rise in die stress. The relief also provides a low-resistance sink toward which surplus metal can escape, which promotes flow into the tooth corners and reduces the peak pressure on die edges. Two ways of providing that sink are compared here. In the first, the preform carries a Ø10 mm central through-hole and metal escapes into it during the final stroke. In the second, the preform is solid and the relief is a Ø10 mm cavity machined in the centre of the upper die, its depth set to 2.4 mm by adjusting the length of the upper ejector.
Because the teeth are formed mainly during the final stroke, the volume of material sitting on the face cone of the preform controls both filling quality and load. The face cone angle of the preform is matched to that of the gear, and the face cone centre is aligned with the mid-width of the finished tooth, at a radius Rm = 19 mm. The face cone carries a boss of width W and height H, and its proportions are captured by the width-to-height ratio
$$\eta = \frac{W}{H}$$
which is the single geometric variable used to tune the volume split between the tooth region, the relief and the flash.
Finite Element Model
Simulation was carried out in Deform-3D. The spiral tooth trace makes the metal flow fully three-dimensional, and an accurate description of filling at the tooth corners requires a full 3-D solution rather than an axisymmetric approximation. Because the part is quasi-axisymmetric, rotational boundary conditions allow a one-fifth sector model, which keeps the computation tractable without losing the local flow detail. Upper die, lower die and ejector are treated as rigid bodies; the preform is plastic. The workpiece material is AISI-4120 steel with a Poisson ratio of 0.3, elastic modulus of 206 GPa and density of 7.85×10³ kg/m3, and its flow stress curve is taken from compression data for the same steel. Forging is performed at room temperature, 20 °C, with a friction coefficient of 0.12. The upper die and upper ejector move along the Z axis at 20 mm/s. The preform is meshed with tetrahedral elements, with a minimum element size of 0.3 mm on the face cone boss and 1 mm elsewhere, so that the region that controls tooth filling is resolved finely while the bulk is kept coarse.
Relief Strategy: Central Hole versus Die Cavity
The two relief concepts were compared at an identical forming load of 3 635 kN, so that the stress states reflect the same punch force rather than different amounts of deformation. With the die cavity, the highly stressed regions appear both at the tooth tips and at the flash fillet. With the central hole, high stress is confined to the flash fillet and the tooth tips are noticeably less loaded, which means the stress concentration at the tips is suppressed — a direct benefit for die life, since the tooth-tip inserts of the upper die are the most highly loaded and most expensive elements to replace.
The velocity fields explain the difference. When the relief is a cavity in the upper die, surplus metal at the large end of the teeth must follow a tortuous route through the tooth region before reaching the cavity. When the preform has a central hole, metal at the large end flows directly inward to the hole. The flow path is shorter and the flow resistance lower, which is precisely why the tooth-tip stress concentration is relieved. On this basis, the central-hole variant was selected for the final forging die.
| Feature | Die relief cavity | Central hole in preform |
|---|---|---|
| Relief location and size | Centre of upper die, Ø10 mm, depth 2.4 mm | Through-hole in preform, Ø10 mm |
| Regions of high stress | Tooth tips and flash fillet | Flash fillet only |
| Flow path of surplus metal from tooth large end | Tortuous, through the tooth region | Direct, radially inward |
| Tooth-tip stress concentration | Pronounced | Weak |
| Implication for die life | Higher loading on tip inserts | Lower loading, longer life |
Preform Aspect Ratio and Tooth Filling
With the relief strategy fixed, the width-to-height ratio of the face cone boss was varied. Each simulation was run until the teeth were completely filled in the upper die, and the stroke–load curves for η = 1.0, 2.0 and 3.0 all show the same two-stage character: a long, gentle rise as the metal is redistributed and the tooth cavities begin to fill, followed by a steep rise once filling is nearly complete and further punch travel only extrudes flash. What differs is the level at which the steep stage begins. The forming load first falls and then rises with increasing η, reaching a minimum of 4 238 kN at η = 2.0.
Sectioning the model along the tooth trace and retaining only the die and workpiece contours reveals why. At η = 1.0 the face cone material of the preform contacts the die first at the root of the small end, and from there it must be pushed toward the large end; the flow resistance is high and the load climbs. At η = 3.0 the material contacts the large-end sidewall first and then flows up along that wall to fill the large end. The wider boss also diverts more metal toward the central hole and the flash, so less material reaches the teeth while the flash grows wider — both effects raise the load. At η = 2.0 the flow lies between these two extremes: the material reaches the small-end root and the large-end sidewall at essentially the same instant and then fills the large-end corners. The volume is distributed more evenly between tooth region, relief and flash, and the resulting load is the lowest of the three.
| η = W/H | Filling sequence | Forming load at complete filling |
|---|---|---|
| 1.0 | Contact at small-end root, then flow toward large end | Above the η = 2.0 minimum |
| 2.0 | Simultaneous contact at small-end root and large-end sidewall, then corner filling | 4 238 kN (minimum) |
| 3.0 | Contact at large-end sidewall, upward flow, excess diverted to hole and flash | Above the η = 2.0 minimum |
Forge Trial Validation
The combined scheme — central-hole relief with η = 2.0 — was tested on an 8 000 kN CNC double-action hydraulic extrusion press. The dies were heat treated to 60–62 HRC and the cavity surfaces polished to Ra 0.4 μm. Billets of 20CrMo were spheroidize annealed to 15 HRC and phosphated and soap-treated before forging to control friction and prevent pick-up at the low working temperature; the toothed upper die descended at 20 mm/s, matching the simulation.
The press recorded a final-stroke load of 3 860 kN, below the 4 238 kN predicted by the model. The discrepancy is attributed to the rotational symmetry boundary condition, which is imposed on the side faces of the billet: elements on that boundary deform under a constraint that does not exist in the physical workpiece, and the resulting mesh distortion stiffens the numerical response relative to the real process. The prediction is therefore conservative with respect to press capacity. Inspection of the preform and of the forged teeth showed complete filling of the corner regions at both the large and small ends of the tooth, with a sound, well-formed gear.
Design Implications
Three conclusions follow for open-die cold precision forging of spiral bevel gears. First, the way surplus metal leaves the tooth region matters as much as the fact that it can leave: a central hole in the preform shortens the flow path relative to a cavity in the die, lowers flow resistance and keeps stress concentration away from the tooth tips, which is where die life is decided. Second, the face cone boss of the preform should be proportioned so that the small-end root and the large-end sidewall are reached at the same moment; for this gear, a width-to-height ratio of 2.0 gives that balance and the lowest load at complete filling, whereas both narrower and wider bosses shift metal prematurely toward either the large end or the relief and flash. Third, the simulated load overestimates the measured load by roughly 10 %, a margin attributable to the symmetry boundary condition rather than to friction or material data, so press selection based on such models retains a measure of safety. The same reasoning — matching the preform’s volume distribution to the sequence in which the die cavity is contacted — carries over to other near-net-shape gear forgings where tooth-corner filling and die stress are the limiting factors.