
In my extensive experience within the gear manufacturing industry, I have consistently encountered significant challenges posed by the heat treatment distortion of gear shafts. These critical components, especially those with large length-to-diameter ratios, often exhibit substantial deformation after carburizing and quenching. This distortion severely complicates subsequent machining operations and jeopardizes the final quality, which is unacceptable for heavy-duty, high-speed, and high-reliability transmission systems where failure can lead to catastrophic breakdowns. This article details a comprehensive process experimentation and the systematic approach I developed to overcome these obstacles, ensuring precise gear tooth geometry, uniform hardened case depth, and strict adherence to geometric tolerances for features like keyways.
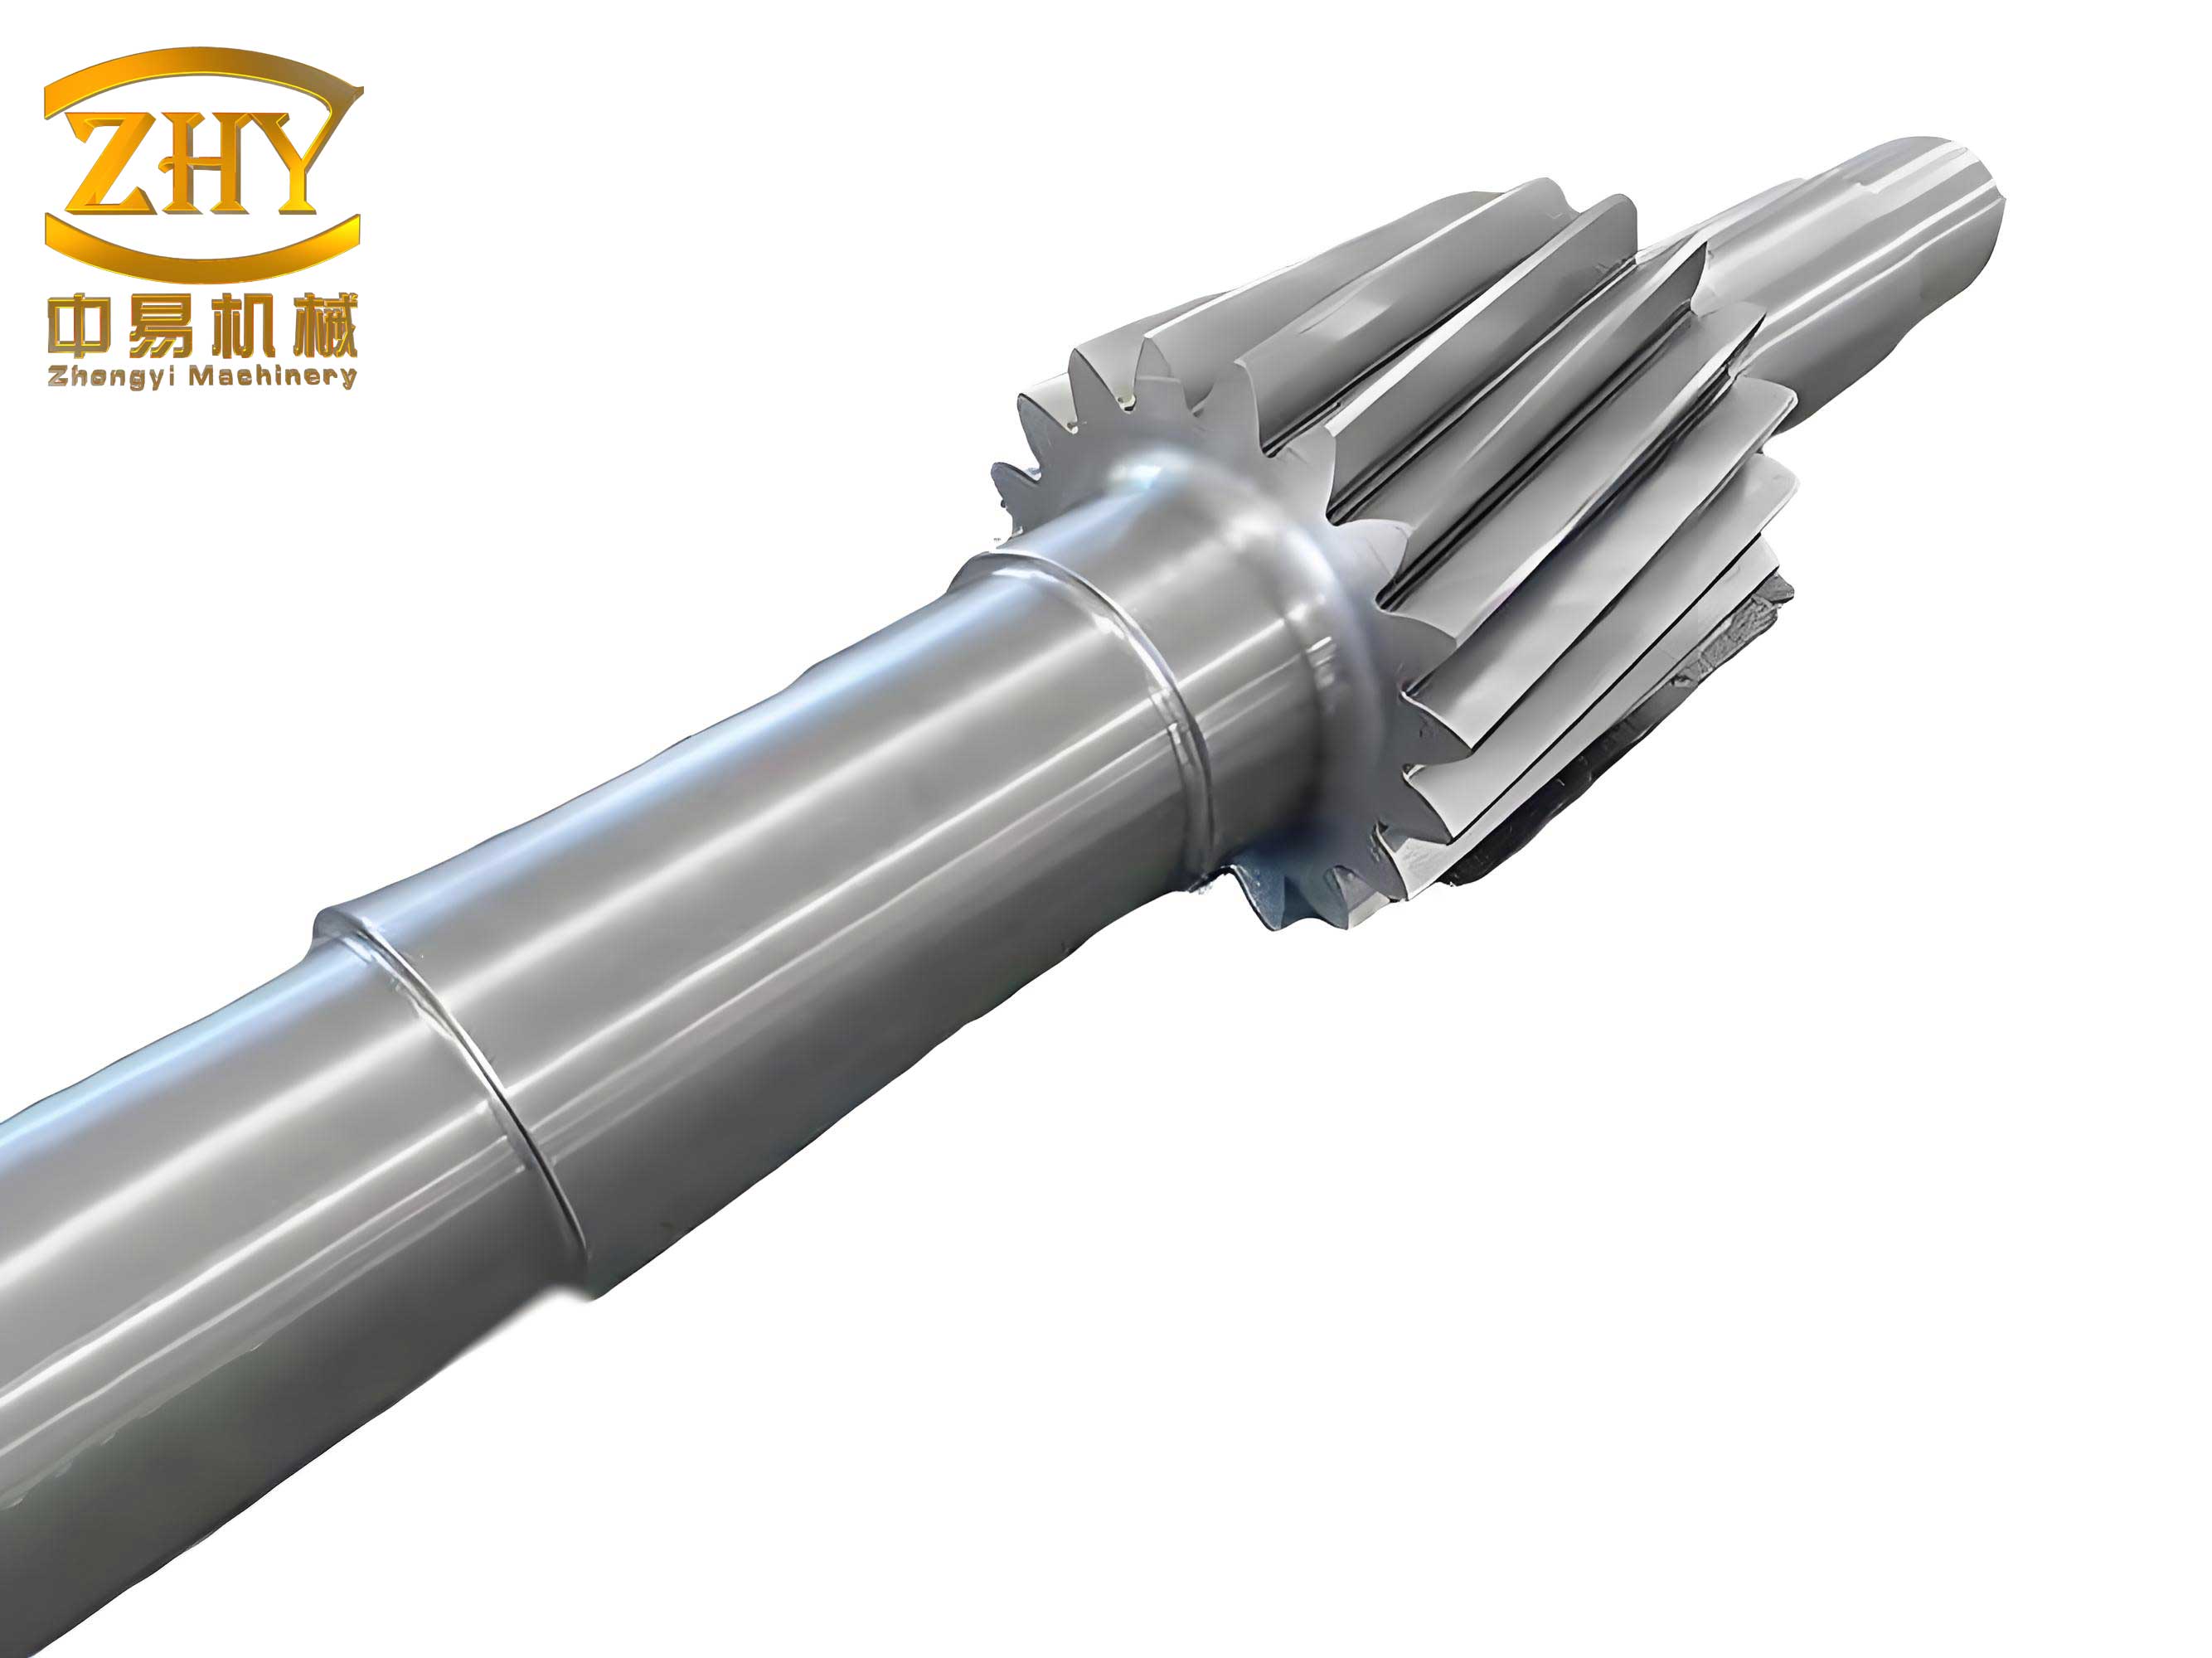
The core problem stems from the inherent characteristics of gear shafts. The length-to-diameter ratio (L/D) for the gear shafts I commonly work with ranges from 3 to 7. Post-heat-treatment, these slender components warp and bend, making it difficult to establish a reliable datum for finishing operations. Two critical quality aspects are directly threatened. First, the final gear grinding operation aims to achieve the specified surface finish and profile. To preserve the effective hardened case depth of 2–3 mm, the grinding allowance must be minimal. However, pre-grinding distortion leads to an uneven stock allowance. Consequently, after grinding, the effective case depth becomes non-uniform across the tooth flank, dramatically reducing the service life of the entire assembly. Second, features machined before heat treatment, such as a 40mm wide input keyway with an H7/s6 interference fit, invariably see their dimensional and geometric tolerances drift beyond acceptable limits due to thermal stresses, causing severe assembly issues.
The fundamental principle guiding my solution is that all critical-to-quality elements must be positioned ideally relative to a unified datum. This datum is ideally the axis simulated by the centers at both ends of the gear shaft. Therefore, the entire post-heat-treatment machining strategy must be rebuilt around re-establishing this true axis from the distorted part. The successful machining of gear shafts hinges on this concept. Based on this, I devised and validated the following multi-stage process sequence, as summarized in the table below.
| Process Step | Key Objective & Description | Critical Output/Requirement |
|---|---|---|
| 1. Forging | Obtain rough blank shape. | Material consistency. |
| 2. Rough Turning | Remove excess material; create basic shape. | Prepare for heat treatment. |
| 3. Quenching & Tempering (QT) | Improve core mechanical properties. | Uniform hardness and structure. |
| 4. Finish Turning I | Machine surfaces close to final dimensions; create center holes. | Accurate pre-heat-treatment geometry; high-quality 60° center holes (see Fig. 2 style). |
| 5. Rough Grinding I | Prepare specific diameters for subsequent operations. | Establish reference surfaces. |
| 6. Gear Hobbing | Generate gear teeth. | Correct tooth form with grinding allowance. |
| 7. Heat Treatment (Carburizing + Quenching) | Achieve surface hardness and case depth. | Target hardness of 58-62 HRC; case depth 2-3 mm. Distortion occurs here. |
| 8. Center Hole Reformation | Re-establish the true datum axis post-distortion. | Correct gear pitch runout ≤ 0.03 mm; re-grind 60° faces to Ra ≤ 0.8 µm. |
| 9. Finish Turning II | Remove hardened surface layer from keyway area. | Turn Ø156mm area down to Ø151mm to facilitate keyway milling. |
| 10. Rough Grinding II | Pre-grind critical journals. | Grind Ø175mm & Ø151mm to Ra ≤ 0.4 µm; runout ≤ 0.03 mm. |
| 11. Gear Profile Grinding | Finish grind gear teeth to final specifications. | Final tooth profile, lead, and pitch accuracy; uniform case depth. |
| 12. Keyway Milling | Mill the input keyway. | Achieve width 40N9 and symmetry relative to reformed center axis. |
| 13. Finish Grinding | Final precision grinding of journals. | Achieve final dimensions and surface finish for bearing fits. |
The effectiveness of this sequence for gear shafts relies entirely on the execution of several key operations. During Finish Turning I, creating robust and precise center holes is paramount. These holes must be machined with a specific geometry that allows for their reformation later. A typical design includes a 60° working surface with a protective chamfer and a small pilot hole. The dimensional relationship can be expressed to ensure durability:
$$ D_{pilot} \approx 0.25D_{center}, \quad \theta_{chamfer} = 120^\circ $$
where $D_{center}$ is the nominal diameter of the center hole. Furthermore, on the diameter destined for the keyway (e.g., Ø156 mm), a copper-rich anti-carburizing coating is applied before heat treatment. This keeps the surface hardness lower (typically below 45 HRC), drastically reducing the difficulty and tool wear during the post-heat-treatment turning operation to remove the hardened layer.
The single most critical step is the reformation of the center holes after heat treatment. This operation literally redefines the gear shaft’s datum axis based on its current, distorted state. The part is set up on a lathe using the gear teeth themselves as the reference. Using a dial indicator, the pitch circle at both ends of the gear is meticulously aligned. The target is to minimize the radial runout (TIR) to within 0.03 mm. This alignment ensures that the new axis is the true functional axis of the gear, not the distorted axis of the journals. Once aligned, the old center holes are recut or ground to restore a perfect 60° surface with a roughness no greater than Ra 0.8 µm. The success of all subsequent operations for these gear shafts depends on this step’s precision. The relationship between initial distortion $δ$ and the required correction $C$ at the centers can be modeled for understanding:
$$ C \approx \frac{L_{shaft}}{L_{gage}} \cdot δ_{pitch} $$
where $δ_{pitch}$ is the measured pitch circle runout, $L_{shaft}$ is the shaft length, and $L_{gage}$ is the distance between measurement points.
Following datum re-establishment, machining proceeds. The Ø156 mm area is turned down to Ø151 mm, removing the thin, hardened case. The key journals (e.g., Ø175 mm and the new Ø151 mm) are then rough ground. The grinding parameters must be controlled to minimize heat-induced errors. A simplified model for stock removal considers the required finish tolerance ($T_f$), initial runout ($R_i$), and grinding system stiffness ($k$):
$$ MRR_{optimal} \propto \frac{T_f – R_i}{k} $$
where $MRR$ is the material removal rate. The process aims for a surface roughness ≤ Ra 0.4 µm and a runout relative to the new centers of ≤ 0.03 mm.
A significant challenge arises when grinding the gear teeth on standard machines like the Y7163A grinder if the gear is located at one extreme end of a long shaft, exceeding the machine’s travel limit. For such gear shafts, a custom fixture is indispensable. My design involves creating a rigid connection between the gear end face and the machine worktable. Four M10 threaded holes are drilled in the gear shaft’s end face. A connecting sleeve (Component 2) is bolted to this face. This sleeve then mates with a fixture base (Component 1) mounted on the machine table. The critical feature is a controlled clearance fit between the sleeve and the base, allowing for fine adjustment. To facilitate this adjustment under the weight of the heavy gear shaft, a Ø15 mm steel ball is placed at the interface between the base and the sleeve. This transforms sliding friction into rolling friction, making micro-adjustments with set bolts effortless and precise.
The alignment procedure for the gear shaft in this fixture is systematic. First, the fixture base is lightly bolted to the table. The gear shaft, attached via the connecting sleeve, is placed onto the base. Using dial indicators on the key journals (Ø150mm and Ø175mm), eight M12 adjustment bolts around the base are sequentially tightened or loosened. The goal is to bring the radial runout of both journals to within 0.015 mm relative to the machine spindle axis. This ensures the reformed datum axis of the gear shaft is parallel to the grinding wheel’s path. Once achieved, all locking nuts are secured. The presence of the steel ball makes this process remarkably efficient. The fixture’s design parameters can be summarized for stiffness and adjustment sensitivity:
| Parameter | Symbol | Value / Description | Purpose |
|---|---|---|---|
| Connection Bolt Size | M10 x 4 pcs | Secure shaft to connecting sleeve. | |
| Adjustment Bolt Size | M12 x 8 pcs | Provide fine radial adjustment of fixture base. | |
| Interfacing Ball Diameter | $d_b$ | 15 mm | Reduce friction for easy adjustment. |
| Clearance Fit | $δ_c$ | 10-20 µm | Allow for necessary alignment correction. |
| Target Runout after Fixturing | $R_t$ | ≤ 0.015 mm TIR | Ensure grinding accuracy. |
| Base Pre-alignment Runout | $R_b$ | 0.10 – 0.15 mm TIR (max) | Initial condition for feasible final adjustment. |
The final keyway milling becomes straightforward once the gear shaft’s axis is securely defined and the journals are precision ground. By supporting the gear shaft between centers on a milling machine, the keyway is machined. Since the milling cutter’s path is referenced to the same center axis established during the hole reformation and maintained during grinding, all geometric tolerances for the keyway, such as symmetry and parallelism, are inherently guaranteed. The keyway dimensions are achieved directly through standard milling practices. The relationship for ensuring symmetry error ($E_{sym}$) is minimized by the established datum:
$$ E_{sym} \approx \frac{1}{2} \cdot (R_{journ1} + R_{journ2}) $$
where $R_{journ1}$ and $R_{journ2}$ are the residual runouts of the journals used for fixturing during milling. With runouts held below 0.03 mm, symmetry error is negligible.
In conclusion, the developed integrated process and fixture system has proven highly effective for manufacturing high-precision, distortion-prone gear shafts. This methodology is particularly suited for gear shafts where the gear element is at one end and falls outside the standard working range of available gear grinders. Several crucial lessons were reinforced. First, the initial alignment of the custom fixture base itself is a prerequisite; its external cylindrical surface must be trued to within 0.10-0.15 mm before attempting to clamp and align the workpiece gear shaft. Second, the adjustment bolts on the fixture base must be accurately positioned in pairs to apply balanced corrective forces. The heart of the strategy lies in accepting that heat treatment distortion for gear shafts is unavoidable and proactively planning the process sequence to re-derive the functional datum from the part’s post-heat-treatment condition. By doing so, we transform a problematic variable into a controlled starting point for all finishing operations, thereby securing the stringent quality requirements for critical gear shafts in demanding applications. The consistent application of this philosophy ensures that every gear shaft produced meets the highest standards of performance and reliability.
The technical approach can be further generalized. The post-heat-treatment distortion $\Delta$ in gear shafts can be considered a function of multiple variables: material composition ($M$), geometry (L/D ratio), carburizing depth ($d_c$), and quenching intensity ($Q$). While a precise predictive model is complex, a phenomenological representation is useful for process planning:
$$ \Delta \approx f(M, \frac{L}{D}, d_c, Q) = k_{\alpha} \cdot \left(\frac{L}{D}\right)^n \cdot d_c \cdot Q $$
where $k_{\alpha}$ is a material-dependent coefficient and $n$ is an empirical exponent often near 2 for bending modes. Our process innovation effectively introduces a correction function $C(\Delta)$—the center hole reformation—which minimizes the impact of $\Delta$ on final quality metrics $Q_{final}$ (e.g., profile error, case depth uniformity):
$$ Q_{final} = g(\text{Process Parameters}) + h(C(\Delta)) $$
where $h(C(\Delta))$ becomes a negligible term when $C(\Delta)$ is executed precisely. This underscores that for challenging components like gear shafts, a robust process must include explicit steps to measure and correct for inherent process-induced variations rather than assuming perfect initial conditions.