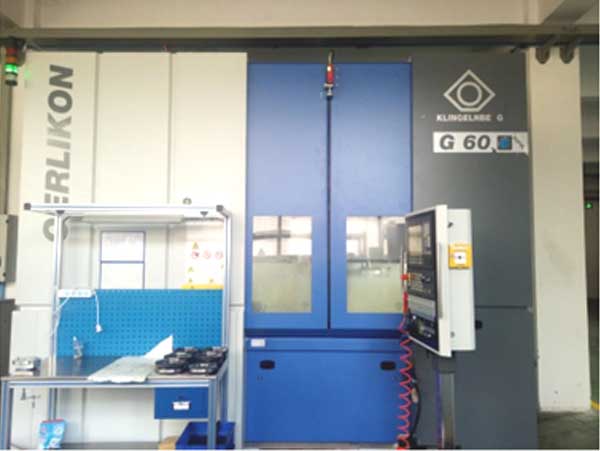
Spiral bevel gears are extensively employed in aviation transmission systems due to their exceptional load capacity, smooth operation, and noise reduction properties. The fatigue performance of these critical components is directly influenced by residual stresses induced during gear milling processes. This study establishes a comprehensive finite element model to quantify how milling parameters affect residual stress distribution in aviation spiral bevel gears.
Residual Stress Mechanisms in Gear Milling
During gear milling operations, residual stresses arise from complex thermomechanical interactions between the cutting tool and workpiece. The primary mechanisms include:
- Thermal effects: Localized heating followed by rapid cooling generates thermal gradients
- Mechanical deformation: Plastic deformation beneath the cutter induces compressive stresses
- Phase transformations: Microstructural changes alter material volume
The Johnson-Cook constitutive model effectively captures these interactions:
$$ \sigma = \left[ A + B\varepsilon^n \right] \left[ 1 + C \ln \dot{\varepsilon}^* \right] \left[ 1 – T^{*m} \right] $$
Where $A$, $B$, $C$, $n$, and $m$ are material constants, $\varepsilon$ is plastic strain, $\dot{\varepsilon}^*$ is dimensionless strain rate, and $T^*$ is homologous temperature.
Finite Element Simulation Framework
Our gear milling simulation incorporates actual gear geometry and machine kinematics. The relative motion between cutter and workpiece follows the transformation:
$$ R_w = M_{mm}M_{m’w}R_m $$
$$ c_w = M_{mm}M_{m’w}c_m $$
Where transformation matrices $M$ convert machine axes movements into relative positioning coordinates. Material properties for 45 steel are specified below:
| Temperature (°C) | Thermal Conductivity (W/m·°C) | Coefficient (10⁻⁶/°C) | Specific Heat (J/kg·°C) |
|---|---|---|---|
| 20 | 50.24 | 9.1 | 461 |
| 100 | 46.06 | 12.32 | 544 |
| 400 | 41.87 | 13.71 | 586 |

Orthogonal Experimental Design
An L9 orthogonal array evaluates three critical gear milling parameters at varying levels:
| Run | Cutting Speed (rad/s) | Feed Rate (rad/s) | Depth of Cut (mm) |
|---|---|---|---|
| 1 | 3.8277 | 0.4 | 3.0 |
| 2 | 3.8277 | 0.5 | 2.0 |
| 3 | 3.8277 | 0.6 | 1.5 |
| 4 | 4.3745 | 0.4 | 2.0 |
| 5 | 4.3745 | 0.5 | 1.5 |
| 6 | 4.3745 | 0.6 | 3.0 |
| 7 | 4.9213 | 0.4 | 1.5 |
| 8 | 4.9213 | 0.5 | 3.0 |
| 9 | 4.9213 | 0.6 | 2.0 |
Residual Stress Distribution Characteristics
All gear milling trials produced compressive residual stresses in surface layers. Stress profiles follow characteristic distributions:
$$ \sigma_{res}(z) = \sigma_{max} e^{-kz} + \sigma_{eq} $$
Where $\sigma_{max}$ is surface stress, $k$ is decay coefficient, and $\sigma_{eq}$ is equilibrium stress. Representative data for run 9 shows subsurface stress evolution:
| Depth (mm) | Stress (MPa) | Depth (mm) | Stress (MPa) |
|---|---|---|---|
| 0.0 | -102.4 | 3.8 | 15.3 |
| 0.6 | -162.5 | 5.1 | 12.2 |
| 1.9 | -20.7 | 6.4 | 6.5 |
| 3.2 | 16.5 | 7.0 | 3.1 |
Parameter Influence Analysis
Orthogonal analysis reveals distinct effects of gear milling parameters:
| Parameter | Range (MPa) | Influence Rank | Optimal Direction |
|---|---|---|---|
| Depth of Cut | 64.8 × 10⁶ | 1 | Lower values preferred |
| Cutting Speed | 19.0 × 10⁶ | 2 | Medium values optimal |
| Feed Rate | 7.0 × 10⁶ | 3 | Higher values acceptable |
Depth of cut dominates residual stress generation in gear milling. Increasing depth from 1.5mm to 3.0mm elevates mean compressive stress by 64.8 MPa while increasing stress non-uniformity by 38%. The stress distribution homogeneity index $H$ follows:
$$ H = 1 – \frac{\sigma_{\tau_{max}} – \sigma_{\tau_{min}}}{\bar{\sigma_\tau}} $$
Where $\sigma_\tau$ represents tangential stress components. Shallow depths (1.5mm) yield $H > 0.92$ versus $H < 0.78$ at 3.0mm depths.
Industrial Implications for Gear Milling
Optimized gear milling parameters significantly enhance component performance:
- Fatigue life extension: Controlled compressive stresses retard crack initiation
- Geometric precision: Reduced distortion improves tooth contact patterns
- Process efficiency: Feed rate optimization increases productivity
The parametric sensitivity hierarchy provides clear guidance for aviation gear milling: When increasing production throughput, prioritize feed rate adjustments over depth of cut changes. For critical fatigue applications, implement moderate cutting speeds (4.37 rad/s) with conservative depths (1.5-2.0mm).
Conclusions
This investigation establishes quantitative relationships between gear milling parameters and residual stress states. Key findings include:
- Depth of cut exhibits 3.4× greater influence than cutting speed and 9.3× greater than feed rate
- Shallow depths (≤2mm) improve stress uniformity by 18-24% versus deep cuts
- Moderate cutting speeds (4.37 rad/s) generate optimal compressive stress profiles
- Feed rate demonstrates minimal impact, enabling 20-30% increases for productivity
These results provide fundamental guidelines for high-integrity aviation gear milling. Future work will incorporate multi-axis dynamics and tool wear effects into the simulation framework.
