
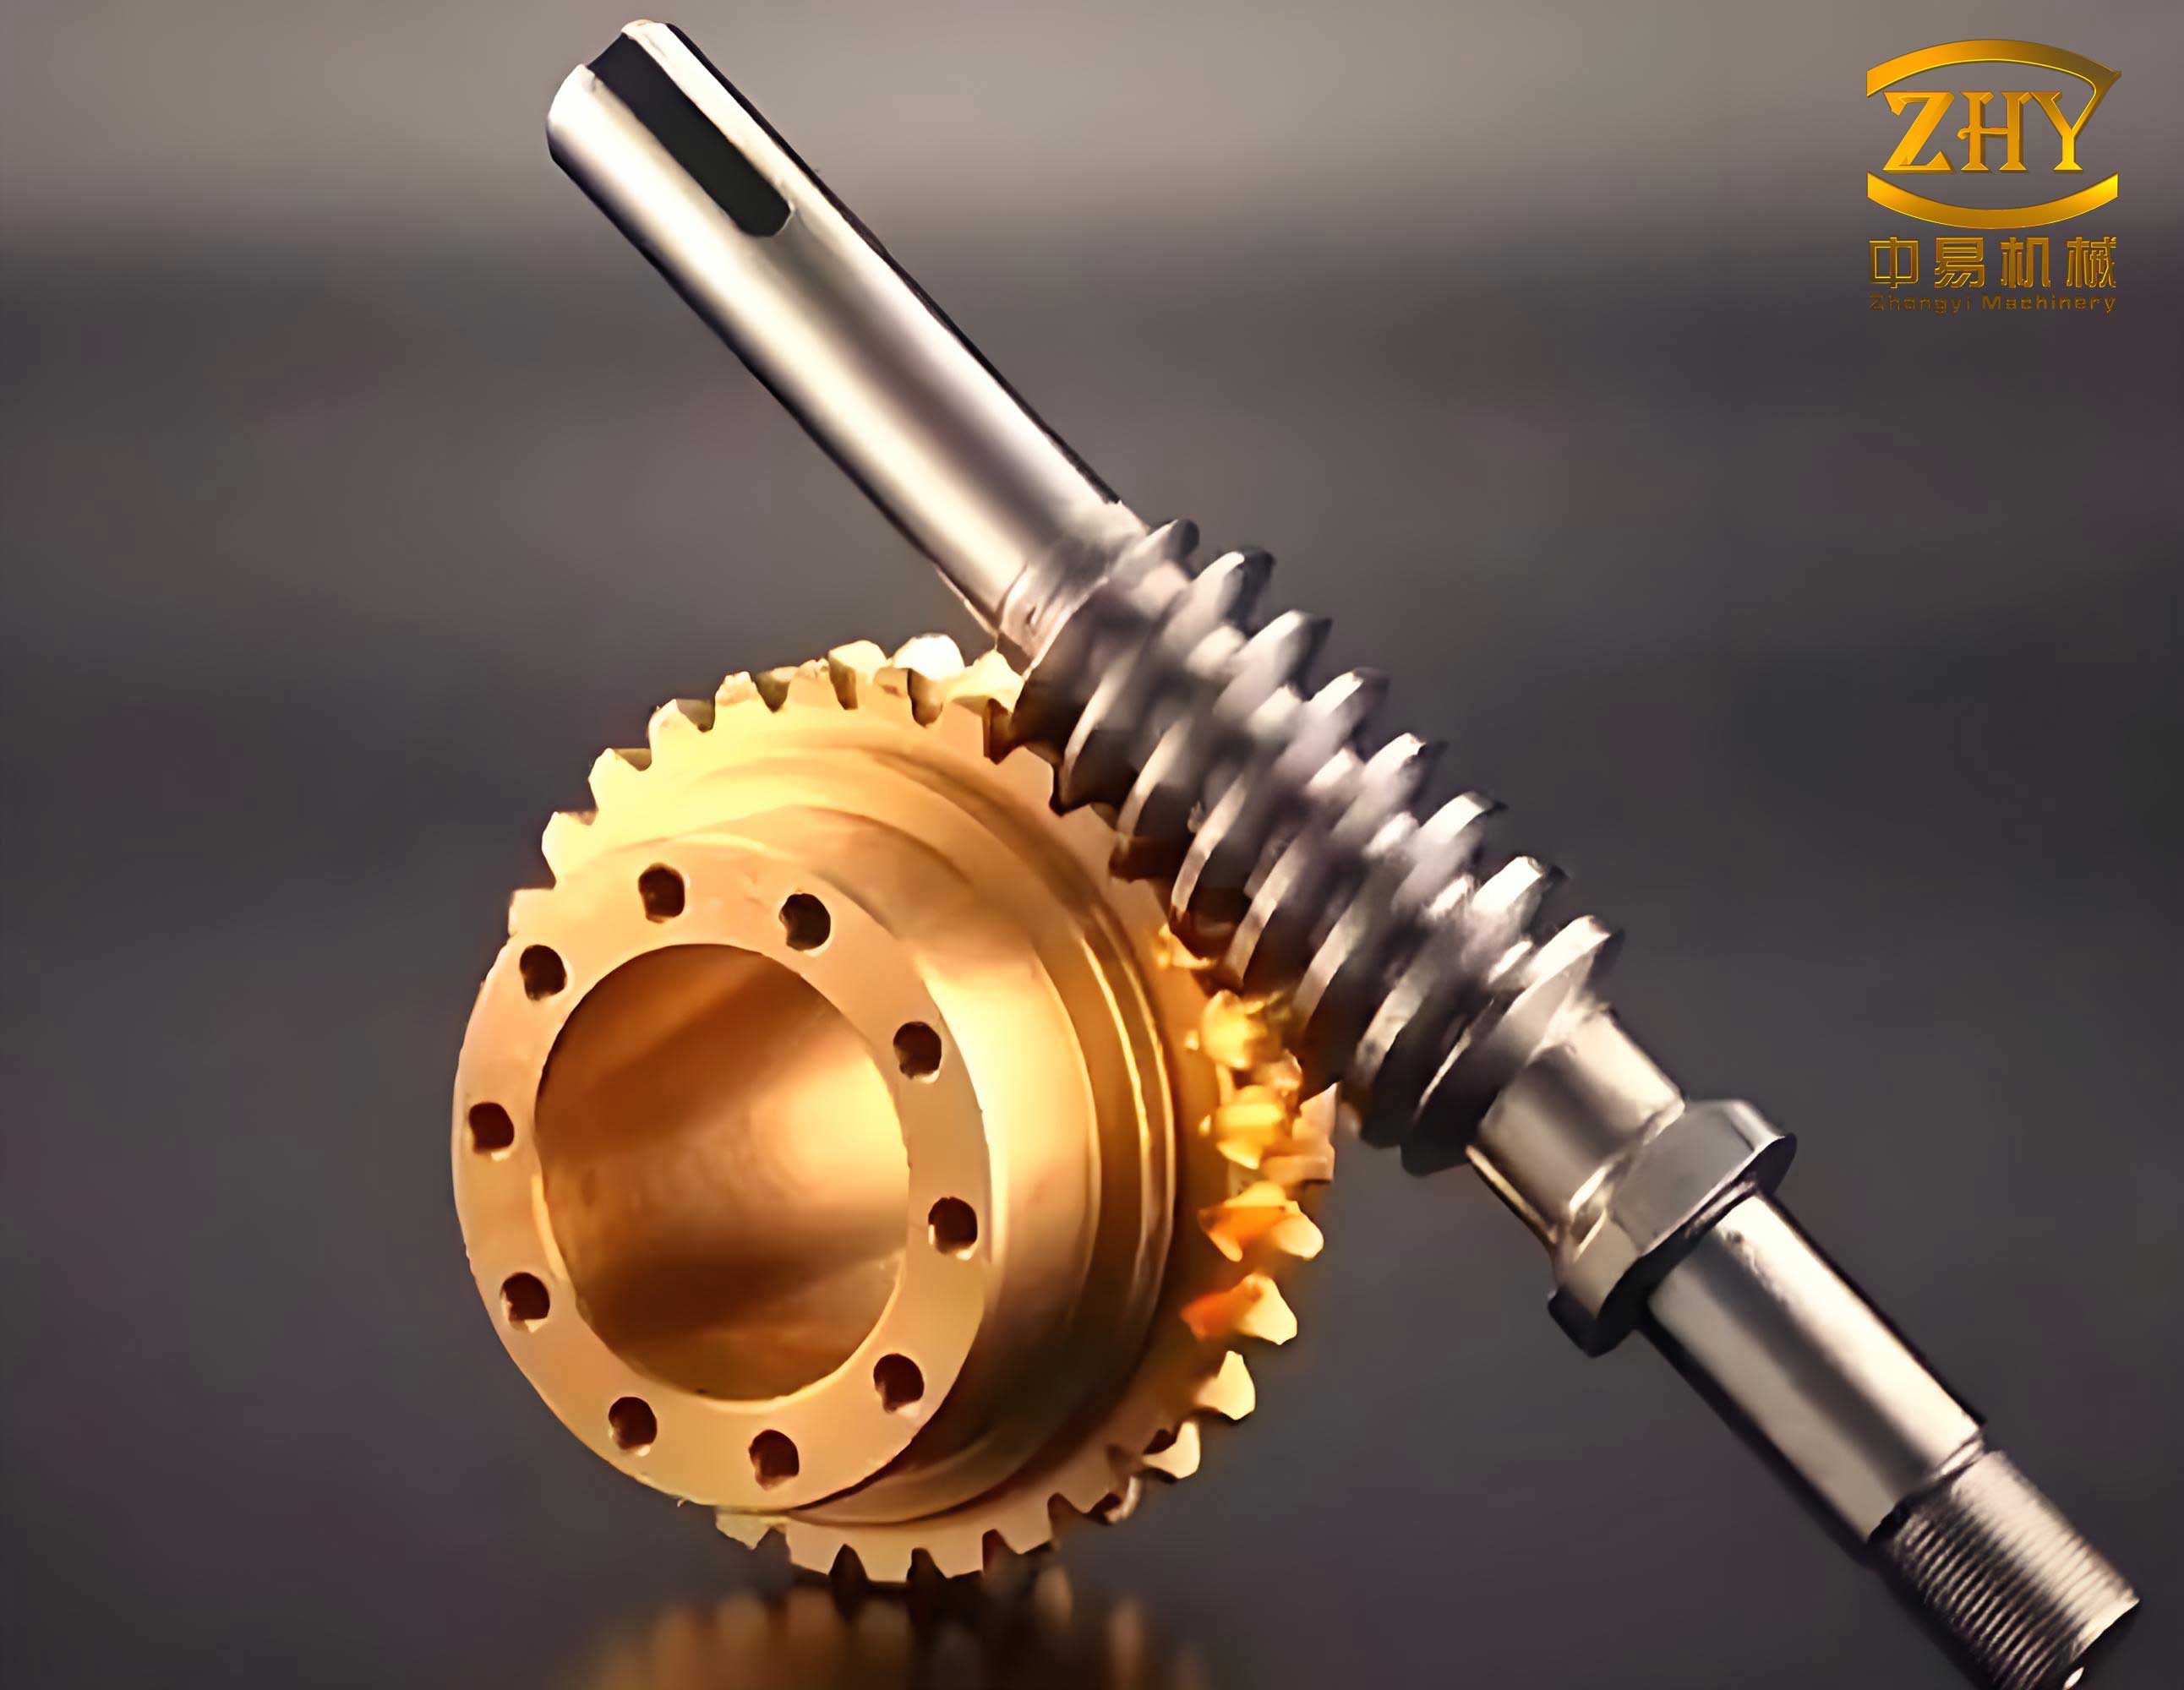
In my extensive experience with power transmission systems, few mechanisms are as uniquely elegant and practically indispensable as the screw gear drive, commonly known as the worm and worm wheel assembly. As an engineer tasked with maintenance, redesign, and reverse engineering, I have come to deeply appreciate the intricacies of these components. This drive is specifically engineered to transmit motion and power between non-intersecting, non-parallel shafts, most frequently arranged at a right angle (90°). The defining characteristic of the screw gear is the meshing between a threaded screw (the worm) and a specially designed gear (the worm wheel), which results in a remarkably high reduction ratio in a single stage, inherent self-locking capability in many configurations, and exceptionally smooth, quiet operation. These virtues—compactness, smoothness, and low vibration—make screw gear sets the premier choice for applications ranging from heavy-duty conveyor systems in metallurgy to precision indexing tables in machine tools and countless other industrial machines. The focus of this discussion will be on their failure modes and, crucially, the systematic methodology for their accurate dimensional recovery—a process vital for replication, repair, or documentation.
Fundamental Principles and Geometry
Before delving into failure and measurement, one must firmly grasp the geometry that defines a screw gear pair. The correct meshing condition is paramount and is governed by three key equalities:
- The axial module ($$m_{x1}$$) and axial pressure angle ($$\alpha_{x1}$$) of the worm must equal the transverse module ($$m_{t2}$$) and transverse pressure angle ($$\alpha_{t2}$$) of the worm wheel.
- The lead angle ($$\gamma$$) on the worm’s pitch cylinder must equal the helix angle ($$\beta_2$$) on the worm wheel’s pitch cylinder.
- The hand of the helix (almost universally right-handed) must be identical for both members.
This interdependence means the worm wheel is essentially generated by a cutting tool that replicates the geometry of its mating worm. Therefore, the primary objective in surveying a screw gear pair is to accurately determine the worm’s parameters. The core geometric relationships are summarized below:
| Parameter | Symbol | Formula / Relationship |
|---|---|---|
| Axial Module | $$m$$ (or $$m_x$$) | Fundamental scaling parameter, standardized. |
| Axial Pitch | $$P_x$$ | $$P_x = \pi m$$ |
| Worm Lead | $$P_z$$ | $$P_z = z_1 P_x = \pi m z_1$$ |
| Worm Pitch Diameter | $$d_1$$ | Often standardized with module as “diameter factor” q: $$d_1 = m q$$ |
| Worm Tip Diameter | $$d_{a1}$$ | $$d_{a1} = d_1 + 2m$$ |
| Worm Root Diameter | $$d_{f1}$$ | $$d_{f1} = d_1 – 2.4m$$ (common) |
| Worm Lead Angle | $$\gamma$$ | $$\tan \gamma = \frac{P_z}{\pi d_1} = \frac{m z_1}{d_1}$$ |
| Wheel Pitch Diameter | $$d_2$$ | $$d_2 = m z_2$$ |
| Wheel Throat Diameter | $$d_{a2}$$ | $$d_{a2} = d_2 + 2m$$ |
| Center Distance | $$a$$ | $$a = \frac{d_1 + d_2}{2} = \frac{m(q + z_2)}{2}$$ (for non-modified gears) |
Failure Modes in Screw Gear Drives
The failure modes of a screw gear pair share similarities with those of conventional gears but are heavily influenced by the prevalent sliding action at the tooth contact. Due to the materials typically used (hardened steel worm against a softer bronze or cast iron wheel), the worm wheel is almost invariably the weaker element and the first to fail. From my observations, the failure mode is critically dependent on the operating environment and lubrication.
| Failure Mode | Typical Environment | Root Cause & Manifestation | Preventive Measures |
|---|---|---|---|
| Abrasive Wear | Open (unsealed) drives, contaminated lubricant. | Ingress of abrasive particles (dust, grit) into the mesh. Characterized by a gradual loss of tooth profile, increased backlash, and visible scoring marks along the direction of sliding. This is the dominant and rapid failure mode for exposed screw gear sets. | Effective sealing, use of high-viscosity adhesive lubricants, regular maintenance, and cleaning. |
| Adhesive Wear (Scuffing/Galling) | Boundary lubrication conditions, high sliding speeds, insufficient lubricant film. | Localized welding and tearing of asperities due to breakdown of the lubricant film. Leads to severe surface damage, transfer of material between surfaces, and often precedes catastrophic failure. A common issue in poorly lubricated or overloaded screw gear systems. | Use of extreme pressure (EP) lubricants, proper viscosity selection, ensuring adequate cooling, and using material combinations with good compatibility (e.g., phosphor bronze against hardened steel). |
| Pitting (Contact Fatigue) | Closed, well-lubricated drives operating for long periods under high load. | Subsurface shear stresses exceed the material’s endurance limit, leading to crack initiation and propagation. Small pits form on the worm wheel tooth surface, typically in the active contact zone. This is a progressive fatigue failure. | Increasing surface hardness of the wheel, improving surface finish, using lubricants with good film-forming properties, and ensuring correct alignment to distribute load evenly. |
| Tooth Breakage | All drives, but often a secondary failure. | Can result from severe overload (shock load), excessive wear that undermines the tooth root, or as a consequence of large pits that act as stress concentrators. Less common than surface failures but catastrophic. | Avoiding shock loads, proper sizing during design, maintaining correct backlash to prevent impact loading, and timely replacement before wear becomes excessive. |
A Systematic Methodology for Screw Gear Surveying
When a replacement screw gear pair is needed and original drawings are unavailable, a meticulous survey is essential. An inaccurate survey leads to improper meshing, rapid failure, and machine downtime. The following step-by-step procedure, refined through practice, ensures reliable parameter recovery.
Step 1: Identifying the Worm Type
The first and most critical step is classifying the worm profile. The vast majority of industrial screw gear sets use one of four common cylindrical worm types, each defined by its generating method and resulting geometry.
| Worm Type (DIN/ISO Designation) | Defining Characteristic | Key Identification Method | Typical Pressure Angle |
|---|---|---|---|
| ZA – Archimedes Worm | Straight-line profile in the axial plane. Simplest to manufacture on a lathe. | A straight edge or precision angle gauge will fit flush against the tooth flanks when viewed axially. The axial pressure angle is constant and measurable here. | $$\alpha_x = 20^\circ$$ (standard) |
| ZI – Involute Helicoid Worm | Straight-line profile in a plane tangent to the base cylinder. More complex geometry. | The axial profile is convex. A straight edge will not fit axially. Identification often requires checking against known base diameter or detailed measurement of multiple profiles. | $$\alpha_n = 20^\circ$$ in normal plane is common. |
| ZN – Straight-Sided Normal Worm | Straight-line profile in the normal plane (perpendicular to the tooth thread). | The tooth profile appears straight when a gauge is placed in the normal plane to the helix. This is a key differentiator from ZA worms. | $$\alpha_n = 20^\circ$$ (standard). The axial pressure angle varies. |
| ZK – Cone-Generated Worm | Generated by a conical grinding wheel or milling cutter. Very common in high-precision, mass-produced sets. | The profile is convex in all sections. Often identified by spiral grinding marks. The most accurate and performant type, but hardest to identify precisely without manufacturer data. | Defined by tool geometry, often $$\alpha_n = 20^\circ$$. |
Practical Tip: I always start by cleaning the worm thoroughly. Using a high-quality angle gauge or a precision-ground parallel, I first attempt to fit it against the tooth flank in the axial plane. A perfect fit indicates a ZA worm, which is the most likely scenario in many general-purpose machines. If a gap is visible, I then try to fit the gauge in the normal plane (requiring careful alignment perpendicular to the thread). A fit here suggests a ZN worm. If neither plane gives a straight-line fit, the worm is likely ZI or ZK. For critical applications, consulting a gear metrology expert or using a coordinate measuring machine (CMM) may be necessary.
Step 2: Determining the Module ($$m$$)
The module is the fundamental scaling dimension. Two reliable methods exist:
Method A: Via Worm Axial Pitch ($$P_x$$)
This is the most direct method if the worm is accessible. Using a vernier caliper or a pitch measuring instrument, measure the distance between corresponding points on adjacent threads along the worm’s axis.
$$ m = \frac{P_x}{\pi} $$
For higher accuracy, measure over several pitches (e.g., $$N$$ pitches) and divide: $$ m = \frac{P_{x(N)}}{N \pi} $$.
Method B: Via Worm Wheel Throat Diameter ($$d_{a2}$$)
This is often easier when the worm wheel is more accessible. Measure the throat diameter (the outer diameter at the center of the tooth face width). Count the number of teeth on the worm wheel ($$z_2$$).
$$ m = \frac{d_{a2}}{z_2 + 2} $$
This formula assumes standard tooth addendum ($$h_a = m$$).
The calculated value must be compared to standard module series (e.g., 1, 1.25, 1.5, 2, 2.5, 3, 4, 5, 6, 8, 10…). The closest standard value is the correct module. Both methods should be used to cross-verify.
Step 3: Determining Worm Pitch Diameter ($$d_1$$)
Measure the worm’s tip diameter ($$d_{a1}$$) accurately using a micrometer. The pitch diameter is then:
$$ d_1 = d_{a1} – 2m $$
This is a critical dimension for calculating the lead angle and center distance.
Step 4: Determining Number of Starts ($$z_1$$) and Hand
The number of threads (starts) on the worm is simply counted visually. Standard values are 1, 2, 4, and 6. A single-start worm is most common for high reduction ratios. The hand of the helix is determined by observing the direction of the thread slope—if it slopes upwards to the right, it is right-handed (RH), which is standard for >90% of applications. The worm wheel’s teeth will be sloped to match.
Step 5: Calculating the Lead Angle ($$\gamma$$)
Using the now-known parameters, the lead angle is calculated:
$$ \tan \gamma = \frac{m \cdot z_1}{d_1} $$
Therefore,
$$ \gamma = \arctan \left( \frac{m z_1}{d_1} \right) $$
This angle is vital for understanding the efficiency and potential self-locking behavior of the screw gear pair. A lead angle less than the friction angle typically indicates a self-locking drive.
Step 6: Center Distance Check and Validation
This is the ultimate check for the correctness of the entire survey. Calculate the theoretical center distance ($$a_{calc}$$) using the measured and derived parameters:
$$ a_{calc} = \frac{d_1 + (m \cdot z_2)}{2} $$
Now, physically measure the actual center distance ($$a_{meas}$$) of the housing or the assembly itself using inside calipers, gauge pins, or a CMM.
- If $$a_{calc} \approx a_{meas}$$ (within reasonable machining tolerance), the survey is validated.
- If there is a significant, consistent discrepancy, it strongly indicates the presence of profile shift or “modification” in the worm wheel. The profile shift coefficient ($$x_2$$) can then be back-calculated using the modified center distance formula:
$$ a_{meas} = \frac{m}{2}(q + z_2 + 2x_2) $$
Where $$q = d_1 / m$$ is the diameter factor.
Detailed Case Study: Surveying a Milling Machine Indexing Head Drive
Let me illustrate the process with a hypothetical but realistic example from my field work: a failed worm wheel from an old universal milling machine’s indexing head.
1. Initial Inspection & Type Identification: The worm is steel, accessible. A precision ground 20° angle gauge fits perfectly against the tooth flanks in the axial view. Conclusion: ZA (Archimedes) worm, $$\alpha_x = 20^\circ$$.
2. Module Determination:
Method A: I measure the axial pitch on the worm. Over 5 pitches, $$P_{x(5)} = 31.416\,\text{mm}$$. Therefore, $$P_x = 31.416 / 5 = 6.2832\,\text{mm}$$. $$m = 6.2832 / \pi = 2.000\,\text{mm}$$.
Method B: The worn bronze wheel has $$z_2 = 60$$. Its throat diameter $$d_{a2} \approx 124.05\,\text{mm}$$. $$m = 124.05 / (60 + 2) = 2.001\,\text{mm}$$.
Conclusion: Standard module $$m = 2\,\text{mm}$$.
3. Worm Pitch Diameter: Worm tip diameter $$d_{a1} = 28.00\,\text{mm}$$. $$d_1 = 28.00 – (2 \times 2) = 24.00\,\text{mm}$$.
4. Starts & Hand: The worm has a single, continuous thread. $$z_1 = 1$$. The thread slopes up to the right: Right-Hand (RH).
5. Lead Angle:
$$ \tan \gamma = \frac{2 \times 1}{24} = 0.08333 $$
$$ \gamma = \arctan(0.08333) \approx 4.7636^\circ \text{ or } 4^\circ 45′ 49” $$
This is a relatively small lead angle, confirming the drive is likely self-locking, which is desirable for an indexing head to hold position.
6. Validation via Center Distance:
Calculated center distance: $$a_{calc} = (24.00 + (2 \times 60)) / 2 = (24.00 + 120.00) / 2 = 72.00\,\text{mm}$$.
Measured center distance in the housing (using gauge rods): $$a_{meas} = 72.02\,\text{mm}$$.
The discrepancy of 0.02mm is within expected manufacturing and measurement tolerances. Conclusion: Survey is correct; no significant profile shift is present.
Final Specification: ZA worm gear set, $$m=2$$, $$z_1=1$$ (RH), $$z_2=60$$, $$d_1=24\text{mm}$$, $$\gamma \approx 4.76^\circ$$, $$a=72\text{mm}$$, $$\alpha_x=20^\circ$$. This data is sufficient to order or manufacture a replacement set.
Advanced Considerations in Screw Gear Surveying and Design
Beyond the basic parameters, a comprehensive survey or redesign must account for several other factors to ensure the longevity and performance of the new screw gear set.
Material Selection and Heat Treatment
The classic material combination is a case-hardened or through-hardened alloy steel (e.g., 16MnCr5, 20MnCr5, 4140, 4340) for the worm, paired with a tin bronze (e.g., CuSn12) or aluminum bronze (e.g., CuAl10Fe5Ni5) for the wheel. For less critical, low-speed applications, cast iron (worm) against phosphor bronze or even polymer composite wheels is used. The survey should note any surface hardening (e.g., induction hardening, nitriding) on the worm, as this affects its ultimate strength and wear resistance.
Backlash and Tooth Thickness
Measured backlash is a critical indicator of wear and a key parameter for assembly. During a survey, the backlash should be measured at the worm wheel circumference under a light static torque. Excessive backlash from the failed set informs the specification for the new set. The normal chordal tooth thickness or span measurement over teeth on the worm can be taken to determine if the worm itself is worn or was manufactured with a non-standard thickness to provide specific running clearance.
Lubrication Requirements
The survey of the housing often reveals the intended lubrication method—oil bath, grease nipple, or forced oil circulation. The selection of the correct lubricant viscosity and EP additives is as crucial as the geometric accuracy of the parts. High-sliding-speed screw gear drives require high-viscosity oils with good film strength, while slow, heavily loaded drives benefit from high-EP greases.
Manufacturing Processes
| Component | Common Processes | Survey Implications |
|---|---|---|
| Worm | Turning (ZA), Hobbing, Thread Milling, Grinding (ZK, ZI), Polishing. | Surface finish marks can help identify type (e.g., grinding spirals on ZK). Finish quality should be noted for replication. |
| Worm Wheel | Hobbing with a worm-type hob (finish hobbed, then sometimes shaved or ground). | The hob must match the worm’s exact geometry (type, $$m$$, $$d_1$$, $$\gamma$$). The survey data literally defines the hob specification. |
In conclusion, the art and science of surveying a screw gear system is a foundational skill for maintenance and design engineers. It requires a systematic approach, precise measurement, and a deep understanding of the underlying geometry and tribology. By meticulously following the steps of type identification, module and diameter determination, and final validation through center distance, one can reliably recover the “DNA” of these complex mechanical components. This process not only facilitates the repair of existing machinery but also contributes to the accumulation of practical knowledge, informing better design choices for future screw gear applications, ensuring they continue to provide reliable, compact, and efficient power transmission in the myriad machines that depend on them.