
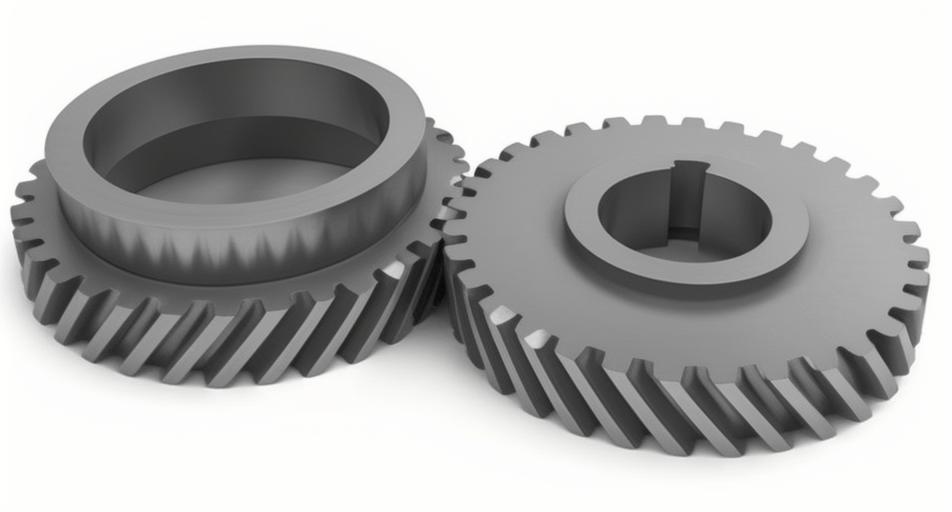
Accurate measurement of geometric parameters is fundamental for ensuring the quality and performance of mechanical components. Among these, helical gears are critical elements in power transmission systems, prized for their smooth operation and high load capacity. Traditional measurement methods for these helical gears, often reliant on dedicated gauges or coordinate measuring machines (CMMs), can be time-consuming, require skilled operators, and struggle with the demands of automated, high-throughput production lines. This necessitates the development of efficient, non-contact, and automated inspection techniques.
Machine vision, with its advantages of non-contact operation, high speed, and excellent repeatability, presents a compelling solution. This article details a comprehensive methodology for the automatic measurement of key geometric parameters of helical gears using machine vision principles. The discussion encompasses system design, image processing workflows, specialized algorithms for parameter extraction, and an experimental validation of the proposed method’s accuracy and reliability.
1. Measurement System Architecture and Workflow
The effectiveness of any vision-based metrology system hinges on a robust hardware setup and a well-defined processing sequence. The system developed for this study was constructed to ensure stability, precision, and ease of use for inspecting helical gears.
1.1 Hardware Configuration
The core hardware platform is an industrial machine vision research station. The key components include:
- Camera: A monochrome industrial area-scan camera with a resolution of over 10 megapixels, providing the necessary detail for precise edge detection.
- Lens: A fixed-focal-length lens selected for its low distortion characteristics, which is crucial for maintaining measurement accuracy across the entire field of view.
- Lighting: A programmable ring light source was employed to provide uniform, shadow-free illumination on the gear’s top surface, enhancing edge contrast.
- Fixture: A modular fixture system with precision-ground locating blocks and keys. The helical gear is securely clamped, and the fixture allows for fine adjustment to align the gear’s rotational axis perpendicular to the camera’s optical axis. This alignment is critical to minimize perspective error and ensure that the measured profile corresponds to the true cross-section.
- Computer: A standard workstation for image acquisition, processing, and algorithm execution.
1.2 Overall Measurement Process
The measurement follows a logical, step-by-step pipeline to transform a raw image into precise dimensional data. The workflow is summarized below:
- Image Acquisition: The system captures a high-contrast image of the fixtured helical gear.
- Camera Calibration: A two-stage calibration is performed. First, intrinsic calibration using a checkerboard target corrects for lens distortion. Second, a pixel-to-millimeter scaling factor is determined using a gauge block of known length.
- System Repeatability Verification: A high-precision circular target is measured multiple times to quantify the system’s inherent measurement uncertainty.
- Image Pre-processing: The raw gear image undergoes filtering, segmentation, and edge detection to isolate the gear’s contour.
- Parameter Extraction: Custom algorithms analyze the contour data to calculate all target geometric parameters.
2. System Calibration and Precision Verification
2.1 Distortion Correction and Scale Calibration
Even high-quality lenses introduce slight geometric distortion. To correct this, the camera’s intrinsic parameters are calculated using multiple images of a checkerboard calibration target taken at different orientations. Once calibrated, the undistortImage function can be applied to any acquired gear image, rectifying the distortion.
Subsequently, the relationship between pixel distance and real-world distance (the pixel scale factor, \(K\)) is determined. A gauge block of certified length \(L\) is placed in the same plane as the gear. By measuring its length in pixels (\(N\)) from an image, the scale factor is computed as:
$$K = \frac{L}{N}$$
This factor \(K\) (in mm/pixel) is used to convert all subsequent pixel-based measurements into physical dimensions.
2.2 Repeatability and Uncertainty Analysis
To establish confidence in the measurement system, a repeatability test is conducted using a target with an array of precision circles. The center coordinates of specific circles are measured \(n\) times (e.g., \(n=10\)). For each circle \(i\), the radial distance \(l_{ij}\) from the \(j\)-th measured center \((x_{ij}, y_{ij})\) to the mean center \((\bar{x}_i, \bar{y}_i)\) is calculated:
$$l_{ij} = \sqrt{(x_{ij} – \bar{x}_i)^2 + (y_{ij} – \bar{y}_i)^2}$$
The mean radial deviation \(\bar{l}_i\) and standard deviation \(\sigma_i\) for circle \(i\) are:
$$\bar{l}_i = \frac{1}{n}\sum_{j=1}^{n} l_{ij}$$
$$\sigma_i = \sqrt{\frac{\sum_{j=1}^{n} (l_{ij} – \bar{l}_i)^2}{n-1}}$$
The standard uncertainty of the measurement for each point, \(\Delta X_i\), is then given by:
$$\Delta X_i = \frac{t_{\alpha}(n-1) \cdot \sigma_i}{\sqrt{n}}$$
where \(t_{\alpha}(n-1)\) is the t-distribution confidence factor for \(n-1\) degrees of freedom at a chosen confidence level \(\alpha\) (e.g., 95%). Results from such a test, showing uncertainties on the order of 0.003 pixels or less, confirm the system’s stability and reliability for measuring helical gears.
3. Image Processing for Contour Extraction
Before any parameter can be measured, the precise contour of the helical gear must be extracted from the image. This involves a series of pre-processing steps.
- Region of Interest (ROI) Segmentation: The initial RGB image contains the gear and the fixture. A clustering-based segmentation algorithm (like k-means) is first used to isolate the gear from the background fixture.
- Grayscale Conversion and Filtering: The segmented color image is converted to an 8-bit grayscale image to reduce data complexity. A median filter is then applied to suppress noise while preserving edge sharpness.
- Image Binarization: The grayscale image is converted to a binary image (black and white). The Otsu method is typically used to automatically determine an optimal threshold value \(T\):
$$g(x, y) = \begin{cases} 1 & \text{if } f(x, y) \geq T \\ 0 & \text{if } f(x, y) < T \end{cases}$$
where \(f(x, y)\) is the grayscale value at pixel \((x, y)\). - Morphological Closing: Small holes or imperfections within the binary gear shape are filled using a morphological closing operation (dilation followed by erosion).
- Edge Detection and Boundary Tracing: The Canny edge detector is applied to the binary image to find the gear’s outer and inner (bore) boundaries. Finally, a boundary-tracing algorithm collects the ordered sequence of pixel coordinates that define these contours. This ordered list is the primary dataset for all subsequent geometric calculations.
4. Algorithms for Geometric Parameter Extraction
With the gear contour obtained, specialized algorithms are deployed to measure each parameter of interest for the helical gears.
4.1 Gear Center and Bore Diameter
For helical gears with a keyway, the simple centroid (center of mass) of the binary shape is inaccurate. Instead, a robust method is used:
- From the traced contour, extract the subset of points belonging to the bore (inner circle), excluding those on the keyway edges.
- Use a least-squares circle fitting algorithm on these bore points. This algorithm minimizes the sum of squared distances between the points and the circumference of a hypothetical circle.
- The fit returns the precise pixel coordinates of the bore center \((x_c, y_c)\) and its radius \(r_{bore}\). The bore diameter is \(d_{bore} = 2 \cdot r_{bore} \cdot K\).
This center \((x_c, y_c)\) becomes the reference point for all radial measurements.
4.2 Tooth Tip Circle (Da) and Tooth Root Circle (Df) Diameters
The algorithm leverages the radial distance profile:
- For every point \(p\) on the outer contour (tooth profile), calculate its radial distance \(R_p\) to the gear center \((x_c, y_c)\):
$$R_p = \sqrt{(x_p – x_c)^2 + (y_p – y_c)^2}$$ - Construct a histogram of all \(R_p\) values. For a gear with machining tolerances, the histogram will show two prominent peaks or dense regions.
- The peak at the larger radius corresponds to the tooth tip circle. The mean radius value of this cluster, converted using \(K\), gives \(r_a\) and thus \(D_a = 2r_a\).
- The peak at the smaller radius corresponds to the tooth root circle, yielding \(r_f\) and \(D_f = 2r_f\).
This method is statistically robust against local profile deviations.
4.3 Number of Teeth (z)
The number of teeth is determined by analyzing the periodic variation in the radial distance \(R_p\) as one traverses the entire outer contour. Plotting \(R_p\) against the contour point index creates a quasi-sinusoidal waveform.
- Define a threshold band slightly inside the extremes, e.g., from \((r_f + \delta)\) to \((r_a – \delta)\), where \(\delta\) is a small offset (e.g., 10 pixels).
- Count how many times the \(R_p\) curve crosses from below this band to above it (or vice-versa). Each complete “pulse” (entering and exiting the band) corresponds to one tooth space or one tooth.
The pulse count directly yields the number of teeth \(z\). This is highly reliable for helical gears with a standard profile.
4.4 Helix Angle (β)
Measuring the helix angle of helical gears requires imaging the gear’s tooth flank. The gear is carefully fixtured so that its face is perpendicular to the camera.
- Acquire an image where the helical tooth lines are visible on the gear’s cylindrical surface.
- Apply edge detection to highlight these oblique lines.
- Use the Hough Transform to detect the dominant straight line corresponding to the tooth direction on the image plane. The Hough Transform outputs parameters (e.g., slope \(k_1\)) of this line.
- A reference horizontal line in the image has a slope \(k_2 = 0\).
- The helix angle \(\beta\) (as projected onto the image plane, which is valid with proper alignment) is calculated from the angle between the two lines:
$$\cos \beta = \frac{|1 + k_1 \cdot k_2|}{\sqrt{1 + k_1^2} \cdot \sqrt{1 + k_2^2}} = \frac{1}{\sqrt{1 + k_1^2}}$$ - Therefore, \(\beta = \arccos\left(\frac{1}{\sqrt{1 + k_1^2}}\right)\) or more simply \(\beta = \arctan(|k_1|)\).
4.5 Module (m) and Pitch Diameter (d)
For helical gears, the module is not measured directly but derived from the measured tip diameter, tooth count, and helix angle using the standard gear formula:
$$m_n = \frac{D_a}{z / \cos\beta + 2}$$
where \(m_n\) is the normal module. This calculated value is then compared to standard module series to identify the nominal module \(m\).
The pitch diameter \(d\) is subsequently calculated using the fundamental relation for helical gears:
$$d = \frac{z \cdot m_n}{\cos\beta}$$
4.6 Keyway Dimensions
The keyway width \(b\) and depth \(h\) are measured relative to the bore:
- From the traced inner contour, identify the three linear segments that define the keyway: two sides and the bottom.
- Perform least-squares line fitting on the pixel points belonging to each of these three edges.
- The intersection points of the two side lines with the bottom line define the keyway corners. The distance between these intersection points, scaled by \(K\), gives the keyway width \(b\).
- The keyway depth \(h\) is the distance from the bore center \((x_c, y_c)\) to the fitted bottom line, plus the bore radius \(r_{bore}\), all converted to physical dimensions: \(h = (d_{bot} + r_{bore}) \cdot K\), where \(d_{bot}\) is the perpendicular pixel distance from the center to the bottom line.
5. Experimental Validation and Results
The proposed method was validated by measuring two different helical gears. Each gear was measured 10 times using the vision system, and the results were compared against reference measurements obtained using traditional tools (micrometers, gear calipers, etc.). The system’s field of view limited the measurable gear diameter range to approximately 10 mm to 70 mm.
The following table summarizes the comparison for a larger helical gear (nominal \(D_a \approx 66.8 \text{ mm}\)):
| Parameter | Reference Value | Vision System Mean | Absolute Error | Relative Error |
|---|---|---|---|---|
| Number of Teeth, \(z\) | 24 | 24 | 0 | 0.00% |
| Normal Module, \(m_n\) (mm) | 2.5 | 2.5 | 0 | 0.00% |
| Tip Diameter, \(D_a\) (mm) | 66.81 | 66.63 | 0.18 | 0.27% |
| Root Diameter, \(D_f\) (mm) | 54.51 | 54.65 | 0.14 | 0.26% |
| Pitch Diameter, \(d\) (mm) | 62.74 | 62.70 | 0.04 | 0.07% |
| Helix Angle, \(\beta\) (deg) | 17.00 | 16.86 | 0.14 | 0.80% |
| Bore Diameter (mm) | 20.40 | 20.58 | 0.18 | 0.89% |
| Keyway Width, \(b\) (mm) | 5.97 | 6.01 | 0.04 | 0.69% |
| Keyway Depth, \(h\) (mm) | 23.17 | 23.20 | 0.03 | 0.12% |
The results for a smaller helical gear (nominal \(D_a \approx 39.6 \text{ mm}\)) are shown below:
| Parameter | Reference Value | Vision System Mean | Absolute Error | Relative Error |
|---|---|---|---|---|
| Number of Teeth, \(z\) | 18 | 18 | 0 | 0.00% |
| Normal Module, \(m_n\) (mm) | 2.0 | 2.0 | 0 | 0.00% |
| Tip Diameter, \(D_a\) (mm) | 39.60 | 39.33 | 0.27 | 0.69% |
| Root Diameter, \(D_f\) (mm) | 30.61 | 30.91 | 0.30 | 0.98% |
| Pitch Diameter, \(d\) (mm) | 37.64 | 37.68 | 0.04 | 0.10% |
| Helix Angle, \(\beta\) (deg) | 17.00 | 17.17 | 0.17 | 0.98% |
| Bore Diameter (mm) | 14.75 | 14.88 | 0.13 | 0.91% |
| Keyway Width, \(b\) (mm) | 4.94 | 4.84 | 0.10 | 1.96% |
| Keyway Depth, \(h\) (mm) | 17.70 | 17.55 | 0.15 | 0.86% |
6. Discussion and Conclusion
The experimental results demonstrate the efficacy of the proposed vision-based methodology for the automated measurement of helical gears. The repeatability tests confirmed a low measurement uncertainty (<0.003 pixels), indicating a stable and reliable system.
For the larger gear, all measured parameters showed a relative error of less than 1%. For the smaller gear, most parameters were within 1% error, with the keyway width showing the largest error at just under 2%. This discrepancy highlights a general trend: measurement precision tends to be higher for larger components because edge detection and pixel quantification errors become relatively smaller compared to the feature’s actual size.
The key advantages of this method for inspecting helical gears are clear:
- Automation and Speed: The entire process, from image capture to result output, is automated, enabling rapid in-line or at-line inspection.
- Non-contact Measurement: Eliminates the risk of damaging delicate gear teeth and avoids errors due to probe contact force.
- Comprehensive Parameter Set: A single image acquisition allows for the extraction of nearly all critical external geometric parameters of the helical gear, including the challenging helix angle.
- High Repeatability: The digital nature of the measurement ensures consistent results free from operator influence.
Future work will focus on enhancing the algorithm’s versatility and precision. This includes implementing sub-pixel edge detection techniques to further improve accuracy, extending the method to measure gear quality parameters like pitch deviation and profile error, and developing strategies to handle a wider variety of gear types and sizes. In conclusion, this vision-based approach presents a robust, efficient, and accurate solution for the modern metrology needs of helical gear manufacturing.