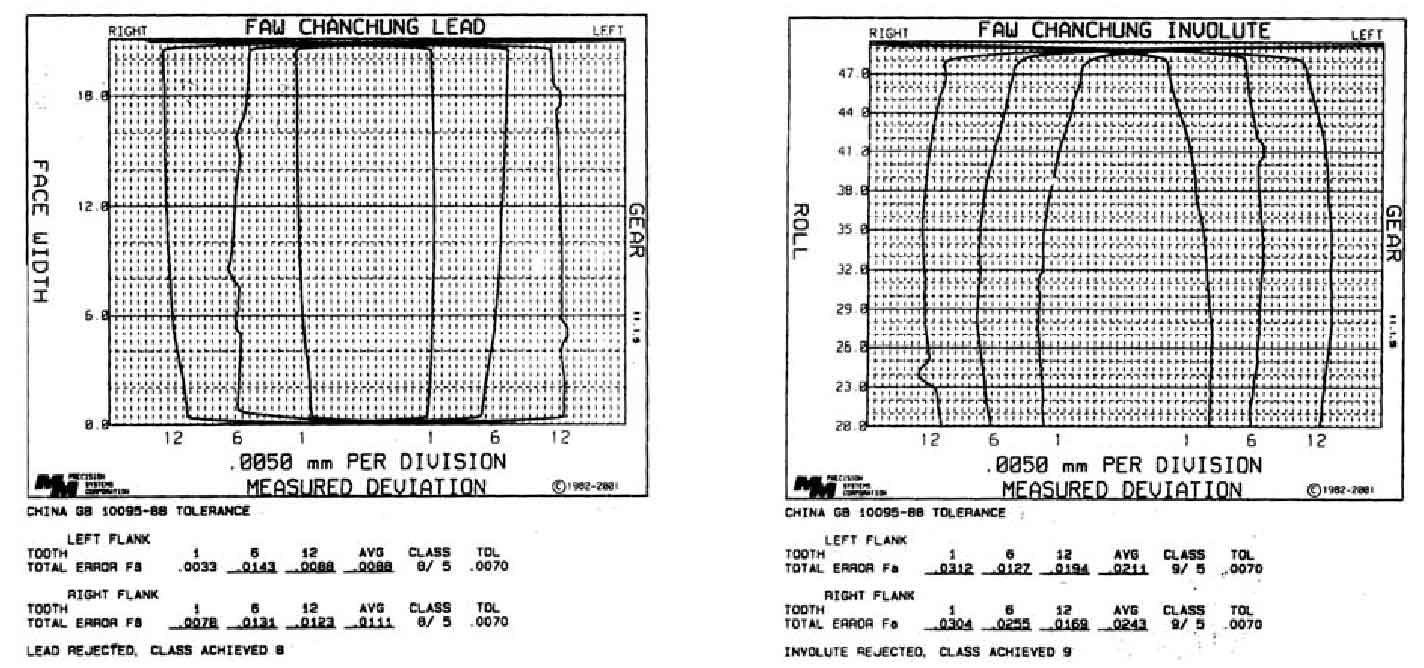
The smooth pinion has 16 teeth in total. In this experiment, the pinion is measured with 3 teeth to grasp the shape parameters of the pinion as a whole. Before testing, mark and number the teeth of the pinion; After the test, the same detection method is used to detect the pinion shape parameters in turn according to the marked order.
As shown in figure (A and b), the tooth direction error diagram and tooth shape error diagram of the smooth pinion are shown respectively. It can be seen from the figure that the detected tooth numbers are the 1st, 6th and 12th teeth respectively. The three curves on the left in each figure are the tooth direction error line and tooth shape error line of the tooth surface on the right side of the tooth respectively; The three curves on the right are the tooth direction error line and tooth profile error line of the left tooth surface of the gear tooth, and the error values on the left and right sides of the gear tooth are respectively displayed in the lower position in the figure.

