
Spiral bevel gears are used where a high ratio, high contact overlap, and a compact axial layout are required: vehicle and off-highway drive axles, helicopter transmissions, marine drives, and port machinery. In these applications, the large wheel—the driven gear—often limits the fatigue life of the final drive. The conventional route of milling, heat treatment, and grinding gives good geometric control, but milling interrupts the grain-flow continuity at the tooth surface. A forged tooth can, in principle, retain a flow pattern that follows the flank, which is the metallurgical motivation for precision forging.
The competing hot-forging route has a different limitation. At temperatures of 1 000 °C and above, scale formation and thermal distortion make the as-forged flank inaccurate, so the tooth is usually cut before heat treatment. Warm forging at or below 750 °C is intended to avoid the heavy scale layer of hot forging and to press the flank close enough to final form that pre-heat-treatment milling can be omitted. It does not eliminate finishing: a grinding allowance remains, and the forged tooth is made thicker than the finished tooth. The process is therefore a near-net-shape route, not a replacement for final grinding.
Design Target and Basic Geometry
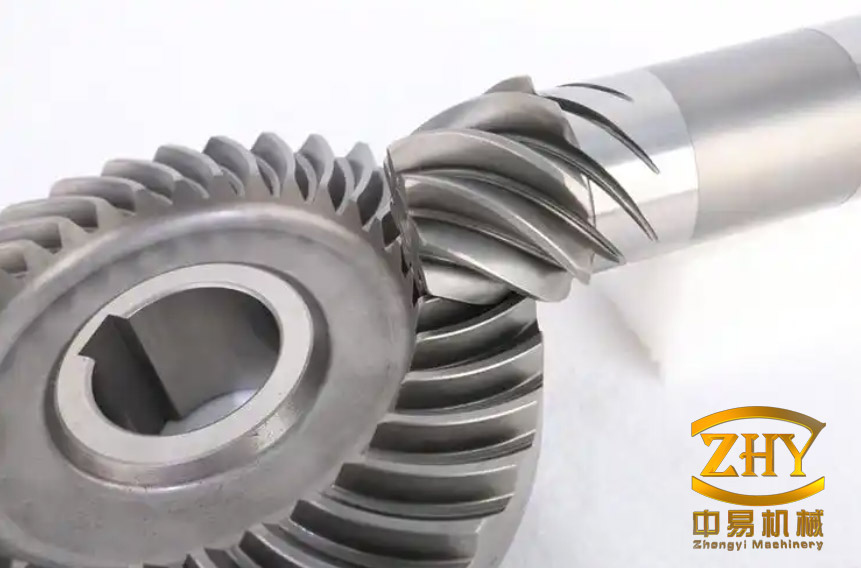
The demonstration part is the large wheel of a 44-tooth, 15-tooth-pinion pair with a 3 mm module, a 132 mm pitch diameter, and a left-hand spiral. The 3 mm module places the part in the small-to-medium module class (≤4 mm), where warm forging is attractive because the press load remains manageable and the tooth is small enough for detailed cavity filling. The blank is a near-net preform rather than a finished gear.
| Parameter | Value |
|---|---|
| Number of teeth, wheel / pinion | 44 / 15 |
| Module | 3 mm |
| Mean pressure angle | 20° |
| Spiral angle at reference point | 35° |
| Hand | Left |
| Pitch diameter | 132 mm |
| Addendum | 1.536 mm |
| Dedendum | 4.128 mm |
| Face cone angle | 72.903° |
| Pitch cone angle | 71.175 29° |
| Root cone angle | 67.787 34° |
| Outer cone distance | 68.830 16 mm |
Generating the Die Cavity from the Gear Flank
The die cavity is not designed independently of the gear. It is the negative of the desired gear flank, offset outward by the grinding allowance. For the large wheel, the flank is defined by a cutter head with straight inner and outer edges. As the head rotates, each edge sweeps a conical surface; the machine settings then place that surface relative to the workpiece.
In the cutter-head frame, the cutting edge is written as
$$
\mathbf r_c(u_c,\theta_c)=
\begin{bmatrix}
(r_o\pm u_c\sin\alpha_c)\cos\theta_c\\
(r_o\pm u_c\sin\alpha_c)\sin\theta_c\\
-u_c\cos\alpha_c
\end{bmatrix}
$$
where \(r_o\) is the nominal cutter radius, \(u_c\) and \(\theta_c\) are surface coordinates, and \(\alpha_c\) is the cutter profile angle. The plus sign refers to the outer cutter and the minus sign to the inner cutter. In homogeneous coordinates, the corresponding workpiece flank is
$$
\mathbf r_2=\mathbf M_{2c}(S_1,q_1,\gamma_1,X_{G20})\,\mathbf r_c(u_c,\theta_c)
$$
Here, \(S_1\) and \(q_1\) are the radial and angular cutter positions, \(\gamma_1\) is the workpiece mounting angle, and \(X_{G20}\) is the horizontal/axial offset. The matrix \(\mathbf M_{2c}\) maps cutter-head coordinates to workpiece coordinates. Evaluating it over the cutting edge gives the gear flank point set.
For forging, the flank must be thickened to leave stock for post-heat-treatment grinding. If \(\Delta h\) is the allowance per flank and \(r_1\) is the radius at the mid-face width, the flank is rotated by
$$
\Delta\delta=\frac{\Delta h}{r_1}
$$
with \(\Delta\delta\) in radians. The rotation is
$$
\mathbf r_e=\mathbf M_{es}\mathbf r_s,\qquad
\mathbf M_{es}=
\begin{bmatrix}
1&0&0&0\\
0&\cos\Delta\delta&-\sin\Delta\delta&0\\
0&\sin\Delta\delta&\cos\Delta\delta&0\\
0&0&0&1
\end{bmatrix}
$$
where \(\mathbf r_s\) and \(\mathbf r_e\) are the flank points before and after rotation. The sign is chosen so that tooth thickness increases. The rotated point set is then reversed to form the die cavity. This preserves the generated flank curvature while adding a controlled stock layer; the die is not a simply scaled copy of the finished tooth.
Finite-Element Model and Response Points
A full-blank simulation would be expensive, so the model uses a one-twelfth sector of the preform. The sector is meshed with 120 000 tetrahedral elements, with local refinement where the workpiece contacts die corners. The dies are treated as rigid bodies and the workpiece as a plastic body. The workpiece material is 18CrNi4A. The displacement step is 0.138 8 mm, one-third of the smallest element size of 0.416 36 mm. The interface heat-transfer coefficient is 5 000 W/(m²·K), the environmental convection coefficient is 20 W/(m²·K), and the ambient temperature is 20 °C.
Response points are placed at the large end, mid-section, and small end of the tooth, with four points at each axial position, covering the addendum and dedendum. Equivalent strain is dimensionless; equivalent stress is reported in MPa. The sector model relies on cyclic symmetry, so it represents local cavity filling and thermal-mechanical response rather than circumferential variation from blank placement or die misalignment.
Process Sensitivity
Four variables were varied one at a time: ram speed, die preheat temperature, friction coefficient, and workpiece heating temperature. The ranges were 15–25 mm/s, 200–300 °C, 0.12–0.30, and 650–750 °C, respectively. The workpiece range lies inside the 600–800 °C warm-forging window for 18CrNi4A.
Across the matrix, the large end consistently showed the highest equivalent strain and the small end the lowest. This is a flash-zone effect: flash formation at the large end changes the radial flow path and raises the local deformation work. The observation matters because a parameter can improve average filling while worsening the local strain peak at the large end.
Ram speed
At 15, 20, and 25 mm/s, equivalent strain first rose and then fell. At 20 mm/s, a sharp local increase appeared at the large-end tooth tip, which is undesirable for strain uniformity. Equivalent stress decreased as speed increased. The result is a trade-off: the higher speed lowers forming stress, while the intermediate speed produces a high aggregate strain but a local spike. A single average strain value would hide that non-uniformity.
Die preheat temperature
At 200, 250, and 300 °C, equivalent strain increased with preheat. Less heat is lost from the workpiece to the die, and deformation heating further raises the surface temperature, so the material flows more readily. The large end was most sensitive to preheat; the mid-section and small end changed less, and the small end remained the least strained region. The final selection used 250 °C rather than the highest preheat because the selection was not based on strain alone.
Friction coefficient
At friction coefficients of 0.12, 0.25, and 0.30, strain was lowest at 0.25 and higher at both extremes. Low friction improves surface flow; high friction adds interfacial heating and can also promote local flow. The highest equivalent stress occurred at 0.12, not at 0.30. The interpretation is that easier flow at low friction promoted flash at the large end, which raised the equivalent stress. Friction therefore cannot be treated as a monotonic penalty on forming load.
Workpiece heating temperature
At 650, 700, and 750 °C, equivalent strain was almost insensitive to temperature, while equivalent stress fell markedly as temperature rose. At 750 °C, the large-end stress was lower than the mid-section and small-end stress. Within a tooth, the root carried more strain than the flank and the tip; the asymmetric contact and filling of the two sides made the concave flank accumulate more strain than the convex flank. In this window, temperature acts mainly as a load-reduction variable rather than a filling-control variable.
Screening Matrix and Parameter Selection
A nine-run screening matrix was built around the baseline A1B2C2D1. Runs 1–3 vary ram speed, runs 4–5 vary die preheat, runs 6–7 vary friction, and runs 8–9 vary workpiece temperature. This is a one-factor-at-a-time screen rather than a full factorial design, so it resolves main effects but not the complete interaction space.
| Run | Combination | Equivalent strain | Equivalent stress (MPa) |
|---|---|---|---|
| 1 | A1B2C2D1 | 43.84 | 5 422 |
| 2 | A2B2C2D1 | 52.75 | 5 497 |
| 3 | A3B2C2D1 | 42.25 | 5 345 |
| 4 | A1B1C2D1 | 52.32 | 5 503 |
| 5 | A1B3C2D1 | 51.59 | 5 463 |
| 6 | A1B2C1D1 | 56.84 | 5 507 |
| 7 | A1B2C3D1 | 64.88 | 5 498 |
| 8 | A1B2C2D2 | 46.92 | 4 922 |
| 9 | A1B2C2D3 | 39.96 | 4 502 |
Factor levels: A1/A2/A3 = 15/20/25 mm/s; B1/B2/B3 = 200/250/300 °C; C1/C2/C3 = 0.12/0.25/0.30; D1/D2/D3 = 650/700/750 °C.
The two responses trade off, so the screening used normalized influence weights. Within each factor, the response at each level was divided by the minimum response for that factor; level ratios were combined multiplicatively with factor ratios to give a global weight. The weights are a screening index, not a statistical significance test. For strain, a higher weight means more accumulated deformation in this framework; for stress, a lower weight means a lower forming load.
| Level | Strain weight | Stress weight |
|---|---|---|
| A1 | 1.102 | 1.111 |
| A2 | 1.326 | 1.126 |
| A3 | 1.062 | 1.095 |
| B1 | 1.314 | 1.120 |
| B2 | 1.123 | 1.104 |
| B3 | 1.321 | 1.112 |
| C1 | 1.642 | 1.151 |
| C2 | 1.267 | 1.113 |
| C3 | 1.875 | 1.128 |
| D1 | 1.097 | 1.204 |
| D2 | 1.174 | 1.046 |
| D3 | 1.000 | 1.000 |
The five highest strain scores were A2B3C3D2 (3.854), A2B1C3D2 (3.833), A2B3C3D1 (3.601), A2B1C3D1 (3.582), and A2B3C3D3 (3.283). The five lowest stress scores were A3B2C2D3 (1.345), A3B3C2D3 (1.355), A3B2C3D3 (1.364), A1B2C2D3 (1.365), and A3B3C3D3 (1.373). The high-strain set clusters around A2 = 20 mm/s and C3 = 0.30; the low-stress set clusters around A3 = 25 mm/s, B2 = 250 °C, C2 = 0.25, and D3 = 750 °C.
No candidate appeared in both the high-strain and low-stress sets. Because the screening logic treated lower forming stress as the primary selection criterion, the chosen combination was A3B2C2D3: ram speed 25 mm/s, die preheat 250 °C, friction coefficient 0.25, and workpiece heating temperature 750 °C. An additional simulation of this combination, not present in the nine-run matrix, gave a summed equivalent stress of 4 433 MPa across the large-end, mid-section, and small-end zones, below the 4 502 MPa obtained for A1B2C2D3—a reduction of about 1.5%. This verifies the ranking trend for the selected set, but it is not a proof of global optimality.
Warm-Forging Trial and Gear Inspection
The selected parameters were used for a warm-forging trial on a 2 000 t hydraulic press. After forging, the gear was datum-machined on a vertical lathe: the mounting face, bore, outside diameter, and front face were turned. The gear was then measured on a Gleason 650GMS gear measuring center.
| Characteristic | Result |
|---|---|
| Maximum flank topology deviation, left flank | 13.7 µm |
| Maximum flank topology deviation, right flank | 13.9 µm |
| Concave flank deviation | +5.1 µm / −13.7 µm; total 18.7 µm |
| Convex flank deviation | +13.9 µm / −13.8 µm; total 27.7 µm |
| Total cumulative pitch deviation | 60.7 µm and 86.8 µm |
| Corresponding accuracy grade, GB/T 11365—2019 | Grade 8 and grade 9 |
The maximum flank topology deviations of 13.7 µm and 13.9 µm are within the permitted range for this application. The total cumulative pitch deviations of 60.7 µm and 86.8 µm correspond to grades 8 and 9 of GB/T 11365—2019, which is sufficient for the subsequent heat-treatment and grinding sequence. These are pre-grinding values. They show that the warm-forged flank can carry a controlled grinding allowance; they do not establish final gear accuracy or fatigue life.
What the Route Can and Cannot Establish
The useful result is not only a single parameter set. It is that a generated gear flank can be converted into a forging die with a controlled stock layer, that the large-end flash zone dominates the strain field, and that a normalized stress-based screen can identify a lower-load window for this part. The trial supports dimensional feasibility for the 44-tooth, 3 mm module, 18CrNi4A large wheel.
The evidence has clear limits. It covers one gear size and one material, with a single forging trial and no production repeatability study. Die wear, die thermal cycling, residual stress, microstructure and hardness gradients, and fatigue life were not measured. The nine-run screen resolves main effects but not the full interaction space, and the stress-only selection may overlook local strain uniformity: the 20 mm/s case is a reminder that an aggregate score can hide a large-end strain spike. Heating rate, ambient temperature, and the coupling between process temperature and microstructure remain open for further work.
Within those limits, warm forging of spiral bevel gears offers a credible intermediate route: it avoids the heavy scale and flank inaccuracy of hot forging, reduces the dependence on pre-heat-treatment milling, and still leaves a controlled allowance for the final grinding operation.