
As a mechanical engineer specializing in gear design, I have extensively worked with bevel gears, particularly miter gears, which are a special type of bevel gear where the shafts intersect at a 90-degree angle and the gears have equal numbers of teeth. In this article, I will share my methodology for rapid parametric modeling and assembly of straight bevel gears, with a focus on miter gears, using Pro/ENGINEER (Pro/E). This approach leverages parametric relationships to enhance design efficiency, ensure meshing accuracy, and provide a robust foundation for virtual prototyping and motion simulation analysis. The techniques discussed here are applicable to various bevel gear configurations, but I will emphasize miter gears due to their common use in differential systems and other mechanical transmissions.
Bevel gears, including miter gears, are crucial components for transmitting motion between intersecting shafts. Their design involves complex geometry, such as conical pitch surfaces and involute tooth profiles, which can be challenging to model accurately. Traditional modeling methods often require multiple auxiliary planes, axes, and points, leading to tedious and error-prone processes. Through my experience, I have developed a streamlined method that simplifies the creation of miter gears by reducing the number of required sketches and utilizing parametric equations. This method not only speeds up the design process but also ensures that the gears are correctly dimensioned for proper meshing. In the following sections, I will delve into the geometric principles, parameter definitions, and step-by-step modeling procedures in Pro/E, supported by tables and formulas to summarize key concepts.
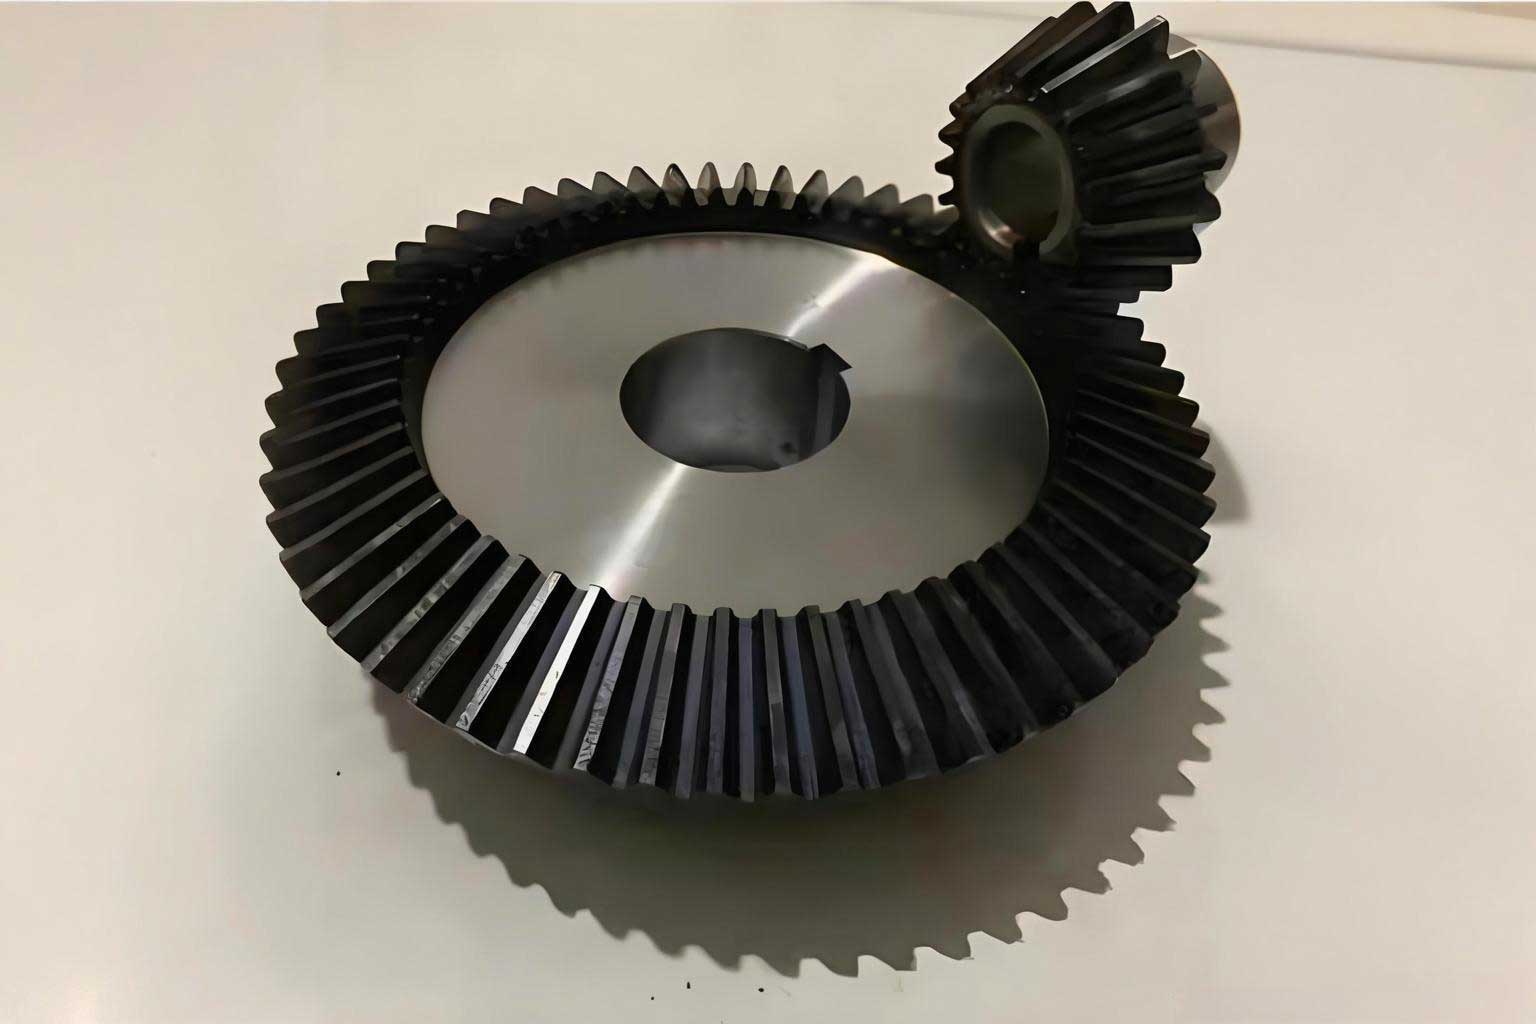
The image above illustrates a typical miter gear, highlighting its conical shape and tooth geometry. Miter gears are widely used in applications like differential drives, where they facilitate torque distribution between wheels. Their design requires precise control over parameters such as module, pressure angle, and cone distance to achieve smooth engagement and minimize noise. By adopting a parametric approach in Pro/E, designers can easily modify these parameters to generate different gear sizes and configurations, making it ideal for iterative design and optimization. This article will cover everything from basic gear theory to advanced Pro/E techniques, ensuring that readers can apply these methods to their own projects involving miter gears.
Fundamentals of Bevel Gear Geometry
To effectively model miter gears, one must first understand the underlying geometry. Bevel gears have teeth cut on conical surfaces, and their parameters are defined at the large end of the gear. For miter gears, the shaft angle is fixed at 90 degrees, and the gear ratio is 1:1, meaning the pinion and gear have the same number of teeth. This simplifies some calculations but still requires careful attention to detail. The key geometric parameters include:
- Module (m): A measure of tooth size, typically in millimeters.
- Number of teeth (z): For miter gears, this is equal for both gears.
- Pressure angle (α): The angle between the tooth profile and a radial line, usually 20° or 22.5°.
- Pitch diameter (d): Calculated as $$d = m \times z$$.
- Pitch cone angle (δ): For miter gears with a 90° shaft angle, δ = 45° for both gears.
- Cone distance (R): The distance from the apex of the pitch cone to the large end, given by $$R = \frac{d}{2 \sin(\delta)}$$.
- Addendum (h_a) and dedendum (h_f): Tooth height parameters, where $$h_a = m$$ and $$h_f = 1.25m$$ for standard gears.
These parameters are interrelated through trigonometric relationships. For instance, the base circle diameter for bevel gears is derived from the pitch diameter and pressure angle, but it must be adjusted for the conical shape. In parametric modeling, we define these relationships using equations in Pro/E to automate updates when parameters change. This is especially useful for miter gears, as designers often need to explore different sizes while maintaining meshing correctness.
Parametric Modeling Principles in Pro/E
Pro/ENGINEER, now part of Creo Parametric, is a powerful CAD tool that supports parametric, feature-based modeling. This means that the model is driven by parameters and relationships, allowing for easy modifications. For miter gears, we can set up a parameter table that includes all key dimensions, such as module, tooth count, and pressure angle. Then, we use relations to link these parameters to geometric features, ensuring that the gear updates automatically when any parameter is changed. This approach reduces manual recalculations and minimizes errors, which is critical for complex components like miter gears.
The core of parametric modeling lies in defining relations between dimensions. For example, the pitch diameter depends on module and tooth number, so we can write a relation like $$d = m \times z$$. Similarly, the cone distance R can be expressed as $$R = \frac{d}{2 \sin(\delta)}$$. In Pro/E, these relations are entered through the Tools > Relations menu, and they can include mathematical functions and conditional statements. This enables the creation of a flexible model that adapts to different design scenarios, whether for standard miter gears or custom variations.
Step-by-Step Modeling of Miter Gears in Pro/E
Based on my experience, I have condensed the modeling process into seven key steps. These steps are tailored for straight bevel gears, with a focus on miter gears, and they leverage parametric relations to streamline the workflow. Each step involves specific Pro/E features, such as sketches, curves, and patterns, which I will explain in detail.
Step 1: Parameter Definition and Relation Setup
Start by creating a new part in Pro/E. Then, define the gear parameters using the Parameters dialog (Tools > Parameters). For a miter gear, we need parameters for module, tooth count, pressure angle, and others. I recommend creating a comprehensive table as shown below, which includes both basic and derived parameters. This table serves as a reference for the relations that will drive the model.
| Parameter | Symbol | Value (Example) | Relation |
|---|---|---|---|
| Module | m | 3.5 mm | User-defined |
| Number of teeth | z | 10 | User-defined |
| Pressure angle | α | 22.5° | User-defined |
| Shaft angle | Σ | 90° | Fixed for miter gears |
| Pitch cone angle | δ | 45° | δ = Σ/2 for miter gears |
| Pitch diameter | d | 35 mm | d = m × z |
| Cone distance | R | 24.75 mm | R = d / (2 sin(δ)) |
| Addendum | h_a | 3.5 mm | h_a = m |
| Dedendum | h_f | 4.375 mm | h_f = 1.25m |
| Face width | b | 8.83 mm | Typically 0.3 × R |
After defining the parameters, input the relations in the Relations dialog. For instance, to calculate the pitch diameter, add: d = m * z. Similarly, for the cone distance: R = d / (2 * sin(δ)). These relations ensure that when you change the module or tooth count, all dependent dimensions update automatically. This parametric setup is fundamental for efficiently designing miter gears, as it allows quick iterations without redrawing geometry.
Step 2: Creating the Pitch Cone Line
The pitch cone line represents the generative line of the pitch cone, which is essential for defining the gear’s conical shape. In Pro/E, select the FRONT plane as the sketching plane and draw a line from the origin at an angle equal to the pitch cone angle δ. For miter gears, δ is 45°, so the line should be at 45° to the horizontal. Assign a relation to the angle dimension, such as sd# = δ, where sd# is the dimension symbol in Pro/E. This links the sketch to the parameter δ, making it parametric. Additionally, draw a vertical construction line from the endpoint to define the gear axis, as this will be used later for patterns and assembly.
This sketch serves as the foundation for the gear model. By parameterizing the angle, we can easily adjust the cone angle if designing non-miter bevel gears, but for miter gears, it remains fixed at 45°. The length of the line can be set equal to the cone distance R using another relation, ensuring the gear size scales correctly with parameters.
Step 3: Generating the Involute Tooth Profile
The tooth profile for straight bevel gears is based on an involute curve, but it must be projected onto a conical surface. This requires creating a reference coordinate system and drawing the involute at the large end of the gear. First, create a datum plane (DTM1) that passes through the pitch cone line and is rotated 90° from the FRONT plane. This plane will be used to sketch the gear’s base circles.
On DTM1, establish a coordinate system (CS0) at the intersection of the pitch cone line and the gear’s back face. This coordinate system defines the orientation for the involute equation. Then, sketch four concentric circles representing the addendum, pitch, base, and dedendum circles at the large end. Their diameters are calculated using relations derived from gear geometry. For example, the pitch circle diameter at the large end (dd) is given by $$dd = \frac{d}{\cos(\delta)}$$, where d is the pitch diameter. Similarly, the addendum circle diameter is $$dd_a = dd + 2h_a$$, and the base circle diameter is $$dd_b = dd \times \cos(\alpha)$$. Input these relations in Pro/E to control the circle sizes.
Next, create the involute curve using the Equation option under Curves. Select the CS0 coordinate system and choose Cartesian coordinates. The involute equation in parametric form is:
$$x = r_b (\cos(\theta) + \theta \sin(\theta))$$
$$y = r_b (\sin(\theta) – \theta \cos(\theta))$$
$$z = 0$$
where $$r_b = \frac{dd_b}{2}$$ is the base radius, and $$\theta$$ is the parameter ranging from 0 to the involute roll angle. In Pro/E, this can be written as:
rb = dd_b / 2
theta = t * 45
x = rb * cos(theta) + pi * rb * theta / 180 * sin(theta)
y = rb * sin(theta) - pi * rb * theta / 180 * cos(theta)
z = 0
This generates the involute curve for one side of the tooth. To create the full tooth profile, mirror this curve about a plane passing through the tooth centerline. This plane can be defined by the gear axis and a point on the pitch circle, ensuring symmetry for miter gears.
Step 4: Building the Gear Blank
With the tooth profile defined, the next step is to create the solid gear blank. Use the Revolve tool in Pro/E to generate a conical solid based on the pitch cone line. Sketch the profile on the FRONT plane, including the gear’s back face, front face, and root cone lines. The root cone angle is typically smaller than the pitch cone angle to provide clearance. For miter gears, we often use equal addendum design, but for clarity, I will describe a standard approach. The sketch should include relations to control dimensions like face width and cone angles. For example, the root cone line can be set at an angle $$\delta_f = \delta – \arctan(h_f / R)$$, which can be expressed as a relation in Pro/E.
After revolving, you will have a solid cone representing the gear blank. This blank will serve as the base for cutting the tooth spaces. Ensure that the blank dimensions are linked to parameters so that changes propagate correctly. This step is crucial for miter gears, as the blank geometry directly affects the meshing with the mating gear.
Step 5: Cutting the Tooth Spaces
To form the teeth, we need to cut material from the gear blank using the involute profile. This is done using the Sweep Blend feature in Pro/E. Select the pitch cone line as the trajectory, and define two sections: one at the large end (using the involute curve) and one at the small end (a point or scaled profile). The sweep blend will create a cut along the cone, generating a single tooth space. For accuracy, ensure that the sections are properly aligned and that the cut depth matches the tooth height parameters.
Once the first tooth space is created, use the Pattern tool to duplicate it around the gear axis. Create a pattern axis by extruding a central hole or using the gear axis, and specify the number of instances equal to the tooth count z. This will generate all tooth spaces, completing the gear teeth. For miter gears, since the tooth count is typically low, this pattern is efficient and ensures uniform spacing. The patterned features are associative, so if the tooth profile changes, all teeth update automatically.
Step 6: Adding Central Features
After forming the teeth, add central features such as a bore, keyway, and chamfers. These features are important for practical applications of miter gears, as they allow the gear to be mounted on a shaft. Use standard Pro/E tools like Hole, Extrude, and Chamfer to create these features. Parameterize their dimensions where possible, for example, linking the bore diameter to the pitch diameter via a relation like $$bore\_diameter = 0.3 \times d$$. This maintains design consistency and makes the model adaptable for different sizes of miter gears.
Step 7: Assembly and Export
To simulate meshing, assemble two miter gears in a new Pro/E assembly file. Use constraints such as Align and Mate to position the gears correctly. For miter gears, the axes should intersect at 90 degrees, and the pitch cones should be tangent. This can be achieved by aligning datum planes through the gear axes and matching cone surfaces. Once assembled, check for interference using the Global Interference tool to ensure proper meshing. Finally, export the model to formats like STEP or IGES for use in simulation software. This step is vital for virtual prototyping, as it allows engineers to perform motion and stress analysis on the miter gears before physical manufacturing.
Advanced Topics in Miter Gear Modeling
Beyond basic modeling, there are advanced techniques that can enhance the design of miter gears. These include incorporating backlash, crowning for noise reduction, and optimizing tooth contact patterns. In Pro/E, these can be achieved through additional parameters and features. For instance, backlash can be added by offsetting the tooth profiles slightly, using a relation like $$backlash = 0.05 \times m$$. Crowning involves modifying the tooth surface to a slight barrel shape, which can be modeled using variable section sweeps. These refinements are especially important for high-performance applications of miter gears, such as in automotive differentials.
Another key aspect is the calculation of geometric properties. For miter gears, the contact ratio can be derived using formulas that account for the conical shape. The contact ratio $$C_r$$ is given by:
$$C_r = \frac{\sqrt{R_{a1}^2 – R_{b1}^2} + \sqrt{R_{a2}^2 – R_{b2}^2} – C \sin(\alpha)}{p_b}$$
where $$R_a$$ and $$R_b$$ are the addendum and base radii, C is the center distance, and $$p_b$$ is the base pitch. For miter gears with equal teeth, this simplifies, but it still requires accurate modeling of the gear geometry. By embedding such formulas in Pro/E relations, designers can automatically evaluate the contact ratio and ensure smooth operation.
Practical Applications and Case Study
Miter gears are commonly used in differential systems, where they distribute torque between wheels. To illustrate the parametric modeling process, consider a case study of designing miter gears for a small vehicle differential. The requirements include a module of 2.5 mm, 12 teeth per gear, and a pressure angle of 20°. Using the steps outlined above, I created a parametric model in Pro/E, with relations for all key dimensions. The table below summarizes the calculated parameters for this case.
| Parameter | Value | Calculation |
|---|---|---|
| Module (m) | 2.5 mm | Given |
| Teeth (z) | 12 | Given |
| Pitch diameter (d) | 30 mm | d = m × z = 2.5 × 12 |
| Pitch cone angle (δ) | 45° | Fixed for miter gears |
| Cone distance (R) | 21.21 mm | R = d / (2 sin(δ)) = 30 / (2 × 0.7071) |
| Face width (b) | 6.36 mm | b = 0.3 × R (typical) |
| Contact ratio | 1.45 | Calculated from formula |
After modeling, I assembled the miter gears in Pro/E and exported them for simulation. The parametric approach allowed quick adjustments, such as changing the module to 3 mm for higher strength, and the model updated automatically. This demonstrates the efficiency of parametric modeling for miter gears, enabling rapid prototyping and design optimization.
Conclusion
In this article, I have presented a comprehensive method for parametric modeling and assembly of miter gears in Pro/ENGINEER. By focusing on parametric relationships, this approach simplifies the design process, ensures meshing accuracy, and facilitates virtual prototyping. The step-by-step procedure covers parameter definition, sketch creation, involute generation, and assembly, with an emphasis on miter gears as a common bevel gear type. The use of tables and formulas helps summarize key concepts, making it easier for engineers to apply these techniques. As mechanical systems evolve, parametric modeling of components like miter gears will continue to play a vital role in reducing design time and improving product quality. I encourage designers to explore further refinements, such as incorporating dynamic simulation and additive manufacturing considerations, to fully leverage the power of parametric CAD tools.