
In the realm of mechanical transmission systems, gear drives are fundamental, and among them, miter gears—a type of straight bevel gear used for intersecting shaft applications—play a critical role in transmitting power and motion. As an engineer specializing in gear manufacturing, I have extensively researched and implemented advanced CNC milling techniques for miter gears to overcome the limitations of traditional methods like gear planing, form milling, and circular broaching. These conventional approaches often result in poor accuracy, typically around GB 11365-1989 grade 8-9 (equivalent to AGMA 2009 grade B9), and produce straight tooth profiles that lead to full-length contact patterns along the tooth face width. Such contact patterns are prone to shifting due to machining errors, heat treatment distortions, assembly misalignments, and load-induced deflections, causing stress concentrations at the tooth ends or roots and premature failure. To address these issues, I have developed a high-precision CNC milling process for miter gears using a six-axis, five-coordinate controlled gear milling machine, which achieves accuracies up to GB 11365-1989 grade 5 (equivalent to AGMA 2009 grade B5) and incorporates tooth flank crowning for optimized contact patterns. This article details my first-person perspective on this innovative methodology, encompassing machine setup, tooth profile modification, contact analysis, and a standardized gear development workflow to ensure consistency across production batches. Throughout, I will emphasize the application to miter gears, a key subset of straight bevel gears, and incorporate tables and formulas to summarize critical parameters.
The cornerstone of my research is the Phoenix II 275HC gear milling machine, a state-of-the-art CNC platform with six axes (X, Y, Z, A, B, C) enabling five-coordinate simultaneous motion. This machine utilizes an intermittent generating method to mill miter gears, where the cutter and gear blank undergo complex relative movements to generate the spherical involute tooth flank. The process begins with software-based design and simulation. Using dedicated gear software, such as Straight Bevel modules, I calculate the gear geometry card and cutter parameters based on design drawings. Then, through TCA (Tooth Contact Analysis) in Unical software, I simulate the contact patterns and perform first-order corrections, primarily adjusting the spiral angle to shift the contact zone toward the toe (small end) of the tooth. This pre-correction accounts for expected shifts post-heat treatment and under load. The output is an adjustment card that guides the 275HC machine during milling.
The actual milling of miter gears involves a precise sequence. For the left tooth flank, the cutter is positioned above the gear blank. It starts at a 0° orientation and pivots to 20°, while simultaneously rotating around the C-axis and oscillating about the B-axis. Concurrently, the gear blank rotates around the A-axis and translates linearly in the X and Z directions, creating the generating motion for the left flank. After completing one tooth’s left side, the cutter retracts, the blank indexes to the next tooth, and the process repeats until all left flanks are milled. Then, the cutter moves below the blank to machine the right flanks. This method inherently introduces a crowning effect along the tooth length, meaning the tooth profile is slightly convex, which prevents edge contact and ensures a localized contact pattern. The degree of crowning is controlled by cutter parameters: with a fixed cutter diameter (typically 9 inches for this machine), the crown amount increases with larger cutter blade angle (or dish angle). This relationship is crucial for tuning contact pattern size. The crowning effect can be quantified by the crown drop $$C_d$$ at the tooth center relative to the ends, approximated by:
$$C_d = \frac{D_c \cdot \sin(\alpha_d)}{2 \cdot R_m}$$
where $$D_c$$ is the cutter diameter, $$\alpha_d$$ is the cutter dish angle, and $$R_m$$ is the mean cone distance of the miter gear. By adjusting $$\alpha_d$$, I can tailor the crowning to achieve desired contact ellipse dimensions.
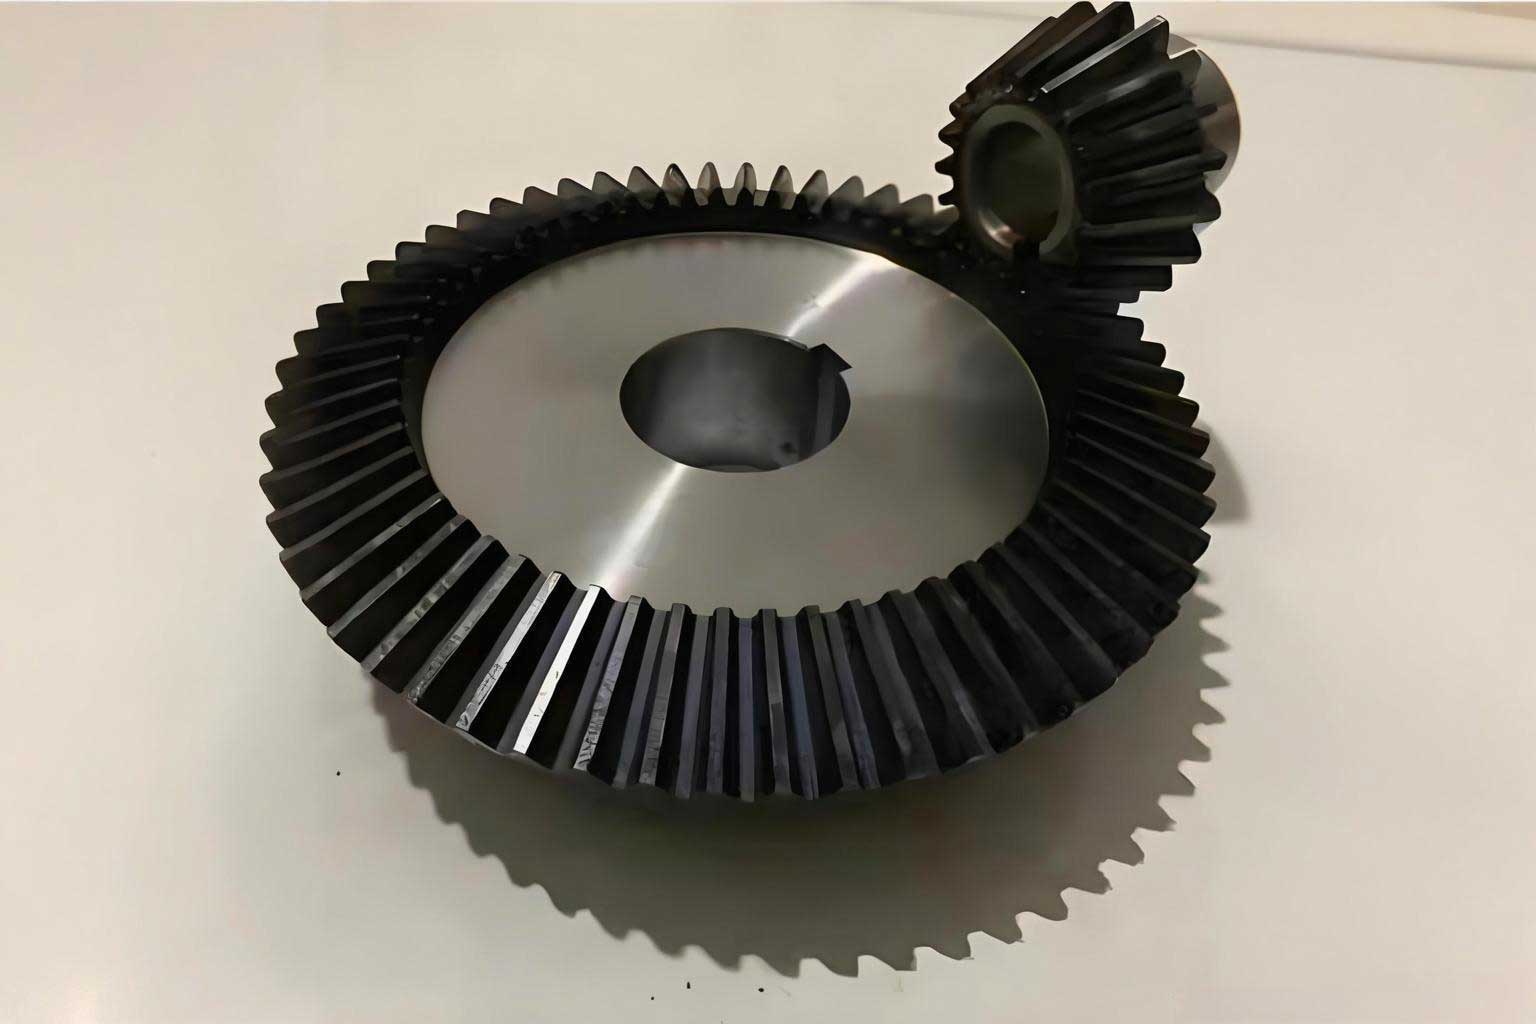
Contact pattern analysis is integral to optimizing miter gear performance. In TCA, I model the gear pair under light load and evaluate the contact ellipse’s location, size, and shape. The goal is to position the pattern centrally between toe and heel, and between tip and root, with a slight bias toward the toe to compensate for post-assembly shifts. The contact pattern shift $$\Delta L$$ due to load or misalignment can be estimated using elasticity theory:
$$\Delta L = k \cdot \frac{F}{E \cdot b}$$
where $$k$$ is a geometric factor, $$F$$ is the applied load, $$E$$ is Young’s modulus, and $$b$$ is the face width. Through iterative simulations, I determine the required spiral angle correction $$\Delta \beta$$ to pre-shift the pattern. For miter gears, this correction is typically in the range of 0.1° to 0.5°, ensuring that under operating conditions, the contact ellipse remains within safe boundaries, avoiding edge contact. The table below summarizes key TCA parameters for a typical miter gear set:
| Parameter | Symbol | Typical Value | Influence on Contact |
|---|---|---|---|
| Cutter Diameter | $$D_c$$ | 9 inches | Affects crowning magnitude |
| Cutter Dish Angle | $$\alpha_d$$ | 20°-30° | Higher angle increases crowning |
| Spiral Angle Correction | $$\Delta \beta$$ | 0.2° | Shifts pattern along length |
| Contact Ellipse Ratio | $$a/b$$ | 1.2-1.5 | Elliptical shape for stress distribution |
| Toe Bias Distance | $$d_t$$ | 1-2 mm | Ensures pattern stays off toe under load |
After initial milling, I employ a rigorous development workflow to qualify the miter gears. This involves creating master gears—specifically, control gears and master control gears—that serve as references for manufacturing consistency. The process begins with rough milling of a single tooth on a sample gear. I then use a Coordinate Measuring Machine (CMM) to perform geometric verification, measuring parameters like chordal tooth thickness at the midpoint, tooth depth, and flank form. The midpoint chordal thickness $$s_m$$ is critical for backlash control and is given by:
$$s_m = m \cdot \sin\left(\frac{\pi}{2Z}\right)$$
where $$m$$ is the module and $$Z$$ is the number of teeth. CMM measurements provide data for backlash adjustment; I iteratively correct the machine settings based on deviations until the gear meets drawing tolerances. For flank form evaluation, I define a grid of 45 points on the tooth surface (9 points along the profile height and 5 points along the face width) and compare actual coordinates to theoretical positions. This grid-based analysis quantifies form errors in pressure angle and spiral angle, enabling precise machine compensation. The root mean square error $$E_{RMS}$$ over the grid is minimized:
$$E_{RMS} = \sqrt{\frac{1}{N} \sum_{i=1}^{N} (d_i – d_{i,理论})^2}$$
where $$N=45$$, $$d_i$$ are measured deviations, and $$d_{i,理论}$$ are theoretical values. Once the single tooth is approved, I mill all teeth and conduct full CMM inspection for tooth-to-tooth composite errors, pitch deviations, and runout.
Subsequently, the miter gear pair is assembled on a rolling tester, such as a 360T machine, and run under light load (as per drawing specifications) for 20 seconds. This test reveals the contact pattern and backlash. The contact pattern should be elliptical or rectangular, centered between tip and root, and located 1-2 mm from the toe. Backlash at the heel (large end) must match drawing requirements; it correlates with midpoint chordal thickness and ensures proper meshing. If discrepancies arise, I return to the milling stage for further corrections. The table below outlines acceptance criteria for miter gear contact patterns:
| Criterion | Requirement | Purpose |
|---|---|---|
| Pattern Location | Centered between tip and root, 1-2 mm from toe | Avoids edge contact under load |
| Pattern Size | 30-50% of face width and tooth height | Ensures sufficient load-bearing area |
| Pattern Shape | Elliptical or rectangular with sharp boundaries | Indicates proper crowning and alignment |
| Backlash at Heel | Within drawing tolerance (e.g., 0.05-0.10 mm) | Guarantees smooth operation and thermal expansion clearance |
The master gear development workflow is systematic and ensures traceability. I produce three types of gears: standard control gears (master control gears), control gears, and production gears. The master control gear is the most accurate pair from the development batch, meeting all drawing requirements and used to establish digital CMM inspection programs. Control gears, typically two pairs, are manufactured to the same standard and serve as references for inspecting production batches. They must exhibit contact patterns identical to the master control gear and have flank form deviations within 50% of the drawing tolerance. Production gears are then checked against the control gears via CMM and rolling tests. This hierarchical approach guarantees consistency across batches. The following table details the roles and specifications:
| Gear Type | Quantity | Purpose | Key Requirements |
|---|---|---|---|
| Master Control Gear | 1 pair | Reference for CMM program and control gear validation | Highest accuracy; no rolling test after qualification |
| Control Gears | 2 pairs | Inspection tools for production batches | Matching contact pattern; flank form within 50% tolerance |
| Production Gears | Batch volume | End-use components | Must pass CMM and rolling test against control gears |
To validate the miter gears under real conditions, I conduct gearbox testing. A pair is installed in the final or a representative housing, and contact patterns are evaluated under three load levels: light load (per drawing), normal operating load, and maximum load. This assesses the effects of housing deflections, bearing clearances, and thermal expansion. Typically, as load increases, the contact pattern expands by 5-40% and shifts toward the heel by a similar percentage. The pattern must never reach the toe, heel, tip, or root under any working load; a safety margin of at least 2.5% of tooth height from the edges is maintained. If gearbox testing reveals unacceptable pattern migration, I revise the milling parameters—such as increasing toe bias or adjusting crowning—and repeat the development cycle. This iterative process ensures that the miter gears perform reliably in service.
For batch production, I implement a streamlined workflow based on the qualified master control gears. Each production batch undergoes milling using the same machine settings derived from the development phase. Then, gears are inspected via the digitized CMM program, which compares flank grid points to the master control gear data. Additionally, sample gears from each batch are paired with control gears for rolling tests to verify contact patterns and backlash. This approach minimizes human error and ensures that every miter gear meets the established standards. The use of CNC technology enables repeatable high-precision manufacturing, while the master gear system provides a robust quality assurance framework.
In terms of gear geometry, miter gears have specific design parameters that influence milling. The pitch cone angle $$\delta$$ for miter gears (with shaft angle $$\Sigma = 90^\circ$$) is 45° for equal-diameter pairs, but can vary for non-equal ratios. The formula for cone distance $$R$$ is:
$$R = \frac{m \cdot Z}{2 \sin(\delta)}$$
where $$m$$ is the module and $$Z$$ is the tooth count. During milling, I adjust the machine’s axial settings to account for these geometric constraints. The CNC program calculates tool paths based on these inputs, ensuring accurate tooth generation.
Heat treatment is another critical factor for miter gears. After soft-state machining and qualification, gears undergo carburizing or induction hardening, which can distort tooth profiles. To compensate, I analyze distortion patterns from sample batches and apply corrective offsets in the soft-state milling. For instance, if heat treatment consistently causes a spiral angle increase of 0.1°, I reduce the soft-state spiral angle by that amount. This proactive correction is embedded in the adjustment card for production gears, reducing post-heat treatment rework.
The economic benefits of this CNC milling approach for miter gears are significant. Compared to traditional planing, CNC milling reduces cycle times by up to 50% and improves accuracy by three to four AGMA grades. The crowning capability eliminates the need for post-milling lapping or grinding in many applications, further cutting costs. Moreover, the master gear system ensures interchangeability, allowing miter gears to be replaced without selective assembly—a key advantage in aerospace and automotive industries where downtime must be minimized.
Looking forward, I am exploring enhancements such as adaptive milling with real-time feedback from in-process sensors, which could dynamically adjust cutter paths based on actual material removal. Additionally, integrating AI-based TCA could optimize contact patterns for varying load spectra, making miter gears even more resilient. The principles developed here also apply to other bevel gear types, such as spiral bevel gears, with modifications to account for curved teeth.
In conclusion, my research on CNC milling of miter gears has yielded a high-precision, efficient manufacturing methodology that addresses the shortcomings of conventional techniques. By leveraging six-axis CNC machines, implementing tooth flank crowning, and establishing a rigorous master gear development workflow, I have achieved consistent production of miter gears with optimized contact patterns and interchangeability. The use of CMM digitization and rolling testing ensures quality control across batches. This approach not only enhances gear performance and longevity but also streamlines production, making it a valuable advancement in gear manufacturing technology. As industries demand higher reliability and precision, such methods will become increasingly essential for miter gears and beyond.