
In my years of experience with mechanical transmission systems, I have found the worm gear to be an indispensable component for transmitting motion and power between skewed shafts, typically at a 90° angle. The worm gear pair, consisting of a worm and a worm gear wheel, offers a compact structure, smooth operation, and minimal vibration impact, making it widely adopted in metallurgical machinery, machine tools, and other manufacturing equipment. However, like all mechanical elements, worm gears are subject to failure modes that require careful analysis and precise measurement for effective maintenance and replacement. In this article, I will share my systematic approach to understanding worm gear failures and the detailed measurement procedures that ensure accurate restoration of these critical components.
Understanding Worm Gear Failure Modes
The failure modes of worm gears closely resemble those of traditional gear drives, including fatigue pitting, scuffing (adhesive wear), abrasive wear, and tooth fracture. However, a critical distinction arises from the inherent strength imbalance between the worm and the worm gear. In practice, the worm gear wheel is almost always the weaker element, and failure predominantly occurs on the worm gear teeth. This asymmetry is due to the material combination, the sliding action, and the geometry of the meshing surfaces. I have observed that in enclosed (closed) worm gear drives, the primary failure mechanisms are scuffing and pitting on the worm gear tooth flanks, whereas in open drives, abrasive wear dominates. Consequently, replacement parts are frequently required for the worm gear, and the accuracy of measurement directly impacts the performance and service life of the new components.
| Failure Type | Description | Location | Predominant Conditions |
|---|---|---|---|
| Fatigue Pitting | Surface material removal due to cyclic contact stress | Worm gear tooth flank | Closed drive, moderate load |
| Scuffing (Adhesive Wear) | Local welding and tearing of surfaces due to high sliding velocity and temperature | Worm gear tooth flank | Closed drive, high load and speed |
| Abrasive Wear | Progressive material removal by hard particles | Worm gear tooth flank | Open drive, contaminated lubricant |
| Tooth Fracture | Complete breakage of teeth due to overload or fatigue | Worm gear tooth root | Severe overload or material defect |
When a worm gear fails, it is essential to first diagnose the failure mode because the measurement and subsequent design of the replacement part must account for the original geometry as well as any corrective measures. In my fieldwork, I have often encountered cases where scuffing had altered the tooth profile, necessitating careful re-measurement to avoid compounding errors.
Fundamental Conditions for Correct Meshing
Before proceeding with measurement, I always recall the fundamental meshing conditions for a worm gear pair:
- The axial module of the worm must equal the transverse module of the worm gear.
- The axial pressure angle of the worm must equal the transverse pressure angle of the worm gear.
- The lead angle on the worm pitch cylinder must equal the helix angle on the worm gear pitch cylinder.
- The hand of the helix (right-hand or left-hand) must be identical for both elements.
These conditions arise from the fact that the worm gear is typically cut with a hob that replicates the worm geometry. Therefore, the worm gear’s form and parameters are dictated by the worm itself. In measurement, I always start from the worm to infer the worm gear characteristics.
Step-by-Step Measurement Procedure for Worm Gears
1. Identifying the Worm Type
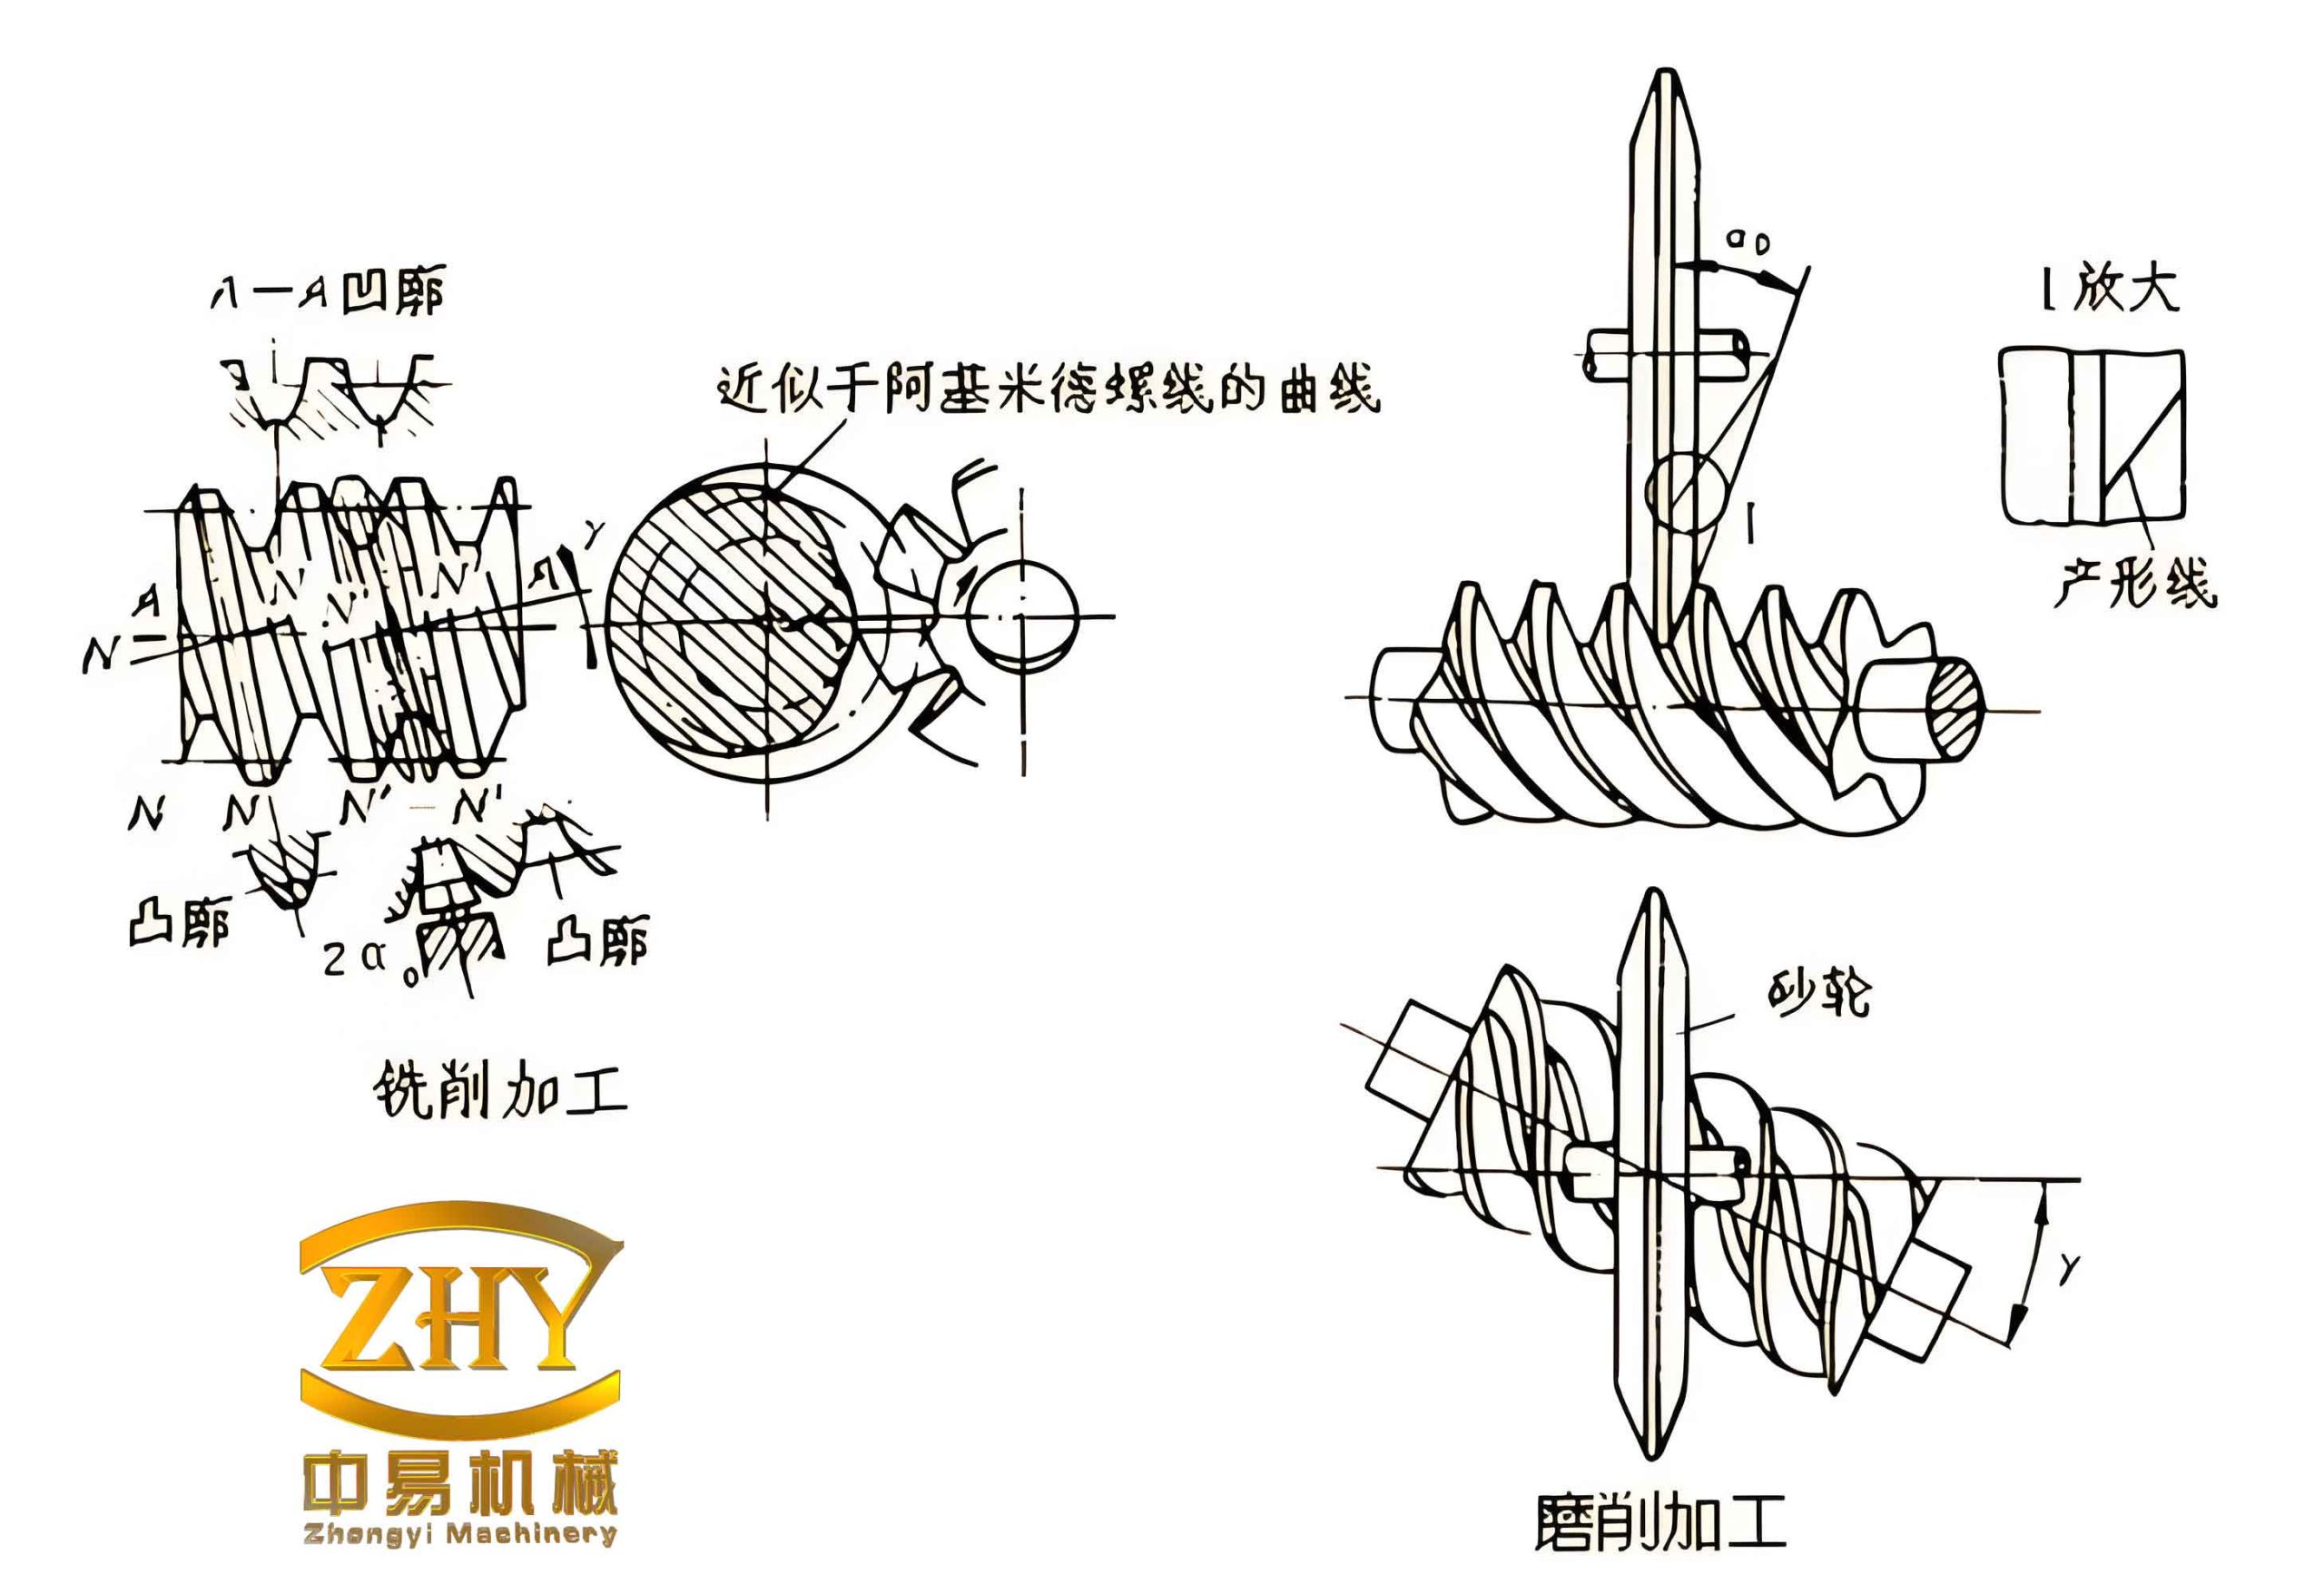
Ordinary cylindrical worms (excluding ZK type) are usually machined on a lathe using a straight-edged cutting tool with a trapezoidal profile. Depending on the tool orientation, the tooth profiles in different sections vary. I classify them into four main types:
| Type | Abbreviation | Tooth Profile in Axial Section | Tooth Profile in Normal Section | Characteristics |
|---|---|---|---|---|
| Archimedean Worm | ZA | Straight line | Curved (Archimedean spiral in transverse) | Axial pressure angle 20°, simple manufacture, most common |
| Involute Worm | ZI | Convex curve | Convex (involute in transverse) | Normal pressure angle 20°, straight line on base cylinder tangent plane |
| Extended Involute Worm (Zhen-type, often called ZN) | ZN | Convex curve | Straight line | Normal pressure angle 20°, normal profile is straight |
| Concave-convex Worm (ZK) | ZK | Convex curve | Convex curve | Transverse profile approx. Archimedean spiral, complex geometry |
To determine the type, I use a protractor or angle gauge. I press the gauge firmly against the tooth flank along the axial direction of the worm. If it fits snugly, the axial profile is straight, indicating a ZA worm. If it does not, I then test along the normal direction. A good fit in the normal direction suggests a ZN worm. For ZI and ZK types, neither the axial nor normal sections yield a straight line; the distinction requires more detailed profile measurement, often with a gear tooth caliper or optical comparator. In practice, ZA worms are by far the most common, and my measurement approach frequently starts by assuming ZA unless evidence suggests otherwise.
Once the type is identified, I measure the pressure angle. For ZA worms, the axial pressure angle is typically 20°. For ZI and ZN worms, the normal pressure angle is 20°. This angle is crucial for subsequent calculations and for selecting the correct cutting tool when manufacturing a replacement worm gear.
2. Determining the Module
The module is the most fundamental parameter. I use two independent methods to cross-check:
Method A – From the worm: Measure the axial pitch (also called axial tooth pitch) Px of the worm. The axial module m is then:
$$ m = \frac{P_x}{\pi} $$
To measure Px accurately, I use a vernier caliper or a pitch gauge over several teeth to reduce error, then divide by the number of pitches measured.
Method B – From the worm gear: Measure the throat diameter (also called tip circle diameter) da2 of the worm gear, and count the number of teeth z2. Then:
$$ m = \frac{d_{a2}}{z_2 + 2} $$
This formula applies to standard addendum worms (addendum = m). If the worm gear is modified (profile shifted), the formula may need adjustment. However, for most standard worm gears, this is reliable.
After obtaining a value from each method, I compare them. If they agree within a reasonable tolerance (typically 0.01 mm), I round to the nearest standard module value from gear design handbooks. Standard modules for worm gears are: 1, 1.25, 1.5, 2, 2.5, 3, 4, 5, 6, 8, 10, 12, 16, 20, etc. (units in mm). Consistency is critical; I always verify using both methods to avoid gross errors.
| Method | Measured Parameter | Formula | Remarks |
|---|---|---|---|
| From Worm | Axial pitch Px | $$ m = P_x / \pi $$ | Most direct; requires careful pitch measurement |
| From Worm Gear | Throat diameter da2 and tooth count z2 | $$ m = d_{a2} / (z_2 + 2) $$ | Assumes standard addendum; check for profile shift |
3. Determining the Pitch Circle Diameter of the Worm
The pitch circle diameter of the worm, d1, is a key parameter affecting both the lead angle and the center distance. I measure the outside diameter (tip diameter) of the worm, da1, using a micrometer or caliper. Then:
$$ d_1 = d_{a1} – 2m $$
This formula assumes standard addendum (height of tooth head = m). For ZA worms, the addendum is exactly m. For other types, the addendum may differ slightly, but the standard formula is a good starting point. If the worm tip diameter is worn or damaged, I may need to measure multiple points and take an average.
4. Determining the Number of Starts (Threads) and Hand of Helix
The number of starts, z1, is simply counted by visually tracing the helical thread(s) on the worm from one end to the other. Standard practice dictates that worm starts are usually 1, 2, 4, or 6, though other numbers are possible. I always verify by checking the thread runout across the axial length.
The hand of helix is determined by observing the direction of the thread. If the thread slopes upward to the right when the worm is oriented horizontally with its axis, it is right-hand; if it slopes upward to the left, it is left-hand. In most applications, right-hand worms are standard. The worm gear must have the same hand to mesh properly.
5. Calculating the Lead Angle
With the pitch circle diameter d1, module m, and number of starts z1 known, the lead angle γ on the pitch cylinder is:
$$ \tan \gamma = \frac{m z_1}{d_1} $$
Therefore:
$$ \gamma = \arctan\left(\frac{m z_1}{d_1}\right) $$
The lead angle is identical to the helix angle of the worm gear on its pitch cylinder. This angle is critical for the axial thrust balance and for verifying the meshing condition. A small lead angle (e.g., below 5°) results in a high self-locking ability but lower efficiency, while a larger lead angle (e.g., above 25°) gives higher efficiency but less self-locking.
6. Verifying the Measurement by Center Distance
The final check is to compute the theoretical center distance a and compare it with the actual measured center distance between the worm and worm gear shafts. For a standard (non-profile-shifted) worm gear pair:
$$ a = \frac{d_1}{2} + \frac{d_2}{2} $$
where d2 is the pitch circle diameter of the worm gear. For a standard worm gear:
$$ d_2 = m z_2 $$
Thus:
$$ a = \frac{d_1}{2} + \frac{m z_2}{2} $$
Alternatively, using the throat diameter da2 = d2 + 2m, we get:
$$ a = \frac{d_1}{2} + \frac{d_{a2} – 2m}{2} = \frac{d_1 + d_{a2} – 2m}{2} $$
I measure the actual center distance using a gauge or by mounting the pair in a fixture. If the calculated a matches the measured value within a few hundredths of a millimeter (accounting for manufacturing tolerances and wear), I confirm the measurement. If there is a significant discrepancy, I suspect either a measurement error or that the worm gear has been profile-shifted (i.e., non-standard addendum modification). In such cases, I need to adjust the formulas by adding the shift coefficient.
Practical Application: A Case Study from a Steel Plant Saw Blade Grinder
To illustrate the step-by-step process, I will share a real measurement example from a saw blade grinding machine in a steel plant. The machine had a worm gear adjusting mechanism that had failed due to scuffing. The worm gear wheel was damaged, and we needed to manufacture a replacement. The worm itself was in good condition and could be reused.
Step 1: Identify Worm Type
I took an angle gauge and pressed it against the worm’s axial tooth flank. It fit perfectly straight. I then measured the axial pressure angle, which read 20°. The axial profile was a straight line, and the transverse profile would be an Archimedean spiral. This confirmed a ZA (Archimedean) worm.
Step 2: Determine Module
I measured the worm gear’s throat diameter: da2 = 134.00 mm. I counted the worm gear teeth: z2 = 65. Using the worm gear method:
$$ m = \frac{134}{65 + 2} = \frac{134}{67} = 2.000 \, \text{mm} $$
To double-check, I measured the axial pitch of the worm over several teeth. The worm had 1 start (z1 = 1). I measured Px across 10 threads and divided by 10, obtaining Px = 6.283 mm. Then:
$$ m = \frac{6.283}{\pi} = 2.000 \, \text{mm} $$
Both methods agreed perfectly. The module is 2 mm, a standard value.
Step 3: Determine Worm Pitch Circle Diameter
I measured the worm’s outside diameter: da1 = 18.00 mm. Then:
$$ d_1 = 18 – 2 \times 2 = 14.00 \, \text{mm} $$
So the pitch circle diameter of the worm is 14 mm.
Step 4: Number of Starts and Hand
Visually, the worm had a single thread (z1 = 1). The thread ran up to the right when viewed horizontally, so it was right-handed. The worm gear also exhibited right-hand teeth. This matched.
Step 5: Calculate Lead Angle
$$ \tan \gamma = \frac{m z_1}{d_1} = \frac{2 \times 1}{14} = 0.142857 $$
$$ \gamma = \arctan(0.142857) \approx 8.1301^\circ = 8^\circ 7′ 48” $$
I recorded the lead angle as 8°7’48”.
Step 6: Verify Center Distance
The worm gear pitch circle diameter d2 = m z2 = 2 × 65 = 130 mm. The theoretical center distance:
$$ a = \frac{d_1}{2} + \frac{d_2}{2} = \frac{14}{2} + \frac{130}{2} = 7 + 65 = 72.00 \, \text{mm} $$
Using the throat diameter formula:
$$ a = \frac{14 + 134 – 2 \times 2}{2} = \frac{14 + 134 – 4}{2} = \frac{144}{2} = 72.00 \, \text{mm} $$
I measured the actual center distance of the existing housing using a gauge; it read 72.02 mm, which is within the typical manufacturing tolerance. The measurement was correct.
Finally, I determined the required accuracy class based on the application (moderate speed, continuous adjustment) and specified a 7-grade (ISO 7) worm gear. With all parameters confirmed, I produced a detailed drawing for the replacement worm gear.
Summary of Key Formulas
To facilitate quick reference, I summarize the essential formulas used in worm gear measurement:
| Parameter | Formula | Remarks |
|---|---|---|
| Axial module (from worm pitch) | $$ m = P_x / \pi $$ | Px = axial pitch |
| Module (from worm gear throat) | $$ m = d_{a2} / (z_2 + 2) $$ | Standard addendum assumption |
| Worm pitch circle diameter | $$ d_1 = d_{a1} – 2m $$ | Standard addendum |
| Lead angle | $$ \gamma = \arctan(m z_1 / d_1) $$ | Also equals worm gear helix angle |
| Worm gear pitch circle diameter | $$ d_2 = m z_2 $$ | For standard gears |
| Center distance | $$ a = (d_1 + d_2) / 2 $$ | Standard pair |
| Center distance (via throat) | $$ a = (d_1 + d_{a2} – 2m) / 2 $$ | Alternative check |
Final Considerations
Throughout my career, I have learned that accurate worm gear measurement is as much an art as it is a science. Wear on the worm teeth can alter the pitch and tip diameters, so I always take multiple measurements at different circumferential positions and average the results. For worms that have been repaired or re-ground, the geometry may deviate from the original, and I then need to treat it as a new design. Additionally, I always check for profile shift by comparing the measured center distance with the standard calculation. If a shift exists, I must determine the shift coefficient x2 from:
$$ a = \frac{d_1 + d_2}{2} + x_2 m $$
where x2 is the profile shift coefficient of the worm gear (usually negative or zero). The worm itself is rarely shifted because it is the basis for the hob design.
In modern practice, coordinate measuring machines (CMM) and gear inspection systems can provide extremely precise data, but for field service and small-batch replacement, manual measurement remains practical and effective. The methods I have outlined here have been used successfully in countless repair scenarios, ensuring that the new worm gear pairs mesh correctly, run smoothly, and have a long service life.
To conclude, mastering the measurement of worn worm gears involves systematic identification of the worm type, precise determination of the module and pitch diameters, and verification through center distance. Each step builds upon the previous one, and careful cross-checking prevents costly errors. Whether you are dealing with a small adjustment mechanism or a large power transmission system, the principles remain the same. I hope that sharing my hands-on experience with worm gear measurement will assist other engineers and technicians in maintaining and restoring these essential mechanical components with confidence.