
As a CAD/CAM/CAE system, Unigraphic NX (UGNX) provides a highly reliable platform with diverse design functionalities, widely applied in mechanical engineering. The involute straight spur gear is a common component in various mechanical transmission devices. By leveraging the expression and feature modeling capabilities of UGNX, I achieve a fully parametric and precise modeling of straight spur gears. In this article, I detail the entire process of parametric design for cylindrical involute straight spur gears, from establishing fundamental parameters to generating final three-dimensional models, with extensive use of mathematical formulas and tables to summarize key steps and relationships.
The concept of parametric design is essential for modern engineering. A parametric model uses constraints to represent shape features and a set of parameters to control the design outcome. By altering these parameters, a family of geometrically similar parts can be generated efficiently. Two basic approaches exist: program-driven and dimension-driven. In my work with straight spur gears, I adopt a dimension-driven method within UGNX, where the gear geometry is controlled by expressions that link all critical dimensions. This enables rapid iteration and customization of straight spur gears without rebuilding the model from scratch.
To begin the parametric design of a straight spur gear, I first define the six fundamental parameters that govern its geometry. These parameters are the number of teeth \(z\), module \(m\), pressure angle \(\alpha_k\), addendum coefficient \(h_a\), top clearance coefficient \(c\), and gear thickness \(h\). In UGNX, all variables must be predefined using the expression tool, and expressions must be written in English using letters or alphanumeric combinations. The following table summarizes these basic parameters with their typical ranges and notations used in UGNX.
| Parameter | Symbol | Expression in UGNX | Typical Value / Range | Description |
|---|---|---|---|---|
| Number of teeth | $$z$$ | z | 10–200 | Integer; determines gear size and ratio |
| Module | $$m$$ | m | 1–50 mm | Standard module defines tooth size |
| Pressure angle | $$\alpha_k$$ | ak | 20° (common) | Angle at pitch circle, usually 20° |
| Addendum coefficient | $$h_a$$ | ha | 1.0 (standard) | Ratio of addendum to module |
| Clearance coefficient | $$c$$ | c | 0.25 (standard) | Ratio of clearance to module |
| Gear thickness | $$h$$ | h | 10–100 mm | Face width of the gear |
After assigning initial values to these parameters, I construct the reference curves of the straight spur gear. The following derived parameters are expressed in UGNX:
$$
d = m \times z \quad \text{(pitch circle diameter)}
$$
$$
d_a = d + 2 \times h_a \times m \quad \text{(addendum circle diameter)}
$$
$$
d_b = d \times \cos(\alpha_k) \quad \text{(base circle diameter)}
$$
$$
d_f = d – 2 \times m \times (h_a + c) \quad \text{(dedendum circle diameter)}
$$
These four diameters – pitch, addendum, base, and dedendum – are essential for defining the tooth profile. In UGNX, I use the Sketch tool to create four concentric circles on the XC-YC plane. Using the Dimensional Constraint function, I assign the diameters to the corresponding expression variables: db, d, df, and da. Then, I apply Geometric Constraints to ensure all circles share the same center. This step completes the basic reference geometry for the straight spur gear.
The most critical part of modeling a straight spur gear is generating the involute tooth profile. The involute curve is mathematically defined by parametric equations in Cartesian coordinates. In UGNX, I cannot draw an involute directly in the sketch environment; instead, I create it using the Law Curve function with the following equations:
$$
x_t = \frac{d_b}{2} \times (\cos(t) + t \times \sin(t))
$$
$$
y_t = \frac{d_b}{2} \times (\sin(t) – t \times \cos(t))
$$
$$
z_t = 0
$$
Here, \(t\) is a parameter that varies from 0 to a maximum value, typically \(\pi/2\) (about 1.57), which generates a sufficient portion of the involute. The variable \(t\) corresponds to the roll angle. The law curve is defined in UGNX using the Insert → Curve → Law Curve command, where I input these equations as expressions. It is important to note that the involute must be created before entering the sketch environment; otherwise, it will not be visible inside the sketch. Alternatively, I can insert the curve later and reorder it in the part navigator.
Depending on the number of teeth, the relationship between the base circle and the dedendum circle changes. When the tooth count \(z\) is less than 41, the base circle diameter is larger than the dedendum circle diameter. In this case, the addendum circle, involute, and dedendum circle do not form a closed loop, and the extrusion feature cannot be completed directly. Two methods can resolve this issue:
- Method 1: Create additional involute segments between the base circle and dedendum circle. This approach is complex and requires careful trimming. Additionally, fillet radii near the root are very close to the involute, making the process tedious.
- Method 2 (Recommended): Use a straight line tangent to the involute at its end point and extend it to the dedendum circle. This approximation introduces a negligible error in the tooth root geometry and is simple to implement. I adopt this method for all straight spur gears with \(z < 41\).
For \(z \geq 41\), the base circle lies inside the dedendum circle, and the addendum circle, involute, and dedendum circle naturally form a closed contour. In that case, no additional line is needed. The following table summarizes the two cases and the corresponding modeling strategy.
| Condition | Base vs Dedendum | Profile Closure | Modeling Approach |
|---|---|---|---|
| $$z < 41$$ | $$d_b > d_f$$ | Not closed (gap exists) | Add tangent line from involute endpoint to dedendum circle |
| $$z \ge 41$$ | $$d_b \le d_f$$ | Closed automatically | Use involute directly; trim as needed |
After defining the involute and the auxiliary line (if needed), I trim the curves using the Edit → Curve → Trim command in the modeling environment (outside the sketch). The sketch environment’s quick trim function does not work on law curves, and attempting to extract curves would break parametric associativity. Therefore, trimming must be performed in the model space to preserve the parametric integrity of the straight spur gear.
Once a single tooth profile is ready, I proceed to three-dimensional modeling. The steps are as follows:
- Create the gear blank: Enter the sketch on the XY plane, draw the addendum circle and the dedendum circle, and assign their diameters as da and df respectively. Extrude this sketch to form a solid cylinder of thickness \(h\). This is the gear blank.
- Generate one tooth or tooth space: Using the trimmed tooth profile (involute + tangent line + arcs), I create a second sketch containing the complete closed contour of a single tooth (or the tooth space). I extrude this profile to the same thickness \(h\).
- Boolean operation: If I extruded a tooth profile, I use Union to add it to the gear blank. If I extruded a tooth space (the gap between two teeth), I use Subtract to remove material from the blank. Either way, I obtain a single tooth on the cylinder.
- Pattern the teeth: Use the Insert → Associative Copy → Instance Feature command. Select the single tooth feature, choose Circular Array, and enter the number of instances equal to \(z\). Set the angle spacing to \(360/z\). The rotation axis is the Z-axis of the gear. After this, the entire straight spur gear is formed.
- Root fillet: Add fillets at the root of each tooth to reduce stress concentration. The standard fillet radius is \(R = 0.38 \times m\). It is crucial to perform the fillet operation after the pattern, because applying fillet to a single tooth before patterning would create multiple non-parametric fillet instances that cannot be updated together. By filleting one edge on the patterned gear, UGNX automatically applies the same fillet to all teeth, maintaining full parametric control.
The following table summarizes the key modeling steps and the corresponding UGNX commands used.
| Step | Action | UGNX Command / Tool | Parametric Consideration |
|---|---|---|---|
| 1 | Define basic parameters | Expression Editor (Tools → Expression) | All parameters must use English names |
| 2 | Create reference circles | Sketch → Basic Curves → Circle; Dimensional & Geometric Constraints | Assign diameters via expressions |
| 3 | Generate involute curve | Insert → Curve → Law Curve (By Equation) | Use parametric involute equations; create before sketch |
| 4 | Trim involute and auxiliary line | Edit → Curve → Trim (in model space) | Preserves parametric associativity |
| 5 | Extrude gear blank | Insert → Design Feature → Extrude | Use addendum/dedendum circles |
| 6 | Create single tooth profile | Sketch → Profile; Extrude | Closed contour from trimmed curves |
| 7 | Boolean add/subtract | Insert → Combine → Unite / Subtract | Add tooth to blank or subtract tooth space |
| 8 | Circular pattern | Insert → Associative Copy → Instance Feature → Circular Array | Number = z; angle = 360/z; axis = Z |
| 9 | Root fillet | Insert → Detail Features → Edge Blend | Perform after pattern; radius = 0.38*m |
An important parameterization aspect is the use of UGNX expressions to control the entire straight spur gear model. After the model is built, I can change any of the six basic parameters (z, m, ak, ha, c, h) and the gear regenerates automatically. There are several ways to modify parameters:
- Direct editing: Open the Expression Editor and modify values. The model updates automatically.
- Export/Import .epx file: Export expressions to a text file, edit the file in Notepad or any text editor, and import back into UGNX.
- Using spreadsheet: Link expressions to an Excel spreadsheet via UGNX’s Spreadsheet function. Change values in Excel and update the gear model.
- Part navigator: Right-click on expression nodes in the Part Navigator to change values directly.
The following table provides an example of how parameter changes affect the geometry. For instance, varying the number of teeth \(z\) while keeping module constant alters the gear diameter, tooth thickness, and overall appearance.
| Parameter | Initial Value | Changed Value | Effect on Model |
|---|---|---|---|
| z | 24 | 30 | Larger pitch diameter, more teeth, same module |
| m | 3 mm | 5 mm | Larger tooth size and overall dimensions |
| ak | 20° | 25° | Involute curvature changes; tooth shape becomes more pointed |
| ha | 1.0 | 0.8 | Reduced addendum; shorter tooth height |
| h | 20 mm | 30 mm | Thicker gear face width |
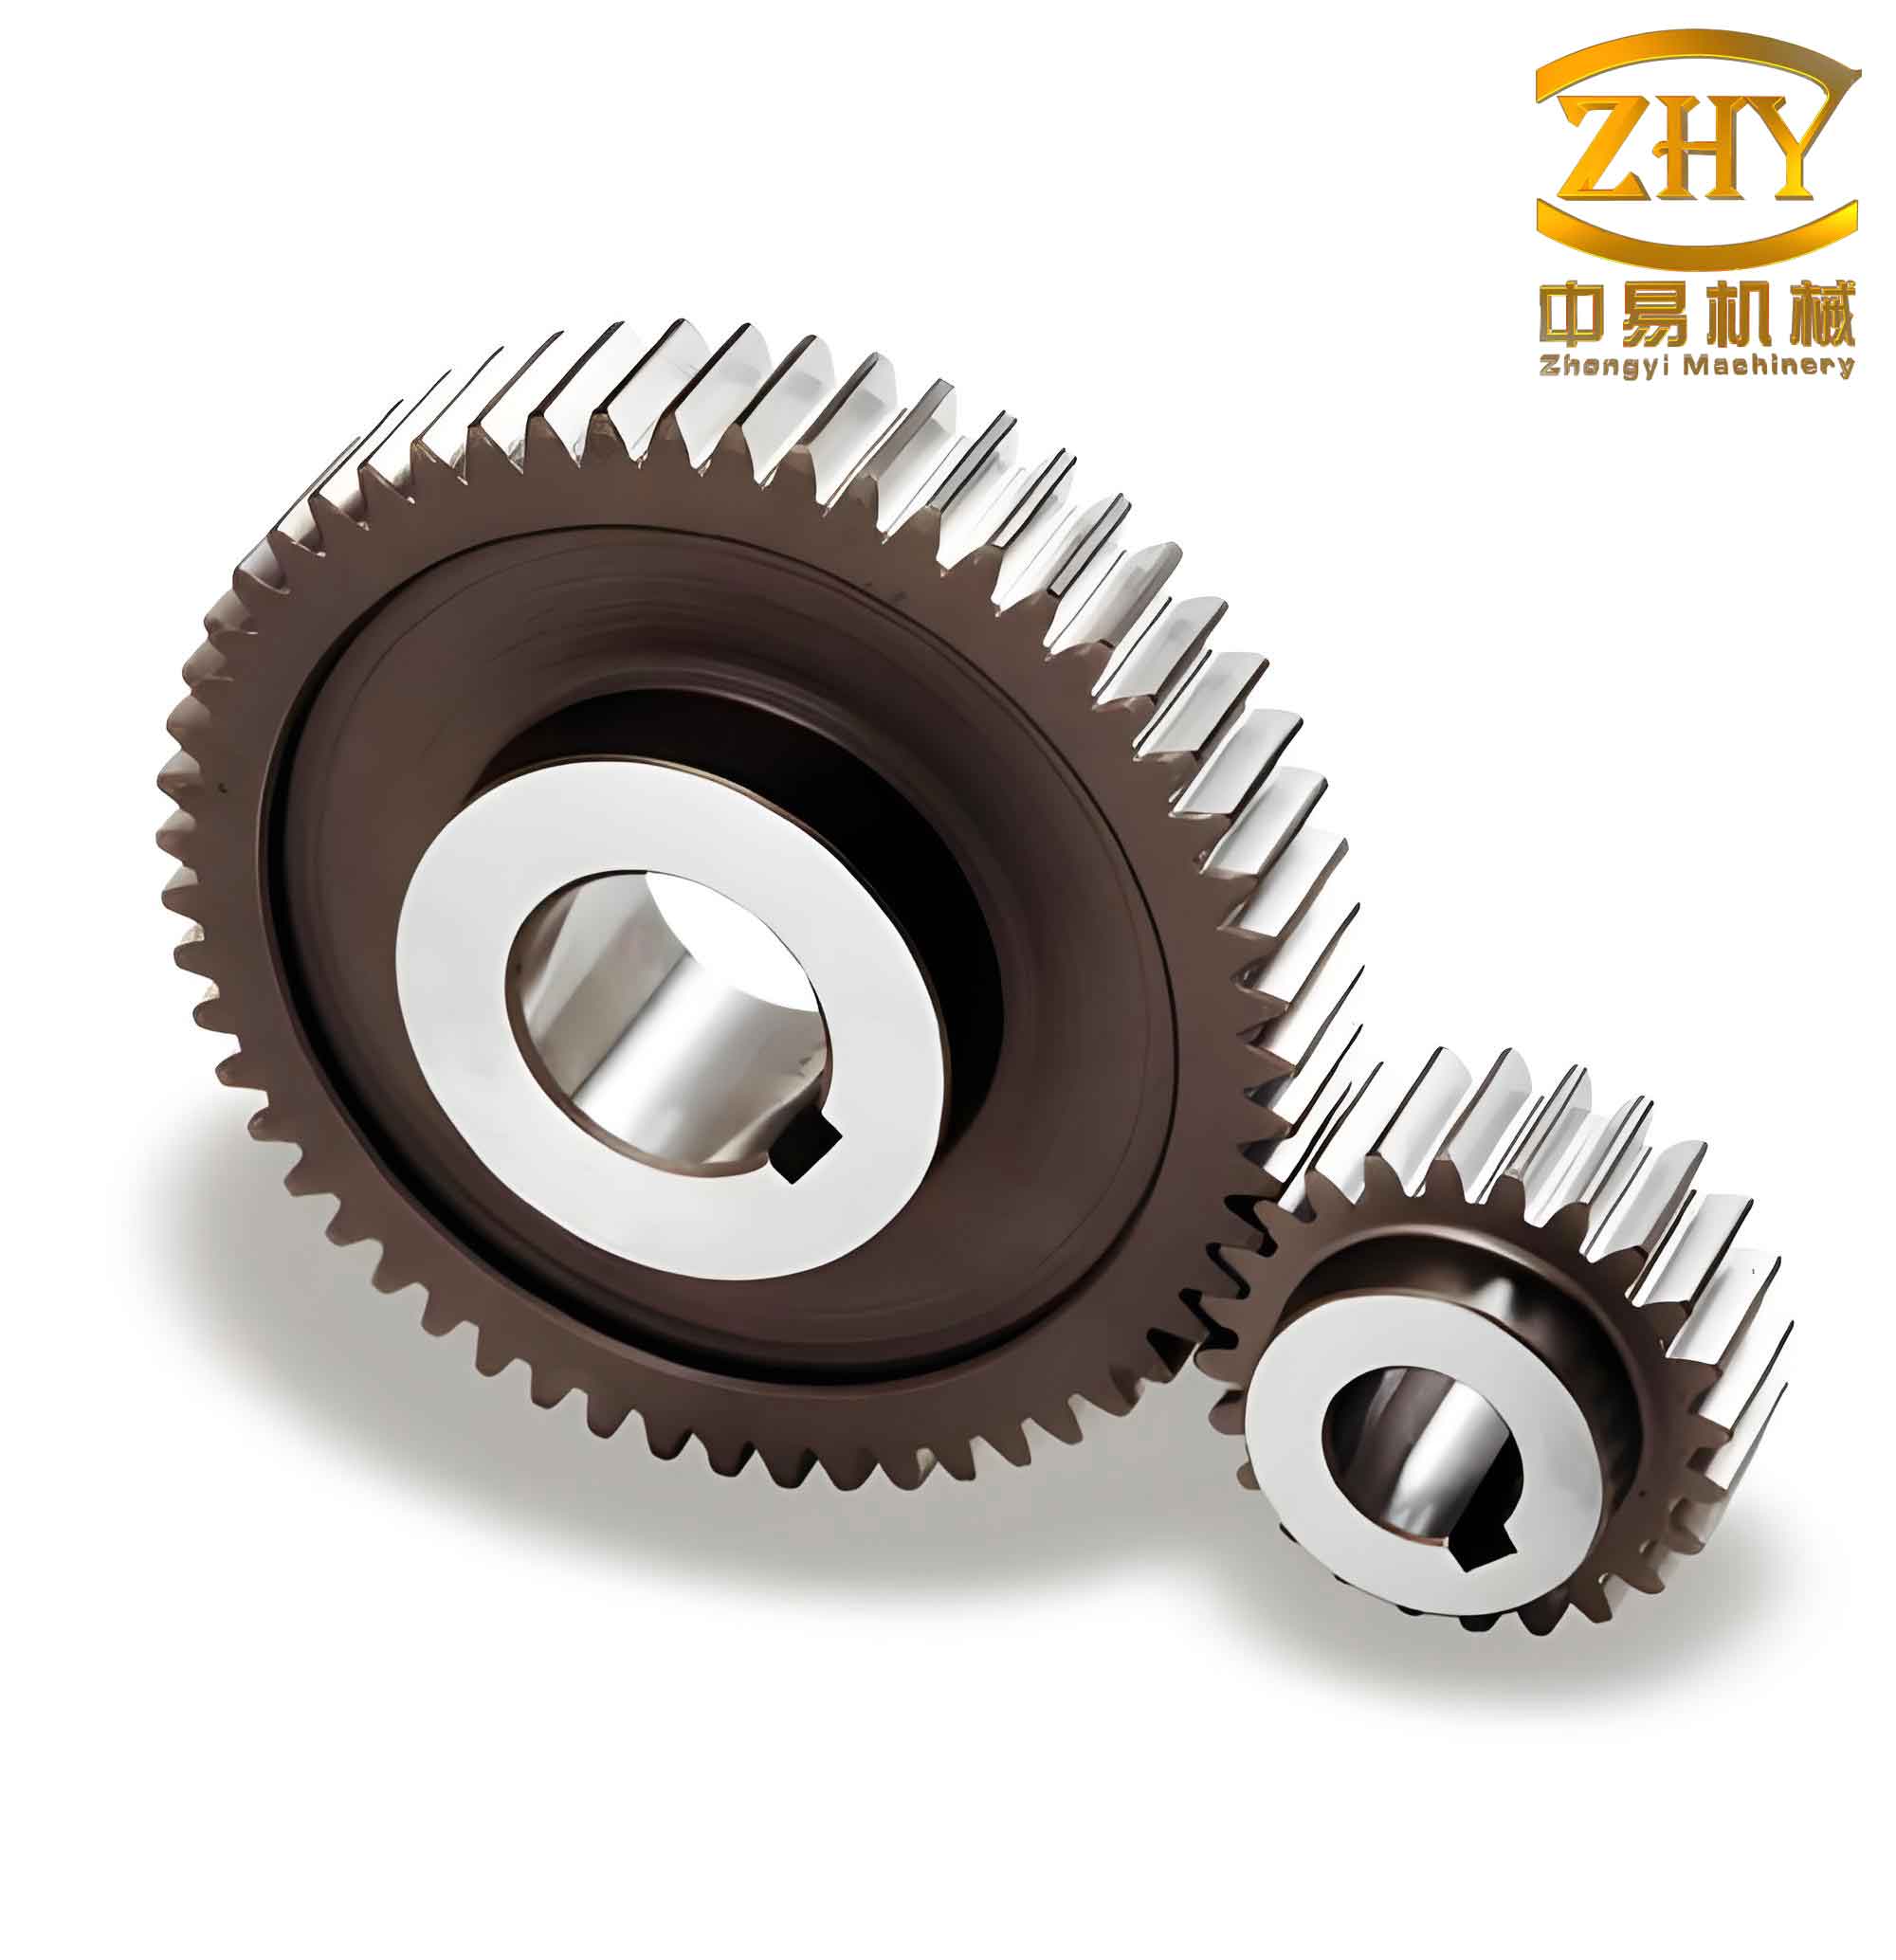
To illustrate the final appearance of a straight spur gear created by this parametric method, I include a representative image of the gear model. Note that the image shows a typical straight spur gear with involute teeth, modeled using the described approach.
Throughout the implementation, I encountered several critical issues that must be addressed to ensure robust parametric design of straight spur gears:
- Sequence of curve creation: The involute curve must be generated before entering the sketch environment. If inserted later, it will not be visible inside the sketch. This can be corrected by reordering the features in the Part Navigator.
- Fillet radius vs. teeth: The root fillet radius must be compatible with the module and tooth count. An excessively large fillet may fail to generate, especially for small teeth. The standard value \(R = 0.38m\) works for most cases.
- Fillet timing: Always apply the root fillet after the circular pattern. Otherwise, the fillet feature will not propagate parametrically, and updating parameters may cause errors.
- Expression consistency: All parameters must be in consistent units (typically mm for length, degrees for angles). Inconsistent units lead to expression errors when exporting or importing .epx files.
- Chinese characters in annotations: UGNX expression notes cannot contain Chinese characters directly. If needed, use .epx file import to include non-English annotations.
- Trimming invalidity: The sketch environment’s quick trim does not work on law curves. Always use the Edit → Curve → Trim command in model space to maintain parametric associations.
In conclusion, I have successfully demonstrated a fully parametric and precise modeling method for straight spur gears using UGNX. By leveraging the expression engine, law curves, and feature patterning, the entire gear geometry is driven by six basic parameters. This approach eliminates the need for manual redrawing and significantly reduces design time. The method is applicable to any number of teeth, whether below or above the 41-tooth threshold, with a simple adjustment of the root profile construction. The resulting model can be easily integrated into larger assemblies and optimized for manufacturing. Furthermore, the same technique can be extended to other types of involute gears, such as helical gears and bevel gears, by adding additional parameters and modifying the sketching procedure.
Through extensive testing, I confirm that the parametric model maintains its associativity when parameters are varied. The use of tables and formulas throughout this article summarizes the essential relationships, providing a clear reference for engineers who wish to implement similar parametric design workflows for straight spur gears. The combination of UGNX’s powerful expression-based modeling and the geometric theory of involute profiles yields a robust solution for modern gear design.