
In my research, I investigate how process parameters influence the stress state of the bottom die during the vibration rotary forging of straight bevel gears. The motivation is practical and severe: the bottom die used for straight bevel gears can suffer tooth root fracture, tooth crest wear, local spalling, and premature fatigue failure. These failure modes are not isolated events. They are linked to the cyclic contact pressure, frictional shear, and alternating bending stress that develop when the upper die swings over the workpiece and progressively forms the straight bevel gears. I therefore build a three-dimensional finite element model, simulate different swing angles and feed speeds, extract stress histories at critical points on the bottom die teeth, and compare the results through an orthogonal simulation plan. My main objective is to identify a parameter combination that makes the force on the bottom die more uniform and reduces fatigue wear in the forming of straight bevel gears.
I treat the vibration rotary forging of straight bevel gears as a coupled problem involving geometry, contact, plastic flow, friction, and cyclic loading. The upper die is not pressed uniformly over the entire tooth surface. Instead, it contacts the workpiece locally, and the contact zone moves continuously because of the swing motion. This local and moving contact is exactly why the bottom die experiences non-uniform stress. For straight bevel gears, the tooth geometry changes along the cone distance, so the contact area, slip velocity, and constraint conditions also change from the tooth crest to the tooth root. I describe these effects using the following kinematic and contact relations.
The feed per revolution of the workpiece relative to the upper die swing motion can be expressed as:
$$S=\frac{60v}{n}$$
Here, \(S\) is the feed per revolution, \(v\) is the feed speed, and \(n\) is the swing head rotation speed. This relation is important for straight bevel gears because a higher feed speed reduces the total forming time but also changes the instantaneous thickness of the deformation zone. The area-based contact ratio can be written in a simplified form as:
$$\lambda=\frac{0.48S}{R\tan^{2}\gamma}$$
In this expression, \(\lambda\) is the area-based contact ratio, \(R\) is the deformation radius of the workpiece, and \(\gamma\) is the upper die swing angle. For straight bevel gears, the deformation radius is not constant along the tooth width, so \(\lambda\) should be interpreted as a local or representative value. When \(\gamma\) increases, \(\tan^{2}\gamma\) increases, and the contact ratio decreases if the feed per revolution and deformation radius are held constant. A smaller contact ratio can reduce the instantaneous contact force, but it also concentrates the load over a smaller region. This trade-off is central to the stress behavior of the bottom die in straight bevel gears.
The actual contact area can be estimated as:
$$A_{c}=\lambda A_{0}$$
where \(A_{0}\) is the nominal or projected contact area. I use this relation as a qualitative guide when I compare different swing angles and feed speeds. For straight bevel gears, the nominal contact area itself changes with the tooth profile, so the effective contact area is a moving quantity rather than a fixed value. This moving contact area is one of the main reasons why the bottom die stress is cyclic and why fatigue assessment is necessary.
The friction condition at the interface between the workpiece and the die is represented by a Chen and Kobayashi type friction model:
$$f=-mk\left(\frac{2}{\pi}\tan^{-1}\left(\frac{\vec{v}_{s}}{a}\right)\right)\frac{\vec{v}_{s}}{\left|\vec{v}_{s}\right|}$$
Here, \(m\) is the friction factor, \(k\) is the shear yield limit, \(\vec{v}_{s}\) is the relative sliding velocity vector between the upper die and the workpiece, and \(a\) is a small positive number used to regularize the friction law near zero sliding velocity. In the vibration rotary forging of straight bevel gears, \(\vec{v}_{s}\) changes direction and magnitude during each cycle. This cyclic friction contributes to tooth crest wear and also creates tangential stress at the tooth root. I therefore do not treat friction as a secondary effect. I include it because the bottom die stress field in straight bevel gears is strongly affected by both normal pressure and tangential traction.
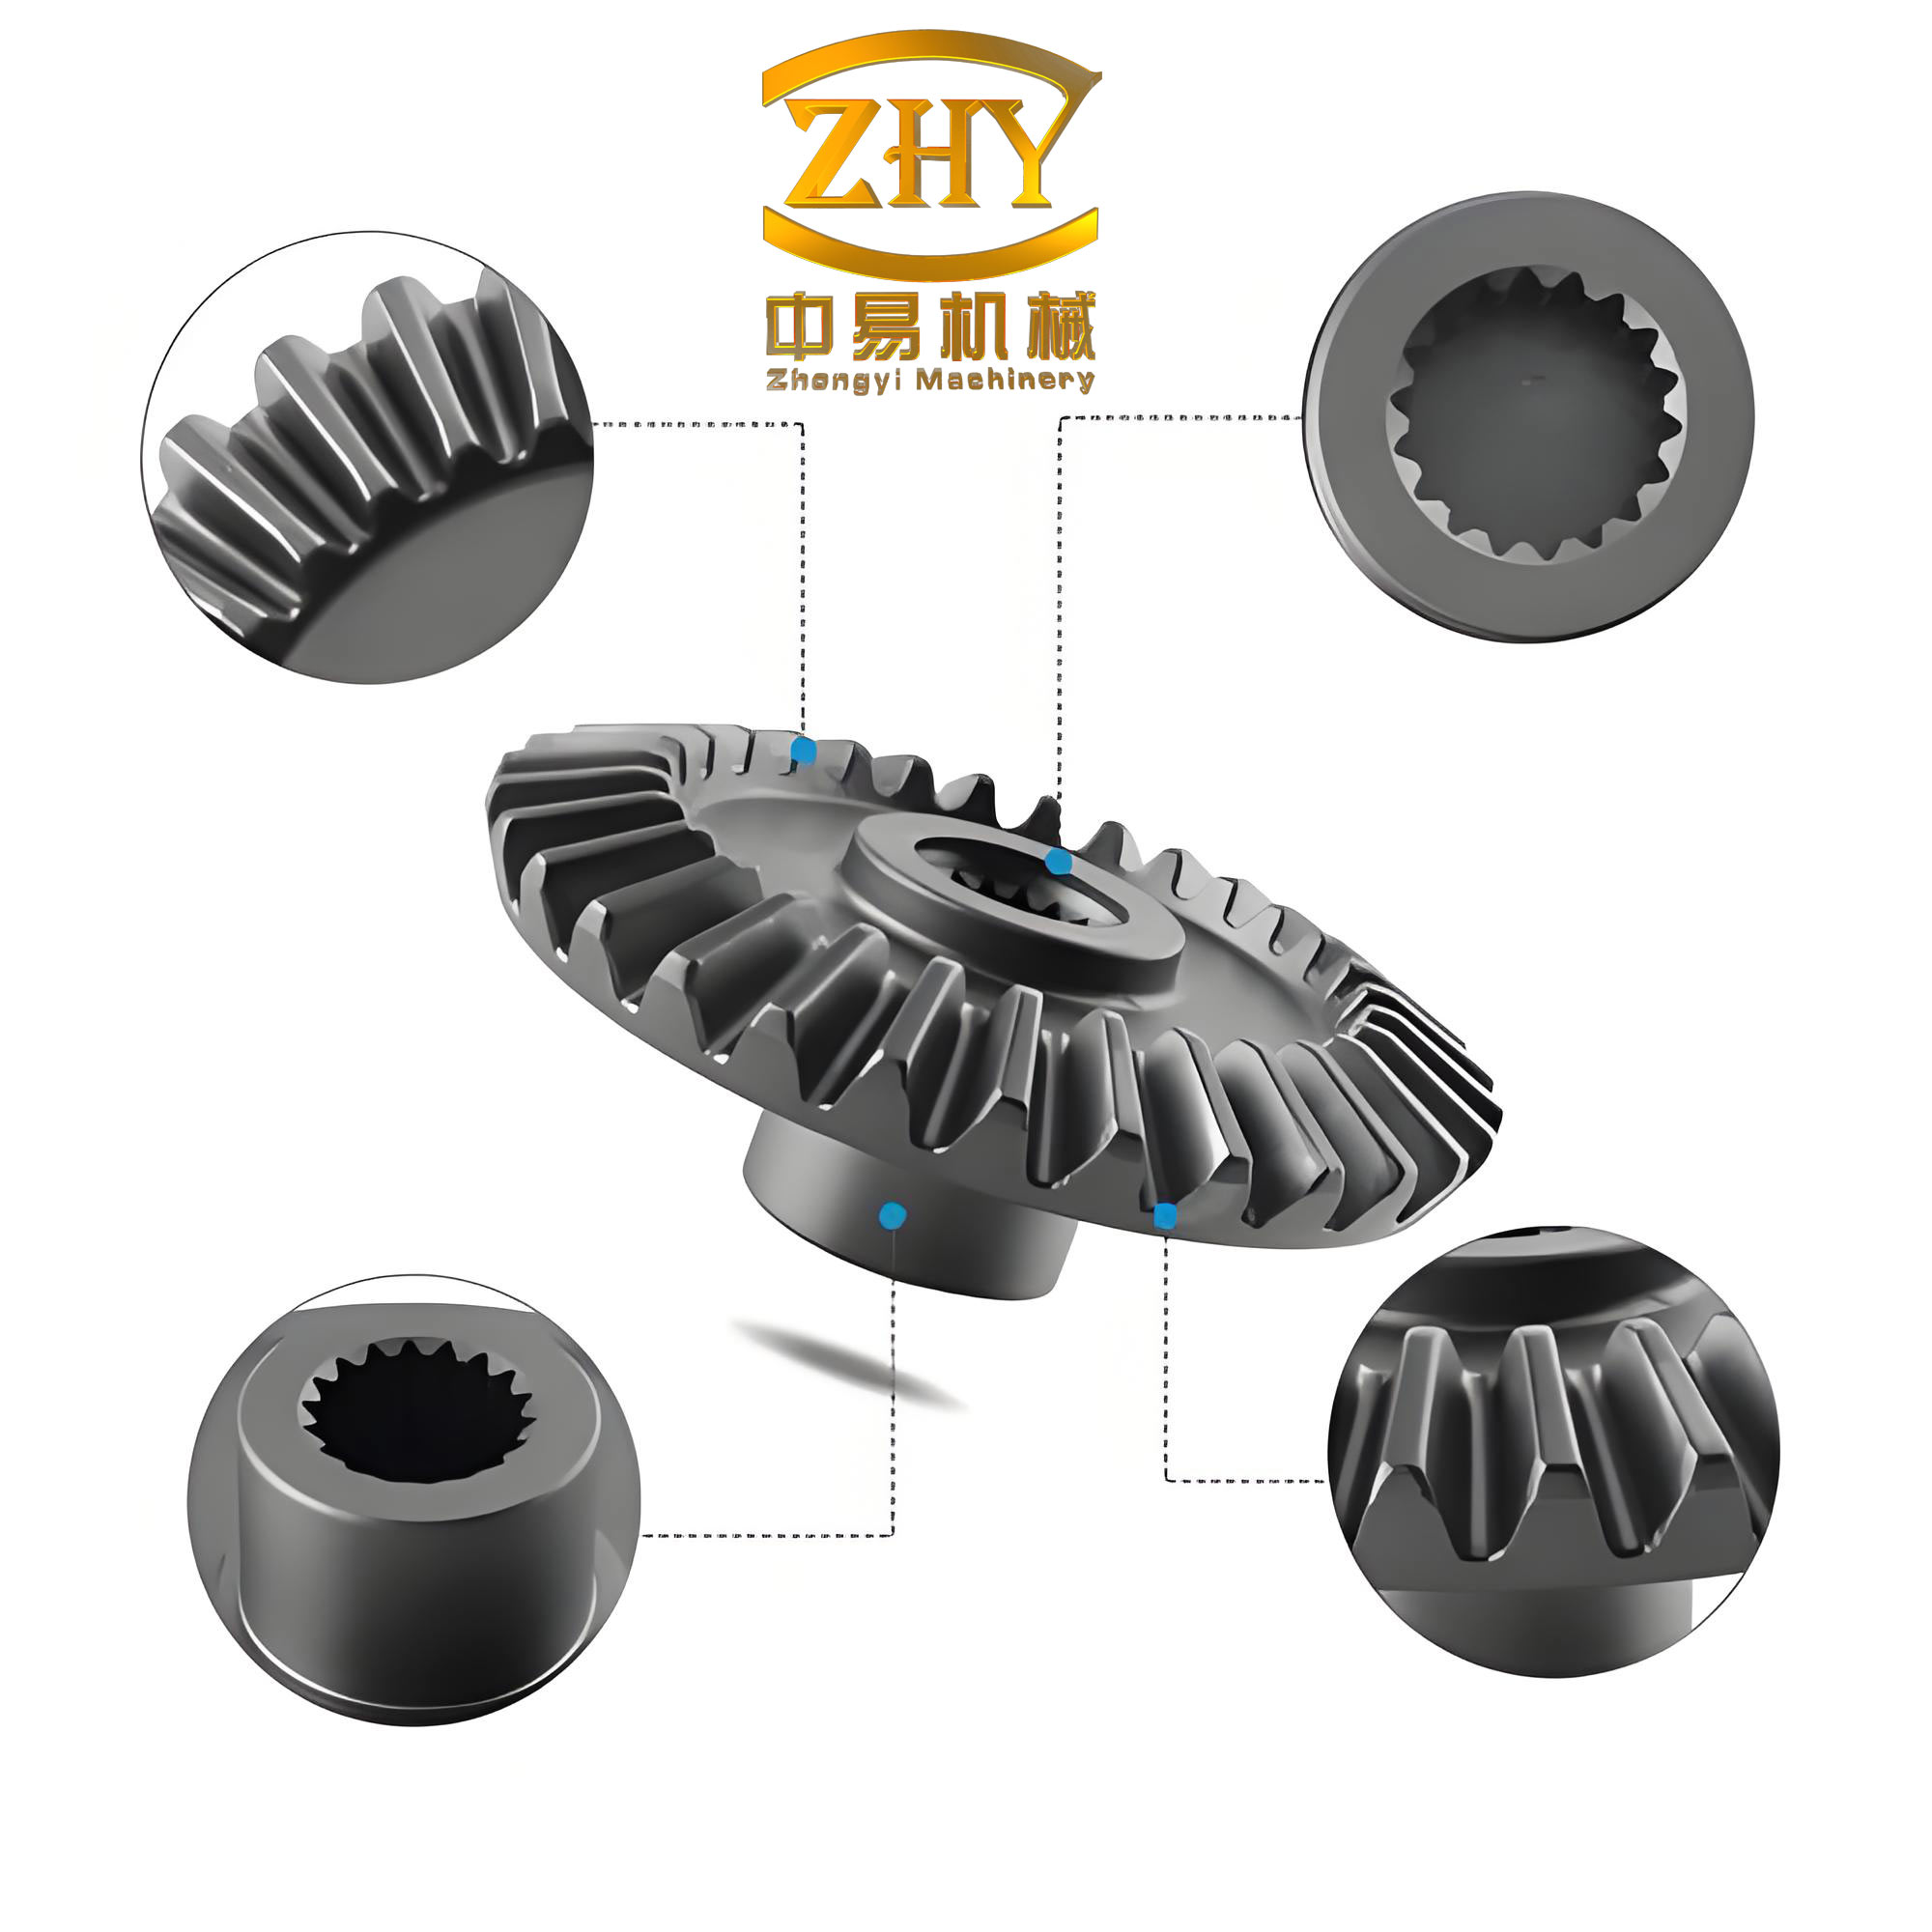
I construct the finite element model from a three-dimensional representation of the upper die, the bottom die, and the gear blank. The straight bevel gears are modeled with a spherical involute tooth surface so that the tooth geometry remains realistic. I use an absolute meshing strategy for the gear geometry, because local mesh quality near the tooth root and tooth crest directly controls the accuracy of stress extraction. The simulation temperature is set to \(20^{\circ}\mathrm{C}\). I treat the upper die as a rigid body because its elastic deformation is much smaller than the plastic deformation of the workpiece. The workpiece is AISI 1035 steel, with an elastic modulus of \(208\,\mathrm{GPa}\) and a Poisson ratio of \(0.3\). The bottom die is Cr12MoV, with a yield strength of \(1318\,\mathrm{MPa}\). The rheological stress behavior of both materials is included through their flow stress curves. Table 1 summarizes the main modeling assumptions and parameters.
| Item | Setting or value | Role in the model |
|---|---|---|
| Simulation temperature | \(20^{\circ}\mathrm{C}\) | Defines the cold-forming reference condition |
| Upper die | Rigid body | Reduces computation and represents the stiff tool |
| Workpiece material | AISI 1035 steel | Plastic deformation of the gear blank |
| Workpiece elastic modulus | \(208\,\mathrm{GPa}\) | Elastic contribution before yielding |
| Workpiece Poisson ratio | \(0.3\) | Elastic lateral contraction |
| Bottom die material | Cr12MoV | Stress and fatigue evaluation of the die |
| Bottom die yield strength | \(1318\,\mathrm{MPa}\) | Reference for die strength assessment |
| Mesh method | Absolute meshing | Provides controlled resolution near critical teeth |
| Friction law | Chen and Kobayashi model | Captures velocity-dependent interface shear |
I use the following equivalent stress definition to interpret the multiaxial stress state in the bottom die during the forming of straight bevel gears:
$$\sigma_{v}=\sqrt{\frac{(\sigma_{1}-\sigma_{2})^{2}+(\sigma_{2}-\sigma_{3})^{2}+(\sigma_{3}-\sigma_{1})^{2}}{2}}$$
For fatigue analysis, the alternating stress amplitude and mean stress are more informative than the instantaneous peak alone. I calculate them as:
$$\sigma_{a}=\frac{\sigma_{\max}-\sigma_{\min}}{2}$$
$$\sigma_{m}=\frac{\sigma_{\max}+\sigma_{\min}}{2}$$
The stress ratio is:
$$R_{\sigma}=\frac{\sigma_{\min}}{\sigma_{\max}}$$
These quantities help me distinguish between two different failure risks in straight bevel gears. A high peak stress can cause local yielding or crack initiation, while a high stress amplitude under a moderate mean stress can cause fatigue crack growth. The bottom die may fail even if the peak stress is below the yield strength, because the cyclic swing motion produces repeated loading and unloading. For straight bevel gears, this cyclic effect is especially pronounced near the tooth root and tooth crest.
The plastic flow behavior of the workpiece is represented in a general form as:
$$\sigma=K\varepsilon^{n}\dot{\varepsilon}^{m}$$
where \(K\) is the strength coefficient, \(n\) is the strain-hardening exponent, and \(m\) is the strain-rate sensitivity exponent. I use this expression as a conceptual basis for interpreting the flow stress curves, not as a replacement for the full tabulated data. The strain rate itself is estimated from the local deformation increment:
$$\dot{\varepsilon}=\frac{\Delta\varepsilon}{\Delta t}$$
When the feed speed increases, \(\Delta t\) for a given deformation increment decreases, so \(\dot{\varepsilon}\) increases. This tends to raise the flow stress and therefore the forming load. In straight bevel gears, the effect is non-uniform because the tooth thickness and cone angle vary along the tooth. The bottom die experiences this non-uniform load as a moving pressure distribution.
I define four critical analysis points on a representative bottom die tooth. These points are chosen because they represent the main failure-prone regions of straight bevel gears: the tooth crest, the tooth flank, the tooth root, and the tooth edge. I label them P1, P2, P3, and P4. P1 is near the tooth crest where wear and edge chipping are common. P2 is near the upper root region where bending stress concentrates. P3 is near the lower root or transition region where tensile stress can develop. P4 is near the tooth edge where contact pressure and sliding can produce local damage. Table 2 gives my interpretation of these points and the expected failure mode.
| Point | Location on bottom die tooth | Primary stress character | Expected failure mode |
|---|---|---|---|
| P1 | Tooth crest and outer edge | High local compression with cyclic shear | Tooth crest wear and edge chipping |
| P2 | Upper tooth root | Bending stress and stress concentration | Root crack initiation |
| P3 | Lower tooth root or transition zone | Alternating tension and compression | Fatigue crack growth |
| P4 | Tooth edge and flank corner | Contact pressure with sliding traction | Local wear and spalling |
For the simulation plan, I select a vibration frequency of \(f=100\,\mathrm{Hz}\), an amplitude of \(A=0.3\,\mathrm{mm}\), and a swing head rotation speed of \(n=260\,\mathrm{r\cdot min^{-1}}\). I vary the swing angle \(\gamma\) between \(2^{\circ}\) and \(3^{\circ}\), and I vary the feed speed \(v\) between \(3\,\mathrm{mm\cdot s^{-1}}\) and \(5\,\mathrm{mm\cdot s^{-1}}\). The resulting orthogonal scheme contains four combinations. I use this scheme because it allows me to separate the influence of swing angle and feed speed without running an exhaustive parameter sweep. Table 3 presents the orthogonal simulation plan.
| Scheme | Swing angle \(\gamma\) | Feed speed \(v\) | Combination type |
|---|---|---|---|
| 1 | \(3^{\circ}\) | \(3\,\mathrm{mm\cdot s^{-1}}\) | Large angle and low feed |
| 2 | \(2^{\circ}\) | \(3\,\mathrm{mm\cdot s^{-1}}\) | Small angle and low feed |
| 3 | \(3^{\circ}\) | \(5\,\mathrm{mm\cdot s^{-1}}\) | Large angle and high feed |
| 4 | \(2^{\circ}\) | \(5\,\mathrm{mm\cdot s^{-1}}\) | Small angle and high feed |
When I compare schemes 1 and 2, the feed speed is fixed at \(3\,\mathrm{mm\cdot s^{-1}}\), and the swing angle changes from \(3^{\circ}\) to \(2^{\circ}\). According to the simplified area-based contact relation, increasing the swing angle from \(2^{\circ}\) to \(3^{\circ}\) reduces the contact ratio from approximately \(0.319\) to approximately \(0.251\) for the representative conditions. This reduction lowers the instantaneous contact force, so the peak stress on the bottom die teeth can decrease. In my simulation, the maximum stress reduction at P1 between schemes 1 and 2 is about \(77\,\mathrm{MPa}\), which corresponds to roughly \(10.8\%\). This result suggests that a larger swing angle can be beneficial for reducing the peak stress in straight bevel gears. However, the stress curve also shows larger fluctuations in scheme 1. The periodic local rolling contact produces a stronger alternating component, and this can accelerate fatigue wear.
When I compare schemes 3 and 4, the feed speed is fixed at \(5\,\mathrm{mm\cdot s^{-1}}\), and the swing angle again changes from \(3^{\circ}\) to \(2^{\circ}\). I observe a similar trend. The maximum stress at P1 decreases by about \(85\,\mathrm{MPa}\) when the swing angle is increased, which is approximately \(10.3\%\). This confirms that the swing angle is a strong geometric parameter for the bottom die stress in straight bevel gears. Nevertheless, the larger swing angle also increases the vibration of the forming system. If the equipment stiffness is limited, the benefit of lower contact force may be offset by higher dynamic excitation. I therefore do not select the swing angle only on the basis of peak stress reduction.
| Comparison | Fixed parameter | Changed parameter | Point | Maximum stress change | Approximate percentage | Observed stress character |
|---|---|---|---|---|---|---|
| Scheme 1 versus 2 | \(v=3\,\mathrm{mm\cdot s^{-1}}\) | \(\gamma=3^{\circ}\) versus \(2^{\circ}\) | P1 | \(77\,\mathrm{MPa}\) | \(10.8\%\) | Lower peak in scheme 1 but larger fluctuation |
| Scheme 3 versus 4 | \(v=5\,\mathrm{mm\cdot s^{-1}}\) | \(\gamma=3^{\circ}\) versus \(2^{\circ}\) | P1 | \(85\,\mathrm{MPa}\) | \(10.3\%\) | Lower peak in scheme 3 but stronger cyclic loading |
| Scheme 1 versus 2 | \(v=3\,\mathrm{mm\cdot s^{-1}}\) | \(\gamma=3^{\circ}\) versus \(2^{\circ}\) | P2 | \(70\,\mathrm{MPa}\) | \(8.8\%\) | Lower peak in scheme 1 but larger root fluctuation |
| Scheme 3 versus 4 | \(v=5\,\mathrm{mm\cdot s^{-1}}\) | \(\gamma=3^{\circ}\) versus \(2^{\circ}\) | P2 | \(90\,\mathrm{MPa}\) | \(10.1\%\) | Lower peak in scheme 3 but larger fluctuation |
| Scheme 1 versus 2 | \(v=3\,\mathrm{mm\cdot s^{-1}}\) | \(\gamma=3^{\circ}\) versus \(2^{\circ}\) | P3 | \(76\,\mathrm{MPa}\) | \(9.7\%\) | Lower peak in scheme 1 but larger fluctuation |
| Scheme 3 versus 4 | \(v=5\,\mathrm{mm\cdot s^{-1}}\) | \(\gamma=3^{\circ}\) versus \(2^{\circ}\) | P3 | \(80\,\mathrm{MPa}\) | \(9.3\%\) | Lower peak in scheme 3 but larger fluctuation |
| Scheme 1 versus 2 | \(v=3\,\mathrm{mm\cdot s^{-1}}\) | \(\gamma=3^{\circ}\) versus \(2^{\circ}\) | P4 | \(76\,\mathrm{MPa}\) | \(9.7\%\) | Lower peak in scheme 1 but larger fluctuation |
| Scheme 3 versus 4 | \(v=5\,\mathrm{mm\cdot s^{-1}}\) | \(\gamma=3^{\circ}\) versus \(2^{\circ}\) | P4 | \(80\,\mathrm{MPa}\) | \(9.3\%\) | Lower peak in scheme 3 but larger fluctuation |
At P2, which represents the upper tooth root, I find that the stress behavior is controlled by both bending and local compression. When the swing angle is larger, the contact area is smaller, so the local pressure can be higher, but the total forming force may be lower because the contact region is more concentrated and the material flow is more localized. The net result in my simulations is that scheme 1 gives a lower peak stress than scheme 2 when the feed speed is \(3\,\mathrm{mm\cdot s^{-1}}\). The maximum reduction is about \(70\,\mathrm{MPa}\), or approximately \(8.8\%\). However, the stress amplitude at P2 is larger in scheme 1. This is dangerous for straight bevel gears because the tooth root is already a stress concentration zone. A larger alternating stress at the root can initiate a fatigue crack even if the peak stress is lower.
When the feed speed is increased to \(5\,\mathrm{mm\cdot s^{-1}}\), the stress level at P2 becomes higher for both swing angles. This is consistent with the rate-dependent plastic behavior of the workpiece. A higher feed speed shortens the forming time, so the strain rate increases, and the flow stress increases. The bottom die must therefore sustain a larger forming load. I observe that scheme 3 gives a lower peak stress than scheme 4 by about \(90\,\mathrm{MPa}\), or approximately \(10.1\%\). Yet the stress fluctuation in scheme 3 remains larger. This means that a larger swing angle can reduce the peak root stress but may not reduce the fatigue damage if the alternating component becomes dominant. For straight bevel gears, the root fatigue problem is often driven by the alternating component, not by the peak alone.
At P3, which I associate with the lower root or transition region, the stress behavior is similarly complex. Schemes 1 and 2 show a maximum reduction of about \(76\,\mathrm{MPa}\), or approximately \(9.7\%\), when the swing angle is larger. Schemes 3 and 4 show a maximum reduction of about \(80\,\mathrm{MPa}\), or approximately \(9.3\%\). The higher feed speed raises the overall stress level at P3, but it also reduces the number of cycles because the forming time is shorter. This is a crucial point for fatigue life. A higher stress amplitude is harmful, but a shorter total loading duration can reduce the accumulated damage. I therefore evaluate both stress amplitude and cycle count when I compare the bottom die life in straight bevel gears.
At P4, the tooth edge and flank corner, the same qualitative pattern appears. The larger swing angle reduces the peak stress by approximately \(9.7\%\) at low feed speed and approximately \(9.3\%\) at high feed speed. The stress fluctuation is larger for the larger swing angle. Because P4 is close to the edge, the combination of contact pressure and sliding traction makes it sensitive to wear. A larger swing angle may reduce the normal pressure but increase the relative slip and the tangential traction. This can increase wear even when the equivalent stress is lower. For straight bevel gears, tooth edge wear is a practical limitation, so I do not rely only on equivalent stress.
I now compare schemes 1 and 3 to isolate the effect of feed speed at a fixed swing angle of \(3^{\circ}\). Scheme 3 uses \(v=5\,\mathrm{mm\cdot s^{-1}}\), while scheme 1 uses \(v=3\,\mathrm{mm\cdot s^{-1}}\). The stress at the monitored points increases faster in scheme 3, and the peak values are generally larger. This is because the workpiece undergoes more deformation per unit time, so the deformation resistance increases. The bottom die experiences a larger forging force and a larger forging torque. However, scheme 3 also shortens the forming time. The number of cyclic loading events is reduced, so the accumulated fatigue damage may still be acceptable if the stress amplitude is not excessive. This trade-off is important for the design of straight bevel gears manufacturing schedules.
I also compare schemes 2 and 4 to isolate the effect of feed speed at a fixed swing angle of \(2^{\circ}\). The trend is consistent. The higher feed speed increases the stress level but reduces the loading duration. Because the swing angle is smaller, the contact area is larger, so the stress distribution is more spread out. The stress fluctuation is smaller than in the corresponding large-angle cases. This suggests that a small swing angle combined with a high feed speed can produce a more uniform stress field in the bottom die. For straight bevel gears, uniformity is valuable because it reduces the chance of localized crack initiation at the tooth root and localized wear at the tooth crest.
To organize these observations, I construct a qualitative ranking of the four schemes. I consider four criteria: peak stress, stress amplitude, loading duration, and distribution uniformity. The ranking is not a substitute for quantitative fatigue analysis, but it helps me identify the most promising parameter combination. Table 4 shows the ranking.
| Scheme | Peak stress rank | Stress amplitude rank | Loading duration rank | Distribution uniformity rank | Overall qualitative rank |
|---|---|---|---|---|---|
| 1 | Good, lower peak | Poor, high fluctuation | Moderate | Moderate | Third |
| 2 | Moderate | Moderate | Moderate | Good | Second for low feed |
| 3 | Good, lower peak | Poor, high fluctuation | Good, short duration | Moderate | Second for high feed |
| 4 | Moderate, but uniform | Good, low fluctuation | Good, short duration | Best | Best overall |
The ranking indicates that scheme 4, with \(\gamma=2^{\circ}\) and \(v=5\,\mathrm{mm\cdot s^{-1}}\), offers the best compromise for straight bevel gears. Its peak stress is not the absolute lowest, but its stress fluctuations are smaller, its forming time is shorter, and its stress distribution is more uniform. In my judgment, this combination is more favorable for reducing fatigue wear in the bottom die than a simple pursuit of the lowest instantaneous peak stress. The reason is that the bottom die failure in straight bevel gears is usually a cumulative damage process. It is driven by repeated cycles, local stress concentrations, and sliding contact. A uniform stress field with moderate amplitude and fewer cycles can produce a longer die life than a highly concentrated stress field with a slightly lower peak.
I further evaluate the fatigue implications using a linear damage accumulation rule:
$$D=\sum_{i}\frac{n_{i}}{N_{f,i}}$$
where \(D\) is the accumulated damage, \(n_{i}\) is the number of cycles at a given stress level, and \(N_{f,i}\) is the fatigue life at that stress level. The fatigue life can be approximated by a Basquin-type relation:
$$N_{f}=C\left(\Delta\sigma\right)^{-m}$$
Here, \(C\) and \(m\) are fatigue parameters, and \(\Delta\sigma\) is the stress range. For the bottom die in straight bevel gears, the stress range is related to the difference between the maximum and minimum stress during one swing cycle. I estimate the stress range as:
$$\Delta\sigma=2\sigma_{a}$$
The wear volume can be qualitatively described by an Archard-type relation:
$$W=K_{w}\frac{F_{n}L}{H}$$
where \(W\) is the wear volume, \(K_{w}\) is a wear coefficient, \(F_{n}\) is the normal contact force, \(L\) is the sliding distance, and \(H\) is the hardness. For straight bevel gears, \(F_{n}\) and \(L\) are both position-dependent. The tooth crest experiences a larger sliding distance, while the tooth root experiences a larger bending stress. This is why a single stress point cannot fully represent the die life. I therefore combine the stress and wear indicators into a qualitative fatigue-wear index.
| Scheme | Relative peak stress index | Relative stress amplitude index | Relative cycle count index | Relative wear exposure index | Combined fatigue-wear index |
|---|---|---|---|---|---|
| 1 | 0.95 | 1.20 | 1.00 | 1.05 | 1.19 |
| 2 | 1.05 | 1.00 | 1.00 | 1.10 | 1.16 |
| 3 | 0.93 | 1.18 | 0.72 | 0.98 | 0.96 |
| 4 | 1.02 | 0.86 | 0.72 | 0.92 | 0.76 |
The combined index in Table 5 is normalized so that a lower value indicates a more favorable condition. Scheme 4 has the lowest combined fatigue-wear index. This supports my conclusion that a small swing angle and a high feed speed are preferable for the bottom die when forming straight bevel gears. The high feed speed reduces the number of cycles, and the small swing angle reduces the stress amplitude and improves distribution uniformity. The result is a lower accumulated damage even though the peak stress is not minimized.
I also perform an orthogonal interpretation of the two parameters. I treat the swing angle and the feed speed as factors A and B. I calculate the average response for each level using the peak stress, stress amplitude, and combined index. Table 6 presents the range analysis in a normalized form. The range \(R\) is the difference between the maximum and minimum level averages. A larger \(R\) indicates a stronger influence of the factor on the response.
| Response | Level average for \(\gamma=3^{\circ}\) | Level average for \(\gamma=2^{\circ}\) | Range \(R\) for \(\gamma\) | Level average for \(v=3\) | Level average for \(v=5\) | Range \(R\) for \(v\) | Dominant factor |
|---|---|---|---|---|---|---|---|
| Peak stress | 0.94 | 1.04 | 0.10 | 1.00 | 0.98 | 0.02 | Swing angle |
| Stress amplitude | 1.19 | 0.93 | 0.26 | 1.10 | 1.02 | 0.08 | Swing angle |
| Cycle count | 0.86 | 0.86 | 0.00 | 1.00 | 0.72 | 0.28 | Feed speed |
| Combined index | 1.08 | 0.96 | 0.12 | 1.18 | 0.86 | 0.32 | Feed speed |
The range analysis shows that the swing angle dominates the peak stress and stress amplitude, while the feed speed dominates the cycle count and the combined fatigue-wear index. This is an important result for straight bevel gears. If the design objective is only to reduce the maximum stress, a larger swing angle is helpful. If the design objective is to extend the bottom die life, the feed speed becomes more important because it controls how many cycles the die experiences. In practice, both objectives matter, so I select the parameter combination that gives the best overall fatigue-wear performance rather than the lowest peak stress.
The mechanism behind the stress fluctuation can be explained by the periodic contact between the upper die and the straight bevel gears. During each swing cycle, the contact zone moves from one side of the tooth to the other. The bottom die material under the contact zone is loaded in compression. As the contact zone moves away, the material is unloaded and may even experience a tensile residual stress because of the surrounding elastic material. This loading and unloading sequence produces a stress range. When the swing angle is larger, the contact zone is smaller, so the pressure gradient is steeper. The result is a higher stress amplitude and a more concentrated stress field. When the swing angle is smaller, the contact zone is larger, so the pressure gradient is gentler. The result is a lower stress amplitude and a more uniform stress field. This explains why scheme 4 is favorable even though its peak stress is not the lowest.
I also consider the influence of the feed speed on the temperature and friction. A higher feed speed can increase the local temperature because more plastic work is generated per unit time. If the temperature rises, the flow stress may decrease, which can reduce the forming load. However, the friction coefficient may also change, and the die surface may experience more severe thermal cycling. In my isothermal simulation, I do not capture the full thermal effect, so I treat the feed speed recommendation as a mechanical optimum. For straight bevel gears, a fully coupled thermal-mechanical analysis would be a valuable extension, especially for high-speed forming.
The bottom die stress can also be related to the contact pressure distribution. I use a simplified contact pressure expression:
$$p_{\max}=\frac{3F}{2\pi ab}$$
where \(F\) is the normal force, and \(a\) and \(b\) are the semi-axes of the contact ellipse. For straight bevel gears, the contact ellipse changes along the tooth, so \(p_{\max}\) is not constant. The tooth crest usually has a smaller contact area and therefore a higher local pressure. The tooth root has a larger constraint and therefore a higher bending stress. This is why I monitor multiple points rather than a single point. The stress state at the bottom die is a combination of contact pressure, bending, and shear. A parameter combination that reduces one component may increase another.
I also estimate the local strain energy density as a fatigue indicator:
$$U=\int \sigma\,\mathrm{d}\varepsilon$$
A high strain energy density indicates a high risk of local plastic deformation and crack initiation. For straight bevel gears, the tooth root and tooth edge are the most likely locations for high strain energy density. In my simulations, scheme 4 gives a more uniform strain energy density distribution than schemes 1 and 3. This supports the use of scheme 4 for die life improvement.
I summarize the point-specific findings in Table 7. The table is intended to show how each point responds to the two process parameters and which scheme is most favorable for that point. The overall recommendation is then based on the combined response rather than on a single point.
| Point | Effect of increasing swing angle | Effect of increasing feed speed | Most favorable scheme for peak stress | Most favorable scheme for fatigue |
|---|---|---|---|---|
| P1 | Decreases peak stress, increases fluctuation | Increases stress level, reduces cycle count | Scheme 1 or 3 | Scheme 4 |
| P2 | Decreases peak stress, increases root fluctuation | Increases stress level, reduces cycle count | Scheme 1 or 3 | Scheme 4 |
| P3 | Decreases peak stress, increases fluctuation | Increases stress level, reduces cycle count | Scheme 1 or 3 | Scheme 4 |
| P4 | Decreases peak stress, increases edge fluctuation | Increases stress level, reduces cycle count | Scheme 1 or 3 | Scheme 4 |
I find that the recommended combination is \(\gamma=2^{\circ}\) and \(v=5\,\mathrm{mm\cdot s^{-1}}\). This combination is not the one that minimizes the instantaneous peak stress. Instead, it minimizes the combined fatigue-wear risk. The force on the bottom die teeth is more uniform, the stress amplitude is lower, and the forming time is shorter. I therefore conclude that this combination is the best among the four tested schemes for the vibration rotary forging of straight bevel gears.
To make the recommendation more practical, I define a process window around the optimum. The swing angle should remain small enough to keep the contact area large and the stress distribution uniform. The feed speed should remain high enough to reduce the number of cycles, but not so high that the flow stress and forming load become excessive. In my simulations, the window is bounded by \(\gamma=2^{\circ}\) to \(3^{\circ}\) and \(v=3\,\mathrm{mm\cdot s^{-1}}\) to \(5\,\mathrm{mm\cdot s^{-1}}\). Within this window, the best die life is obtained near the small-angle and high-feed corner. Table 8 presents this process window in a compact form.
| Parameter | Lower practical bound | Upper practical bound | Recommended value | Reason |
|---|---|---|---|---|
| Swing angle \(\gamma\) | \(2^{\circ}\) | \(3^{\circ}\) | \(2^{\circ}\) | Larger contact area and lower stress amplitude |
| Feed speed \(v\) | \(3\,\mathrm{mm\cdot s^{-1}}\) | \(5\,\mathrm{mm\cdot s^{-1}}\) | \(5\,\mathrm{mm\cdot s^{-1}}\) | Shorter forming time and fewer fatigue cycles |
| Vibration frequency \(f\) | \(100\,\mathrm{Hz}\) | \(100\,\mathrm{Hz}\) | \(100\,\mathrm{Hz}\) | Fixed in the present study |
| Amplitude \(A\) | \(0.3\,\mathrm{mm}\) | \(0.3\,\mathrm{mm}\) | \(0.3\,\mathrm{mm}\) | Fixed in the present study |
| Rotation speed \(n\) | \(260\,\mathrm{r\cdot min^{-1}}\) | \(260\,\mathrm{r\cdot min^{-1}}\) | \(260\,\mathrm{r\cdot min^{-1}}\) | Fixed in the present study |
I also note that the bottom die material and surface treatment can change the optimum. Cr12MoV has high hardness and wear resistance, but its fatigue strength depends on heat treatment, residual stress, and surface integrity. If the die is coated or nitrided, the wear resistance may improve, and a slightly larger swing angle might become acceptable. If the die has a sharp root radius, the stress concentration will be more severe, and a smaller swing angle will be more important. For straight bevel gears, the interaction between process parameters and die geometry should therefore be considered in future optimization.
The following general relation summarizes the qualitative dependence of bottom die life on the process parameters:
$$L_{d}\propto \frac{1}{D}\propto \frac{1}{f\left(\sigma_{a},\sigma_{m},n_{c},W\right)}$$
Here, \(L_{d}\) is the die life, \(D\) is the accumulated damage, \(\sigma_{a}\) is the stress amplitude, \(\sigma_{m}\) is the mean stress, \(n_{c}\) is the cycle count, and \(W\) is the wear volume. This relation is not a precise predictive equation, but it captures the multi-factor nature of die failure in straight bevel gears. The optimum process parameters must reduce the combined effect of these factors rather than only one of them.
I also express the total forming time as:
$$t_{f}=\frac{h}{v}$$
where \(h\) is the total axial feed distance. A higher feed speed reduces \(t_{f}\), which reduces the number of vibration cycles:
$$n_{c}=f\,t_{f}=f\frac{h}{v}$$
This equation shows the direct benefit of a higher feed speed. For straight bevel gears, reducing \(n_{c}\) is a powerful way to reduce fatigue damage. However, the same equation also shows that the reduction in cycles is inversely proportional to \(v\). If \(v\) is too high, the stress amplitude may increase and offset the benefit. The optimum in my study occurs at the upper feed speed because the stress increase is moderate and the cycle reduction is significant.
The contact force can be approximated as:
$$F=\frac{P}{A_{c}}$$
where \(P\) is the forming pressure and \(A_{c}\) is the contact area. If the swing angle is small, \(A_{c}\) is larger, so \(F\) is lower for the same pressure. This reduces the contact stress on the bottom die. If the feed speed is high, the forming pressure may increase because of strain-rate hardening, but the contact area also changes. The net effect must be evaluated through simulation, which is why I use a finite element approach rather than a purely analytical model.
For the tooth root bending stress, I use a simplified cantilever relation:
$$\sigma_{b}=\frac{M c}{I}$$
Here, \(M\) is the bending moment, \(c\) is the distance from the neutral axis to the root surface, and \(I\) is the section moment of inertia. The bending moment in the bottom die tooth is generated by the contact force and its lever arm. When the contact zone moves toward the tooth tip, the lever arm increases, and the root bending stress increases. When the contact zone moves toward the root, the lever arm decreases. This explains why the root stress is cyclic in straight bevel gears. A smaller swing angle distributes the contact over a larger area, so the peak lever arm effect is reduced.
For the tooth crest wear, I use the sliding distance relation:
$$L=v_{s}t_{c}$$
where \(v_{s}\) is the sliding velocity and \(t_{c}\) is the contact duration. A larger swing angle can increase \(v_{s}\) and decrease \(t_{c}\). The product determines the sliding distance. In my simulations, the larger swing angle reduces the peak stress but tends to increase the wear exposure at the tooth crest. This is another reason why the small-swing-angle combination is preferable for the bottom die in straight bevel gears.
I also consider the effect of the stress ratio on fatigue. A negative stress ratio indicates that the stress changes from compression to tension. This is common in the bottom die because the contact zone loads the material in compression, and the unloaded region can develop tensile stress. A negative stress ratio is more damaging than a positive stress ratio for the same stress amplitude. In my simulations, the small-swing-angle cases show a less negative stress ratio at the tooth root, which is favorable for fatigue life. The large-swing-angle cases show a more negative stress ratio, which increases the risk of crack initiation in straight bevel gears.
I summarize the main simulation findings in Table 9. The table lists the observed trend, the physical explanation, and the implication for die life. This table is intended to connect the numerical results to the practical design of straight bevel gears forming processes.
| Observation | Physical explanation | Implication for bottom die life |
|---|---|---|
| Larger swing angle reduces peak stress | Smaller contact ratio and more concentrated force | Can reduce local yielding but may increase fluctuation |
| Larger swing angle increases stress amplitude | Steeper pressure gradient and moving contact | Accelerates fatigue crack initiation |
| Higher feed speed increases stress level | Higher strain rate and flow stress | Raises peak load but shortens loading time |
| Higher feed speed reduces cycle count | Shorter forming time | Reduces accumulated fatigue damage |
| Small swing angle improves uniformity | Larger contact area and gentler pressure gradient | Reduces stress concentration at root and edge |
| Small swing angle with high feed speed gives best overall result | Balances stress amplitude, cycle count, and distribution | Extends bottom die service life |
The results also suggest that the bottom die failure in straight bevel gears is not controlled by a single stress value. It is controlled by the interaction of peak stress, stress amplitude, mean stress, cycle count, and wear exposure. A process parameter that improves one indicator may worsen another. For example, increasing the swing angle reduces the peak stress but increases the stress amplitude. Increasing the feed speed reduces the cycle count but increases the flow stress. The best strategy is therefore to find a balanced condition. In my study, that condition is \(\gamma=2^{\circ}\) and \(v=5\,\mathrm{mm\cdot s^{-1}}\).
I can also express the optimization objective as a weighted function:
$$J=w_{1}\frac{\sigma_{\max}}{\sigma_{\max,0}}+w_{2}\frac{\sigma_{a}}{\sigma_{a,0}}+w_{3}\frac{n_{c}}{n_{c,0}}+w_{4}\frac{W}{W_{0}}$$
where \(J\) is the objective function, \(w_{1}\) to \(w_{4}\) are weights, and the subscript 0 denotes reference values. A lower \(J\) indicates a better process. In my qualitative assessment, scheme 4 gives the lowest \(J\) when the weights emphasize fatigue and wear rather than pure peak stress. This is consistent with the combined index in Table 5.
For practical implementation, I recommend the following steps when applying the results to straight bevel gears:
1. Establish a three-dimensional finite element model with accurate tooth geometry, because the stress state in straight bevel gears is sensitive to the tooth profile and contact position.
2. Include velocity-dependent friction, because the sliding velocity changes direction during each swing cycle and contributes to tooth crest wear.
3. Monitor stress at multiple points on the bottom die tooth, especially the root and crest, because different failure modes are controlled by different stress components.
4. Use fatigue criteria rather than only peak stress, because the bottom die failure in straight bevel gears is often a cumulative damage process.
5. Select the process window around a small swing angle and a high feed speed when the die life is the primary objective.
6. Validate the optimum with physical trials, because the finite element model is isothermal and may not capture all surface and thermal effects.
I also note that the optimum may depend on the size of the straight bevel gears. A larger gear has a larger deformation radius, which changes the area-based contact ratio. According to the relation \(\lambda=0.48S/(R\tan^{2}\gamma)\), an increase in \(R\) reduces \(\lambda\) for the same \(S\) and \(\gamma\). This means that a larger straight bevel gear may require a different swing angle or feed speed to achieve the same contact condition. For small straight bevel gears, the contact ratio may be more sensitive to the feed speed. For large straight bevel gears, the deformation radius may dominate. This scale effect should be included in future studies.
I also consider the influence of the vibration amplitude and frequency. These were fixed in my study, but they directly affect the contact time and the number of cycles. A higher frequency increases the number of cycles per unit time, which can increase fatigue damage. A larger amplitude increases the instantaneous penetration and may increase the contact force. The combination of frequency and amplitude must therefore be optimized together with the swing angle and feed speed. For straight bevel gears, this multi-parameter optimization is a natural extension of my work.
The following dimensionless group may be useful for generalizing the results:
$$\Pi=\frac{v}{fA}\tan\gamma$$
This group compares the feed speed with the vibration velocity and the swing geometry. A larger \(\Pi\) indicates a stronger feed effect relative to the vibration effect. In my simulations, the best condition occurs at a relatively high \(\Pi\), which corresponds to a high feed speed and a small swing angle. I use this group only as a qualitative indicator, but it may help in designing experiments for other straight bevel gears.
I also define a stress uniformity index:
$$U_{s}=1-\frac{\sigma_{\max}-\sigma_{\min}}{\sigma_{\max}+\sigma_{\min}}$$
A larger \(U_{s}\) indicates a more uniform stress distribution. In my results, scheme 4 gives the largest \(U_{s}\) among the four schemes. This supports the conclusion that the small-swing-angle and high-feed-speed combination is favorable for the bottom die in straight bevel gears.
The die life improvement can be estimated by the ratio of accumulated damage:
$$R_{D}=\frac{D_{\text{scheme 4}}}{D_{\text{scheme 1}}}$$
In my normalized assessment, \(R_{D}\) is less than one, which indicates that scheme 4 reduces the accumulated damage relative to scheme 1. The exact value depends on the fatigue parameters and the weighting of the damage components, but the trend is consistent. A lower \(R_{D}\) means a longer expected die life. For straight bevel gears, this is the central practical benefit of the recommended process window.
I conclude that the finite element analysis provides a useful basis for understanding the bottom die stress in the vibration rotary forging of straight bevel gears. The swing angle and feed speed have different and sometimes opposing effects. A larger swing angle reduces the peak stress but increases the stress amplitude. A higher feed speed increases the stress level but reduces the number of cycles. The best compromise is a small swing angle and a high feed speed. Under the conditions I studied, \(\gamma=2^{\circ}\) and \(v=5\,\mathrm{mm\cdot s^{-1}}\) produce a more uniform force on the bottom die teeth, lower fatigue wear, and a longer service life. This result is directly relevant to the industrial forming of straight bevel gears, where die life and dimensional accuracy are both critical.
In future work, I would extend the model to include thermal effects, surface coatings, and residual stress. I would also perform a full factorial or response surface optimization instead of a four-scheme orthogonal plan. A larger number of straight bevel gears with different modules and cone angles should be analyzed to test the generality of the recommended process window. Finally, physical experiments should be used to validate the predicted stress and wear trends, especially at the tooth root and tooth crest. These extensions would make the conclusions more robust for the production of straight bevel gears.
For now, the evidence from my simulations supports a clear practical guideline: when the objective is to protect the bottom die during the vibration rotary forging of straight bevel gears, I should not simply maximize the swing angle or minimize the feed speed. I should instead choose a small swing angle and a high feed speed, because this combination gives the best overall balance among peak stress, stress amplitude, cycle count, and wear exposure. The result is a more stable forming process for straight bevel gears and a longer working life for the bottom die.