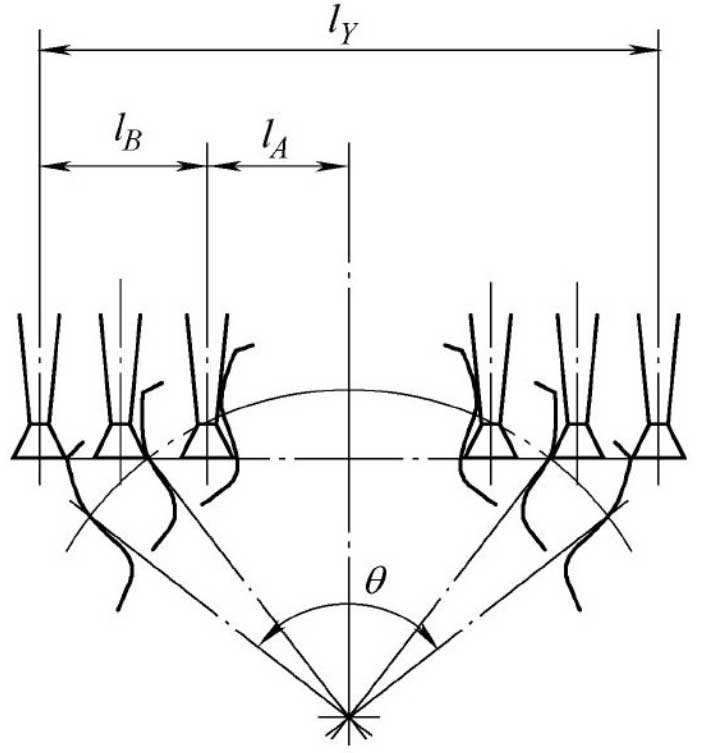
As shown in the figure, when using the generating method to measure the big gear, the conical probe should start from the offset position La, plus the tooth profile generating length lb. considering the left and right tooth profiles, the length of the measuring guide rail is ly, and the corresponding gear angle is θ. The manufacturing accuracy of this long guide rail is a problem. When using polar coordinate method to measure tooth profile, the movement direction of the probe is gear radial, and the length of the guide rail of the instrument is short, but the disadvantage of this method is that it is very “sensitive” to the measurement of the probe at the tooth root, and it is easy to produce measurement errors.

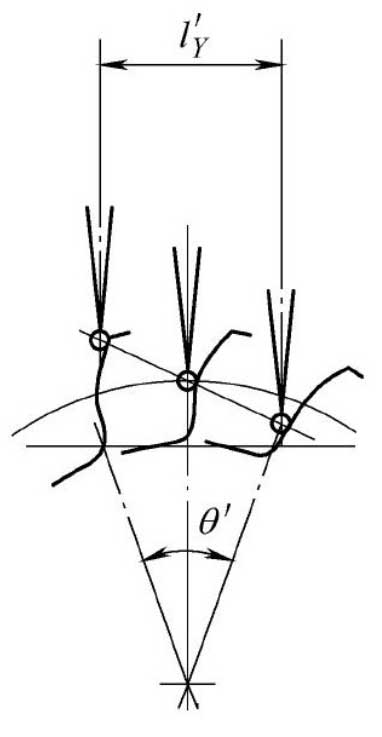
The new measuring principle adopts the meshing line measuring method, and the path of the probe is the direction of the gear meshing line. In fact, it is the combination of the generating method and the polar coordinate method, which has both advantages. With this method, the length of tangent guide rail of the instrument is l’y, l’y is far less than ly, and the angle of gear corresponding to the measurement of left and right tooth surfaces is θ ‘. The advantages of this method are as follows:

(1) It avoids the problem that the tangent guide rail is too long and difficult to manufacture, and makes the structure of the instrument compact;
(2) The movement of the probe is small, which reduces the movement of the center of gravity of the instrument caused by the movement of the slide of the guide rail, and is conducive to ensuring the measurement accuracy;
(3) The problem of “sensitive” of root measurement is avoided.
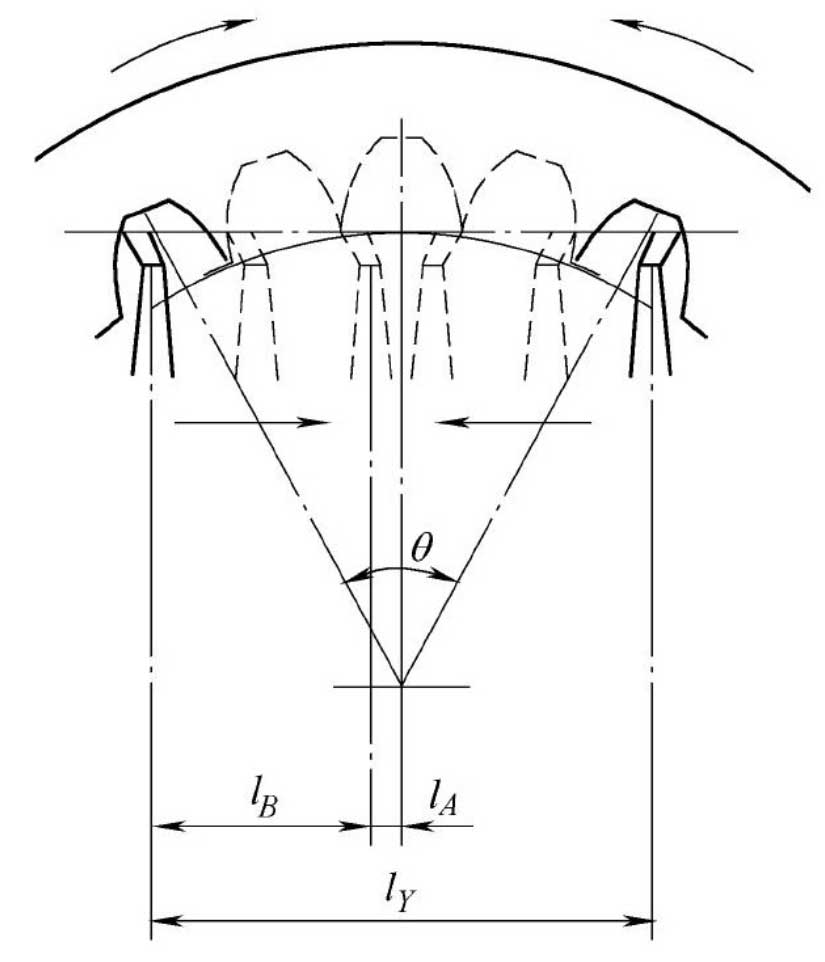
The method of meshing line measurement has more advantages in internal gear measurement. As shown in Figure 15, it is inconvenient to measure the internal gear with the generating method:

(1) The angle of the gear is large, so it needs to be measured with a tip probe, and the probe and the tooth top are easy to interfere;
(2) After measuring one tooth surface, the measuring head must be turned to measure the other tooth surface;
(3) The measurement guide rail is long, and the accuracy is difficult to guarantee;
(4) The large displacement of the probe increases the movement of the center of gravity and affects the measurement accuracy.
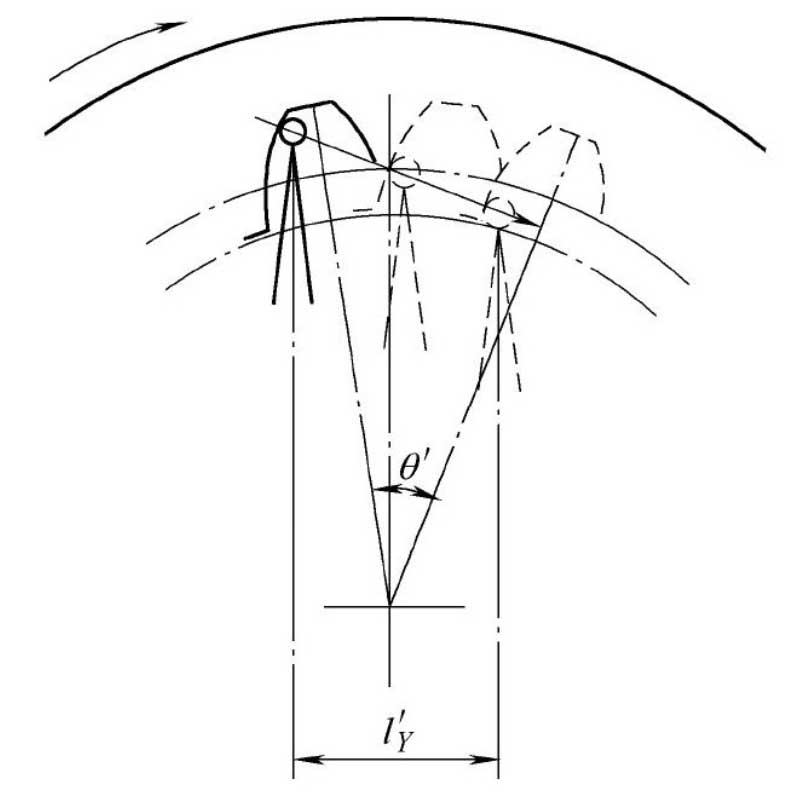
As shown in the figure, the meshing line method is used to measure the internal gear. Due to the small rotation angle of the gear, the ball probe can be used to measure, which not only avoids the disadvantages of the traditional measurement method, but also realizes the continuous and rapid measurement of the internal gear tooth profile.

At present, the measurement method of meshing line has attracted great attention. The gear measurement center of Tokyo Instruments Co., Ltd. has adopted this method, and the zga2000, a large-scale external gear forming grinder produced by Mitsubishi Heavy Industries Co., Ltd. of Japan, has also adopted this technology. The maximum diameter of the gear can be machined is 2 M. the tooth profile of the gear is measured by the meshing line measurement method, which greatly shortens the length of the tangent guide rail.
