
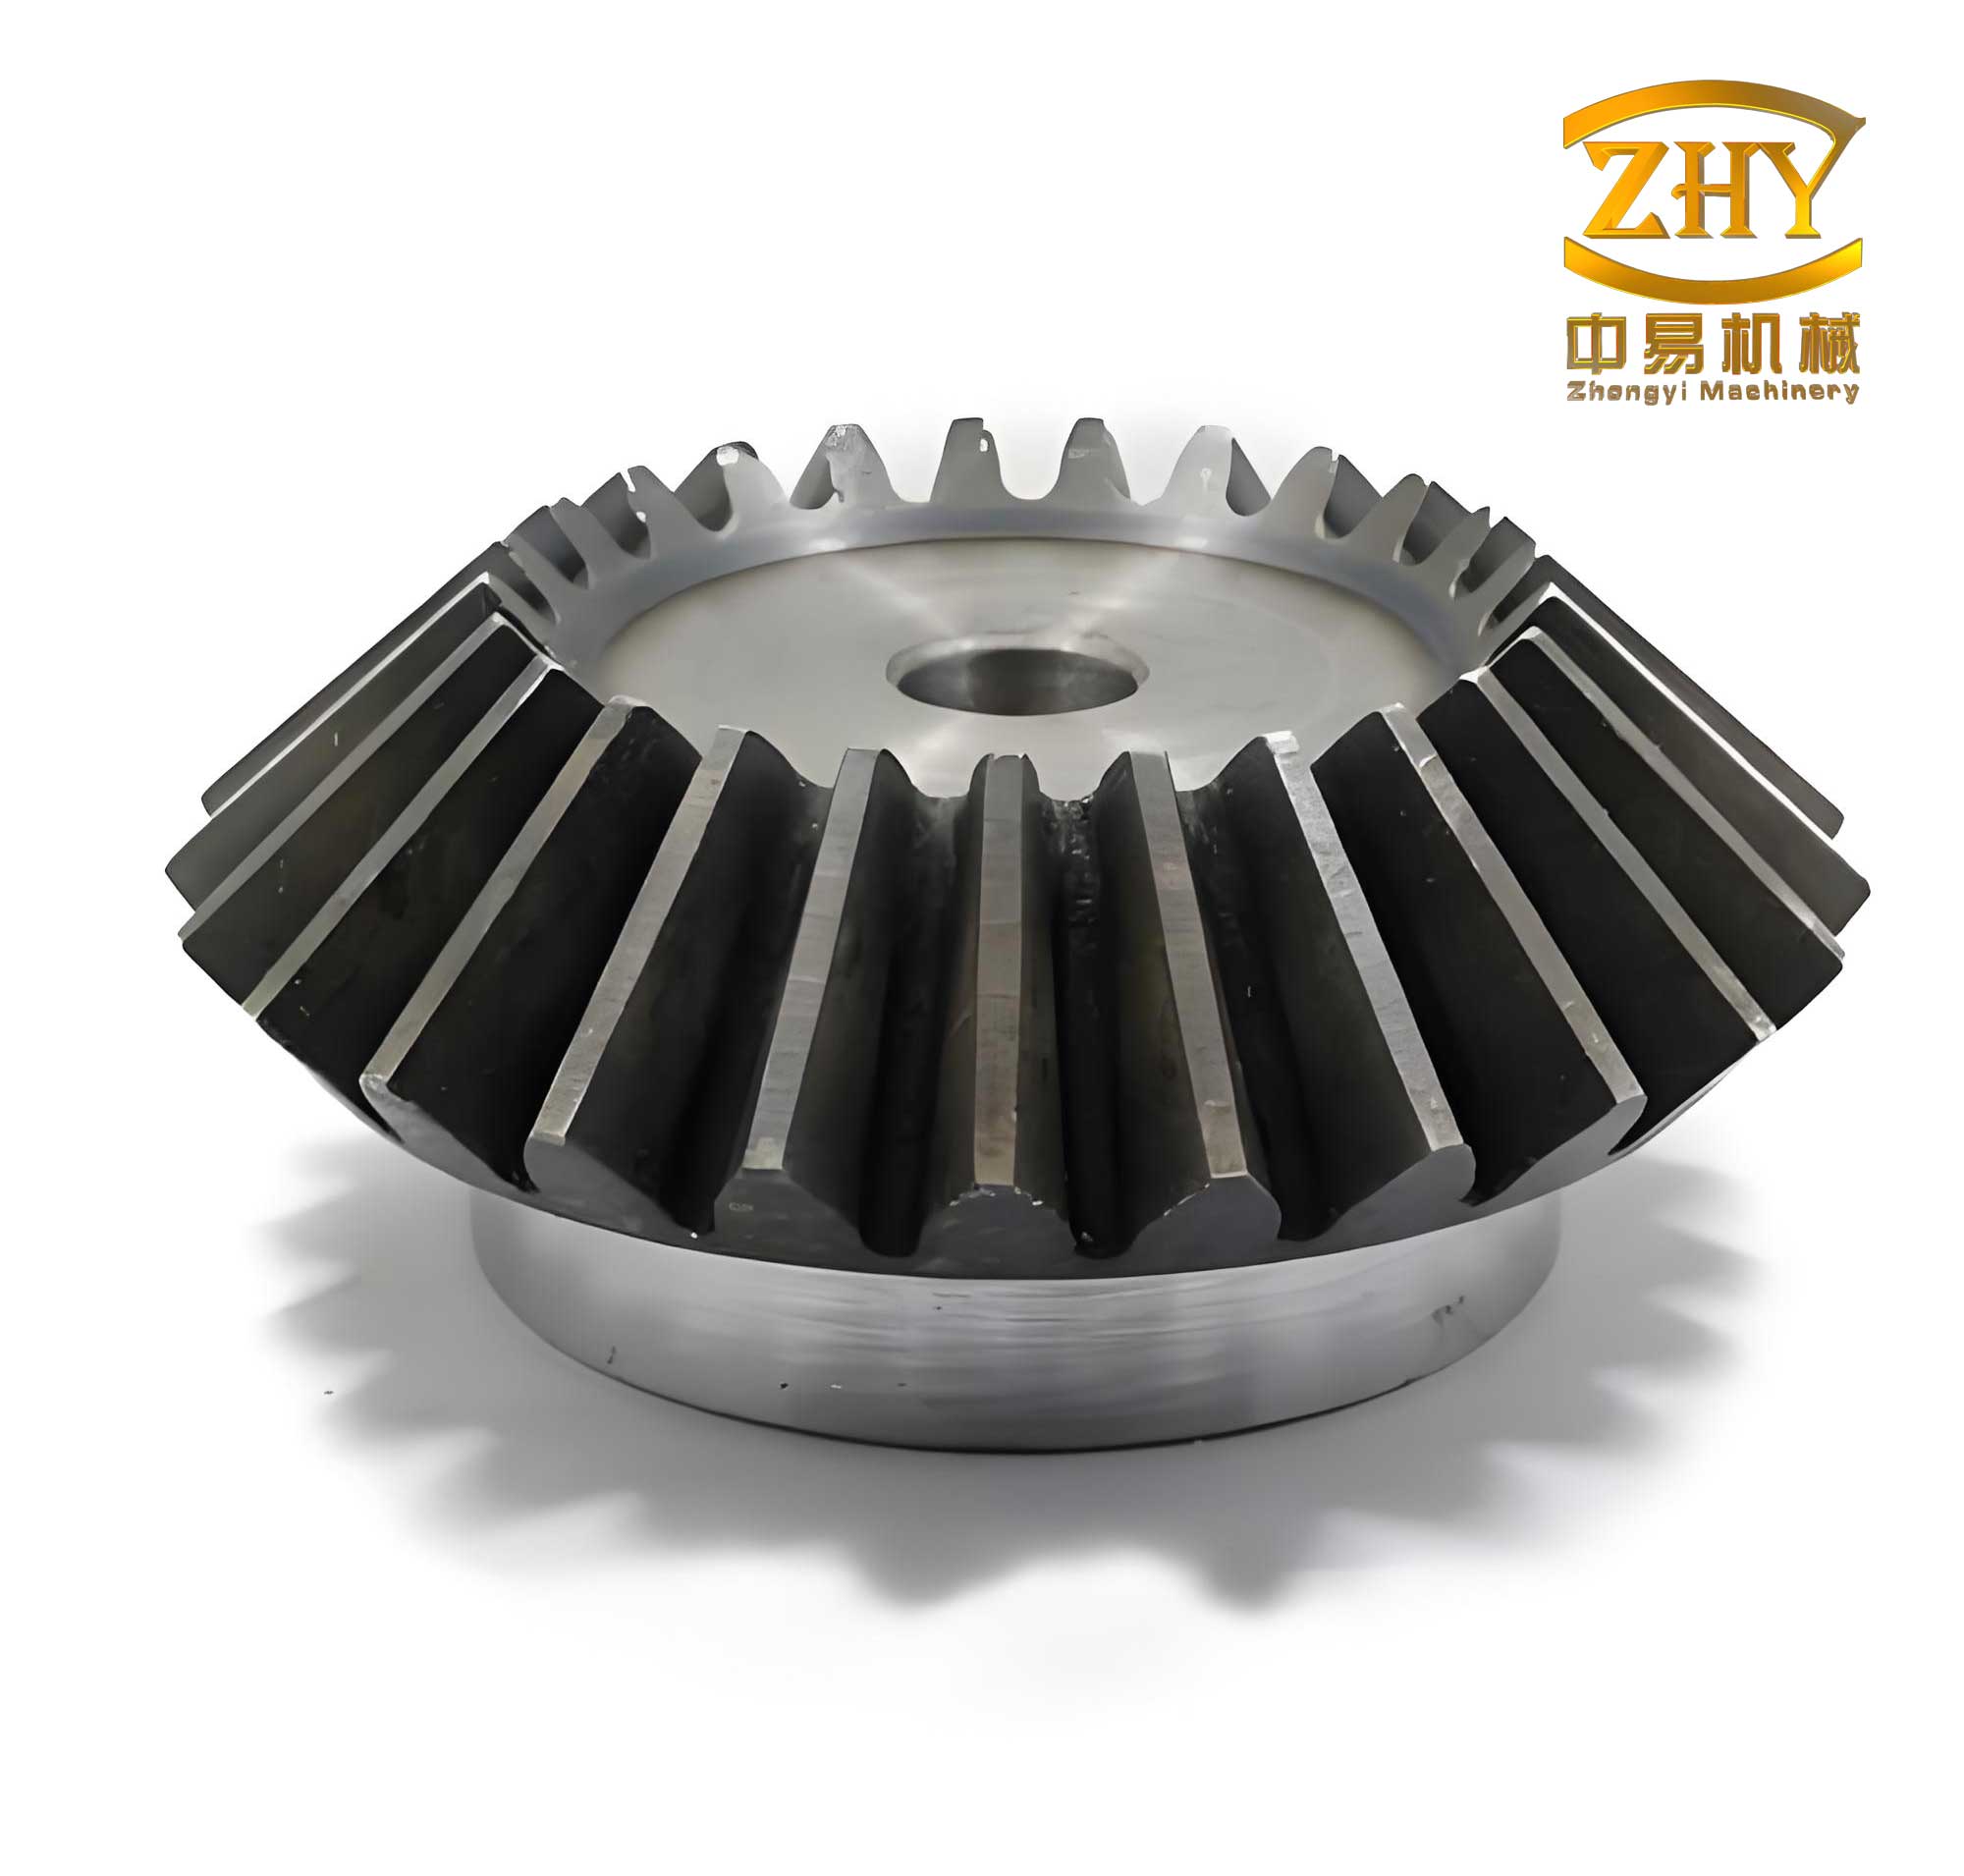
In the realm of mechanical power transmission for low-speed agricultural vehicles, such as three-wheeled farm carts, bevel gears play a pivotal role. These bevel gears, specifically straight bevel gears, are critical components that facilitate motion transfer between intersecting shafts. As an engineer tasked with manufacturing such bevel gears, I often encounter projects requiring cost-effective and efficient methods for small-batch production. This article delves into a comprehensive milling-based process for producing straight bevel gears, focusing on scenarios where operational speeds and precision demands are modest. The methodology outlined here prioritizes practicality, leveraging universal milling machines and form-cutting tools to achieve satisfactory results without the high costs associated with specialized gear-cutting equipment. Throughout this discussion, the term ‘bevel gears’ will be frequently referenced to emphasize their central importance in this application.
The journey from a design blueprint to a functional bevel gear begins with a meticulous review of the provided drawings. For any bevel gear project, the initial step involves verifying all specified parameters to ensure manufacturability and performance. Key dimensions such as module, number of teeth, pressure angle, and shaft intersection angle must be explicitly defined. For instance, in a typical agricultural vehicle bevel gear, the module might be 3 mm, the tooth count 23, and the pressure angle 20 degrees. These parameters are fundamental for subsequent calculations. I always cross-reference these values using standard mechanical engineering handbooks to confirm geometric consistency. The core dimensions of a straight bevel gear can be derived using established formulas. For a gear with a shaft angle Σ (often 90°), the pitch cone angle δ for the gear is calculated as: $$ \delta = \arctan\left(\frac{Z_{\text{gear}}}{Z_{\text{pinion}}}\right) $$ where Z represents the number of teeth. However, for a given pair, the individual pitch cone angles sum to the shaft angle. The pitch diameter d is simply: $$ d = m \cdot Z $$ where m is the module. Other critical dimensions include the addendum diameter da, dedendum diameter df, and cone distance R. A summary of these calculations is presented in the table below for a bevel gear with m=3, Z=23, and a mating pinion of Z=16 (assuming a 90° shaft angle).
| Parameter | Symbol | Formula | Calculated Value (mm or degrees) |
|---|---|---|---|
| Pitch Diameter | d | $$ d = m \cdot Z $$ | 69.00 |
| Pitch Cone Angle (Gear) | δ | $$ \delta = \arctan(Z/Z_{\text{pinion}}) $$ | 55.20° |
| Cone Distance | R | $$ R = \frac{d}{2 \sin \delta} $$ | 41.98 |
| Addendum | ha | $$ h_a = m $$ | 3.00 |
| Dedendum | hf | $$ h_f = 1.25m $$ | 3.75 |
| Addendum Angle | θa | $$ \theta_a = \arctan(h_a / R) $$ | 4.09° |
| Dedendum Angle | θf | $$ \theta_f = \arctan(h_f / R) $$ | 5.11° |
| Face Cone Angle | δa | $$ \delta_a = \delta + \theta_a $$ | 59.29° |
| Root Cone Angle | δf | $$ \delta_f = \delta – \theta_f $$ | 50.09° |
Beyond basic dimensions, the scrutiny of tolerances and material specifications is paramount for bevel gears. The bore diameter, keyway width, and chordal tooth thickness are typically assigned tolerances to ensure proper assembly and meshing. For example, a bore diameter of 30 mm might have a H7 tolerance. Geometric tolerances, such as runout of the tooth profile relative to the bore axis and symmetry of the keyway, are crucial for minimizing vibration and wear in bevel gears. The choice of material and heat treatment directly impacts the durability of bevel gears. For agricultural applications where shocks and abrasive conditions are common, medium carbon steel like AISI 1045 (equivalent to 45# steel) is a robust choice. The heat treatment sequence—quenching and tempering (hardness ~210-230 HB) followed by surface hardening like induction hardening (hardness ~40-50 HRC)—provides an optimal combination of a tough core and a wear-resistant surface for these bevel gears. This balance is essential for the longevity of bevel gears in low-speed, high-torque environments.
Once the drawing is validated, the next phase involves strategic process planning. The decision on the manufacturing route for bevel gears hinges on several factors: production volume, required precision, and available machine tools. For mass production of high-precision bevel gears, dedicated gear generators (like bevel gear planers or CNC bevel gear cutting machines) or precision forging are preferred. However, for a batch size of 80 pieces—categorized as small-batch production—and given the relatively low operational speed and accuracy requirements of farm vehicle bevel gears, a more economical approach is justified. Utilizing a universal milling machine with a dividing head and form-relieved gear cutters presents a viable solution. This method significantly reduces capital investment and tooling costs while being capable of producing bevel gears that meet the functional specifications. The universal milling machine offers the flexibility needed for such job-shop production of bevel gears.
The heart of this methodology is the detailed process plan. A step-by-step sequence is developed to transform a raw material into a finished bevel gear. The process flow and key operations are summarized in the table below, which serves as a roadmap for manufacturing these bevel gears.
| Process Step | Description | Key Objectives & Notes |
|---|---|---|
| 1. Material Preparation | Procuring AISI 1045 steel round bar, cut to size: φ75 mm x 40 mm length. | Provides the stock for the bevel gear blank. |
| 2. Heat Treatment (Preliminary) | Quenching and tempering to achieve a bulk hardness of 210-230 HB. | Enhances core toughness and machinability for subsequent operations on the bevel gear. |
| 3. Turning | Lathe operations to create the gear blank’s major features: bore, external diameters, and faces. | Critical for achieving concentricity. The bore and major datum surfaces are finished in one setup to minimize runout errors for the bevel gear. |
| 4. Milling (Teeth Cutting) | Using a universal mill with dividing head and a form cutter to generate the teeth. | The core operation for creating the tooth profile on the bevel gear. Involves precise angular setup and indexing. |
| 5. Keyway Layout | Marking the keyway position on the bore using surface plate and height gauge. | Preparation for the keyway machining on the bevel gear. |
| 6. Keyway Machining | Using a shaper or a broaching machine to cut the keyway to specified dimensions. | Ensures proper torque transmission for the bevel gear assembly. |
| 7. Deburring | Manual removal of sharp edges and burrs, especially at tooth tips and keyway corners. | Prevents stress concentration and crack initiation during final hardening of the bevel gear. |
| 8. Heat Treatment (Final) | Induction hardening of the tooth surfaces to 40-50 HRC. | Provides high surface hardness for wear resistance while retaining a tough core in the bevel gear. |
| 9. Inspection | Checking critical dimensions, tooth profile, and runout. | Verifies that the finished bevel gear conforms to the drawing requirements. |
The turning operation deserves special attention as it establishes the primary datum for the bevel gear. The sequence typically involves chucking one end of the bar, facing, turning the outer diameter to a rough size (e.g., φ50 mm), and drilling a pilot hole. The part is then reversed, and using the pre-machined diameter for chucking (with soft jaws to avoid damage), the final bore (e.g., φ30H7), the back face, and the external conical profile are finished in a single setup. This practice is crucial for maintaining the perpendicularity and coaxiality between the bore axis and the pitch cone apex, which directly influences the running accuracy of the bevel gear.
The most intricate step is the milling of the teeth on the bevel gear. This operation requires careful setup of the milling machine and the dividing head. The workpiece is mounted on a precision mandrel that fits the finished bore, and the assembly is clamped in the chuck of a dividing head. The dividing head itself must be tilted to the correct angle relative to the milling machine table. For straight bevel gears, the milling cutter’s plane of rotation should be parallel to the root line of the tooth. Therefore, the dividing head is swiveled by an angle equal to the root cone angle δf. From our earlier calculation example, if δf is 50.09°, the dividing head is set to this angle. The formula governing this is: $$ \text{Setting Angle} = \delta_f = \delta – \theta_f $$ where δ is the pitch cone angle and θf is the dedendum angle. Ensuring this angle is precise is vital for the correct tooth depth and profile along the face width of the bevel gear.
Selecting the appropriate form cutter is another critical decision. Standard bevel gear milling cutters are designed for a specific module and a range of equivalent or “virtual” tooth numbers. Because the tooth profile of a bevel gear varies from the heel to the toe, the cutter is chosen to approximate the profile at the midpoint. The virtual number of teeth Zv is calculated to account for the conical shape: $$ Z_v = \frac{Z}{\cos \delta} $$ For a bevel gear with Z=23 and δ=55.20°, $$ Z_v = \frac{23}{\cos(55.20^\circ)} \approx \frac{23}{0.574} \approx 40.1 $$ However, in practice, for setting up a universal milling machine, a simplified approach using the complement angle (for a 90° shaft pair) is common. If the gear’s pitch cone angle is δ, its complementary angle is the “face angle” from the axis. For a pinion with 16 teeth and gear with 23 teeth in a 90° setup, the gear’s pitch cone angle is arctan(23/16)=55.20°. The cosine of this angle is about 0.574. But note: In many workshop manuals, the formula referenced for cutter selection uses the pitch cone angle’s cosine relative to the gear’s own axis. The standard formula for the virtual number of teeth for a straight bevel gear is indeed: $$ Z_v = \frac{Z}{\cos \delta} $$ Where δ is the pitch cone angle. For our example, Zv ≈ 40.1. Consulting a milling cutter selection table for module 3, a cutter number corresponding to this virtual tooth count range (e.g., for virtual teeth 35-54, cutter #5 might be specified) would be chosen. This ensures the cutter profile reasonably matches the required tooth space form for this bevel gear.
Indexing, the process of rotating the workpiece to machine each tooth space, is performed using the dividing head’s worm and wheel mechanism. The standard dividing head has a ratio (often 40:1), meaning 40 turns of the index crank rotate the workpiece one full revolution. To divide the circle into N equal parts (where N is the number of teeth on the bevel gear), the crank must be turned: $$ \text{Turns per division} = \frac{40}{N} $$ For N=23, $$ \text{Turns per division} = \frac{40}{23} = 1 \frac{17}{23} $$ This is an improper fraction. To implement this, we use a dividing plate with a circle of holes that is a multiple of the denominator. If a plate with a 23-hole circle is available, we turn 1 full revolution plus 17 holes on the 23-hole circle. If not, we find an equivalent fraction. 40/23 simplifies to 1 and 17/23. Multiplying numerator and denominator by 2 gives 34/46. So, using a plate with a 46-hole circle, we turn 1 full revolution and 34 holes on the 46-hole circle. This precise angular movement is repeated 23 times to machine all teeth on the bevel gear. The formula for the number of holes to advance on a selected plate with H holes is: $$ \text{Holes to advance} = \frac{40}{N} \times H \quad \text{(fractional part)} $$ After each cut, the workpiece is indexed to the next position, ensuring uniform spacing of teeth on the bevel gear.
During the milling cut, the depth of cut is set based on the tooth depth, which is 2.25m for full-depth teeth (typically 6.75 mm for m=3). However, because the tooth depth is measured perpendicular to the pitch cone, and the cutter is fed vertically or horizontally relative to the table, trigonometric adjustments might be needed. The feed direction is usually parallel to the root line. After roughing all teeth, a final finishing pass with a light cut may be taken to improve surface finish on the bevel gear teeth.
Post-milling operations include keyway machining. The gear is typically mounted on a V-block or in a shaper vise, aligned using the bore and a dial indicator, and the keyway is cut to size. Deburring follows, where all sharp edges, especially at the tooth ends and keyway corners, are carefully rounded off. This step is crucial before the final heat treatment for bevel gears, as sharp edges can act as stress raisers and lead to quench cracks during induction hardening.
The final heat treatment, induction hardening, selectively hardens only the tooth flanks and tips, leaving the core and non-functional surfaces at the lower hardness from the prior tempering. This provides an excellent wear surface while maintaining overall part toughness—a key requirement for durable bevel gears in agricultural machinery. The process parameters (frequency, power, scan speed) are controlled to achieve the specified case depth and hardness for the bevel gear.
To further elucidate the technical calculations involved in the machining of bevel gears, let’s consolidate key formulas and their implications in a structured manner. The table below summarizes essential equations that govern the geometry and setup for milling straight bevel gears.
| Aspect | Formula | Variables and Notes |
|---|---|---|
| Pitch Cone Angle (Gear in 90° pair) | $$ \delta = \arctan\left(\frac{Z_g}{Z_p}\right) $$ | Zg = Gear teeth, Zp = Pinion teeth. For non-90° shafts, use more complex spherical trig. |
| Virtual Tooth Number (for cutter selection) | $$ Z_v = \frac{Z}{\cos \delta} $$ | Determines the equivalent spur gear tooth count for choosing a standard form cutter. |
| Root Cone Angle (Dividing Head Setting) | $$ \delta_f = \delta – \theta_f $$ | θf = dedendum angle = arctan(hf / R). This is the tilt angle for the workpiece axis. |
| Indexing Crank Turns | $$ T = \frac{40}{Z} $$ turns per tooth | For a 40:1 dividing head. Express as whole turns plus fractional turn on available hole circles. |
| Tooth Depth (perpendicular to cone) | $$ h = 2.25m $$ (for 20° full depth) | m = module. Actual cutter infeed may require adjustment based on setup geometry. |
| Cone Distance | $$ R = \frac{d}{2 \sin \delta} = \frac{mZ}{2 \sin \delta} $$ | Distance from apex to pitch circle at the large end. Used in many other calculations. |
In practice, the successful milling of bevel gears also depends on practical workshop wisdom. For example, it is advisable to perform a trial cut on a scrap piece or the first workpiece to verify the tooth profile and dimensions before committing the entire batch. Measuring the chordal tooth thickness over a specified number of teeth (using a gear tooth vernier caliper) is a common in-process check for bevel gears. The chordal tooth thickness s_chord at the large end can be calculated as: $$ s_{\text{chord}} = m Z \sin\left(\frac{90^\circ}{Z}\right) $$ but this is for spur gears; for bevel gears, the measurement is taken in the plane of the back cone, which complicates matters. Often, for inspection purposes, a gear roll tester or a coordinate measuring machine (CMM) is used for more accurate assessment of bevel gears post-machining.
The economic rationale for choosing this milling process for bevel gears is strong for small batches. The table below compares approximate relative costs for different manufacturing methods for bevel gears, highlighting the advantage of the universal milling approach in the context of low-volume production.
| Manufacturing Method | Typical Application Volume | Relative Tooling/Capital Cost | Achievable Precision (AGMA Class) | Suitability for Farm Vehicle Bevel Gears |
|---|---|---|---|---|
| Precision Forging | High volume (>10,000) | Very High | Moderate to High | Low (overkill for cost) |
| Dedicated Gear Planning/Generation | Medium to High volume (>500) | High | High | Moderate (but costly for 80 pcs) |
| CNC Bevel Gear Cutting | Flexible (low to high) | Very High | Very High | Low (high investment) |
| Universal Milling with Form Cutters | Low volume (< 100-200) | Low | Moderate (AGMA 8-10) | High (cost-effective, adequate precision) |
This analysis clearly shows that for a batch of 80 bevel gears destined for low-speed agricultural use, the universal milling method strikes an optimal balance. The process leverages existing machine tools in most job shops, requires only standard cutters and a dividing head, and avoids the long lead times and high costs of specialized gear-cutting equipment. Moreover, the skill set required is common among machinists, making it accessible.
In conclusion, the journey of manufacturing straight bevel gears for agricultural vehicles via milling is a testament to practical engineering. By thoroughly analyzing the drawing, selecting appropriate materials and heat treatments, and meticulously planning the machining sequence—particularly the critical milling setup with correct angular adjustment and indexing—one can produce functional and durable bevel gears efficiently. The use of universal milling machines and form cutters provides a cost-effective pathway for small-batch production, perfectly aligning with the economic and performance requirements of farm machinery components. Throughout this process, attention to detail in calculations, such as the virtual tooth number for cutter selection and the root cone angle for workpiece orientation, ensures the geometric integrity of the final bevel gears. While this method may not achieve the ultra-high precision of dedicated gear generators, it yields bevel gears that are entirely satisfactory for their intended low-speed, high-torque service, proving that sometimes, the most straightforward traditional methods remain highly effective in modern manufacturing contexts for specific applications like these bevel gears.