
I work with straight bevel gear manufacturing for vehicle driveline components, and the most persistent problem I face is not the cutting of the straight bevel gear before heat treatment. The real difficulty appears after carburizing and quenching. A straight bevel gear that has been cut, case-hardened, and quenched rarely retains the exact tooth geometry produced before heat treatment. Distortion changes tooth thickness, pitch, runout, contact pattern, and even the root region. For a straight bevel gear that must transmit torque quietly and reliably, these changes are not acceptable. I therefore decided to grind the straight bevel gear after heat treatment rather than relying only on lapping or corrective cutting before hardening.
The conventional solution is a dedicated straight bevel gear grinding machine that uses two cup-shaped or dish-shaped grinding wheels to grind both flanks simultaneously by a rolling method. Such a machine can produce an excellent straight bevel gear, but it is rare in many workshops, expensive to purchase, and difficult to justify when production volume is moderate. I needed a practical alternative. Instead of buying a new machine, I studied the working principle of flat-top gear shaping and used that principle to convert an existing gear grinding machine into a CNC generating grinder for straight bevel gears. The result was a machine that uses a formed conical grinding wheel, a reciprocating ram, a rotary table, a horizontal table, and a workpiece self-rotation axis to generate the straight bevel gear tooth flank by a rolling motion. The method is not a copy of the original machine design; it is a new kinematic arrangement derived from the geometry of the flat-top gear.
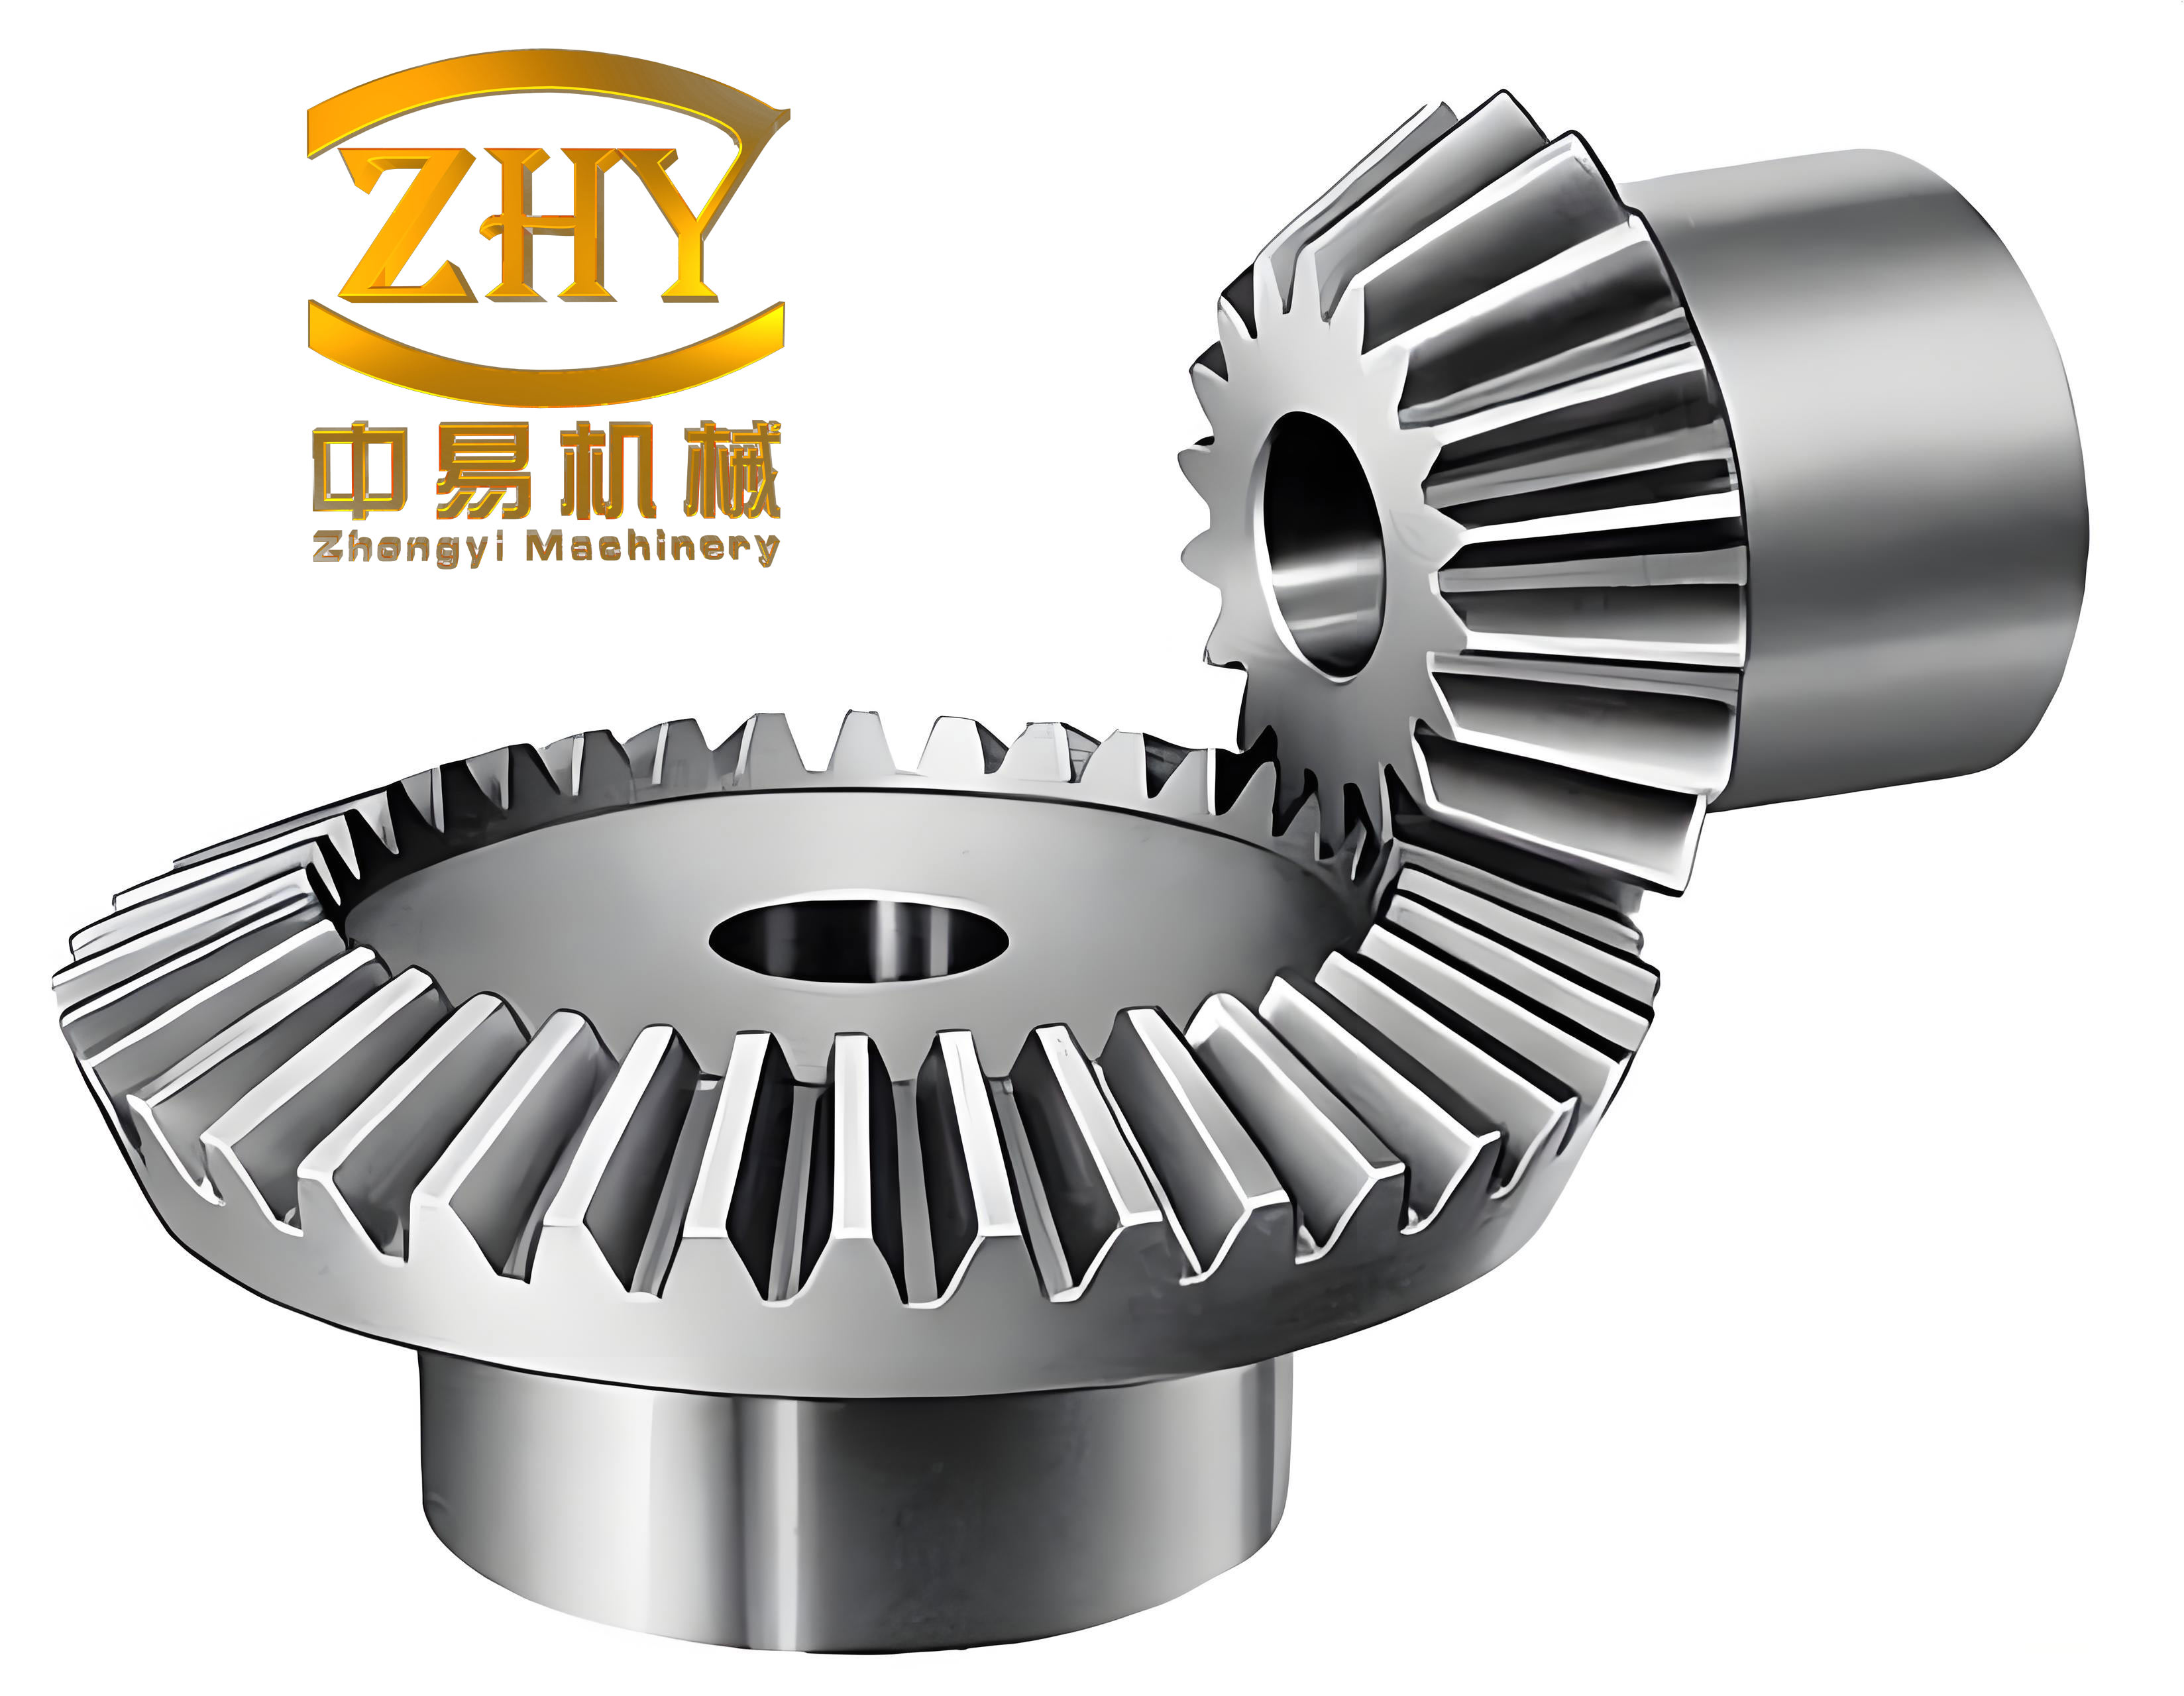
Why I Chose a Generating Method for the Straight Bevel Gear
A straight bevel gear can be machined by forming, by copying, or by generating. Form grinding is simple in concept, but the wheel profile must match the entire tooth space, and the wheel wear is concentrated at the edges. For a heat-treated straight bevel gear, form grinding often produces an unacceptable root geometry and a poor contact pattern. Generating grinding, also called rolling or滚切 in some older literature, creates the flank as an envelope of a family of tool positions. The tool does not need to have the final tooth shape. Instead, the relative motion between the tool and the straight bevel gear creates the involute-like flank. This is the same reason that gear shaping and gear planing can produce accurate bevel gears with simple straight-edged cutters.
The flat-top gear principle is especially useful for a straight bevel gear. In this principle, the virtual generating gear is a crown gear whose top cone angle is 90 degrees. The pitch cone of the virtual gear contacts the pitch cone of the straight bevel gear, and the two cones roll without clearance. A pair of planing tools represents one tooth of the virtual flat-top gear. The tools reciprocate while the cradle rotates, and the straight bevel gear rotates about its own axis. The two flanks of one tooth space are cut alternately. The important advantage is that the cutting direction does not depend on the root angle of the straight bevel gear. That simplifies the machine motion considerably and makes the method suitable for a CNC conversion.
For grinding, I replaced the planing tool with the conical surface of a grinding wheel. The grinding wheel is mounted on a ram. The ram gives the grinding wheel a straight reciprocating motion. One straight generative line on the conical surface of the wheel acts like the cutting edge of the planing tool. As the ram moves, that line sweeps a plane-like surface. If the straight bevel gear and the virtual flat-top gear roll relative to each other, the swept surface removes material from the straight bevel gear flank. The grinding wheel itself does not have to rotate around the cradle center. The rolling motion is distributed among the workpiece self-rotation, the rotary table, and the horizontal table. In this way, a conventional gear grinding machine can be converted into a generating grinder for a straight bevel gear.
Fundamental Geometry of the Straight Bevel Gear and the Virtual Flat-Top Gear
I begin with the basic geometry of the straight bevel gear. The pitch cone angle, cone distance, addendum, dedendum, and tooth thickness are needed before I can set the rolling ratio and the tool position. For a straight bevel gear pair with a shaft angle of 90 degrees, the pitch cone angle of one member can be written as
$$ \delta = \arctan\left(\frac{z}{z_p}\right) $$
where z is the number of teeth of the straight bevel gear being ground and z_p is the number of teeth of its mating pinion. The large-end cone distance is
$$ R = \frac{m z}{2 \sin \delta} $$
where m is the large-end module. The addendum and dedendum at the large end are
$$ h_a = h_a^* m $$
$$ h_f = \left(h_a^* + c^*\right) m $$
where h_a^* is the addendum coefficient and c^* is the clearance coefficient. For a straight bevel gear with tangential modification, the large-end circular tooth thickness can be approximated by
$$ s = m \left(\frac{\pi}{2} + 2 x_t \tan \alpha\right) $$
where x_t is the tangential modification coefficient and alpha is the pressure angle. The root angle theta_f is the angle between the root cone and the pitch cone. It is needed for the rolling ratio and for the root cone setting. The virtual flat-top gear has a top cone angle of 90 degrees, and its pitch cone is in contact with the pitch cone of the straight bevel gear. The rolling ratio between the straight bevel gear and the virtual flat-top gear is
$$ i_c = \frac{\cos \theta_f}{\sin \delta} $$
This equation can also be expressed through the number of teeth of the virtual flat-top gear:
$$ i_c = \frac{z_c \cos \theta_f}{z} $$
where z_c is the equivalent number of teeth of the virtual flat-top gear. If the virtual flat-top gear is considered fixed and the straight bevel gear is considered a planet, then the straight bevel gear rotates about its own axis while its axis also revolves around the virtual gear center. The relationship between the cradle rotation and the workpiece self-rotation is
$$ \phi_c = \frac{1}{i_c} \phi_w = \frac{\sin \delta}{\cos \theta_f} \phi_w $$
$$ \phi_w = i_c \phi_c = \frac{\cos \theta_f}{\sin \delta} \phi_c $$
These two equations are the heart of the generating motion. In my converted machine, the rotary table plays the role of the cradle rotation, and the workpiece head plays the role of the self-rotation of the straight bevel gear. If the rotary table rotates by one degree, the straight bevel gear must rotate by i_c degrees. If the straight bevel gear rotates by one degree, the rotary table must rotate by 1/i_c degrees. The numerical controller interpolates these two axes together with the horizontal table axis.
Tool Position and Cutter Pitch Angle for the Straight Bevel Gear
The position of the grinding wheel relative to the straight bevel gear determines the tooth thickness and the contact pattern. In flat-top gear planing, the angle between the tool edge path on the cradle plane and the tooth bisector through the machine center is called the cutter pitch angle. I use the same concept for the grinding wheel. The cutter pitch angle in degrees is
$$ \lambda \approx \frac{180}{\pi R}\left(\frac{s}{2} + h_f \tan \alpha\right) $$
where R is the large-end cone distance, s is the large-end circular tooth thickness, h_f is the large-end dedendum, and alpha is the pressure angle. The angle lambda controls the tooth thickness and the flank position. If lambda is too small, the straight bevel gear tooth becomes too thick. If lambda is too large, the tooth becomes too thin. Because the grinding wheel removes material rather than planing it, the exact lambda must be adjusted after a trial grind. The theoretical value is a starting point, not a final setting.
For the grinding wheel, I use the conical surface of a cup-shaped or dish-shaped wheel. The straight generative line on the cone is the active part. The wheel is mounted on the ram, and the ram moves parallel to the root cone of the straight bevel gear. The root cone angle seat is adjusted so that the root cone is parallel to the ram motion. The wheel conical surface then sweeps a plane-like generating surface. This surface represents one flank of the virtual flat-top gear tooth. The other flank is generated by reversing the signs of the rolling motion and using the other side of the wheel or by re-setting the wheel to the opposite side.
Machine Axes and CNC Conversion
The original gear grinding machine had a reciprocating ram, a rotary table, a horizontal table, a vertical table, and a grinding wheel spindle. I converted the machine so that the ram, rotary table, and horizontal table are driven by servo motors. The grinding wheel spindle remains driven by a standard three-phase asynchronous motor. The horizontal table and the ram use ball screws to reduce backlash and to improve positioning accuracy. The vertical table can be used for wheel dressing compensation and for adjusting the grinding depth. The CNC controller performs three-axis interpolation among the workpiece self-rotation, the rotary table, and the horizontal table. The ram provides the reciprocating stroke. The grinding wheel spindle provides the cutting speed.
| Machine axis | Function in the straight bevel gear grinding process | Drive type after conversion |
|---|---|---|
| Workpiece self-rotation axis | Rotates the straight bevel gear about its own axis to create the generating motion | Servo motor |
| Rotary table axis | Revolves the straight bevel gear around the virtual flat-top gear center | Servo motor |
| Horizontal table axis | Moves the straight bevel gear to keep the apex projection on the wheel contact plane | Servo motor with ball screw |
| Ram axis | Reciprocates the grinding wheel along the tooth width direction | Servo motor or converted mechanical drive with ball screw |
| Vertical table axis | Sets grinding depth and compensates for wheel dressing | Manual or servo, depending on machine condition |
| Grinding wheel spindle | Provides the grinding speed | Three-phase asynchronous motor |
The conversion is not difficult if the original machine has sufficient rigidity and if the slideways are in good condition. The most important requirement is that the workpiece self-rotation axis, the rotary table axis, and the horizontal table axis have minimal backlash and good repeatability. For a straight bevel gear with a module around 10 mm, a positioning error of a few micrometres can change the contact pattern. I therefore use preloaded ball screws, closed-loop servo control, and a rigid fixture. The grinding wheel spindle must also be well balanced. A vibrating wheel cannot produce a smooth straight bevel gear flank.
Coordinate Relationship and Horizontal Compensation
In the flat-top gear principle, the virtual gear is fixed and the straight bevel gear performs a planetary motion. The straight bevel gear rotates about its own axis and also revolves around the virtual gear center. If I mount the straight bevel gear on the converted machine, the rotary table provides the revolution and the workpiece head provides the self-rotation. However, the grinding wheel is not located at the virtual gear center. It is located at the side of the virtual gear, where its conical surface represents one tooth flank. I therefore need a horizontal compensation motion to keep the cone apex projection in the correct relationship with the wheel contact plane.
Let r be the distance from the cone apex projection to the rotary table center in the horizontal plane. In the example I studied, this distance was 178.2773 mm. Let phi_c be the rotary table angle measured from the position where the apex projection lies on the wheel symmetry plane. The horizontal offset required to keep the generating point on the wheel contact line is
$$ L(\phi_c) = r \sin \phi_c $$
When the rotary table rotates by an increment, the horizontal table must move by the difference between the new offset and the previous offset:
$$ \Delta L_k = r\left(\sin \phi_{c,k} – \sin \phi_{c,k-1}\right) $$
If the initial cutter pitch angle is lambda, the initial horizontal offset before the generating pass is
$$ L_0 = r \sin \lambda $$
In my example, lambda was 5.95 degrees, and the initial offset was 18.48 mm. After the straight bevel gear self-rotated by 10 degrees, the rotary table rotated by 7.7166 degrees, and the new horizontal offset was 23.9763 mm. These values show the order of magnitude of the compensation. In actual production, I do not use a 10-degree self-rotation increment per grinding pass. I use a much smaller increment, typically 0.5 degrees or less, so that the envelope of the grinding wheel positions produces a smooth flank. A smaller increment increases the number of program blocks, but modern CNC systems can handle this easily.
| Symbol | Meaning | Example value |
|---|---|---|
| m | Large-end module of the straight bevel gear | 11.467 mm |
| alpha | Pressure angle | 22.5 degrees |
| z | Number of teeth of the straight bevel gear | 18 |
| h_a^* | Addendum coefficient | 0.8 |
| c^* | Clearance coefficient | 0.188 |
| x_t | Tangential modification coefficient | 0.038 |
| lambda | Cutter pitch angle | 5.95 degrees |
| i_c | Rolling ratio between the straight bevel gear and the virtual flat-top gear | 1.2959 |
| r | Horizontal distance from cone apex projection to rotary table center | 178.2773 mm |
| L_0 | Initial horizontal offset | 18.48 mm |
| L_2 | Horizontal offset after example rotation | 23.9763 mm |
Generating Motion Cycle for One Straight Bevel Gear Tooth
The grinding cycle for one flank of a straight bevel gear tooth is a sequence of small generating steps. Each step consists of a workpiece self-rotation increment, a rotary table increment, and a horizontal table compensation. The ram moves the grinding wheel across the tooth width. The grinding wheel removes a small amount of material at each position. After the full generating range has been completed, the wheel is retracted, the straight bevel gear is indexed to the next tooth, and the cycle repeats. For the opposite flank, the signs of the self-rotation, rotary table rotation, and horizontal compensation are reversed.
| Step | Action | Equation or setting |
|---|---|---|
| 1 | Index the straight bevel gear to the tooth space to be ground | Index angle = 360/z |
| 2 | Set the initial cutter pitch angle | phi_c = lambda |
| 3 | Apply initial horizontal offset | L_0 = r sin lambda |
| 4 | Move the wheel to the top of the tooth flank | Ram position = start of stroke |
| 5 | Rotate the straight bevel gear by one small increment | phi_w = phi_w + Delta phi_w |
| 6 | Rotate the rotary table by the corresponding increment | Delta phi_c = Delta phi_w / i_c |
| 7 | Move the horizontal table by the compensation increment | Delta L = r[sin(phi_c + Delta phi_c) – sin phi_c] |
| 8 | Feed the ram across the tooth width | Ram stroke = tooth width plus clearance |
| 9 | Repeat steps 5 to 8 until the full flank is generated | Number of increments = phi_w,total / Delta phi_w |
| 10 | Retract the wheel, index to the next tooth, and repeat | Index angle = 360/z |
| 11 | For the opposite flank, reverse the signs of phi_w, phi_c, and L | phi_w -> -phi_w, phi_c -> -phi_c, L -> -L |
In my first trials, I used a self-rotation increment of 10 degrees only to make the motion easy to observe and to verify the geometry. That increment is far too coarse for a finished straight bevel gear. For production, I use an increment of 0.5 degrees or smaller. The exact value depends on the module, the required surface roughness, and the capability of the CNC controller. If the increment is too large, the flank shows visible facets. If the increment is too small, the cycle time increases without a proportional improvement in accuracy. I usually start with 0.5 degrees and reduce it to 0.25 degrees for the final finishing pass.
Numerical Example of a Straight Bevel Gear
The straight bevel gear I used for the first trial had a large-end module of 11.467 mm, a pressure angle of 22.5 degrees, 18 teeth, an addendum coefficient of 0.8, a clearance coefficient of 0.188, and a tangential modification coefficient of 0.038. Using the equations above, I calculated the following values. The rolling ratio was 1.2959. The cutter pitch angle was 5.95 degrees. The horizontal distance r was 178.2773 mm. The initial horizontal offset L_0 was 18.48 mm. After a self-rotation of 10 degrees, the rotary table rotated by 7.7166 degrees, and the horizontal offset became 23.9763 mm. These values were used to write the first CNC program.
| Parameter | Formula | Calculated value for the example straight bevel gear |
|---|---|---|
| Large-end module m | Given | 11.467 mm |
| Pressure angle alpha | Given | 22.5 degrees |
| Number of teeth z | Given | 18 |
| Addendum h_a | h_a = h_a^* m | 9.174 mm |
| Dedendum h_f | h_f = (h_a^* + c^*) m | 11.325 mm |
| Circular tooth thickness s | s = m(pi/2 + 2 x_t tan alpha) | 18.374 mm |
| Rolling ratio i_c | i_c = cos theta_f / sin delta | 1.2959 |
| Cutter pitch angle lambda | lambda = (180/(pi R))(s/2 + h_f tan alpha) | 5.95 degrees |
| Initial horizontal offset L_0 | L_0 = r sin lambda | 18.48 mm |
| Workpiece self-rotation for test | Delta phi_w = 10 degrees | 10 degrees |
| Rotary table rotation for test | Delta phi_c = Delta phi_w / i_c | 7.7166 degrees |
| Horizontal offset after test rotation | L = r sin phi_c | 23.9763 mm |
It is important to remember that the cutter pitch angle and the rolling ratio are theoretical starting values. The actual straight bevel gear after heat treatment has a tooth thickness that is slightly different from the nominal value. The grinding allowance is not uniform. I therefore measure the tooth thickness and the runout of the straight bevel gear before grinding, and I adjust the initial position of the grinding wheel accordingly. If the straight bevel gear has a large runout, I may need to leave more material on one side and less on the other. The CNC program can include a small offset for each tooth, but I prefer to correct the fixture and the indexing first because a uniform generating motion is easier to control.
Wheel Dressing and Compensation
The grinding wheel must be dressed so that its conical surface is accurate and its tip radius is suitable for the root fillet of the straight bevel gear. I use the original wheel dresser of the gear grinding machine when possible. If the original dresser is not convenient, I mount a diamond dresser on the work table and use the vertical and horizontal table motions to dress the wheel. The vertical table can also be used to compensate for the wheel diameter reduction after dressing. If the wheel radius decreases by Delta R_w, the vertical compensation is approximately
$$ \Delta z = \Delta R_w \cos \alpha $$
where alpha is the pressure angle. For a straight bevel gear with a large module, the wheel wear can be significant, so I dress the wheel frequently and compensate after each dressing. The wheel tip is rounded to avoid damaging the root fillet. The root fillet of the straight bevel gear is not generated by the full profile of the wheel; it is formed by the rounded tip and by the generating motion. If the tip radius is too small, the root fillet becomes sharp and the fatigue strength of the straight bevel gear decreases. If the tip radius is too large, the wheel may interfere with the root and remove too much material. I therefore select the tip radius based on the specified root fillet and the grinding allowance.
| Wheel dressing item | Purpose | Practical setting for a straight bevel gear |
|---|---|---|
| Conical surface angle | Matches the pressure angle of the straight bevel gear | Set to the theoretical pressure angle, then trial-adjust |
| Wheel tip radius | Controls the root fillet of the straight bevel gear | Equal to or slightly larger than the specified fillet radius |
| Dressing frequency | Maintains wheel form and reduces burn | After each straight bevel gear or after a fixed number of teeth |
| Vertical compensation | Keeps the grinding depth constant | Delta z = Delta R_w cos alpha |
| Wheel balance | Reduces vibration and improves surface finish | Balance after mounting and after dressing |
Machine Setup Procedure for the Straight Bevel Gear
The setup procedure I follow has seven main steps. First, I clean the fixture and the work head. Second, I mount the straight bevel gear on the fixture and check its runout. Third, I adjust the root angle seat so that the root cone of the straight bevel gear is parallel to the ram motion. Fourth, I align the workpiece self-rotation axis and the rotary table axis with the symmetry plane of the grinding wheel. Fifth, I set the initial cutter pitch angle and the initial horizontal offset. Sixth, I dress the wheel and set the grinding depth. Seventh, I run a trial pass and inspect the contact pattern, tooth thickness, and surface roughness. I adjust the cutter pitch angle, the rolling ratio, and the horizontal offset until the straight bevel gear meets the drawing requirements.
The root angle setting is critical. If the root cone is not parallel to the ram motion, the grinding wheel will not sweep the correct generating surface. The tooth flank will have a twist, and the contact pattern will be incorrect. I use a dial indicator and a precision angle block to set the root angle. For a straight bevel gear with a large cone angle, the setting is sensitive, so I recheck it after the fixture is clamped. The workpiece self-rotation axis must also be centered with the rotary table axis. If there is an offset, the rolling motion will produce an asymmetric tooth. I use a coaxial indicator to align the two axes and then lock the fixture.
Rolling Ratio Verification
After the machine is set, I verify the rolling ratio. The simplest method is to mark the straight bevel gear and the rotary table, rotate the rotary table by a known angle, and measure the workpiece self-rotation. The measured ratio should match i_c. If it does not, the CNC parameters or the mechanical ratio are wrong. I also check the sign of the rotation. For one flank, the straight bevel gear and the rotary table rotate in one direction. For the opposite flank, they rotate in the opposite direction. If the sign is wrong, the grinding wheel will grind the wrong side of the tooth space. A simple dry run with the wheel retracted can prevent a costly mistake.
Another useful check is to simulate the generating motion in a two-dimensional CAD system. I draw the root cone, the pitch cone, and the wheel contact line. I then plot the positions of the cone apex projection for several rotary table angles. The horizontal compensation values should match the values calculated by the equation
$$ L(\phi_c) = r \sin \phi_c $$
If the CAD values and the calculated values do not match, I check the definition of r and the location of the wheel contact point. A small error in r can cause a large error in the horizontal compensation, especially when the rotary table angle is large. For a straight bevel gear with a large cone distance, I measure r directly on the machine rather than relying on a drawing dimension.
Grinding Parameters and Straight Bevel Gear Quality
The grinding parameters affect both the geometry and the surface integrity of the straight bevel gear. The wheel speed, feed rate, depth of cut, and spark-out passes must be selected carefully. If the depth of cut is too large, the wheel may burn the straight bevel gear surface or cause a geometric error. If the feed rate is too high, the wheel may leave chatter marks. I use a relatively high wheel speed and a small depth of cut per generating pass. The final pass removes only a few hundredths of a millimetre. A spark-out pass without infeed improves the surface finish and reduces the elastic recovery error.
| Grinding parameter | Typical value for a straight bevel gear | Effect on the straight bevel gear |
|---|---|---|
| Wheel speed | 25 to 35 m/s | Higher speed improves finish but increases burn risk |
| Depth of cut per pass | 0.01 to 0.05 mm | Small depth reduces burn and improves accuracy |
| Generating increment | 0.25 to 0.5 degrees | Smaller increment improves flank smoothness |
| Ram feed | 2 to 8 m/min | Too high causes chatter and wheel wear |
| Spark-out passes | 1 to 3 | Improves surface finish and reduces springback |
| Coolant | Flood coolant, clean and filtered | Reduces thermal distortion of the straight bevel gear |
The heat treatment condition of the straight bevel gear also matters. Carburized and quenched straight bevel gears have a hard case and a softer core. The grinding wheel must cut the hard case without inducing cracks. I use a soft-grade wheel with a suitable grain size and a clean coolant. If the straight bevel gear has a high case depth, I reduce the depth of cut and increase the number of passes. I also inspect the straight bevel gear for grinding burn using acid etching or a magnetic particle method when the application is critical.
Error Sources and Countermeasures
The converted machine is capable of good accuracy, but it is not immune to errors. The main error sources are the rolling ratio, the cutter pitch angle, the horizontal compensation, the wheel profile, the fixture runout, and the thermal growth of the machine. I have learned to check each source systematically. The rolling ratio error produces a tooth thickness error and a contact pattern shift. The cutter pitch angle error produces a tooth thickness error and a flank position error. The horizontal compensation error produces a flank twist and a contact pattern change along the tooth width. The wheel profile error produces a pressure angle error and a root fillet error. The fixture runout produces an asymmetric tooth and a pitch error. Thermal growth produces a gradual drift during a long production run.
| Error source | Symptom on the straight bevel gear | Countermeasure |
|---|---|---|
| Incorrect rolling ratio | Tooth thickness error, contact pattern shift | Verify i_c by index marks and CAD simulation |
| Incorrect cutter pitch angle | Tooth too thick or too thin | Adjust lambda after trial grind |
| Horizontal compensation error | Flank twist, poor contact along tooth width | Recalculate L = r sin phi_c and check r |
| Wheel profile error | Pressure angle error, wrong root fillet | Dress wheel and inspect with a profile gauge |
| Fixture runout | Pitch error, asymmetric tooth | Clean fixture, indicate runout, re-clamp |
| Thermal growth | Gradual size drift | Warm up machine, use coolant, inspect periodically |
| Backlash in axes | Irregular flank, poor surface finish | Preload ball screws, reduce reversal error |
Comparison with Conventional Straight Bevel Gear Grinding
The conventional method for grinding a straight bevel gear uses two cup-shaped grinding wheels that grind both flanks by rolling. It is a mature method, but the machine is specialized and expensive. My converted machine uses one conical wheel and a generating motion. It is not intended to replace a high-volume dedicated machine. It is intended for workshops that need to grind a straight bevel gear after heat treatment but cannot justify a large capital investment. The converted machine has fewer axes, but the CNC programming is more complex because the generating motion is distributed among three axes. The setup is also more sensitive to the initial cutter pitch angle and the horizontal compensation.
| Item | Conventional cup-wheel straight bevel gear grinder | Converted generating grinder |
|---|---|---|
| Tool type | Two cup-shaped wheels | One conical wheel on a ram |
| Generating motion | Rolling cradle with two wheels | Workpiece self-rotation, rotary table, and horizontal table interpolation |
| Machine cost | High | Low to moderate |
| Setup complexity | High but well documented | Moderate, requires process development |
| Flexibility | Excellent for straight bevel gears | Good for moderate production and repair |
| Root fillet control | Good | Depends on wheel tip radius and generating motion |
| Best application | High-volume precision straight bevel gear production | Job shop, low-volume, and post-heat-treatment correction |
Practical Observations from My Trials
In my trials, the most difficult part was not the CNC programming. It was the wheel dressing. A straight bevel gear has a tapered tooth, so the grinding wheel contact line must be positioned correctly along the tooth width. If the wheel is dressed with a slight angle error, the contact pattern moves to the toe or the heel. I therefore dress the wheel with a diamond and check the contact pattern on a test straight bevel gear. I use marking compound and roll the straight bevel gear with a master gear or a mating pinion. The contact pattern should be centered and should extend over most of the tooth width without concentrating at the edges.
Another observation is that the horizontal compensation must be smooth. If the CNC program uses coarse blocks, the straight bevel gear flank shows small steps. I use a fine increment and a look-ahead function in the controller. The controller must also handle the reversal of the horizontal table when the rotary table passes through the zero position. If the backlash is not compensated, the straight bevel gear flank will have a visible mark at that point. I therefore use a preloaded ball screw and a one-directional approach whenever possible.
The grinding allowance on a heat-treated straight bevel gear is not uniform. The tooth thickness may vary from tooth to tooth, and the runout may be significant. I measure the straight bevel gear before grinding and group the teeth if necessary. If the variation is too large, I correct the heat treatment process rather than trying to remove all the distortion by grinding. Excessive grinding removes the hard case and reduces the load capacity of the straight bevel gear. The purpose of grinding is to correct the geometry and improve the surface finish, not to remove a large amount of material.
Mathematical Summary of the Generating Motion
The generating motion of the straight bevel gear can be summarized by a set of equations. The rotary table angle and the workpiece self-rotation angle are related by the rolling ratio. The horizontal table position is a sine function of the rotary table angle. The cutter pitch angle determines the initial tooth thickness position. The ram provides the reciprocating motion across the tooth width. The grinding wheel conical surface provides the generating line. The following equations are the core of the process:
$$ i_c = \frac{\cos \theta_f}{\sin \delta} $$
$$ i_c = \frac{z_c \cos \theta_f}{z} $$
$$ \phi_c = \frac{\sin \delta}{\cos \theta_f} \phi_w $$
$$ \phi_w = \frac{\cos \theta_f}{\sin \delta} \phi_c $$
$$ \lambda \approx \frac{180}{\pi R}\left(\frac{s}{2} + h_f \tan \alpha\right) $$
$$ L(\phi_c) = r \sin \phi_c $$
$$ \Delta L_k = r\left(\sin \phi_{c,k} – \sin \phi_{c,k-1}\right) $$
$$ \Delta \phi_c = \frac{\Delta \phi_w}{i_c} $$
$$ N = \frac{\phi_{w,\text{total}}}{\Delta \phi_w} $$
In these equations, delta is the pitch cone angle of the straight bevel gear, theta_f is the root angle, z is the number of teeth, z_c is the equivalent number of teeth of the virtual flat-top gear, R is the large-end cone distance, s is the large-end circular tooth thickness, h_f is the large-end dedendum, alpha is the pressure angle, r is the horizontal distance from the cone apex projection to the rotary table center, phi_c is the rotary table angle, phi_w is the workpiece self-rotation angle, and N is the number of generating increments. These equations are sufficient to program the generating motion of a straight bevel gear on the converted machine.
Advantages of the Converted Machine for the Straight Bevel Gear
The converted machine has several advantages. It uses an existing gear grinding machine, so the capital cost is much lower than a new dedicated straight bevel gear grinder. It can grind a straight bevel gear after heat treatment, which improves the final accuracy and contact pattern. It is flexible enough to handle different straight bevel gear sizes by changing the CNC program and the fixture. It does not require a special two-wheel grinding head. The grinding wheel is easy to dress, and the wheel cost is relatively low. The machine can also be used for other gear grinding operations when it is not grinding a straight bevel gear. For a workshop with moderate production and a variety of straight bevel gear types, this flexibility is valuable.
The method also has limitations. It is not as fast as a dedicated straight bevel gear grinder. The generating motion requires many small increments, so the cycle time is longer. The setup is sensitive to the initial cutter pitch angle and the horizontal compensation. The root fillet depends on the wheel tip radius. The method is best suited for straight bevel gears with moderate modules and moderate precision requirements. For very large straight bevel gears or very high production volumes, a dedicated machine may still be the better choice. However, for many repair and job-shop applications, the converted machine provides a practical way to grind a straight bevel gear after heat treatment.
Quality Inspection of the Ground Straight Bevel Gear
After grinding, I inspect the straight bevel gear for tooth thickness, pitch, runout, contact pattern, and surface roughness. Tooth thickness is measured with a gear tooth calliper or a span gauge. Pitch and runout are measured on a gear inspection instrument or with a precision fixture. The contact pattern is checked by rolling the straight bevel gear with a master gear or its mating pinion. The contact pattern should be centered on the tooth and should not extend to the edges. Surface roughness is measured with a portable roughness tester. If the straight bevel gear is for a critical application, I also check for grinding burn and cracks.
| Inspection item | Method | Acceptance condition for the straight bevel gear |
|---|---|---|
| Tooth thickness | Tooth calliper or span gauge | Within drawing tolerance |
| Pitch error | Gear inspection instrument | Within specified accuracy grade |
| Runout | Dial indicator on fixture | Below the specified limit |
| Contact pattern | Marking compound and rolling test | Centered, no edge concentration |
| Surface roughness | Portable roughness tester | Better than the drawing requirement |
| Grinding burn | Acid etch or magnetic particle inspection | No visible burn or cracks |
Programming Strategy for the Straight Bevel Gear
I program the generating motion using absolute coordinates for the rotary table and the horizontal table. Absolute programming prevents the accumulation of small errors over many increments. For each increment, I calculate the rotary table angle, the workpiece self-rotation angle, and the horizontal offset. I then issue a synchronized move of the three axes. The ram motion can be synchronized with the generating motion or it can be a separate feed. In my first programs, I used a simple loop with a fixed increment. Later, I improved the program by using a variable increment that is smaller near the final tooth form and larger at the beginning. This reduces the cycle time without sacrificing accuracy.
I also use a safe retract position between teeth. The grinding wheel must clear the straight bevel gear before the index motion begins. If the wheel is too close, it may scratch the next tooth. The retract distance depends on the tooth height and the wheel diameter. I usually retract by at least 2 to 3 mm. The index motion should be fast but smooth. A sudden index motion can cause the straight bevel gear to slip on the fixture if the clamping force is not sufficient. I therefore use a positive drive fixture whenever possible.
Thermal and Mechanical Stability
The converted machine must be thermally stable. Grinding generates heat, and the machine structure expands. For a straight bevel gear with a tight tolerance, this expansion can cause a size drift during the production run. I warm up the machine before grinding and use a flood coolant to control the temperature. I also avoid grinding a straight bevel gear immediately after a heavy cut on another part. If the machine has been idle, I run a warm-up program for 15 to 30 minutes. The coolant should be clean and at a controlled temperature. A dirty coolant can clog the wheel and cause burn.
Mechanically, the machine must be rigid. The ram must move without vibration. The rotary table must rotate smoothly. The workpiece self-rotation axis must have minimal runout. The fixture must clamp the straight bevel gear securely without distorting it. If the fixture is too weak, the grinding force will push the straight bevel gear away from the wheel, and the tooth thickness will vary. If the fixture is too strong, it may distort a thin-walled straight bevel gear. I use a fixture that supports the straight bevel gear near the root cone and clamps it evenly.
Conclusion
I have described a practical method for converting a conventional gear grinding machine into a CNC generating grinder for straight bevel gears. The method is based on the flat-top gear planing principle. A conical grinding wheel on a reciprocating ram represents one tooth flank of a virtual flat-top gear. The straight bevel gear performs a compound motion consisting of self-rotation, rotary table revolution, and horizontal compensation. The rolling ratio, cutter pitch angle, and horizontal offset are calculated from the straight bevel gear geometry. The CNC controller interpolates the three axes to generate the straight bevel gear flank. The grinding wheel is dressed to the required conical form and tip radius. The process is verified by trial grinding and inspection.
The main advantage of this method is that it makes it possible to grind a heat-treated straight bevel gear without buying an expensive dedicated machine. It improves the accuracy and surface finish of the straight bevel gear and corrects heat treatment distortion. The main challenges are the setup sensitivity, the wheel dressing, and the programming of the generating motion. With careful attention to these factors, the converted machine can produce a satisfactory straight bevel gear. I believe this method is useful for workshops that need a flexible and economical solution for straight bevel gear grinding. The straight bevel gear remains a critical component in many transmissions, and the ability to grind it accurately after heat treatment is a significant advantage. The converted machine has become a valuable part of my production process for straight bevel gears, and I continue to refine the wheel dressing, CNC programming, and inspection methods to improve the results.