
In the demanding environment of a bulk material handling port, the reliability of critical equipment is paramount. A single operational error can lead to significant mechanical failure, resulting in costly downtime and repairs. This article details a first-person account of the analysis, decision-making, and intricate repair process undertaken following the catastrophic failure of a pivotal component in a bucket wheel stacker-reclaimer—the main gear shaft. The gear shaft, a large-diameter, heavily loaded component, suffered severe plastic deformation and partial fracturing of its teeth due to an overload incident. Faced with a lead time of over four months and a cost of tens of thousands of currency units for a replacement, our engineering team embarked on a mission to develop and execute a reliable in-house repair via welding, a process fraught with challenges given the material’s properties.
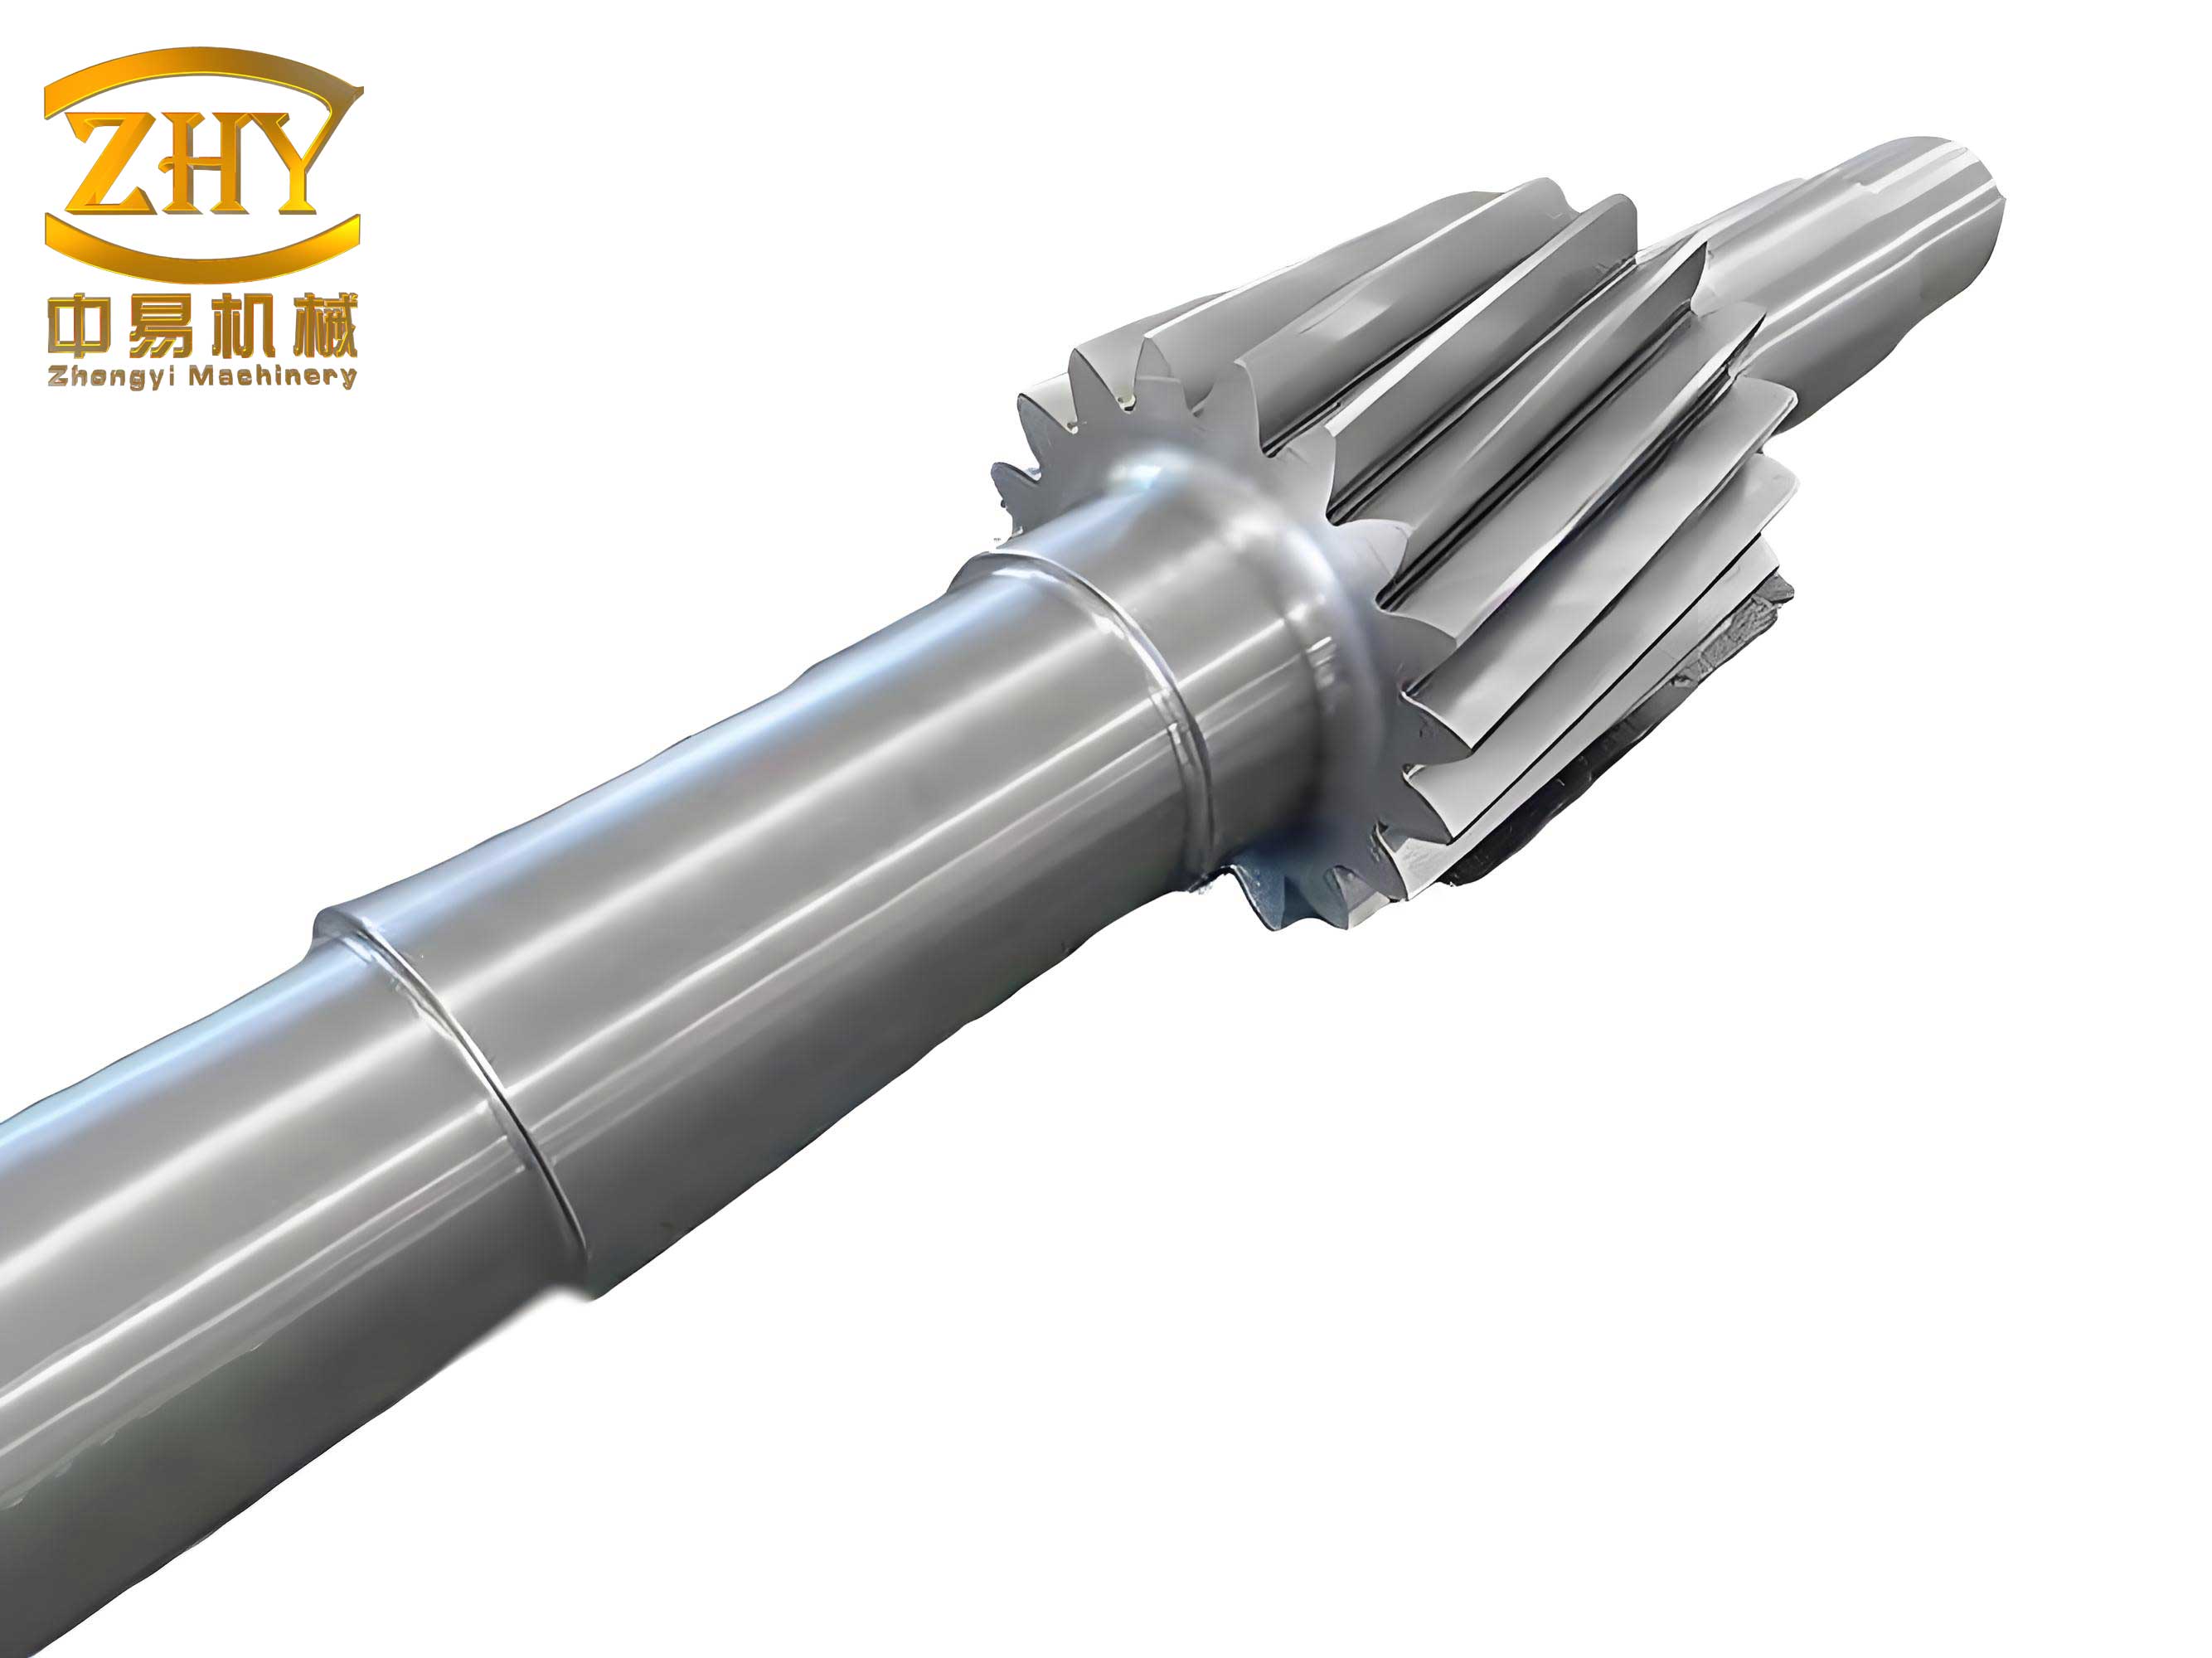
The damaged gear shaft is a central power transmission element. Technical specifications retrieved from the machine’s manual indicated a gear with 26 teeth, a module of 30 mm, a face width of 47 mm, and a total gear section length of 520 mm. The substantial size of the individual teeth, while contributing to the severity of the damage, also presented an opportunity for reconstruction, as it provided sufficient mass and space for implementing a robust repair strategy.
Material Weldability Analysis and the Carbon Equivalent Challenge
The core of the repair challenge lay in the material of the gear shaft: 40CrMnMo, a quenched and tempered high-strength alloy steel. Its chemical composition, as per the material certificate, is summarized in Table 1 below.
| Element | C | Mn | Si | Cr | Mo | P | S |
|---|---|---|---|---|---|---|---|
| Content | 0.37 – 0.45 | 0.90 – 1.20 | 0.17 – 0.37 | 0.90 – 1.20 | 0.20 – 0.30 | ≤ 0.035 | ≤ 0.035 |
This alloy is designed for high strength and good hardenability, with typical post-heat-treatment mechanical properties including a yield strength (ReL) ≥ 690 MPa and a tensile strength (Rm) ≥ 790 MPa. However, these very properties make it notoriously difficult to weld. The primary quantitative metric for assessing the cold cracking susceptibility (and thus weldability) of steel is its Carbon Equivalent (CE). We employed the common International Institute of Welding (IIW) formula for our assessment:
$$ CE = C + \frac{Mn}{6} + \frac{Si}{24} + \frac{Ni}{15} + \frac{Cr}{5} + \frac{Mo}{4} + \frac{Cu}{13} + \frac{P}{2} $$
Where all elemental symbols represent their percentage content. For 40CrMnMo, considering the maximum values from the range to evaluate the worst-case scenario:
$$ CE_{max} = 0.45 + \frac{1.20}{6} + \frac{0.37}{24} + \frac{0}{15} + \frac{1.20}{5} + \frac{0.30}{4} + \frac{0}{13} + \frac{0}{2} $$
$$ CE_{max} = 0.45 + 0.20 + 0.015 + 0 + 0.24 + 0.075 + 0 + 0 = 0.98\% $$
Similarly, the minimum CE calculates to approximately 0.76%. According to welding standards, a CE value exceeding 0.60% indicates a high risk of hydrogen-induced cold cracking and requires strict pre-heating and post-heating procedures. Our calculated range of 0.76-0.98% categorizes this gear shaft material as having very poor weldability. The high alloy content widens the crystallization temperature range, promotes segregation, and increases the propensity for both hot cracking during solidification and, more critically, the formation of hard, brittle martensite in the Heat-Affected Zone (HAZ) leading to cold cracks under welding stresses.
The internal cause for potential weld failure was thus inherent in the chemistry of the gear shaft. The external causes we could control were the joint design, welding procedure, filler metal selection, and thermal management. Our strategy had to systematically address each of these to mitigate the cracking risk and ensure the repaired gear shaft could withstand operational loads.
Developed Repair Philosophy and Procedure
Our repair methodology was built on four foundational pillars designed to overcome the poor weldability of the 40CrMnMo gear shaft:
- Bolted Insert with Welding (Mechanical Locking): Instead of building up the entire tooth from weld metal, we would machine a new tooth insert from a similar high-strength material and mechanically lock it into the body of the gear shaft using high-strength bolts (“studs”). This approach ensures that a significant portion of the operational shear and bending loads is carried by the bolts in pure mechanical fashion, drastically reducing the stress demand on the surrounding weld seams. The welds then primarily serve to secure the insert against loosening and to transfer secondary loads.
- Controlled Arc Welding Process: Gas Metal Arc Welding (GMAW) with a shielding gas mix was selected. This process, particularly with the right gas composition, offers lower heat input potential compared to some manual processes, better control over the weld pool, and excellent protection from atmospheric contamination, reducing the risk of porosity and, by extension, crack initiation sites.
- Low-Carbon, High-Strength Filler Metal: To combat the HAZ hardening and control the carbon content in the fusion zone, we selected a filler wire with a carbon content significantly lower than that of the base gear shaft material. The chosen wire was ER80-G, a high-strength grade capable of matching the base metal’s tensile strength after welding.
- Comprehensive Thermal Management: This was the most critical operational factor. It encompassed rigorous preheating of the gear shaft before welding to reduce the cooling rate, maintaining a specific interpass temperature during welding, and executing a dedicated post-weld heat treatment (PWHT) for stress relief and HAZ softening.
Selection of Consumables and Equipment
The filler metal choice was critical. We selected ER80-G wire, which conforms to relevant high-strength standards. Its chemical composition and typical as-welded mechanical properties are listed in Table 2, demonstrating its suitability for matching the 790 MPa tensile strength of the gear shaft while offering improved weldability.
| Parameter | Details / Value |
|---|---|
| Wire Chemistry (wt.%) | C≤0.10, Mn 1.40-1.80, Si 0.40-0.70, Ni 1.60-2.40, Mo 0.30-0.60 |
| Shielding Gas | 80% Argon / 20% Carbon Dioxide (Ar/CO₂) |
| Weld Metal Tensile Strength (Rm) | ≥ 790 MPa |
| Weld Metal Yield Strength (ReL) | ≥ 690 MPa |
| Impact Toughness at -20°C (KV₂) | ≥ 27 J |
The Ar/CO₂ gas mix provides a stable arc, deep penetration, and minimal spatter. For the welding power source, a modern inverter-type GMAW machine was chosen for its excellent arc characteristics, consistency, and ability to deliver stable parameters essential for welding the sensitive gear shaft material.
Step-by-Step Execution of the Gear Shaft Repair
The physical repair was a meticulous, multi-stage operation.
Stage 1: Preparation and Machining
Cleaning and Defect Removal: The entire repair area on the gear shaft was thoroughly cleaned of all grease, oil, and dirt using industrial solvents and degreasers. The deformed and fractured tooth remnants were then completely removed using a combination of thermal cutting and grinding, creating a flat, clean surface on the gear shaft body down to sound metal. The final preparation involved grinding the area to a bright metallic finish and a final wipe with acetone.
Drilling and Tapping for Studs: Precise layout lines were marked along the width of the missing tooth space. Eight holes of M25 thread size were drilled and tapped into the body of the gear shaft. The depth was calculated to extend approximately 40 mm below the root diameter of the gear, ensuring deep, strong engagement within the robust core of the gear shaft.
Fabrication of Studs and New Tooth Insert: Eight high-strength studs were machined from 40CrMnMo bar stock to match the M25 thread. Concurrently, a new tooth was precision-machined from a forged blank of similar high-strength alloy steel. Its profile was generated based on precise measurements of adjacent, unworn teeth on the same gear shaft to ensure correct involute geometry. Key features were machined into this insert:
- Clearance Holes: Eight 26 mm diameter holes were drilled through the insert to align with the tapped holes in the gear shaft. The oversized diameter (26 mm vs. M25 thread) allowed for minor positional adjustments during final fitting.
- Weld Preparations: 45-degree bevels were machined along both side edges at the root of the tooth insert. This created a suitable groove for the primary securing fillet welds.
Stage 2: Fitting and Alignment
The studs were first screwed into the tapped holes in the gear shaft. The new tooth insert was then lowered onto these studs. Using a precision-machined template that matched the profile of the existing teeth on the gear shaft, the insert was meticulously aligned in all axes (radial runout, pitch, profile). High-strength nuts were finger-tightened on the studs. The alignment was verified using a gear measuring instrument to ensure the repaired tooth would mesh correctly with its mating gear. Once perfect alignment was confirmed, the insert was tack-welded in a few locations to lock its position relative to the gear shaft.
Stage 3: Welding Procedure
With the insert mechanically fastened and aligned, the welding sequence began. The gear shaft was positioned with its axis vertical to facilitate downhand welding.
Preheating: Ceramic pad heaters were uniformly applied to the repair zone and a surrounding area of at least 150 mm on the gear shaft. The temperature was gradually raised and maintained between 250°C and 300°C, as measured by contact thermocouples. This preheat slows the cooling rate post-weld, allowing hydrogen to diffuse out and reducing the martensite transformation rate in the HAZ.
Welding Parameters and Technique: Two certified welders worked simultaneously on opposite sides of the tooth to balance heat input and minimize distortion. The primary parameters were kept within a strict window, as summarized in Table 3.
| Parameter | Setting / Value |
|---|---|
| Process | GMAW (Pulse Transfer Mode) |
| Wire Diameter | 1.2 mm (ER80-G) |
| Shielding Gas & Flow | 80%Ar/20%CO₂ @ 18-22 L/min |
| Voltage | 26 – 28 V |
| Current | 240 – 260 A |
| Travel Speed | 20 – 25 cm/min |
| Heat Input (Approx.) | 15 – 20 kJ/cm (closely controlled) |
| Interpass Temperature | 250 – 300°C |
The welding sequence proceeded as follows:
- Stud Welding (Plug Welds): Each of the eight clearance holes around the studs was filled with weld metal in a vertical-down position, creating a strong “plug weld” that further locked the stud and the insert together with the parent gear shaft.
- Root Passes: The 45-degree bevel grooves along the sides were filled using multiple stringer beads. Care was taken to ensure full fusion at the root between the insert and the gear shaft body.
- Multi-Pass Fill and Cap: Subsequent layers were deposited to build up the fillet welds to the specified size. A strict interpass temperature was maintained. After each pass, the weld bead was lightly peened with a round-nose tool to help relax shrinkage stresses.
Stage 4: Post-Weld Heat Treatment (PWHT) and Finishing
Immediately upon completion of welding, while the gear shaft was still at or above the interpass temperature, the heaters were reactivated. The temperature of the entire repair zone and a significant portion of the gear shaft was uniformly raised to 580°C ± 20°C. This temperature was held (“soaked”) for a duration calculated based on the thickness of the welded section (approximately 2 hours). The purpose was threefold:
- To diffuse out any residual hydrogen from the weld metal and HAZ.
- To temper the hard martensitic structures that formed in the HAZ during welding, restoring toughness.
- To relieve the high residual stresses induced by the localized heating and cooling of welding.
After the soak, the gear shaft was covered with insulating blankets and allowed to cool slowly in still air to ambient temperature.
Final Machining and Inspection: After slow cooling, the weld reinforcements and the plug weld caps were carefully ground and filed flush with the contour of the new tooth and the gear shaft body. The tooth profile was finally dressed using precision files and checked repeatedly with the profile template. The final step involved rotating the repaired gear shaft in mesh with its mating gear (unloaded) to visually check for smooth engagement and correct backlash.
Results, Validation, and Concluding Analysis
The completed repair was subjected to non-destructive testing (NDT). Magnetic particle inspection (MPI) conducted on all weld seams and the adjacent HAZ of the gear shaft revealed no indications of cracks, lack of fusion, or significant porosity. The dimensional inspection confirmed the tooth geometry was within acceptable limits for proper gear meshing.
The ultimate validation was operational performance. The repaired bucket wheel stacker-reclaimer, with its critical gear shaft restored, was returned to full service. It has now been in continuous operation for over two years, handling millions of tons of material. Periodic inspections during planned maintenance shutdowns have shown the repaired tooth and the surrounding welds on the gear shaft to be in excellent condition, with no signs of crack initiation, wear anomalies, or loosening.
This successful repair underscores several key engineering principles. Firstly, it highlights that even components made from materials with very poor weldability, such as a high-carbon-equivalent gear shaft, can be reliably repaired if a holistic engineering approach is taken. This approach must integrate:
- Mechanical Design: Reducing weld dependency via bolting/inserts.
- Metallurgical Science: Understanding CE, HAZ transformations, and filler metal selection.
- Process Control: Strict adherence to preheat, interpass temperature, low-hydrogen practice, and PWHT.
- Skilled Execution: Precision fitting and certified welding technique.
The economic and operational benefits were substantial. The repair was completed in a fraction of the time required for a new gear shaft procurement and at a small fraction of the cost. More importantly, it avoided prolonged, costly downtime for the port. This case study serves as a validated reference procedure for the repair of other high-value, high-strength alloy steel components like large gear shafts, proving that with careful analysis and execution, seemingly catastrophic failures can be overcome with robust, in-situ solutions.