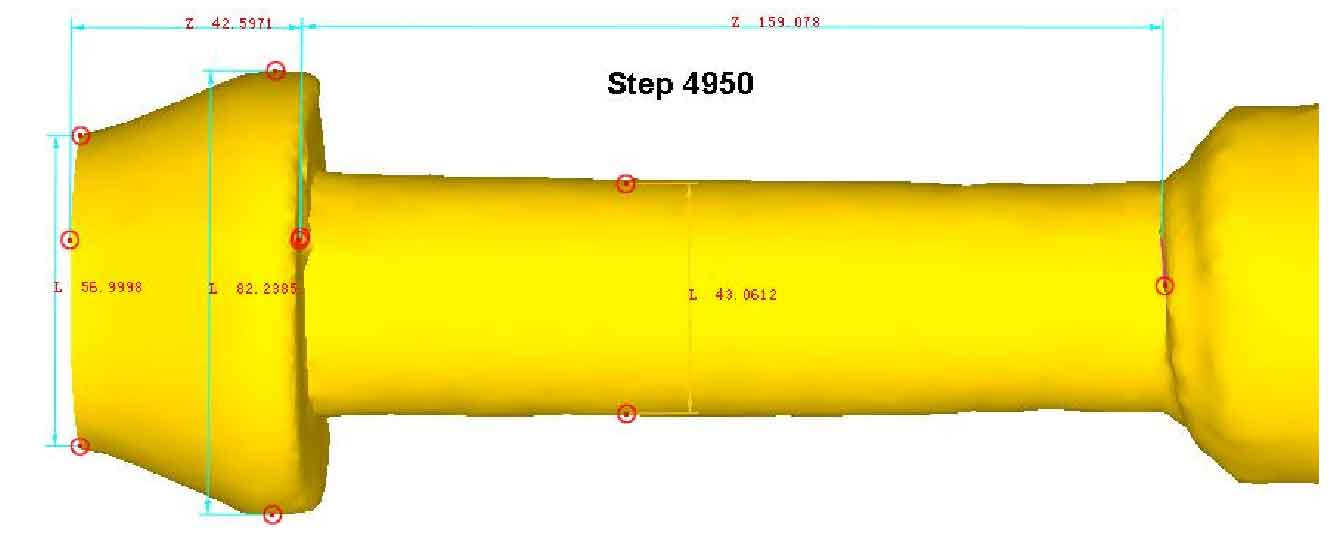
Use the measuring tool in dfeorm post processor to measure the dimensions of each part of the spiral bevel gear blank workpiece obtained by cross wedge rolling. The measurement results are shown in Figure 1:
By comparing the dimensions in Figure 1 with those in Figure 2, it can be found that the axial dimension of the workpiece is basically the same as that in the drawing of hot spiral bevel gear blank, and the error is 1 ~ 2mm, which is within a reasonable range for hot rolling. However, the radial dimension error is large, about 4mm larger than the blank size of the hot spiral bevel gear in Figure 2. This error is caused by the transverse expansion of the rolled piece during the rolling process. In particular, the transverse expansion of the shaft is slightly more severe because the diameter of the shaft becomes smaller after rolling and is no longer constrained by the guide plate.
The diameter of the shaft is 38.89mm in the drawing of hot spiral bevel gear blank, and the rolled size is 43.1mm. Because the spiral bevel gear blank workpiece is not all constrained in the circumferential direction in the rolling process, there is room for transverse expansion of the tie in the rolling process. When the axial extension resistance is large, it will inevitably lead to transverse expansion, resulting in large error of radial dimension.


