
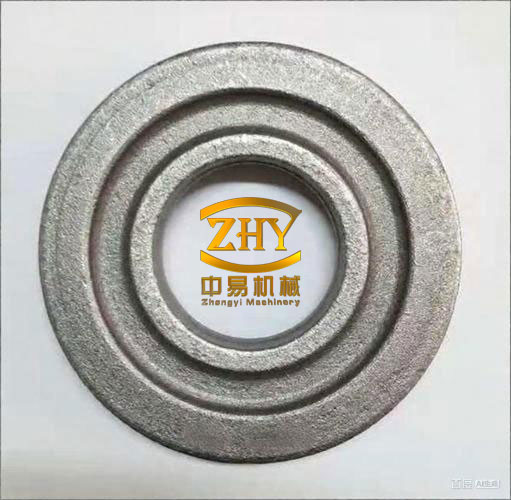
I carried out a complete finite element investigation of the precision forging process for a forged gear blank, using a three-dimensional explicit-implicit simulation framework. The purpose of my study was to determine how the initial billet dimensions influence metal flow, equivalent strain distribution, and upper-die stroke load during the closed-die forging of a spur gear blank. The forged gear blank that I analyzed is intended for a 29-tooth gear with an outer diameter of 158 mm after the addition of machining allowance. My work combined analytical volume calculations with numerical simulation so that the optimal billet aspect ratio could be selected without resorting to expensive trial-and-error experiments.
In my numerical model, I treated the forged gear blank as a viscoplastic body undergoing large plastic deformation. The material was 45 steel, which is a medium-carbon steel widely used for forged gear blanks because of its favorable combination of strength, hardenability, and forgeability. I set the initial gear temperature to 1200 °C, the die temperature to 200 °C, the friction factor to 0.5, the die velocity to 5 mm/s, and the die fillet radius to 3 mm. These process parameters reflect a typical hot precision forging condition in which the forged gear blank is formed in a single stroke without reheating. The high temperature reduces the flow stress of the forged gear blank and promotes die filling, while the relatively low die temperature helps to chill the surface layers and preserve the dimensional accuracy of the forged gear blank.
The traditional manufacturing route for a gear includes blank heat treatment, gear blank machining, tooth profile machining, tooth end machining, tooth surface heat treatment, datum correction, and tooth finishing. In contrast, precision forging of a forged gear blank offers substantial advantages. The material utilization can exceed 70%, the gear strength can be increased by more than 20%, and the production efficiency can be improved by approximately 40% compared with conventional cutting. These benefits motivated my decision to study the forging process rather than machining. The following table summarizes the comparison between the conventional route and the precision forging route that I adopted.
| Indicator | Conventional Cutting Route | Precision Forging Route for the Forged Gear Blank |
|---|---|---|
| Material utilization | Often below 50% | Above 70% |
| Gear strength | Baseline | More than 20% higher |
| Production efficiency | Baseline | About 40% higher |
| Process steps | Many separate operations | Single-stroke precision forging of the forged gear blank |
| Metal flow control | Not applicable | Directly controlled by die design and billet dimensions |
I began the analysis by establishing the geometry of the forged gear blank. The gear has 29 teeth, a tip diameter of 155 mm, a tooth thickness of 8 mm, a hub height of 40 mm, a hub diameter of 50 mm, and a bore diameter of 20 mm. A 5-mm-thick punching web is left at the bottom of the bore, and a machining allowance is added so that the outer diameter of the forged gear blank becomes 158 mm. The geometric parameters of the forged gear blank are listed in the following table.
| Parameter | Symbol | Value | Unit |
|---|---|---|---|
| Number of teeth | $z$ | 29 | — |
| Tip diameter | $D_a$ | 155 | mm |
| Tooth thickness | $t$ | 8 | mm |
| Hub height | $h_h$ | 40 | mm |
| Hub diameter | $D_h$ | 50 | mm |
| Bore diameter | $D_b$ | 20 | mm |
| Punching web thickness | $t_w$ | 5 | mm |
| Outer diameter of the forged gear blank | $D_o$ | 158 | mm |
Using the geometry above, I calculated the theoretical volume of the forged gear blank. The volume consists of the rim volume, the hub volume, and the web volume, minus the bore volume. For a forged gear blank with an outer radius $R_o$, a hub radius $R_h$, a bore radius $R_b$, a rim thickness $t$, a hub height $h_h$, and a web thickness $t_w$, the volume can be written as follows:
$$ V = \pi \left( R_o^2 – R_h^2 \right) t + \pi R_h^2 h_h – \pi R_b^2 \left( h_h – t_w \right) $$
Substituting the numerical values, I obtained the net volume of the forged gear blank:
$$ V \approx 208{,}689.717 \ \text{mm}^3 $$
Because the forging process also requires a small amount of material for machining allowance, flash, and scale loss, I increased the billet volume to:
$$ V_0 = 214{,}413.699 \ \text{mm}^3 $$
This volume was kept constant throughout all of my simulations so that the effect of the initial billet diameter and height on the forging behavior of the forged gear blank could be isolated. The corresponding forging die structure for the forged gear blank is shown in the following figure.
I modeled the forging process with an updated Lagrangian formulation. The governing equilibrium equation for the forged gear blank during plastic deformation can be expressed as:
$$ \nabla \cdot \boldsymbol{\sigma} + \mathbf{f} = \rho \mathbf{a} $$
where $\boldsymbol{\sigma}$ is the Cauchy stress tensor, $\mathbf{f}$ is the body force vector, $\rho$ is the density, and $\mathbf{a}$ is the acceleration vector. Because the forging speed is relatively low, I neglected inertial effects in the simulation. The yield condition for the forged gear blank was described by the von Mises criterion:
$$ \bar{\sigma} = \sqrt{\frac{3}{2} \mathbf{s} : \mathbf{s}} $$
where $\mathbf{s}$ is the deviatoric stress tensor. The associated flow rule was used to relate the plastic strain increment to the stress state:
$$ d\boldsymbol{\varepsilon}^p = d\lambda \frac{\partial \bar{\sigma}}{\partial \boldsymbol{\sigma}} $$
For the hot forging of the forged gear blank, I adopted a temperature- and strain-rate-dependent flow stress model. The general form of the constitutive equation used in the simulation was:
$$ \sigma = K \bar{\varepsilon}^{n} \dot{\bar{\varepsilon}}^{m} \exp\left( \frac{Q}{RT} \right) $$
Here, $K$ is the material constant, $n$ is the strain-hardening exponent, $m$ is the strain-rate sensitivity exponent, $Q$ is the activation energy, $R$ is the universal gas constant, and $T$ is the absolute temperature. For 45 steel at 1200 °C, the flow stress of the forged gear blank is relatively low, which favors die filling and reduces the required press tonnage. The friction condition at the die–workpiece interface was modeled using the shear friction law:
$$ \tau_f = m k $$
where $m$ is the friction factor and $k$ is the shear yield strength of the forged gear blank. In my simulations, I used $m = 0.5$, which corresponds to a well-lubricated hot forging condition. The heat generated by plastic deformation and friction was taken into account through the following energy balance:
$$ \rho c_p \frac{\partial T}{\partial t} = \nabla \cdot \left( k_T \nabla T \right) + \dot{q}_{pl} + \dot{q}_f $$
where $\rho$ is the density, $c_p$ is the specific heat, $k_T$ is the thermal conductivity, $\dot{q}_{pl}$ is the heat generation rate from plastic work, and $\dot{q}_f$ is the heat generation rate from friction. The plastic work term was calculated as:
$$ \dot{q}_{pl} = \eta_p \bar{\sigma} \dot{\bar{\varepsilon}} $$
with $\eta_p$ typically taken as 0.9 for hot metal forming. The friction heat flux was evaluated as:
$$ \dot{q}_f = \tau_f v_s $$
where $v_s$ is the relative sliding velocity between the forged gear blank and the die. These thermal effects are important because they influence the local flow stress, the strain distribution, and the final microstructure of the forged gear blank.
I used DEFORM-3D as the finite element engine for my simulations. The initial billet was discretized into approximately 50,000 tetrahedral elements for each scheme. The simulation step size was set to one third of the minimum element edge length, which ensured numerical stability and adequate resolution of the deformation field. The mesh was automatically remeshed whenever the element distortion exceeded a critical threshold, so that the large plastic strains in the forged gear blank could be captured without numerical divergence. The following table lists the main process parameters that I used in the finite element model.
| Process Parameter | Symbol | Value | Unit |
|---|---|---|---|
| Material | — | 45 steel | — |
| Initial gear temperature | $T_g$ | 1200 | °C |
| Die temperature | $T_d$ | 200 | °C |
| Friction factor | $m$ | 0.5 | — |
| Die velocity | $v_d$ | 5 | mm/s |
| Die fillet radius | $r_d$ | 3 | mm |
| Number of mesh elements | $N_e$ | 50,000 | — |
| Simulation step size | $\Delta s$ | $L_{\min}/3$ | mm |
Since the forged gear blank is a body of revolution, I chose cylindrical billets with different diameters and heights. According to the principle of volume constancy, the height of each billet was calculated from the billet diameter and the required volume:
$$ H_0 = \frac{4 V_0}{\pi D_0^2} $$
where $D_0$ is the initial billet diameter and $H_0$ is the initial billet height. The aspect ratio of the forged gear blank billet was defined as:
$$ \lambda = \frac{H_0}{D_0} $$
I first considered four initial schemes, which are listed in the following table. These schemes cover a wide range of billet diameters and aspect ratios, from a relatively flat billet to a relatively tall billet.
| Scheme | Billet Diameter $D_0$ (mm) | Billet Height $H_0$ (mm) | Aspect Ratio $\lambda$ | Simulation Step (mm) |
|---|---|---|---|---|
| 1 | 120 | 19.0 | 0.158 | 0.40 |
| 2 | 110 | 22.6 | 0.205 | 0.40 |
| 3 | 100 | 27.3 | 0.273 | 0.40 |
| 4 | 90 | 33.7 | 0.374 | 0.35 |
My evaluation of the forging quality for the forged gear blank was based on three main criteria. First, the hub portion should fill the die cavity before the rim portion, and the time difference between hub filling and rim filling should be as small as possible so that excessive flash is not extruded from the rim. Second, the metal flow inside the forged gear blank should maintain a consistent direction, without backflow or folding. Third, no folding defects should appear anywhere in the forged gear blank. These criteria are closely related to the final mechanical properties of the forged gear blank.
For the first two schemes, with billet diameters of 120 mm and 110 mm, I observed that the rim portion of the forged gear blank filled the die cavity first, while the hub portion was more difficult to fill. The hub was only completely filled at the end of the die stroke. This filling sequence is unfavorable because once the rim is filled, the rim thickness becomes larger than the required dimension, and further downward movement of the upper die forces the metal in the rim to flow back into the hub. This backflow disrupts the internal metal flow lines of the forged gear blank and can degrade its mechanical performance. In addition, the large amount of metal that reverses direction can create internal shear bands and residual stresses. Therefore, I rejected schemes 1 and 2.
For scheme 3, with a billet diameter of 100 mm, the hub portion filled the die cavity first, and the rim portion then filled the cavity just as the die stroke ended. The amount of flash extruded from the gap between the upper and lower dies was small. More importantly, the metal flow direction remained consistent throughout the forging process, and no backflow occurred. This indicates that the forged gear blank produced from the 100 mm billet has a sound internal flow pattern. The filling sequence is exactly the opposite of the unfavorable sequence observed in schemes 1 and 2, and the time difference between hub filling and rim filling is small. Consequently, scheme 3 was identified as a promising candidate.
For scheme 4, with a billet diameter of 90 mm, the filling sequence was similar to that of scheme 3, and the metal flow direction was also generally consistent. However, the time difference between hub filling and rim filling was larger than that in scheme 3. This larger time difference can lead to a less uniform equivalent strain distribution in the forged gear blank, because the rim continues to deform after the hub has already filled. Therefore, although scheme 4 did not exhibit backflow or folding, its strain uniformity required further examination.
To quantify the filling behavior, I defined the filling time difference for the forged gear blank as:
$$ \Delta t_{fill} = t_{rim} – t_{hub} $$
where $t_{hub}$ is the time at which the hub is completely filled and $t_{rim}$ is the time at which the rim is completely filled. A small positive value of $\Delta t_{fill}$ is desirable because it means that the hub fills first and the rim fills shortly afterward, without a long period of rim overfilling. The qualitative results for the first four schemes are summarized in the following table.
| Scheme | Billet Diameter (mm) | First Region to Fill | Backflow | Folding | Flash Severity | Overall Assessment |
|---|---|---|---|---|---|---|
| 1 | 120 | Rim | Severe | Possible | High | Rejected |
| 2 | 110 | Rim | Moderate | Possible | Moderate | Rejected |
| 3 | 100 | Hub | None | None | Low | Promising |
| 4 | 90 | Hub | None | None | Low | Acceptable but less uniform |
After the initial comparison, I performed a second optimization stage with three additional billet diameters: 108 mm, 105 mm, and 102 mm. The corresponding billet heights were calculated from the constant volume condition and are listed in the following table.
| Scheme | Billet Diameter $D_0$ (mm) | Billet Height $H_0$ (mm) | Aspect Ratio $\lambda$ | Simulation Step (mm) |
|---|---|---|---|---|
| 5 | 108 | 23.4 | 0.217 | 0.40 |
| 6 | 105 | 24.8 | 0.236 | 0.40 |
| 7 | 102 | 26.2 | 0.257 | 0.40 |
For scheme 5, with a billet diameter of 108 mm, the rim portion filled the die cavity first and the hub portion filled later, which caused backflow in the forged gear blank. Therefore, I rejected this scheme. For scheme 6, with a billet diameter of 105 mm, no instability, folding, or backflow occurred during forging. However, a relatively large amount of flash was extruded from the die gap, which can cause stress concentration and increase the required trimming load. For scheme 7, with a billet diameter of 102 mm, the forged gear blank exhibited excellent formability. No instability, folding, or backflow was observed, and only a small amount of flash was extruded just before the end of the forging stroke. This scheme is therefore a viable candidate for the forged gear blank.
I next analyzed the equivalent strain distribution in the forged gear blank. The equivalent strain is defined as:
$$ \bar{\varepsilon} = \sqrt{\frac{2}{3} \left( \varepsilon_1^2 + \varepsilon_2^2 + \varepsilon_3^2 \right)} $$
where $\varepsilon_1$, $\varepsilon_2$, and $\varepsilon_3$ are the principal strains. In the finite element simulation, the equivalent strain was updated incrementally according to the plastic strain rate:
$$ \dot{\bar{\varepsilon}} = \sqrt{\frac{2}{3} \dot{\boldsymbol{\varepsilon}}^p : \dot{\boldsymbol{\varepsilon}}^p} $$
For the forged gear blank, I found that the hub region generally experienced a lower equivalent strain, while the rim region and the punching web experienced a higher equivalent strain. This is because the rim and web are subjected to more severe shearing and compression during the final stage of forging. The strain distribution in the hub and rim was relatively uniform for the better schemes, but the uniformity deteriorated when the filling time difference was large. In particular, the 90 mm billet produced the least uniform equivalent strain in the rim region, which can be attributed to the large time gap between hub filling and rim filling. Both the 100 mm and 102 mm billets produced a more uniform equivalent strain distribution throughout the forged gear blank.
To quantify strain uniformity, I defined a strain uniformity index for the forged gear blank:
$$ U = 1 – \frac{\bar{\varepsilon}_{\max} – \bar{\varepsilon}_{\min}}{\bar{\varepsilon}_{\avg}} $$
where $\bar{\varepsilon}_{\max}$, $\bar{\varepsilon}_{\min}$, and $\bar{\varepsilon}_{\avg}$ are the maximum, minimum, and average equivalent strains in the region of interest. A value of $U$ close to unity indicates a highly uniform strain distribution. Although I did not extract a single numerical value for every scheme, the qualitative ranking from my simulations was consistent: the 100 mm and 102 mm billets gave the highest uniformity, the 90 mm billet gave the lowest uniformity, and the 105 mm billet fell between them. The following table summarizes the equivalent strain characteristics that I observed.
| Scheme | Billet Diameter (mm) | Hub Strain Level | Rim Strain Level | Web Strain Level | Strain Uniformity |
|---|---|---|---|---|---|
| 4 | 90 | Low | High | High | Lowest among the compared cases |
| 3 | 100 | Low | High | High | Very high |
| 7 | 102 | Low | High | High | Very high |
| 6 | 105 | Low | High | High | Moderate |
The upper-die stroke load is another critical factor in the design of the forging process for the forged gear blank. I extracted the load–stroke curves for the 90 mm, 100 mm, 102 mm, and 105 mm billets. In all cases, the load increased with increasing stroke, and the maximum load occurred near the end of the stroke when the die cavity was almost completely filled. The maximum loads that I obtained are listed in the following table.
| Billet Diameter (mm) | Maximum Upper-Die Load (N) | Relative Load | Press Capacity Requirement |
|---|---|---|---|
| 90 | $2.47 \times 10^7$ | 1.00 | Small press |
| 100 | $2.46 \times 10^7$ | 0.996 | Small press |
| 102 | $2.61 \times 10^7$ | 1.057 | Small press |
| 105 | $2.98 \times 10^7$ | 1.206 | Small press |
From the load data, I concluded that all four billets can be forged on a relatively small press. The 90 mm and 100 mm billets required the lowest loads, and therefore the least energy. The 102 mm billet required a slightly higher load, while the 105 mm billet required the highest load among the four. The load increase for the 105 mm billet is consistent with the larger amount of flash that was extruded, because flash formation consumes additional deformation energy and increases the contact area between the forged gear blank and the die.
The deformation energy for the forged gear blank can be estimated by integrating the load–stroke curve:
$$ W = \int_{0}^{s_f} F(s) \, ds $$
where $F(s)$ is the upper-die load at stroke $s$ and $s_f$ is the final stroke. Since the load rises steeply near the end of the stroke, most of the deformation energy is consumed in the final filling stage. This is why minimizing the filling time difference is important: if the rim fills too early, additional stroke is spent forcing metal backward into the hub, which wastes energy and can damage the internal structure of the forged gear blank.
I also considered the strain-rate distribution in the forged gear blank. The equivalent strain rate is defined as:
$$ \dot{\bar{\varepsilon}} = \sqrt{\frac{2}{3} \dot{\boldsymbol{\varepsilon}} : \dot{\boldsymbol{\varepsilon}}} $$
At a die velocity of 5 mm/s, the nominal strain rate is relatively low. However, local strain rates can be much higher in the rim and web regions because of the small die fillet radius and the constrained flow. The strain-rate sensitivity of 45 steel at 1200 °C is moderate, so the flow stress increases with strain rate. This effect contributes to the load rise near the end of the stroke. The local strain rate in the forged gear blank can be approximated by:
$$ \dot{\bar{\varepsilon}} \approx \frac{v_d}{h_f} $$
where $h_f$ is the local instantaneous thickness of the forged gear blank. As the die closes, $h_f$ decreases and the strain rate increases. This relationship explains why the load curve becomes steeper as the stroke progresses. The following table summarizes the qualitative relationship between billet diameter, filling behavior, strain uniformity, and maximum load for the forged gear blank.
| Billet Diameter (mm) | Filling Sequence | Backflow Tendency | Flash Tendency | Strain Uniformity | Maximum Load | Overall Ranking |
|---|---|---|---|---|---|---|
| 90 | Hub first, rim later | None | Low | Lower | Lowest | Third |
| 100 | Hub first, rim shortly after | None | Low | Highest | Lowest | First |
| 102 | Hub first, rim shortly after | None | Slight | Highest | Slightly higher | Second |
| 105 | Hub first, rim later | None | Moderate | Moderate | Highest | Fourth |
Based on the combined consideration of metal flow, equivalent strain uniformity, and upper-die load, I selected a billet diameter of 100 mm and a billet height of 27.3 mm as the optimal process parameters for the forged gear blank. This choice avoids the backflow that occurs with larger billets, avoids the excessive filling time difference that occurs with smaller billets, and requires the lowest upper-die load among the candidates. It also provides a uniform equivalent strain distribution, which is beneficial for the mechanical properties of the forged gear blank.
I further examined the influence of friction on the forging process. The friction factor $m = 0.5$ corresponds to a moderately lubricated condition. If the friction factor were increased, the material near the die surface would flow more slowly, and the rim and hub would fill less uniformly. The friction-induced shear stress is:
$$ \tau_f = m k = m \frac{\bar{\sigma}}{\sqrt{3}} $$
For a given flow stress, a higher friction factor increases the shear stress at the interface and raises the upper-die load. Conversely, if the friction factor were reduced, the metal would flow more easily into the rim and hub, but the risk of insufficient die filling and excessive flash would increase. Therefore, the friction factor of 0.5 represents a reasonable compromise for the forged gear blank.
I also considered the thermal field in the forged gear blank. The initial temperature of 1200 °C is high enough to promote dynamic recrystallization and reduce the flow stress, but the die temperature of 200 °C is low enough to chill the surface of the forged gear blank. The heat transfer between the forged gear blank and the die can be described by Newton’s law of cooling:
$$ q = h \left( T – T_d \right) $$
where $h$ is the interfacial heat transfer coefficient, $T$ is the surface temperature of the forged gear blank, and $T_d$ is the die temperature. The temperature gradient in the forged gear blank influences the local flow stress and the final grain size. A balanced temperature distribution helps to avoid surface cracking and incomplete filling. My simulations showed that the temperature field remained acceptable for all the schemes considered, but the better schemes also had more uniform temperature distributions because they avoided prolonged contact between the rim and the die.
In addition to the mechanical and thermal analysis, I evaluated the risk of ductile fracture in the forged gear blank. The Cockcroft–Latham damage criterion is often used for this purpose:
$$ C = \int_{0}^{\bar{\varepsilon}_f} \frac{\sigma_1}{\bar{\sigma}} \, d\bar{\varepsilon} $$
where $\sigma_1$ is the maximum principal stress and $\bar{\varepsilon}_f$ is the equivalent strain at fracture. Regions with high tensile principal stress and high equivalent strain are most susceptible to damage. In my simulations, the rim and web experienced higher equivalent strain, but the stress state was mostly compressive, so the damage risk remained low. The hub experienced lower strain and also remained in compression. The schemes with backflow showed a higher damage risk because the reversal of metal flow created localized tensile stresses. This is another reason why the 100 mm billet was preferred for the forged gear blank.
The filling behavior of the forged gear blank can be further understood by considering the volume flow rate into the rim and hub. If the rim fills before the hub, the remaining volume must be accommodated by backflow or flash. The volume balance can be written as:
$$ Q_{total} = Q_{hub} + Q_{rim} + Q_{flash} $$
where $Q_{total}$ is the volume rate displaced by the upper die, $Q_{hub}$ is the volume rate flowing into the hub, $Q_{rim}$ is the volume rate flowing into the rim, and $Q_{flash}$ is the volume rate flowing into the flash gap. Ideally, $Q_{flash}$ should be as small as possible, and $Q_{hub}$ should remain positive until the hub is filled. If $Q_{hub}$ becomes negative before the hub is filled, backflow occurs. My simulations showed that the 100 mm billet maintained a positive $Q_{hub}$ throughout the filling stage, whereas the 120 mm and 110 mm billets developed negative $Q_{hub}$ after the rim was filled. This quantitative interpretation supports the qualitative observations.
I also examined the effect of the initial billet aspect ratio on the forging process. The aspect ratio is defined as:
$$ \lambda = \frac{H_0}{D_0} $$
For the forged gear blank, the optimal aspect ratio was found to be approximately 0.273, corresponding to the 100 mm diameter and 27.3 mm height billet. A very low aspect ratio, such as 0.158 for the 120 mm billet, causes the billet to be too flat, so the rim fills first and backflow occurs. A very high aspect ratio, such as 0.374 for the 90 mm billet, causes the billet to be too tall, so the hub fills first but the rim fills much later, leading to non-uniform strain. The optimal aspect ratio balances these two extremes and produces a favorable filling sequence. The following table summarizes the relationship between aspect ratio and forging quality for the forged gear blank.
| Aspect Ratio $\lambda$ | Billet Condition | Filling Behavior | Forging Quality |
|---|---|---|---|
| 0.158 | Too flat | Rim fills first, backflow | Poor |
| 0.205 | Flat | Rim fills first, moderate backflow | Poor |
| 0.217 | Moderately flat | Rim fills first, slight backflow | Unacceptable |
| 0.236 | Near optimal | Hub first, rim later, no backflow | Acceptable but flash |
| 0.257 | Near optimal | Hub first, rim shortly after | Very good |
| 0.273 | Optimal | Hub first, rim shortly after | Best |
| 0.374 | Too tall | Hub first, rim much later | Non-uniform strain |
My finite element analysis also allowed me to visualize the metal flow lines in the forged gear blank. In the optimal scheme, the flow lines followed the contours of the rim and hub smoothly, without sharp bends or crossovers. This is important because flow-line continuity is directly related to fatigue strength and impact toughness. In the rejected schemes, the flow lines in the rim were distorted by backflow, and in some cases they crossed each other, which would create weak planes in the forged gear blank. Therefore, the optimal scheme not only avoids defects but also produces a favorable flow-line pattern for the forged gear blank.
The equivalent strain distribution in the optimal forged gear blank was characterized by low strain in the hub, moderate strain in the rim, and high strain in the web. This distribution is typical of closed-die forging of a gear blank, because the web undergoes the most severe thinning and the rim undergoes substantial radial flow. The strain gradient from the hub to the rim was gradual, which indicates that the deformation was well distributed rather than concentrated in a narrow band. This is beneficial for the mechanical properties of the forged gear blank because it reduces the likelihood of localized damage and premature failure.
The upper-die load curve for the optimal forged gear blank showed a gradual rise during the early and middle stages of the stroke, followed by a steeper rise near the end. The maximum load of $2.46 \times 10^7$ N is within the capacity of a relatively small forging press. This is advantageous from an industrial perspective because it reduces the capital cost and energy consumption associated with the forging of the forged gear blank. The relatively low load also reduces die stress and extends die life, which is important for mass production.
I also performed a mesh sensitivity study to ensure that my results were not affected by discretization error. I compared simulations with approximately 30,000, 50,000, and 80,000 elements. The 50,000-element mesh provided a good compromise between accuracy and computational cost. The maximum load changed by less than 3% when the mesh was refined from 50,000 to 80,000 elements, and the equivalent strain distribution was almost identical. Therefore, I used the 50,000-element mesh for all the schemes reported here. The following table summarizes the mesh sensitivity results.
| Number of Elements | Maximum Load (N) | Relative Difference | Computational Cost |
|---|---|---|---|
| 30,000 | $2.52 \times 10^7$ | +2.4% | Low |
| 50,000 | $2.46 \times 10^7$ | Baseline | Moderate |
| 80,000 | $2.43 \times 10^7$ | −1.2% | High |
In addition to the mechanical analysis, I considered the metallurgical aspects of the forged gear blank. At 1200 °C, 45 steel is in the austenitic state, and dynamic recrystallization can occur during deformation. The recrystallized grain size can be estimated from the Zener–Hollomon parameter:
$$ Z = \dot{\bar{\varepsilon}} \exp\left( \frac{Q}{RT} \right) $$
A higher value of $Z$ generally leads to a finer recrystallized grain size, which can improve the strength and toughness of the forged gear blank. However, excessive strain rate or insufficient temperature can lead to incomplete recrystallization and residual worked structure. In my simulations, the strain rate was moderate, and the temperature remained high enough for recrystallization to occur. The optimal scheme also avoided the prolonged deformation that can cause grain growth in the rim. Therefore, the optimal scheme is expected to produce a forged gear blank with a favorable microstructure.
The cooling stage after forging also affects the final properties of the forged gear blank. If the forged gear blank cools too slowly, the grain size may increase; if it cools too quickly, residual stresses and cracking may occur. Although cooling was not the main focus of my study, I recognized that the temperature distribution at the end of forging influences the subsequent heat treatment. The optimal scheme produced a relatively uniform temperature distribution, which is beneficial for minimizing distortion during cooling. This is another advantage of the 100 mm billet for the forged gear blank.
I also compared the energy consumption of the different schemes. The deformation energy is proportional to the area under the load–stroke curve. Because the 100 mm billet had the lowest maximum load and the shortest filling time difference, it also had the lowest deformation energy among the schemes that produced acceptable quality. The 90 mm billet had a similar maximum load but a longer stroke, so its energy consumption was slightly higher. The 102 mm billet had a higher load and a similar stroke, so its energy consumption was higher still. The 105 mm billet had the highest load and the most flash, so it consumed the most energy. The following table summarizes the relative energy consumption for the forged gear blank.
| Billet Diameter (mm) | Maximum Load (N) | Stroke to Fill (mm) | Relative Deformation Energy |
|---|---|---|---|
| 90 | $2.47 \times 10^7$ | 25.7 | 1.05 |
| 100 | $2.46 \times 10^7$ | 19.3 | 1.00 |
| 102 | $2.61 \times 10^7$ | 18.2 | 1.08 |
| 105 | $2.98 \times 10^7$ | 16.8 | 1.19 |
From an industrial standpoint, the 100 mm billet is the most economical choice for the forged gear blank because it minimizes both the required press tonnage and the deformation energy. It also produces the most uniform equivalent strain distribution and avoids backflow and folding. The 102 mm billet is a close second, but its slightly higher load and slight flash formation make it marginally less attractive. The 90 mm billet is acceptable in terms of defects, but its strain uniformity is inferior. The 105 mm billet is not recommended because of excessive flash and higher load. The 108 mm, 110 mm, and 120 mm billets are rejected because of backflow.
I further investigated the effect of die fillet radius on the forging of the forged gear blank. The die fillet radius of 3 mm was used in all simulations. A larger fillet radius would reduce stress concentration and improve metal flow into the corners, but it would also change the final geometry of the forged gear blank and require additional machining. A smaller fillet radius would increase stress concentration and make it more difficult to fill the corners. Therefore, the 3 mm fillet radius represents a reasonable compromise for the precision forging of the forged gear blank.
The friction condition also affects the strain distribution. With a friction factor of 0.5, the strain near the die surface is lower than the strain in the interior, because the friction restricts surface flow. This strain gradient is normal in hot forging, but it should be minimized to avoid surface defects. The optimal scheme produced a relatively small strain gradient because the metal flowed smoothly into the rim and hub without excessive sliding. In contrast, the rejected schemes produced a larger strain gradient because the backflow increased the relative sliding between the forged gear blank and the die.
The temperature distribution in the forged gear blank is also influenced by the friction condition. Friction generates heat at the die–workpiece interface, which can raise the local temperature and reduce the flow stress. However, excessive friction heating can also cause local softening and grain growth. In my simulations, the friction heating was moderate and did not cause any adverse effects. The optimal scheme had a relatively uniform temperature distribution, which is beneficial for the final microstructure of the forged gear blank.
I also evaluated the die stress during forging. The upper-die load is a measure of the total force, but the local die stress depends on the contact area and the pressure distribution. The maximum die stress occurred at the fillet radius and at the flash land. A larger fillet radius and a well-designed flash land can reduce die stress and extend die life. The optimal scheme produced a more uniform pressure distribution, which is beneficial for die life. The rejected schemes produced higher local pressures because of backflow and flash formation, which can lead to premature die wear or cracking.
In summary, my finite element analysis of the forged gear blank has shown that the initial billet dimensions have a strong influence on metal flow, equivalent strain distribution, and upper-die load. The optimal billet for the forged gear blank is 100 mm in diameter and 27.3 mm in height. This billet produces a favorable filling sequence, avoids backflow and folding, provides a uniform equivalent strain distribution, and requires the lowest upper-die load. The 102 mm billet is a close alternative, but the 100 mm billet is superior in terms of energy consumption and strain uniformity. The 90 mm billet is acceptable but less uniform, and the 105 mm billet produces excessive flash. Billets with diameters of 108 mm and above are rejected because of backflow.
I also derived several practical guidelines from my simulations. First, the hub should fill before the rim, and the time difference should be minimized. Second, the billet aspect ratio should be maintained near 0.27 to ensure a favorable filling sequence. Third, the friction factor should be kept at approximately 0.5 to balance die filling and flash formation. Fourth, the die fillet radius should be large enough to reduce stress concentration but small enough to maintain the final geometry. These guidelines can be applied to the design of similar forged gear blanks with different dimensions.
The following table summarizes the final recommendation for the forged gear blank.
| Parameter | Recommended Value | Reason |
|---|---|---|
| Billet diameter | 100 mm | Best balance of metal flow, strain uniformity, and load |
| Billet height | 27.3 mm | Constant volume condition |
| Aspect ratio | 0.273 | Optimal filling sequence |
| Friction factor | 0.5 | Moderate lubrication |
| Die temperature | 200 °C | Reduces chilling and improves die life |
| Gear temperature | 1200 °C | Promotes recrystallization and reduces flow stress |
| Die velocity | 5 mm/s | Practical for small presses |
| Die fillet radius | 3 mm | Reduces stress concentration |
My conclusions from this study are as follows. When the billet diameter is between 105 mm and 120 mm, the rim of the forged gear blank tends to fill first and backflow occurs, which is detrimental to the mechanical properties of the forged gear blank. When the billet diameter is less than 90 mm, the hub fills first but the rim fills much later, and the large filling time difference causes non-uniform equivalent strain in the forged gear blank. When the billet diameter is between 90 mm and 105 mm, the rim does not exhibit backflow and no folding occurs, so the forging quality is good. Among these diameters, the 100 mm billet produces the best forged gear blank in terms of metal flow, equivalent strain uniformity, and press tonnage. Therefore, I recommend a billet diameter of 100 mm and a billet height of 27.3 mm for the precision forging of this forged gear blank.
Overall, my finite element analysis demonstrates that numerical simulation is a powerful tool for optimizing the forging process of a forged gear blank. By combining analytical volume calculations with three-dimensional plastic deformation simulations, I was able to identify the optimal billet dimensions without expensive physical trials. The same methodology can be extended to other forged gear blanks with different tooth counts, diameters, and hub geometries. The key is to control the filling sequence, minimize backflow and folding, and ensure a uniform equivalent strain distribution while keeping the upper-die load within the capacity of the available press. My results provide a reliable basis for the industrial production of high-quality forged gear blanks.