The gear material of the failed rolling mill is 17CrNiMo6 steel, the modulus Mn is 9mm, the carburizing and quenching process requires that the effective hardened layer depth is 2.00 ~ 2.50mm, the surface hardness is 58.0 ~ 62.0hrc, and the grinding unilateral allowance is 0.30mm. Grinding cracks were found on the tooth surface of the gear during maintenance after 6 years of service.
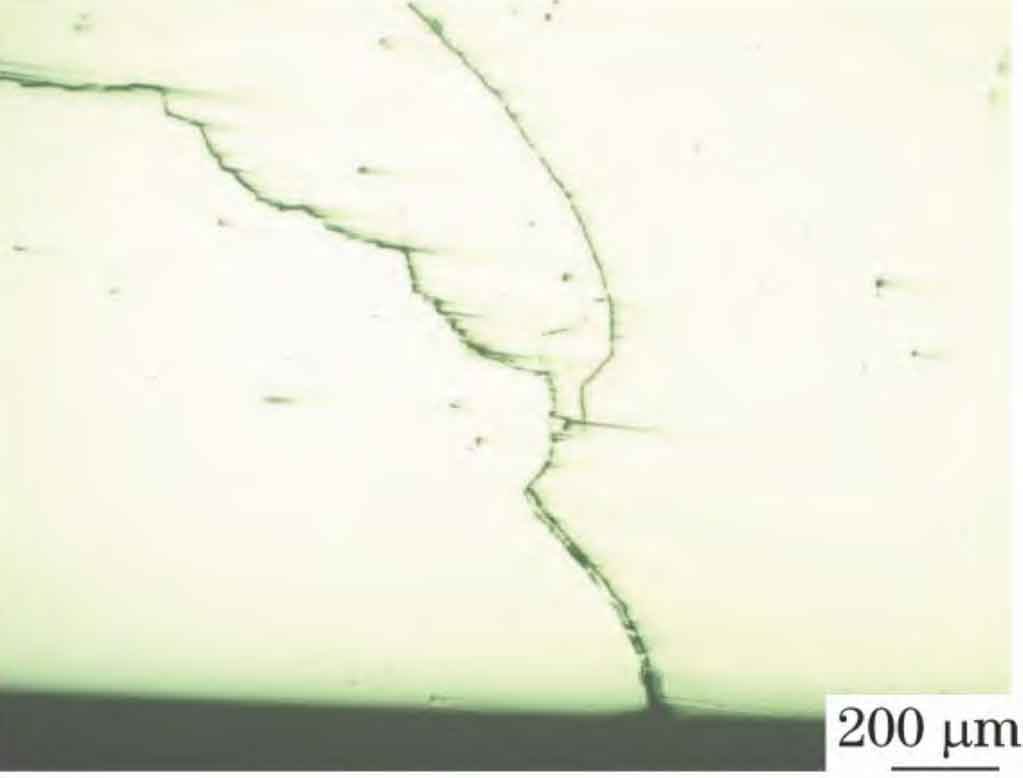
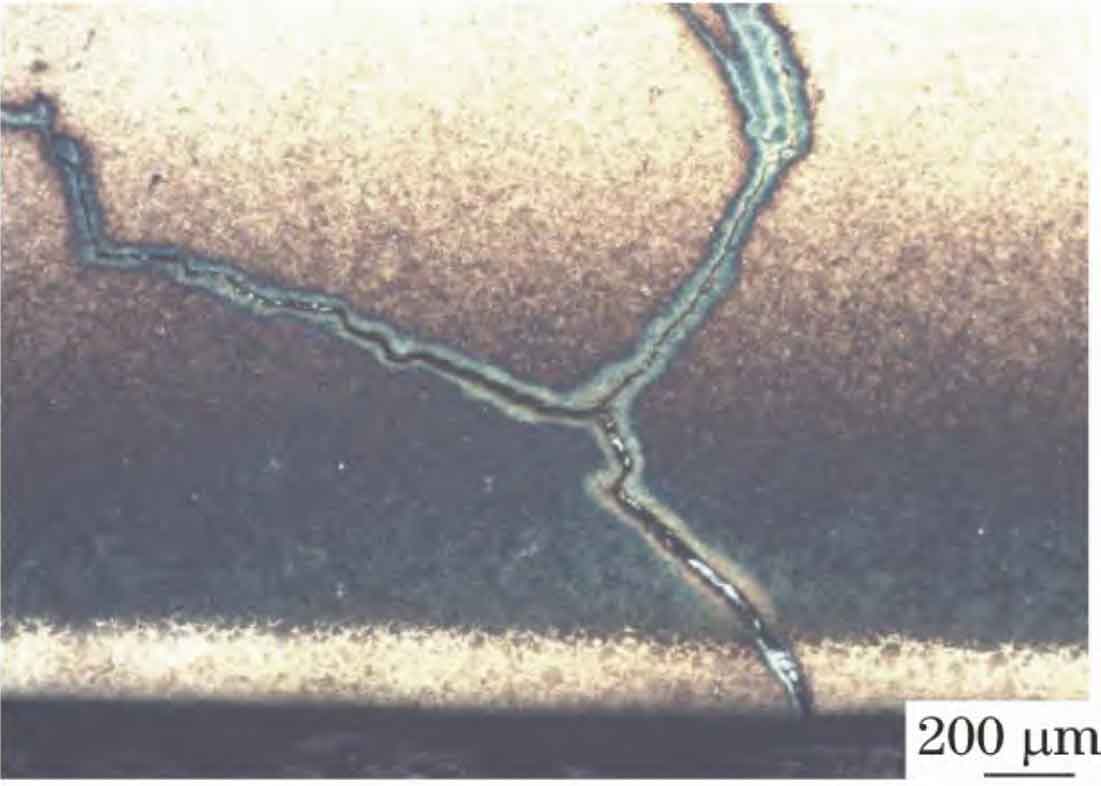
Firstly, the chemical composition analysis and non-metallic inclusion inspection of the failed gear were carried out, and the metallographic inspection and hardness test were carried out at the tooth root. The inspection results were qualified. Cut the gear perpendicular to the cracked tooth surface to prepare metallographic samples. The morphology of the non etched gear grinding crack is shown in Figure 1. It can be seen that the gear grinding crack forks at the position 0.60mm away from the surface, and the total depth of the gear grinding crack is 1.50mm. The microstructure morphology of the gear grinding crack after the sample is etched by nitric acid alcohol solution with a volume fraction of 4% is shown in Fig. 2. It can be seen that there is a grinding burn layer at the origin of the gear grinding crack. The overall morphology is crescent shaped, with a maximum depth of 0.20mm, a length of 5.0mm and a depth of 0.70mm.
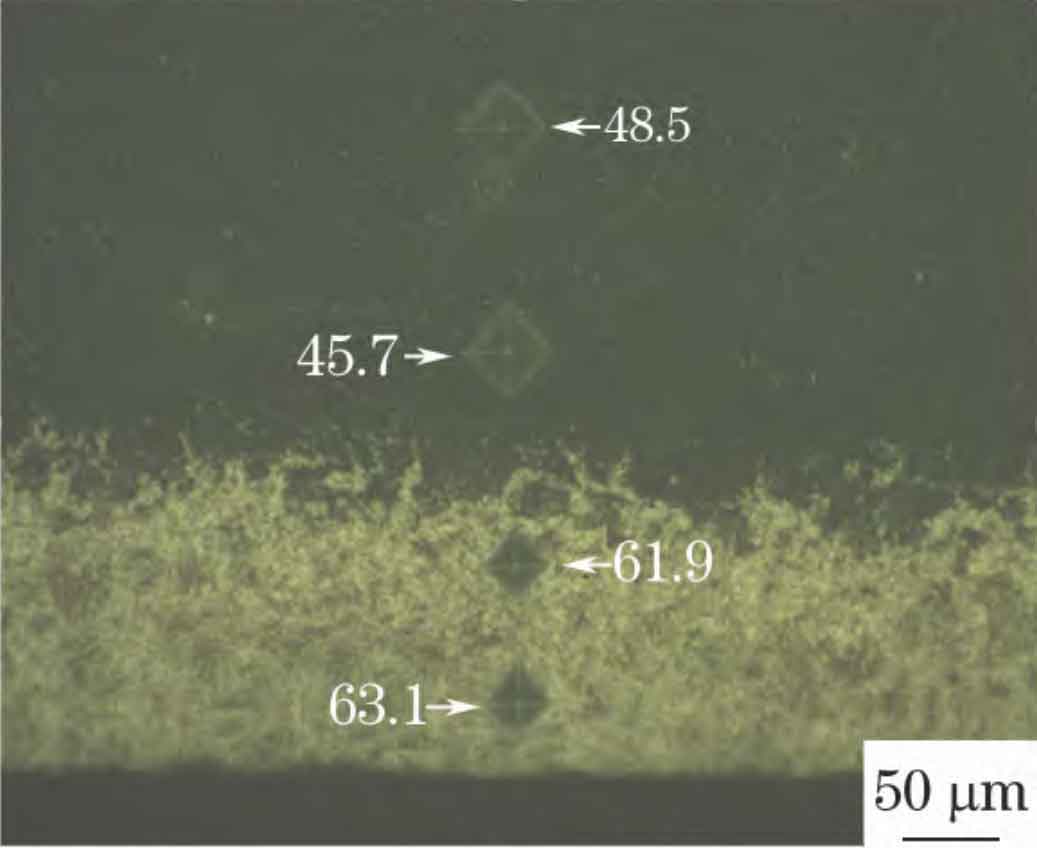
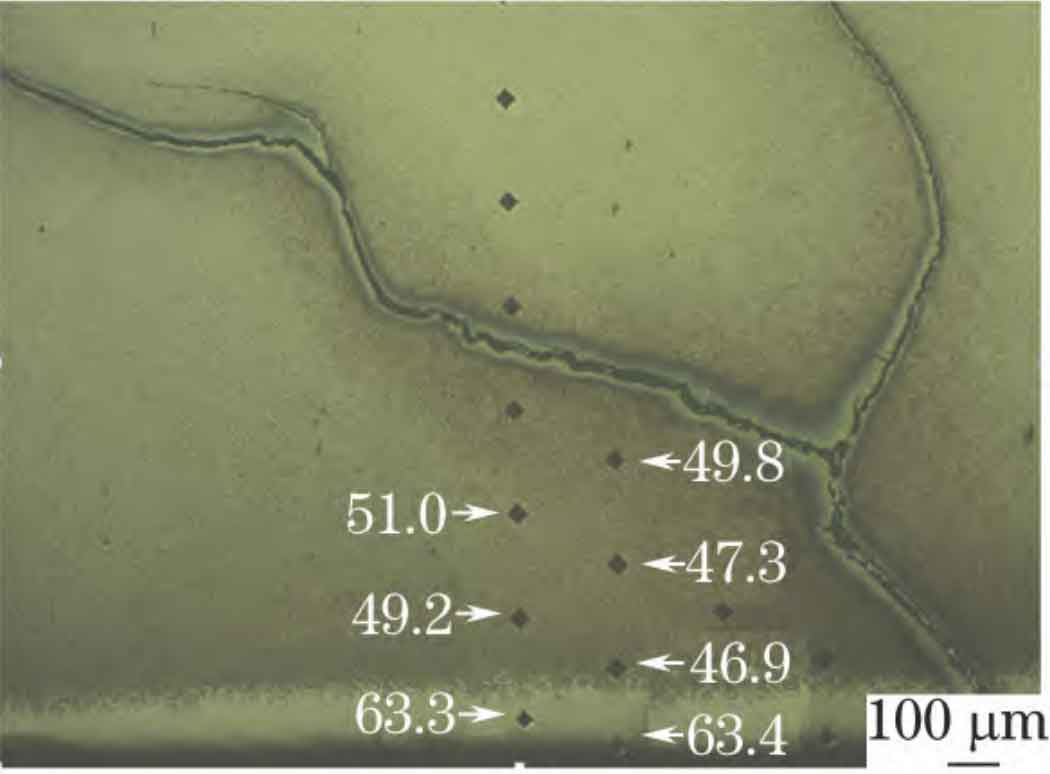
The hardness gradient curve at the grinding burn layer of the failed gear shows the characteristics of high low high. The microhardness indentation corresponding to the hardness gradient is shown in Figure 3. It can be seen that the indentation at the grinding burn layer is small and the hardness is high, and the indentation of the dark grinding tempering layer is large and the hardness is low. Under the ordinary optical microscope, the high-temperature tempering structure of carburized layer is not easy to distinguish from the very fine carburizing quenching structure. Therefore, in order to improve the clarity, according to the different sensitivity of tempering structure at different temperatures to etchant reaction, shallow etching is usually used for the sample.
In the case, the gear grinding process of the rolling mill gear is the same as that of the gear shaft, the heat treatment distortion is large, and the gear grinding allowance is not accurately measured before gear grinding, resulting in excessive feed during the first rough grinding. During the first rough grinding of gear, the feed rate locally reaches 0.190mm, resulting in excessive local grinding heat and gear grinding cracks. From the analysis of wear marks after use, the width of the contact area of the tooth surface becomes narrow, the local stress on the tooth surface is large, and the grinding burn of the tooth surface causes tensile stress on the surface. During operation, cracks are first generated on the surface under the action of external force. The grinding tempering layer is below the white bright layer to 0.60mm, and the hardness is low, about 45.0hrc, It makes the gear grinding crack easier to expand. When it extends to the normal carburizing and quenching layer, the hardness increases to about 55.0hrc, the grinding crack propagation of a single gear is blocked, and continues to expand after branching.
There are many factors causing gear grinding cracks, so the following aspects need to be comprehensively controlled. (1) After carburizing and quenching, the surface martensite shall be cryptocrystalline or fine needle; (2) The content of retained austenite shall be controlled within 20% (area fraction); (3) The surface carbon content was controlled at 0.7% ~ 0.9% (mass fraction), and the carbon content gradient decreased steadily; (4) Carbides are distributed in dispersed fine particles; (5) Strictly control heat treatment distortion; (6) Ensure tempering temperature and time; (7) Reasonable selection of grinding wheel; (8) Reasonable gear grinding process; (9) Fully cool during gear grinding.
The rational formulation and implementation of gear grinding process is very important. For gears with large heat treatment deformation, the actual grinding allowance shall be accurately measured, the feed rate at the initial stage of rough grinding shall be strictly controlled, and the overload current of gear grinding machine shall be limited. When grinding burns are found, stress relief tempering shall be carried out within 2H to prevent excessive stress from further causing gear grinding cracks.


