
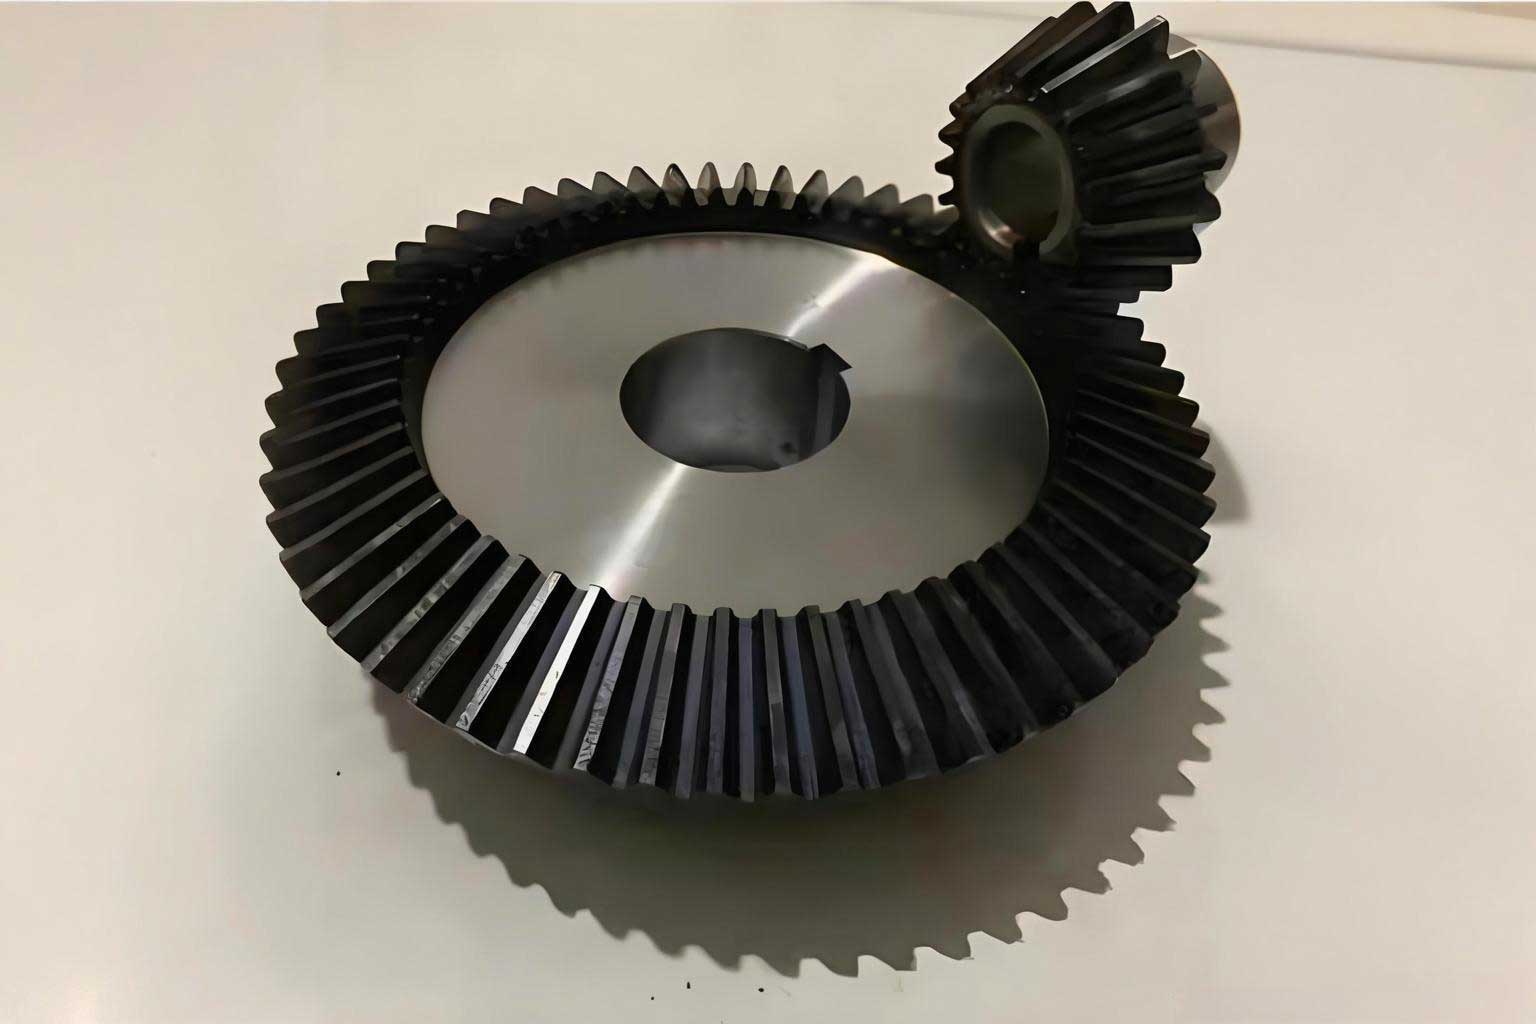
In the realm of heavy machinery and industrial equipment, the demand for large power transmission components often presents unique manufacturing challenges. One such challenge is the production of large-diameter straight bevel gears, often referred to in specific configurations as miter gears when the shaft angle is 90 degrees and the gear ratio is 1:1. From my extensive experience in industrial manufacturing, I have encountered numerous situations where specialized gear-cutting machinery, designed for high-precision, high-volume production, is either unavailable or economically impractical for producing a single, large miter gear or a small batch. This article details a comprehensive methodology for machining large straight bevel gears, or large miter gears, using the more universally available form milling technique on a planer type milling machine or a large horizontal milling machine. The process, while considered a form-cutting method rather than a generating one, is entirely viable for gears operating in low-speed, high-torque, open-gearing environments where functional reliability takes precedence over ultra-high kinematic accuracy.
The core problem is straightforward: a machine component requires a large straight bevel gear pair. The technical specifications are imposing. For instance, consider a gear with a module of 16, 100 teeth, resulting in a pitch diameter of 1600 mm and an outside diameter exceeding 1606 mm. The material is often a cast grade like ZG45 or similar medium-carbon steel. Sending such a component to a specialist with a Gleason or similar bevel gear generator might be the first instinct, but for many fabricators, especially those in remote locations or for one-off projects, this option is nonexistent or prohibitively expensive. This forces the manufacturing engineer to devise an alternative strategy using in-house capabilities. The decision to employ form milling hinges on a critical analysis of the gear’s application. If the gear operates at very low rotational speeds (e.g., in large gate drives, rotary feeders, or certain mining equipment), the dynamic forces and meshing noise associated with minor form deviations are significantly mitigated. The primary requirement shifts from perfect conjugate action to sufficient tooth strength and acceptable static meshing to transmit torque. For a large miter gear in such service, form milling becomes not just a fallback, but a strategically sound choice.
Theoretical Foundations of Form Milling for Bevel Gears
Understanding the geometry of a straight bevel gear is paramount before attempting to machine it. Unlike a spur gear, whose tooth profile is defined on a cylindrical pitch surface, the teeth of a straight bevel gear are formed on a conical pitch surface. This introduces the concept of taper. The tooth dimensions are largest at the heel (outer end) and converge to a smaller size at the toe (inner end). The tooth profile at any section is an involute, but the parameters of this involute change along the face width.
The most critical theoretical adjustment for form milling is that the cutting tool is profiled to the space of the gear tooth at its large end. However, because the tooth tapers, the cutter will not produce a theoretically perfect involute across the entire face width. The error introduced is acceptable for low-speed applications. The key geometric parameters for defining our large miter gear and setting up the machine are derived from the basic gear data.
Let’s define our variables:
$$ m_n $$ is the normal module (16 in our example).
$$ z $$ is the number of teeth (100).
$$ \alpha $$ is the pressure angle (20°).
$$ d $$ is the pitch diameter at the large end ($$ d = m_n \cdot z = 1600 \, \text{mm} $$).
$$ \delta $$ is the pitch cone angle. For a 1:1 ratio miter gear, $$ \delta = 45^\circ $$.
$$ \theta_f $$ is the root angle (provided as 77°20’56” in the example, which is unusual; typically, it’s derived. For this discussion, we’ll use a standard addendum/dedendum).
For setup, we need the complementary angle of the root cone relative to the gear axis. If the root angle is $$ \theta_f $$, then the angle the gear axis makes with the machine table (the mounting angle) is $$ 90^\circ – \theta_f $$. In a more standard approach, using the pitch cone angle $$ \delta $$ and the addendum angle $$ \theta_a $$ and dedendum angle $$ \theta_b $$, we have:
$$ \text{Face Angle} = \delta + \theta_a $$
$$ \text{Root Angle} = \delta – \theta_b $$
The gear blank must be mounted so its root cone elements are parallel to the machine table. Therefore, the tilt angle for the setup is equal to the root angle $$ \delta – \theta_b $$.
The following table summarizes the critical angles and their role in setup:
| Parameter | Symbol | Typical Calculation / Value | Purpose in Setup |
|---|---|---|---|
| Pitch Cone Angle | $$ \delta $$ | For miter gear: $$ \delta = \arctan(1) = 45^\circ $$ | Defines gear geometry. |
| Addendum Angle | $$ \theta_a $$ | $$ \theta_a = \arctan(h_a / R) $$ where $$ R $$ is cone distance. | Used to calculate face angle. |
| Dedendum Angle | $$ \theta_b $$ | $$ \theta_b = \arctan(h_f / R) $$ | Used to calculate root angle. |
| Root Angle | $$ \delta – \theta_b $$ | e.g., $$ 45^\circ – \text{~}3.5^\circ \approx 41.5^\circ $$ | Angle of gear axis relative to machine table plane. |
The form cutter is designed based on the tooth space at the large end. The width of this space at the pitch line is:
$$ s = \frac{\pi m_n}{2} $$
for a standard tooth. The cutter profile must match the inverse of the gear tooth involute profile at the large end, with a pressure angle $$ \alpha $$. This is best created using a profile projector or precise CNC wire EDM to manufacture the cutter from a suitable tool steel blank. It is standard practice to create two cutters: one for roughing (with a narrower profile to leave stock) and one for finishing (to the exact theoretical profile).
Tooling and Fixture Design: The Heart of the Process
The success of machining a large miter gear via form milling rests almost entirely on the design and construction of robust tooling and fixtures. The system must hold the massive gear blank securely, present it at the precise angle to the cutter, and allow for accurate indexing between teeth. The required setup consists of several key components.
1. The Form Milling Cutters: As mentioned, two cutters are needed. They are typically manufactured from high-speed steel (HSS) or carbide-tipped blanks. The finishing cutter’s profile is the exact conjugate of the tooth space at the large end. A crucial consideration is clearance: the side relief and top rake angles must be ground appropriately for the workpiece material (e.g., ZG45 cast steel) to ensure clean cutting and reasonable tool life. The cutter diameter should be as large as feasible to minimize the inherent error caused by the diverging tooth form.
2. The Tilting Base (Angle Plate): This is a custom-built, heavily reinforced wedge or angle plate. Its primary function is to hold the gear blank with its root cone axis parallel to the machine table. Therefore, the tilting angle $$ \beta $$ of this base is precisely equal to the gear’s root angle.
$$ \beta = \delta – \theta_b $$
This component must be extremely rigid to resist cutting forces without deflection. It is bolted directly to the milling machine’s table. For our example large miter gear, this would be a massive steel casting or weldment, stress-relieved and precision-machined on its mounting surfaces.
3. The Indexing Mechanism: A high-precision rotary table is indispensable. It is mounted onto the tilting base. Its axis of rotation must be perfectly perpendicular to the surface of the tilting base upon which it sits. The gear blank is then mounted (often via an intermediate adaptor plate or mandrel) onto this rotary table, concentric with its axis. The indexing accuracy of this table directly determines the pitch error of the finished large miter gear. For 100 teeth, each index movement is $$ 360^\circ / 100 = 3.6^\circ $$. A high-quality optical or digital rotary table is ideal. The setup can be visualized as a chain of relationships: Machine Table -> Tilting Base (Angle $$ \beta $$) -> Rotary Table -> Gear Blank (Axis tilted by $$ \beta $$).
4. Cutter Spindle Alignment: The milling machine’s spindle (vertical head on a planer mill) must be positioned so that the centerline of the form cutter intersects the theoretical apex of the pitch cone of the gear blank. This is a critical alignment step. It ensures the cutter engages the blank correctly across its full face width. This apex point, while virtual, can be established through careful measurement from datums on the fixture.
The following table outlines the fixture and tooling components and their critical attributes:
| Component | Critical Function | Design/Mounting Requirement | Tolerance Consideration |
|---|---|---|---|
| Tilting Base | Set root cone parallel to machine table. | Angle $$ \beta $$ machined to within ±1 minute of arc. Extreme rigidity. | Directly affects tooth taper and depth. |
| Rotary Table | Provide precise angular indexing. | Mounted square to base. High accuracy (e.g., ±10 arc-seconds). | Dictates cumulative pitch error of the miter gear. |
| Workpiece Mounting | Hold gear blank concentric to rotary axis. | Use of precision adaptor/mandrel. Secure clamping to prevent movement. | Affects runout and tooth alignment. |
| Form Cutter | Generate tooth space profile. | Profile accuracy at large end. Correct relief and rake angles. | Primary source of tooth profile error. |
| Spindle Alignment | Align cutter to gear cone apex. | Cutter center plane passes through gear axis at calculated height. | Affects symmetry of cut and tooth thickness. |
The Machining Sequence: A Step-by-Step Procedure
With the tooling and fixture meticulously prepared and installed on a sufficiently large planer mill or horizontal mill with a vertical head, the actual machining of the large miter gear can commence. The process is sequential and requires patience and careful verification at each stage.
Step 1: Workpiece Preparation and Mounting. The gear blank should be pre-machined. This includes turning the back cone, the front face, and the bore (if applicable) to establish accurate datums. The blank is then mounted onto the adaptor on the rotary table. Using dial indicators, the blank is carefully centered (runout minimized) and its front face is indicated to ensure it is square to the rotary table’s axis, which in turn ensures the gear’s pitch cone is correctly oriented relative to the setup angle.
Step 2: Critical Alignment – Setting the Cutter Position. This is a two-part alignment. First, the vertical milling head (or horizontal spindle) is traversed longitudinally (Y-axis) until the cutter’s center plane is aligned with the centerline of the rotary table. This can be done using a wiggler or edge finder referenced off the adaptor mandrel. Second, the height (Z-axis) of the cutter must be set so that its cutting edges will generate the correct tooth depth from the heel to the toe. This height is calculated from the gear geometry so that the cutter’s tip corresponds to the root line at the large end. The depth of cut is then calculated based on the whole depth of the tooth $$ (2.25 \times m_n) $$ at the large end. The machine’s cross-slide (X-axis) will be used for the infeed/radial cut.
Step 3: Trial Cut and Indexing Verification. Before committing to the full cut, a shallow trial cut is essential. A single tooth space is milled completely across the face width by moving the machine table (carrying the entire fixture) longitudinally past the rotating cutter. The rotary table is then indexed by one tooth (3.6°), and a second trial space is cut. After a few teeth, measurements are taken:
- Tooth Span Measurement: Using a vernier gear tooth caliper, the span over a number of teeth (e.g., 10 teeth for a 100-tooth miter gear) is measured at the large end and small end. This checks the indexed pitch and the tooth thickness taper.
- Depth Check: The depth of the trial cut is measured.
These measurements are compared to the calculated values. Any systematic errors (e.g., in indexing, cutter height, or mounting angle) can be corrected at this stage. This step is crucial for ensuring the final large miter gear will mesh properly with its mate.
Step 4: Rough Milling. Once alignment is confirmed, the roughing cutter is installed. A conservative but efficient depth of cut is selected, considering the power of the machine and the rigidity of the setup. The process is now systematic:
- Position the table so the cutter starts just clear of the blank at the heel (large end).
- Engage the feed, moving the table to mill the entire tooth space from heel to toe.
- Retract the cutter radially (using the cross-slide), return the table to the start position.
- Index the rotary table by exactly one tooth pitch.
- Repeat steps 1-4 until all 100 teeth have been roughed out.
It is prudent to leave a consistent finishing allowance on the tooth flanks and bottom, typically 0.5 mm to 1.0 mm per side, depending on size.
Step 5: Finishing Milling. After roughing all teeth, the finishing cutter is installed. Its alignment must be verified again, as even a small tool change can introduce error. The same indexing sequence is followed, but with a very light final pass. The goal is to achieve a clean, continuous cut that defines the final tooth profile. Coolant is highly recommended during finishing to improve surface finish and control heat, which can affect dimensional stability on such a large workpiece.
Step 6: Deburring and Inspection. After milling, the gear is carefully removed from the fixture. All sharp edges and burrs, particularly at the tooth ends, are removed by hand filing or grinding. A final, comprehensive inspection is performed. This includes:
- Visual inspection for tool marks or gouges.
- Re-measuring tooth span across several sectors to check indexing consistency.
- Checking tooth depth at several points.
- A final “roll check” or “blue check” with its mating gear (if available) to assess the contact pattern. For a low-speed large miter gear, a contact pattern biased slightly toward the toe of the tooth is often acceptable and can help prevent edge-loading at the heel.
The machining of the mating large miter gear follows the identical procedure, ensuring both are produced from the same theoretical basis and with the same tooling setup.
Advantages, Limitations, and Applications
The form milling method for producing large miter gears is a powerful technique within its specific domain. Its primary advantages are:
- Accessibility: It utilizes universal machine tools (large milling machines) that are far more common in heavy workshops than dedicated bevel gear generators.
- Cost-Effectiveness for Low Volumes: For one-off or small-batch production, the cost of designing and building fixtures is often lower than the cost of specialized subcontracting.
- Sufficient Accuracy for Many Applications: It meets the requirements of slow-moving, high-torque drives where smooth, quiet operation at high speed is not a priority.
However, the limitations are significant and must be respected:
- Profile Error: The fundamental flaw is that a cutter profiled for the large end cannot produce a true involute at the small end. This deviation increases with the ratio of face width to cone distance.
- Lower Efficiency: The process is serial (tooth-by-tooth) and slow compared to generating methods.
- Skill-Dependent: Success heavily relies on the skill of the machinist in setup, alignment, and tool grinding.
- Not Suitable for High-Speed Gears: The inherent profile and pitch errors can cause vibration, noise, and accelerated wear at moderate to high speeds.
The ideal applications for form-milled large miter gears are found in heavy industry:
- Drives for large rotary kilns or dryers.
- Turning mechanisms for heavy cranes or shipyard equipment.
- Gate lifting mechanisms for dams or large valves.
- Drives for mining equipment like wagon traversers or heavy feeders.
- Certain agricultural processing machines.
In all these cases, the large miter gear operates at speeds often below 50 RPM, under high load, and frequently in an open or semi-open environment where sealing is not critical. The robust construction and adequate tooth contact provided by this method are perfectly satisfactory.
Conclusion and Future Perspectives
Machining a large miter gear via form milling on a universal machine tool is a classic example of practical engineering triumphing over theoretical idealization. It is a testament to the principle that the “best” manufacturing method is the one that safely, reliably, and economically meets the functional requirements of the part. While modern CNC machining centers and advanced multi-axis milling strategies now offer more sophisticated ways to approximate bevel gear teeth with ball-nose end mills and complex toolpaths, the core principle of form milling with a dedicated profile cutter remains valid and highly effective for the largest-scale components where dedicated gear machinery is absent.
The process demands a rigorous approach to geometry, precision in fixture construction, and patience in execution. Every step—from calculating the mounting angle and designing the cutter profile, to performing the critical trial cut—must be executed with care. When done correctly, the result is a serviceable, durable large miter gear capable of performing its duty for decades in a demanding industrial environment. This methodology preserves the capability to manufacture essential spare parts or custom drive components locally, ensuring the continuity of operations in sectors from mining to heavy fabrication, all centered around the reliable, if not perfect, form-milled large miter gear.